
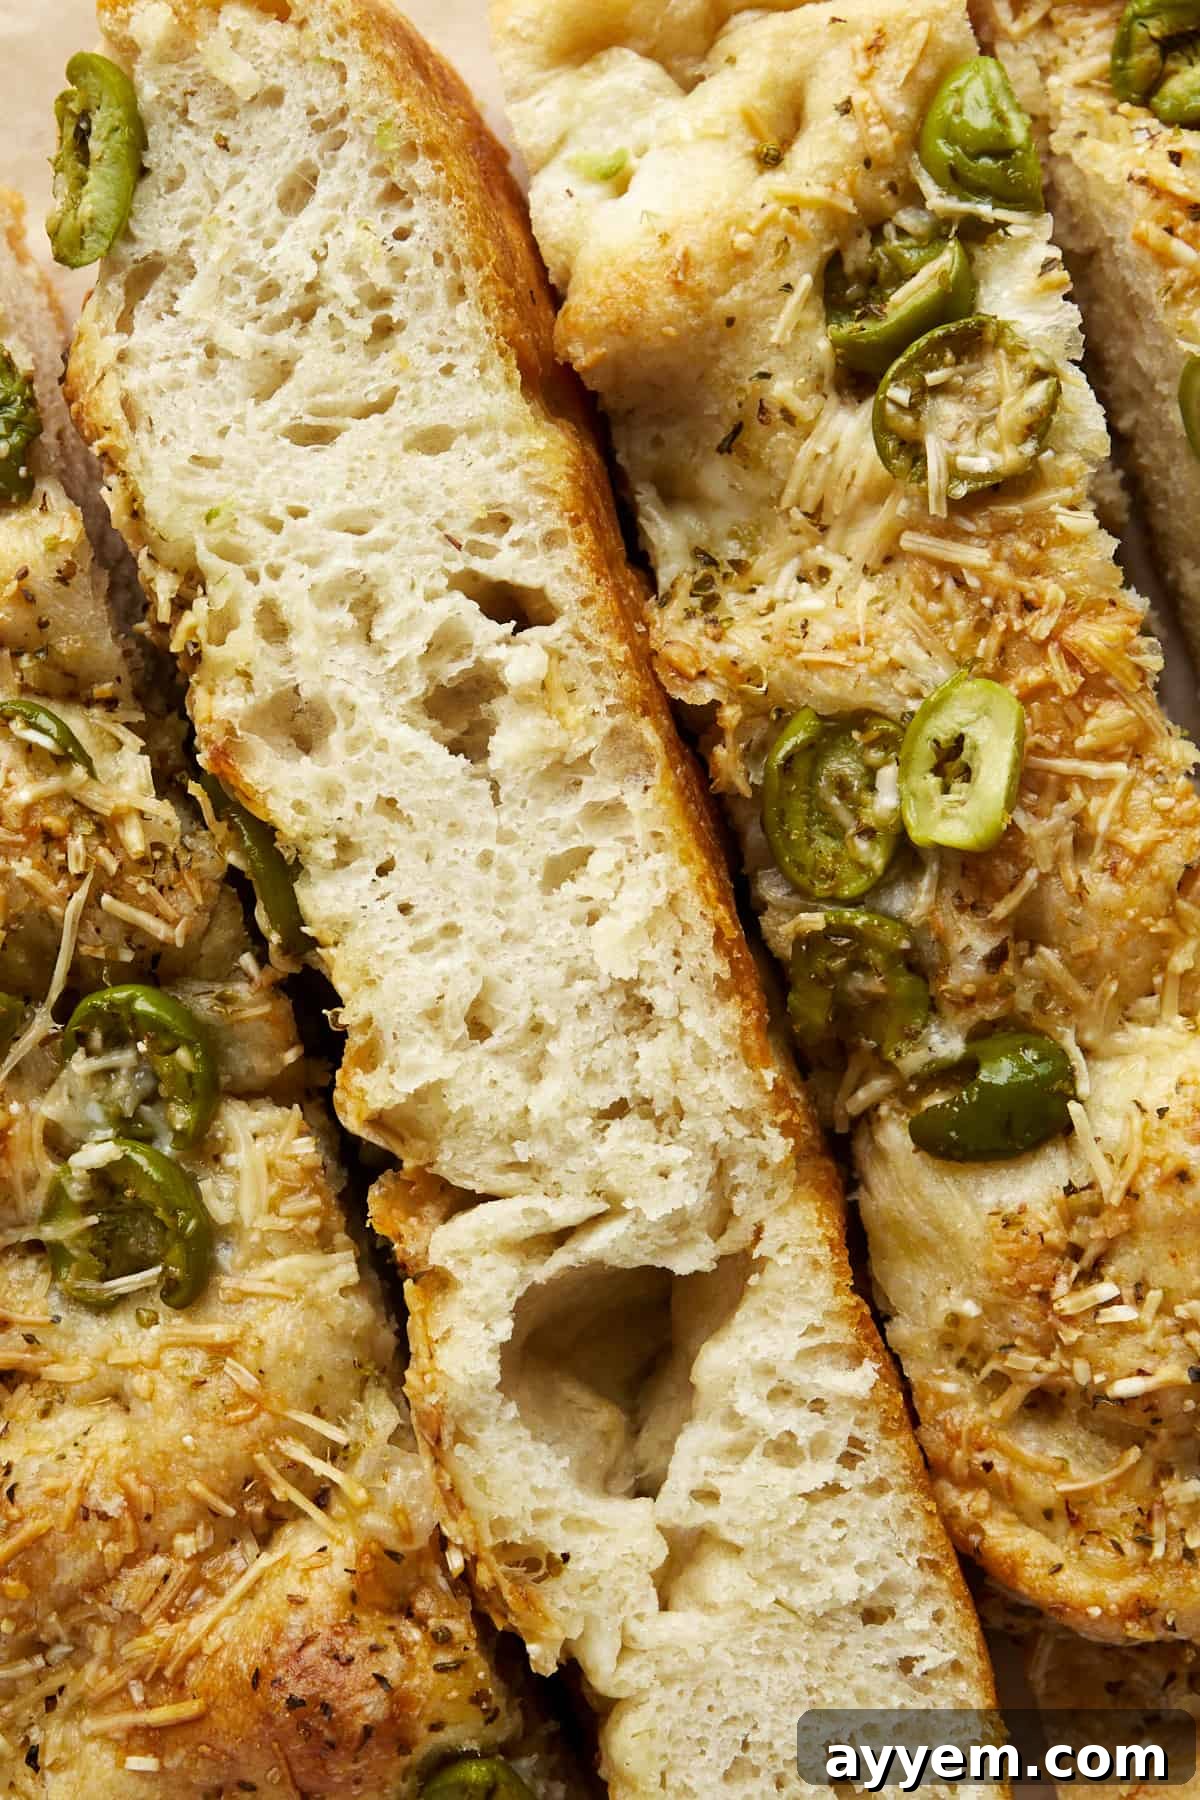
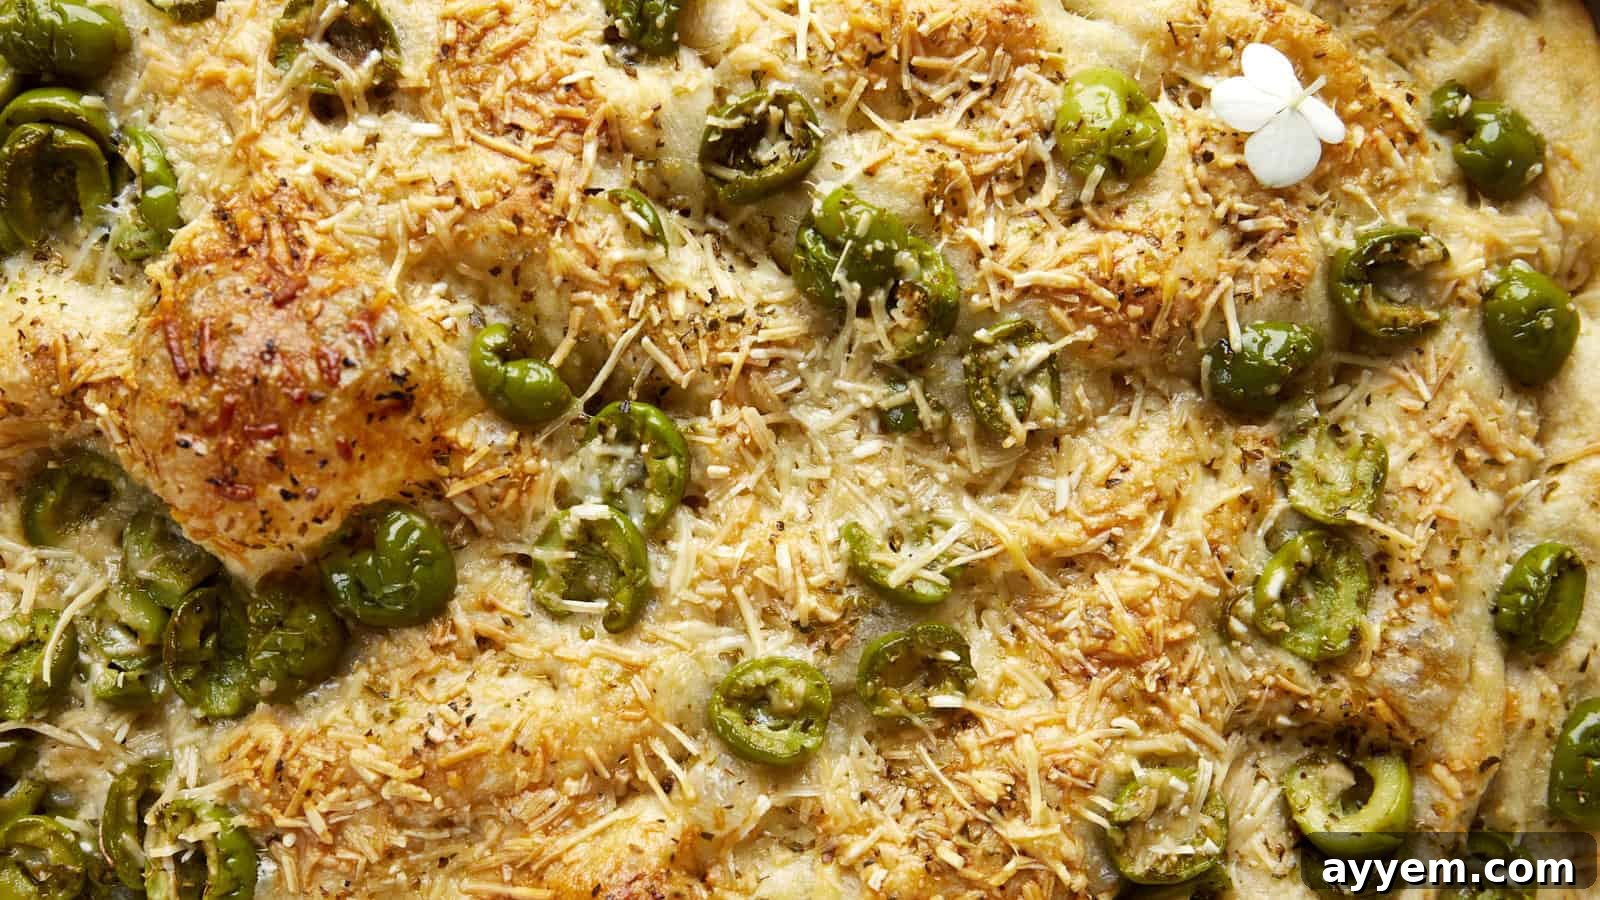
Unlock the secret to bakery-quality bread at home with this incredibly simple **No-Knead Olive Focaccia Bread** recipe. Imagine sinking your teeth into a wonderfully fluffy, airy dough, bursting with the piquant flavor of briny green olives, enhanced by a generous sprinkle of salty Parmesan cheese, and kissed with a rich drizzle of golden olive oil. This isn’t just bread; it’s a sensory experience—a symphony of savory, salty notes baked to golden, puffy perfection. This recipe is designed to be effortlessly delicious, making it an instant classic you’ll want to bake again and again. Prepare to impress your family and friends with minimal effort and maximum flavor, transforming your kitchen into an authentic Italian bakery.
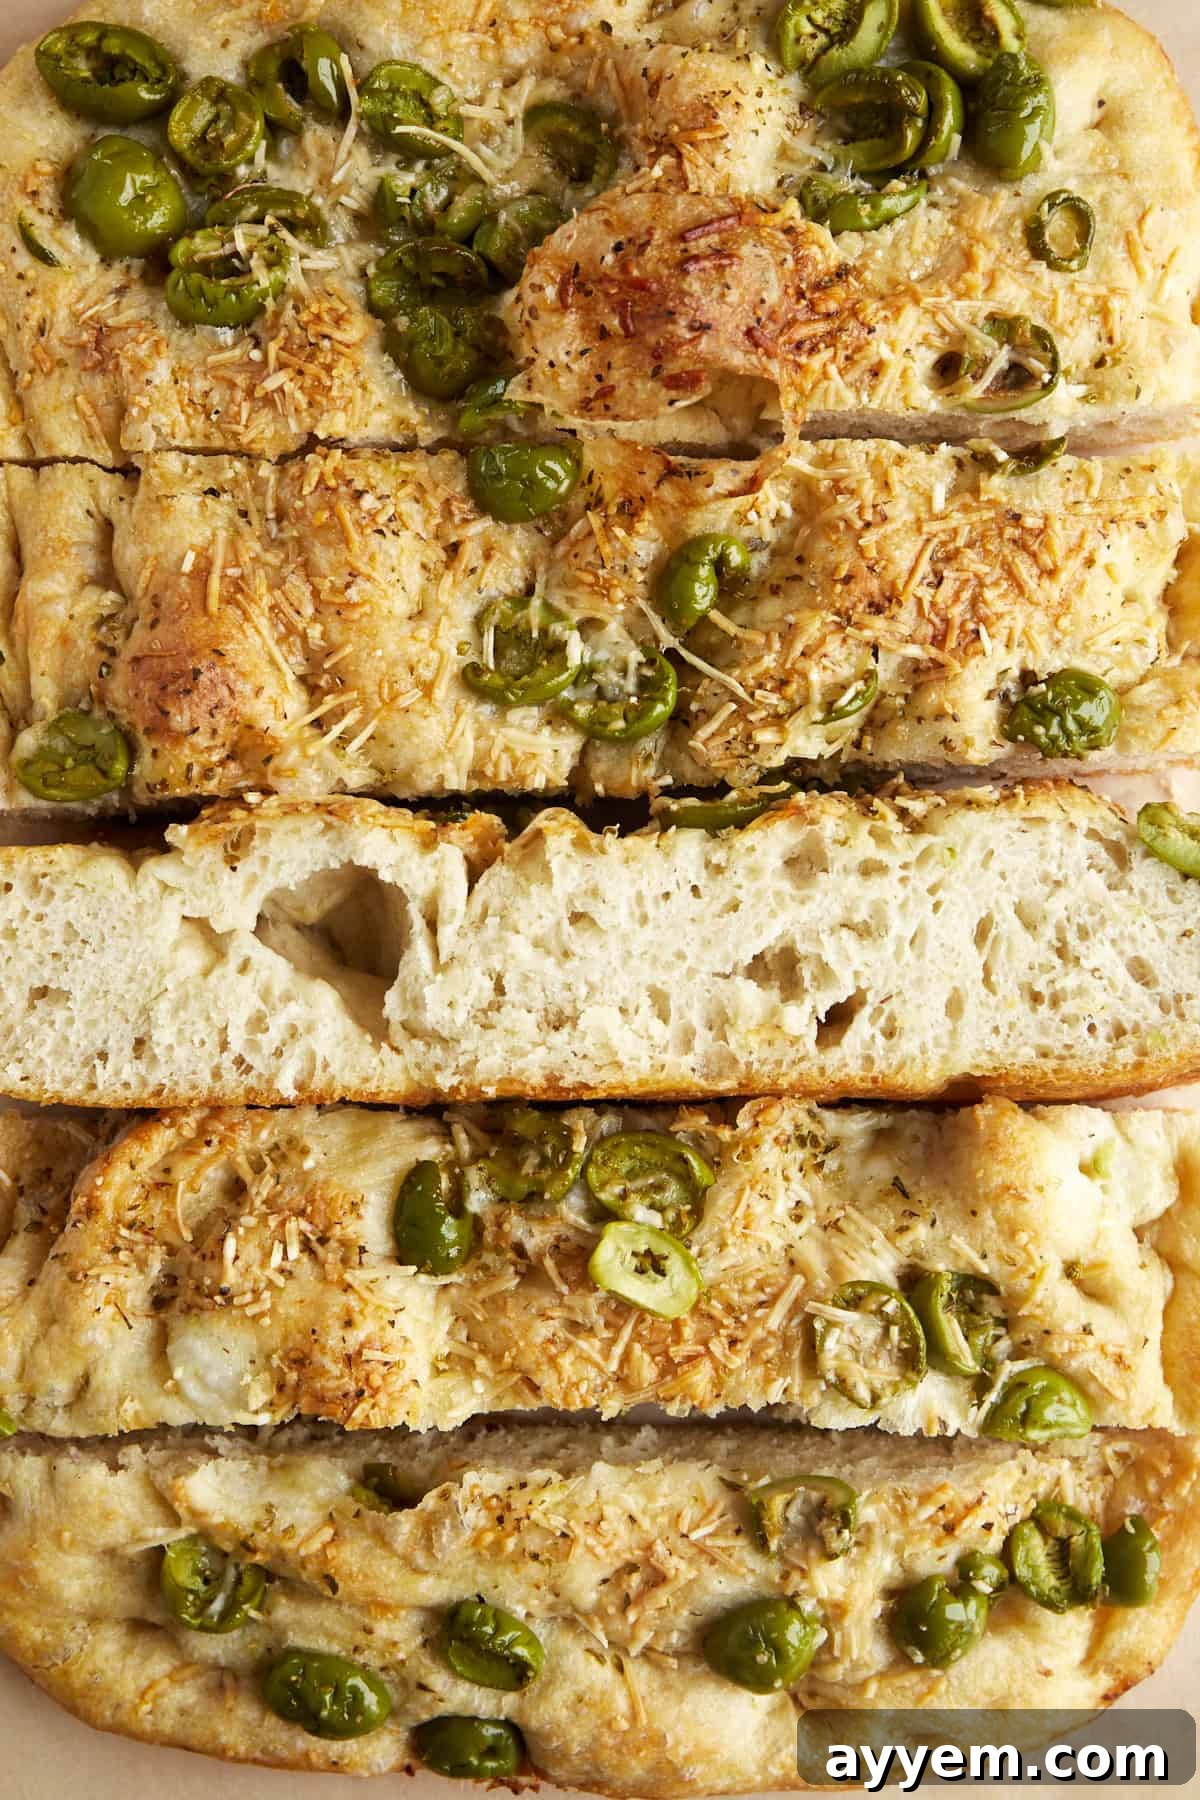
What Is No-Knead Olive Focaccia Bread? A Delightful Italian Twist
Our **No-Knead Olive Focaccia Bread** offers a brilliant, simplified approach to a beloved Italian classic. Focaccia, a rustic flatbread known for its rich olive oil, airy interior, and crispy crust, has been a staple in Italian cuisine for centuries. Traditionally, making focaccia involves a good amount of kneading to develop gluten and achieve its characteristic chewy texture. However, our no-knead version revolutionizes the process, making it incredibly accessible for home bakers of all skill levels, even those new to bread making.
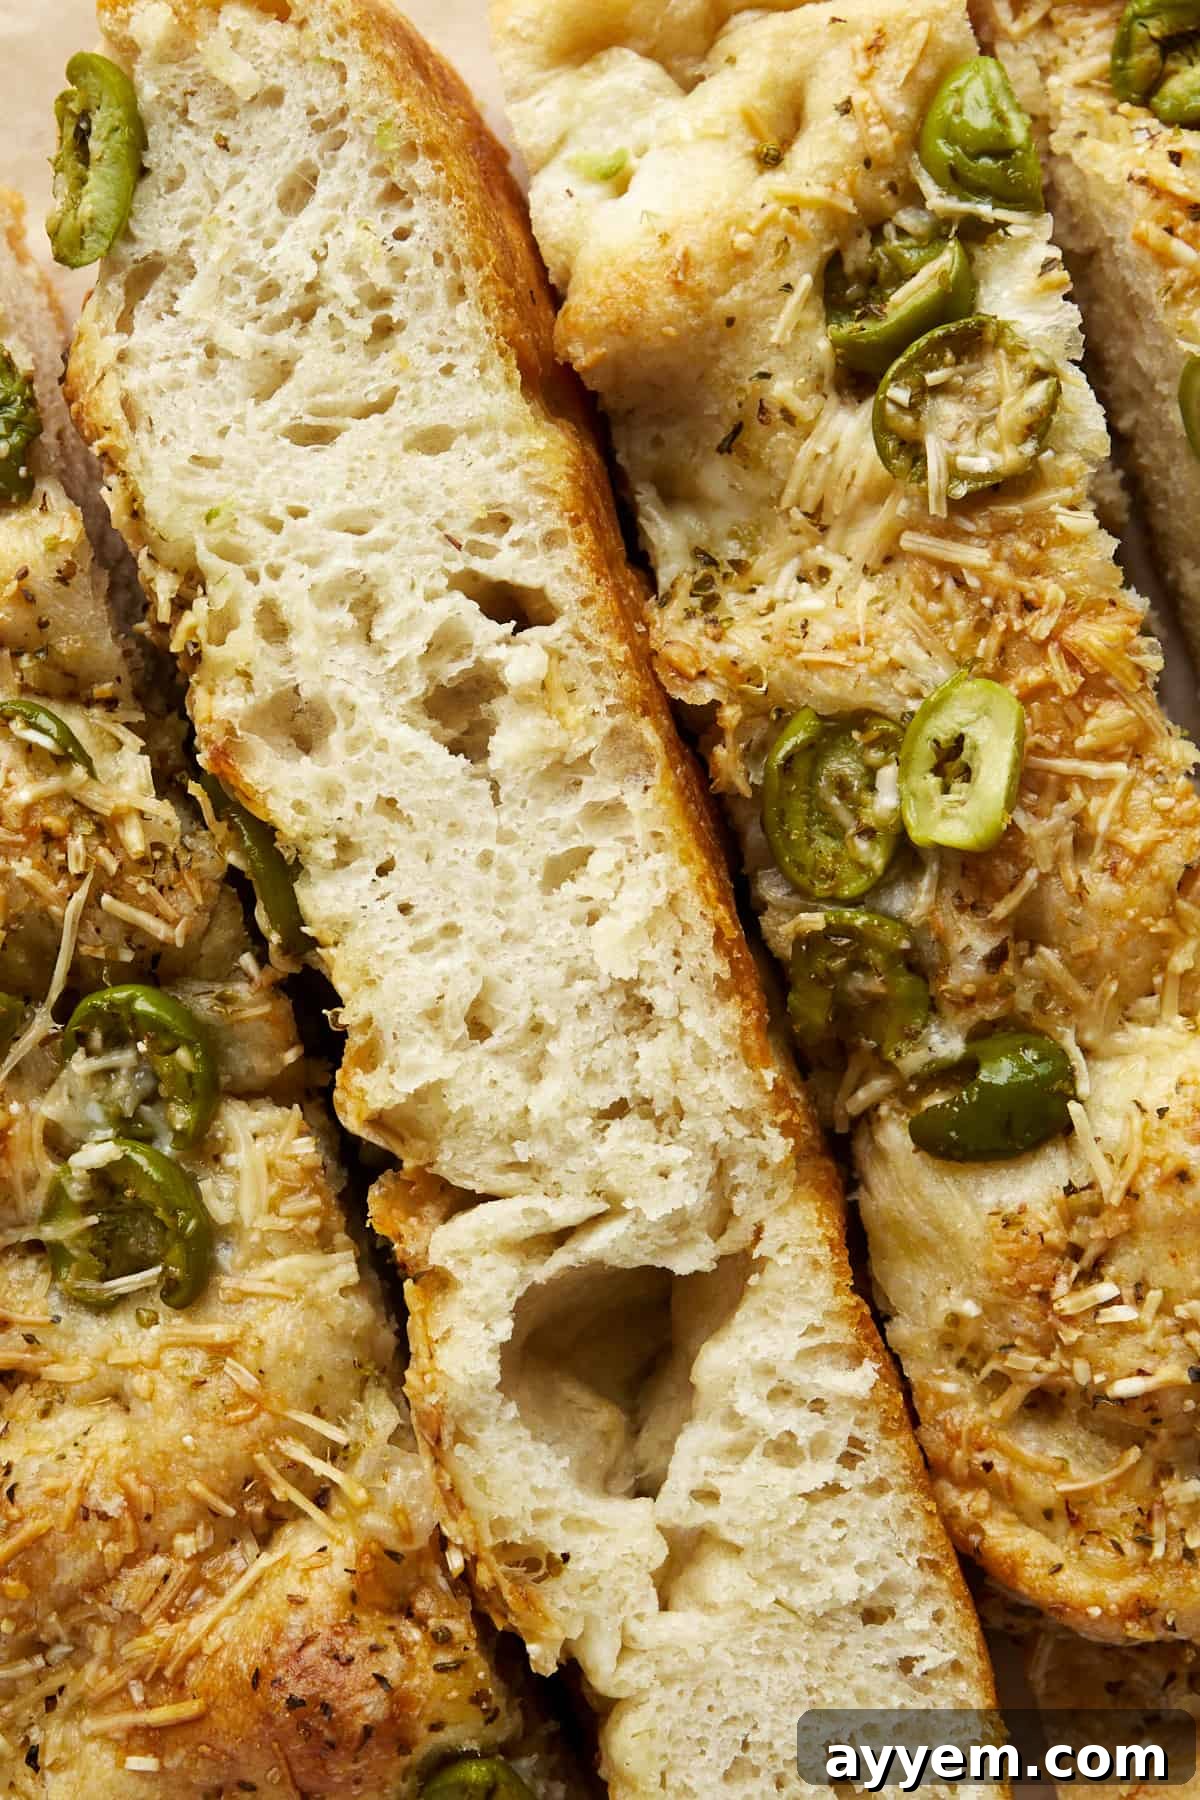
The magic behind the “no-knead” method lies in an extended fermentation period. Instead of vigorous kneading, time does the work, allowing the dough to slowly develop its gluten structure, resulting in a perfectly airy, slightly chewy crumb with wonderfully crisp, golden edges. This means you get all the authentic flavor and texture without the intense labor. Once baked, this focaccia transcends being merely a side dish. Seasoned with fragrant herbs like rosemary and oregano, the sharp brininess of olives (whether green or black), and a savory hint of Parmesan cheese, it transforms into an irresistible culinary delight.
This versatile **homemade focaccia** is perfect as an appetizer, served with a selection of dips and spreads. It pairs beautifully as a side dish with hearty comfort food meals such as one-pot spicy rigatoni or a creamy Marry Me chicken. But don’t stop there! Its robust flavor and satisfying texture also make it an exceptional choice for crafting gourmet sandwiches, elevating your lunch experience to a new level. From casual family dinners to sophisticated gatherings, this **easy focaccia recipe** is guaranteed to be a crowd-plepleaser.
Essential Ingredients for Your Perfect Olive Focaccia
Creating this delicious **olive focaccia** requires only a handful of staple ingredients, each playing a vital role in achieving its signature taste and texture. Quality ingredients truly shine in simple recipes like this. Here’s a closer look at what you’ll need:
- Flour: The foundation of our bread. You can use either high-quality all-purpose flour or bread flour. Bread flour, with its higher protein content, will yield a slightly chewier crumb, while all-purpose flour will still provide a fantastic result. While we haven’t extensively tested it, a 1:1 gluten-free all-purpose flour blend is generally a good substitute for those with dietary restrictions, potentially offering a delicious gluten-free alternative.
- Salt: More than just a flavor enhancer, salt plays a crucial role in regulating yeast activity and strengthening the gluten structure, contributing to the bread’s overall taste and texture. We recommend kosher salt for its clean flavor and coarse texture, which dissolves well.
- Instant Yeast: This is the powerhouse ingredient responsible for making your bread rise, creating that signature light and airy texture. Instant yeast is preferred for this **simple bread recipe** because it can be mixed directly with the dry ingredients without prior activation, making the process incredibly easy and foolproof. If you only have active dry yeast, you can still use it; just be sure to activate it first according to the package instructions (typically by dissolving it in a portion of the lukewarm water with a pinch of sugar for 5-10 minutes until foamy).
- Water: Lukewarm water is essential for activating the yeast and hydrating the flour to form the dough. It helps create the fluffy, pillowy texture that makes focaccia so delightful. Ensure the water is not too hot, which can kill the yeast, or too cold, which will inhibit its activity.
- Olive Oil: A cornerstone of any authentic focaccia, good quality extra virgin olive oil is indispensable. It infuses the bread with a rich, fruity flavor, contributes to a golden-brown, crispy exterior, and helps maintain a moist, tender interior. Don’t skimp on the olive oil—it’s key to the focaccia’s character!
- Toppings: This is where you can truly personalize your focaccia and add layers of flavor. We suggest a classic combination of flaky sea salt (like Maldon, for bursts of salty crunch), fresh rosemary (its piney aroma is heavenly), dried oregano (for an earthy, aromatic depth), grated Parmesan cheese (for a savory, umami kick), and of course, green or black olives (or a mix of both!) for their characteristic briny, salty pop. These toppings create a flavor profile that will keep you coming back for slice after slice.
Olive-Inspired Bliss: Simple Steps for a Focaccia You Can’t Resist!
While this **no-knead olive focaccia recipe** requires a bit of foresight due to its resting periods, the active preparation steps are incredibly straightforward. Trust us, the rich, deeply flavored results are absolutely worth the wait. Here’s how to create your own masterpiece:
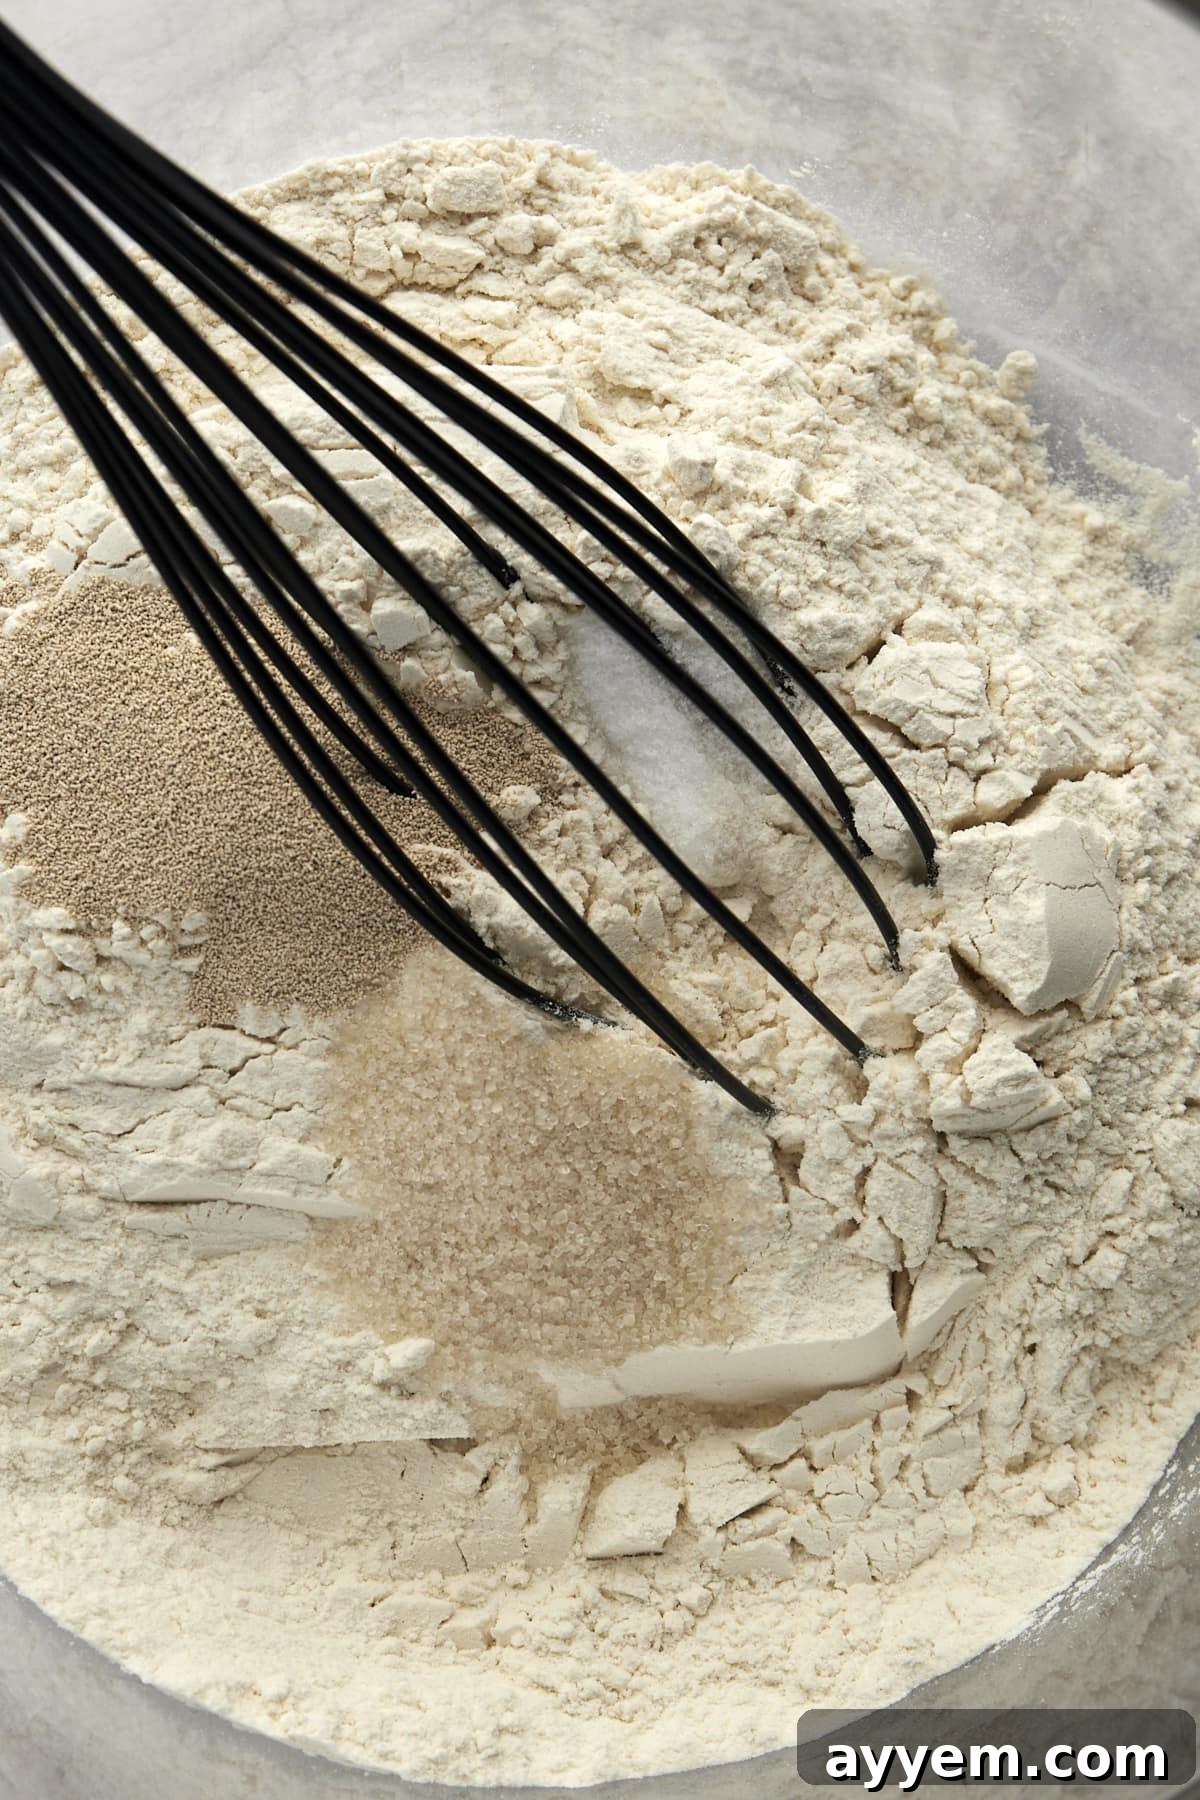
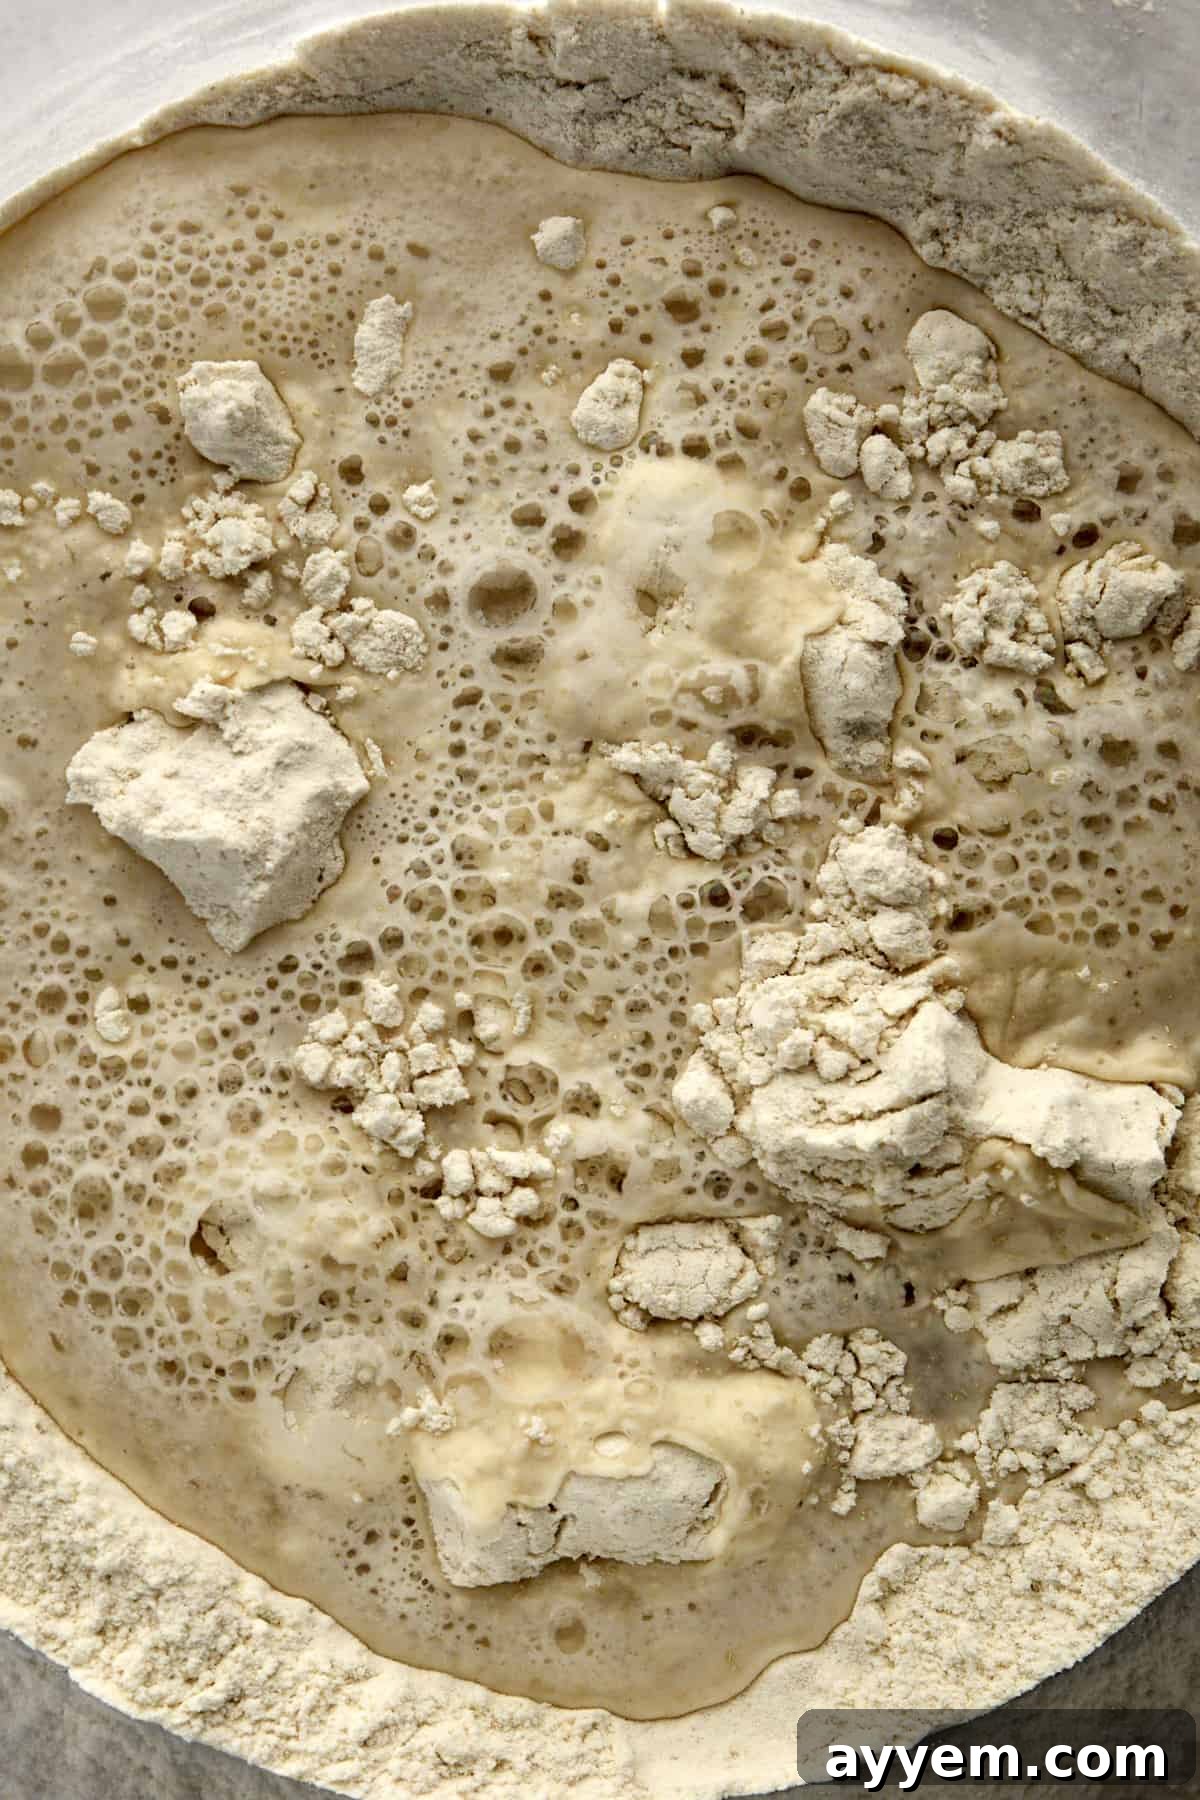
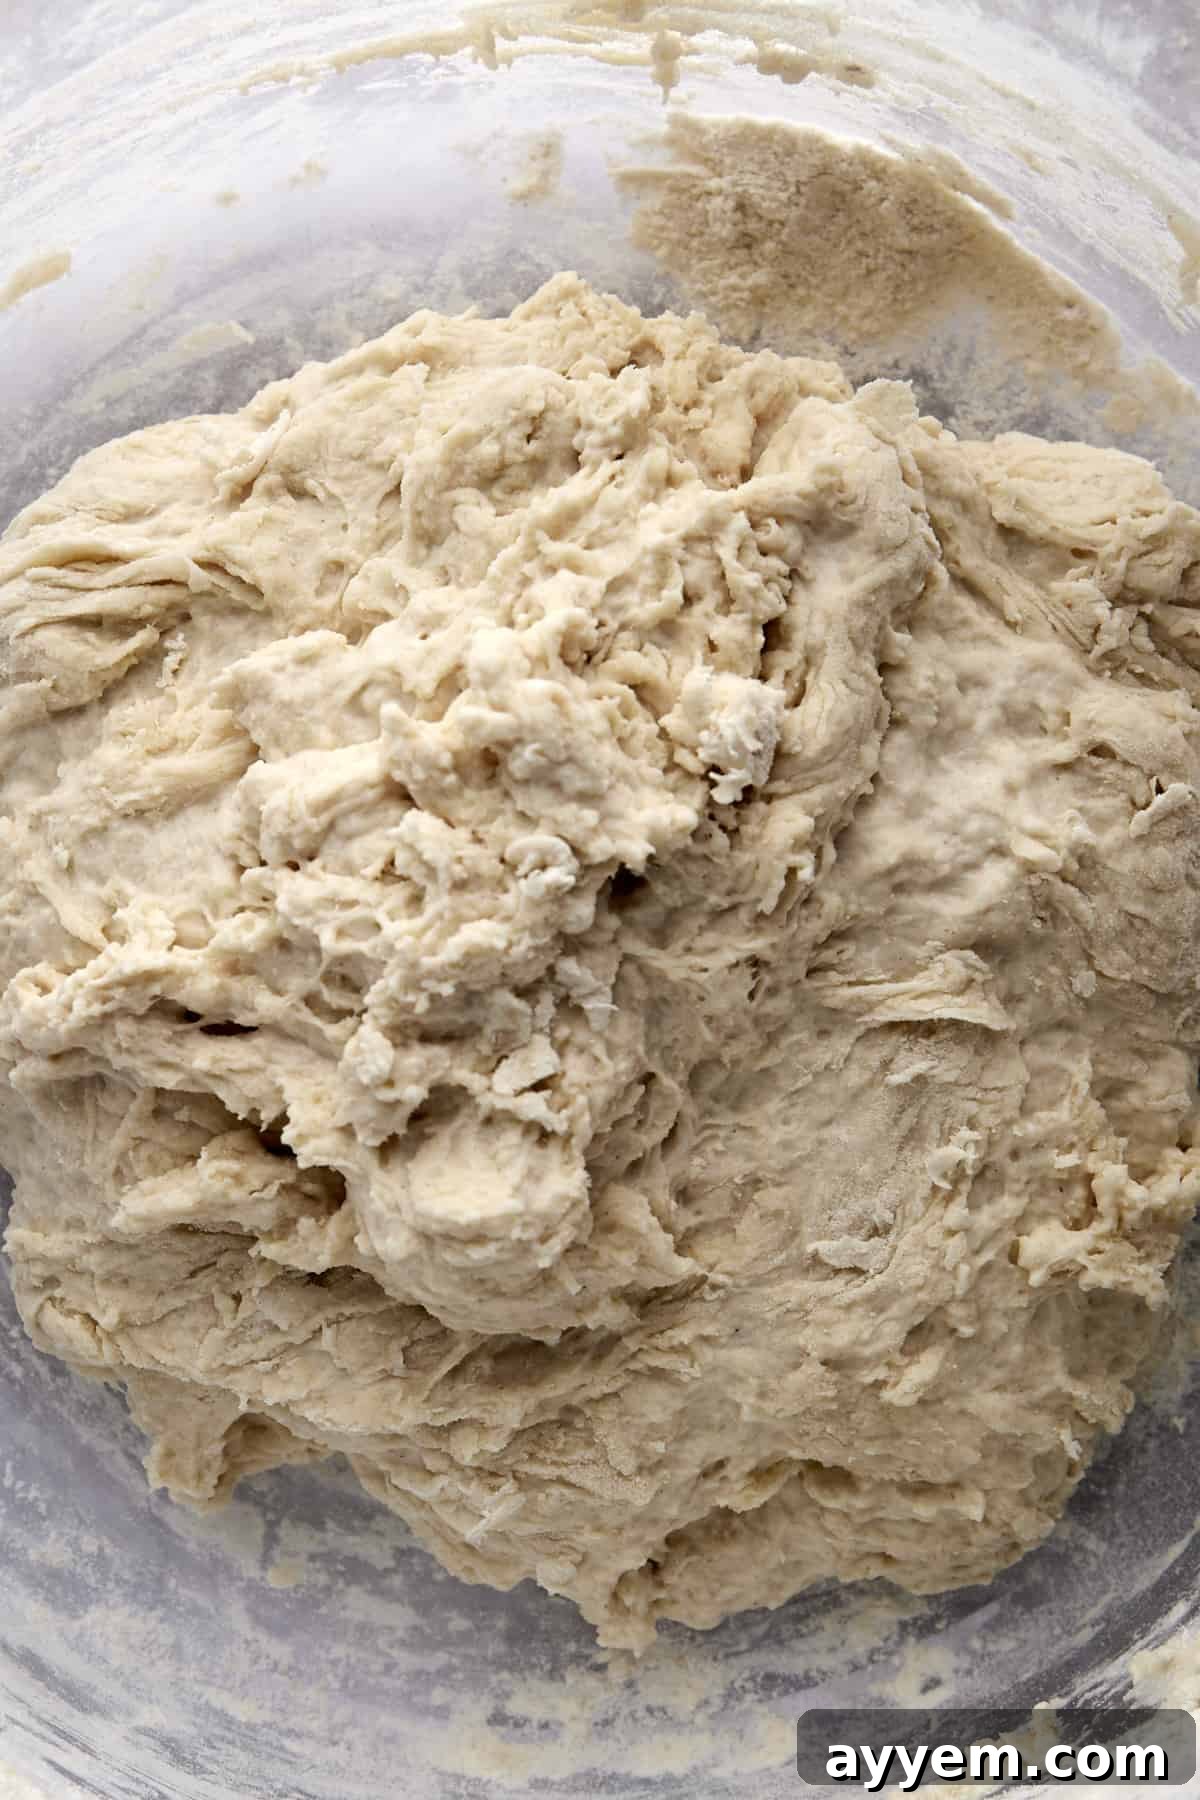
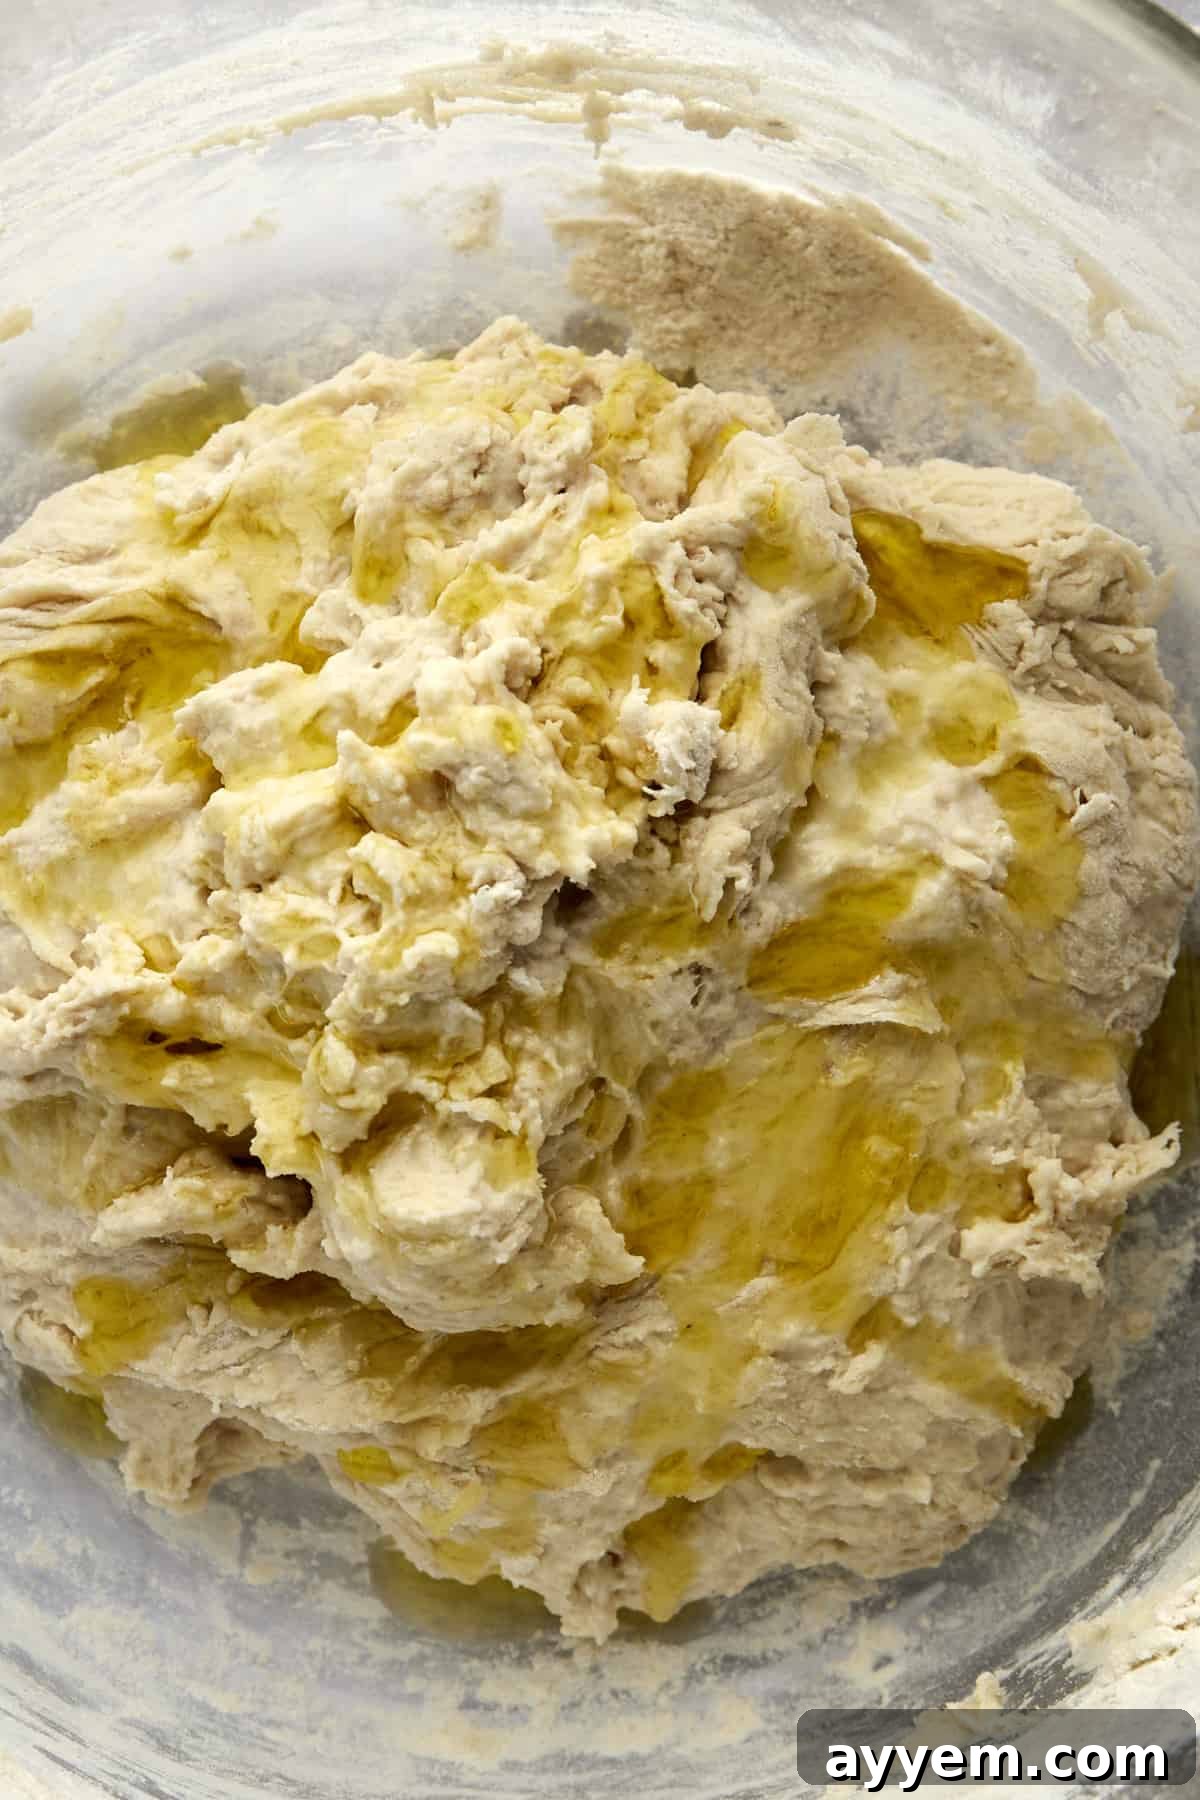
- Make the Dough: In a large mixing bowl, combine the all-purpose or bread flour, kosher salt, and instant yeast. Whisk these dry ingredients together thoroughly to ensure even distribution. Next, pour in the lukewarm water. Using a sturdy rubber spatula, mix until all the dry ingredients are fully hydrated and combined. The dough will be quite wet and sticky—this is exactly what you want for a no-knead dough. Lightly rub a small amount of olive oil around the surface of the dough to prevent it from drying out.
- Rest the Dough (First Proof): Cover the bowl tightly with a damp tea towel, a cloth bowl cover, or plastic wrap. This prevents the dough from forming a crust. Transfer the covered bowl to the refrigerator for a long, slow fermentation. This first proof should last at least 12 hours, but for the best flavor development and texture, aim for 24 to 72 hours (1 to 3 days). This extended cold proof is the secret to a rich, complex flavor and an incredibly airy crumb without any kneading.
- Prepare the Pan: When you’re ready to bake, select a 9×13-inch baking pan. Line the pan with parchment paper, leaving an overhang on the longer sides to help lift the focaccia out easily after baking. Lightly grease the parchment paper and the exposed sides of the pan with butter or a cooking oil spray. Then, pour about 2 tablespoons of olive oil into the center of the prepared pan and spread it evenly across the bottom.
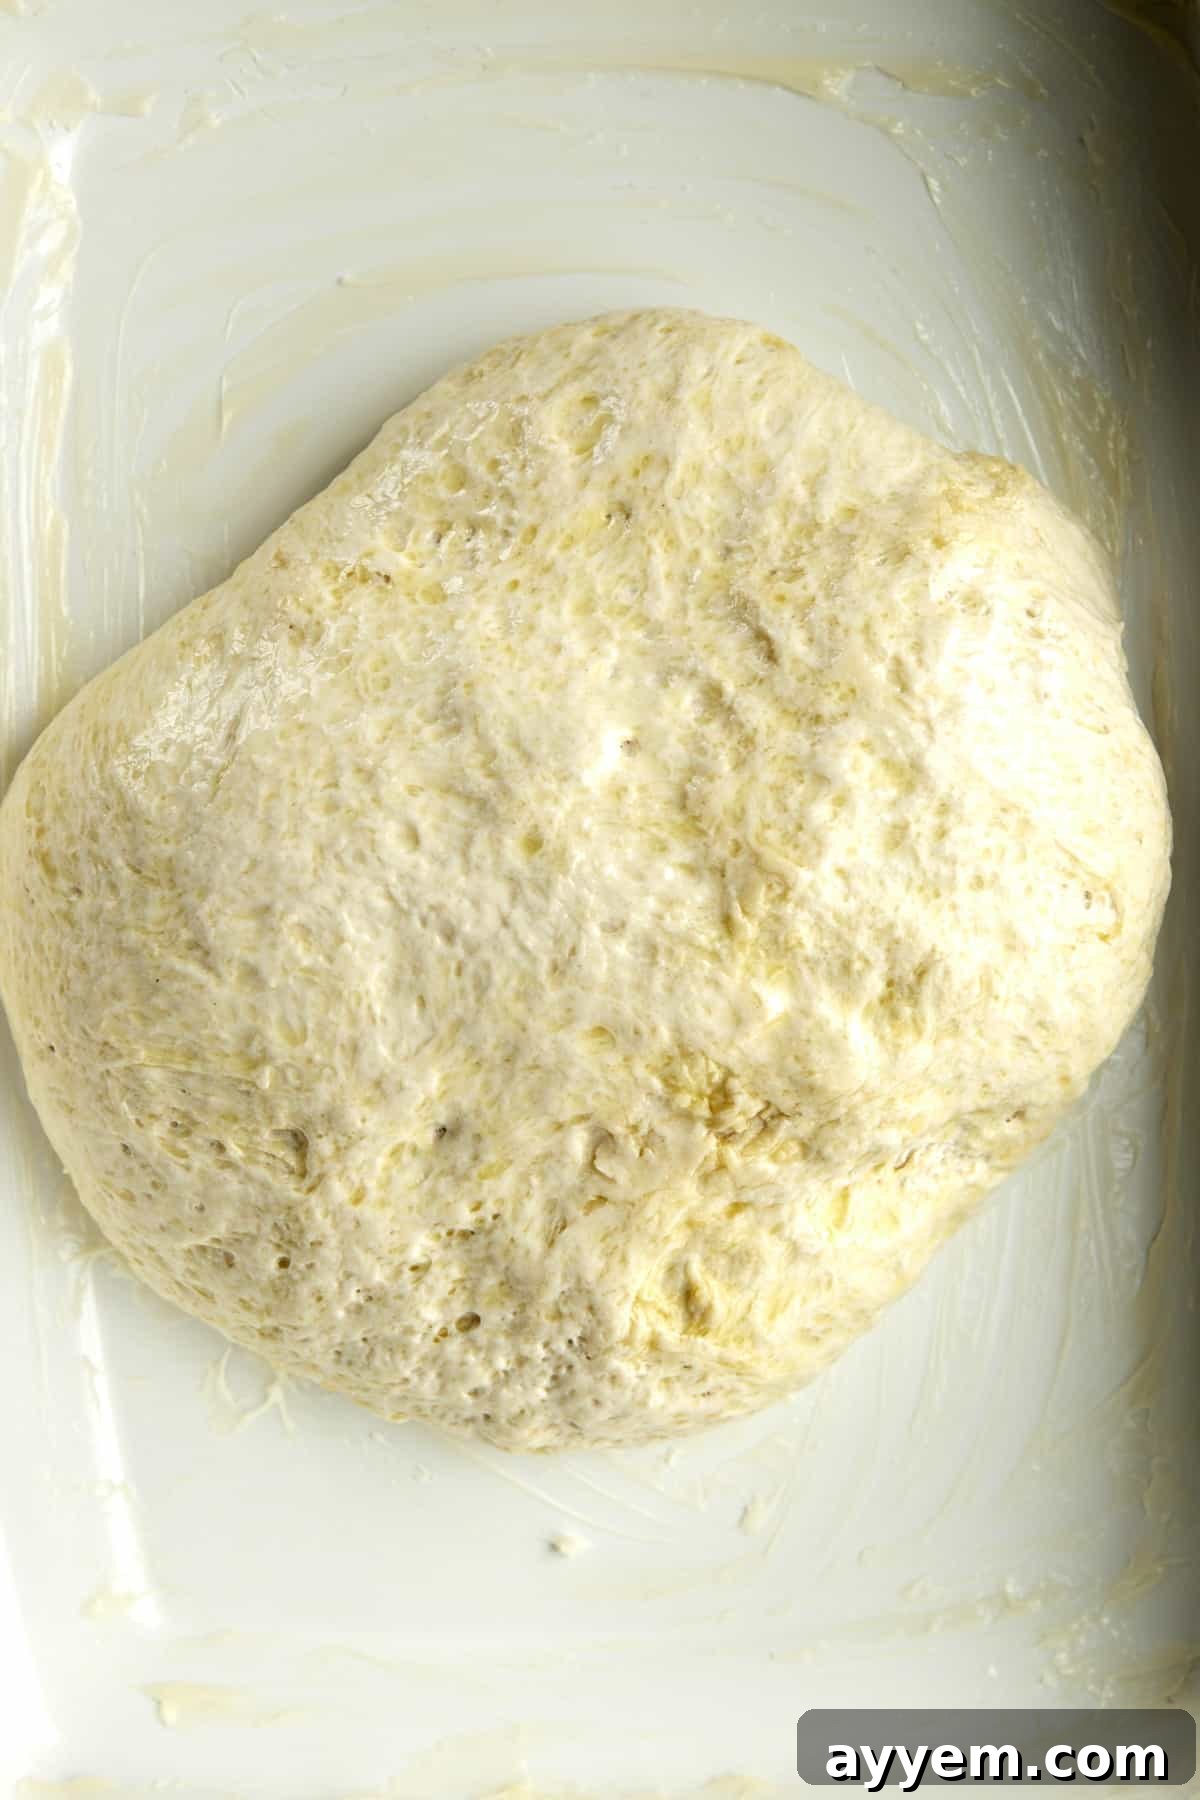
- Roll the Dough and Second Proof: Remove the dough from the fridge. Using two forks or oiled hands, gently pull the edges of the dough from the sides of the bowl towards the center, rotating the bowl as you go. This gentle folding helps to “deflate” the dough and strengthen its structure. Form the dough into a loose ball, and transfer it to the prepared baking pan, ensuring it’s coated in the olive oil at the bottom. Cover the pan loosely with plastic wrap or a damp towel and let the dough rest at room temperature for another 2 to 3 hours. During this second proof, the dough will relax, spread, and become visibly bubbly as it warms up and the yeast becomes active again.
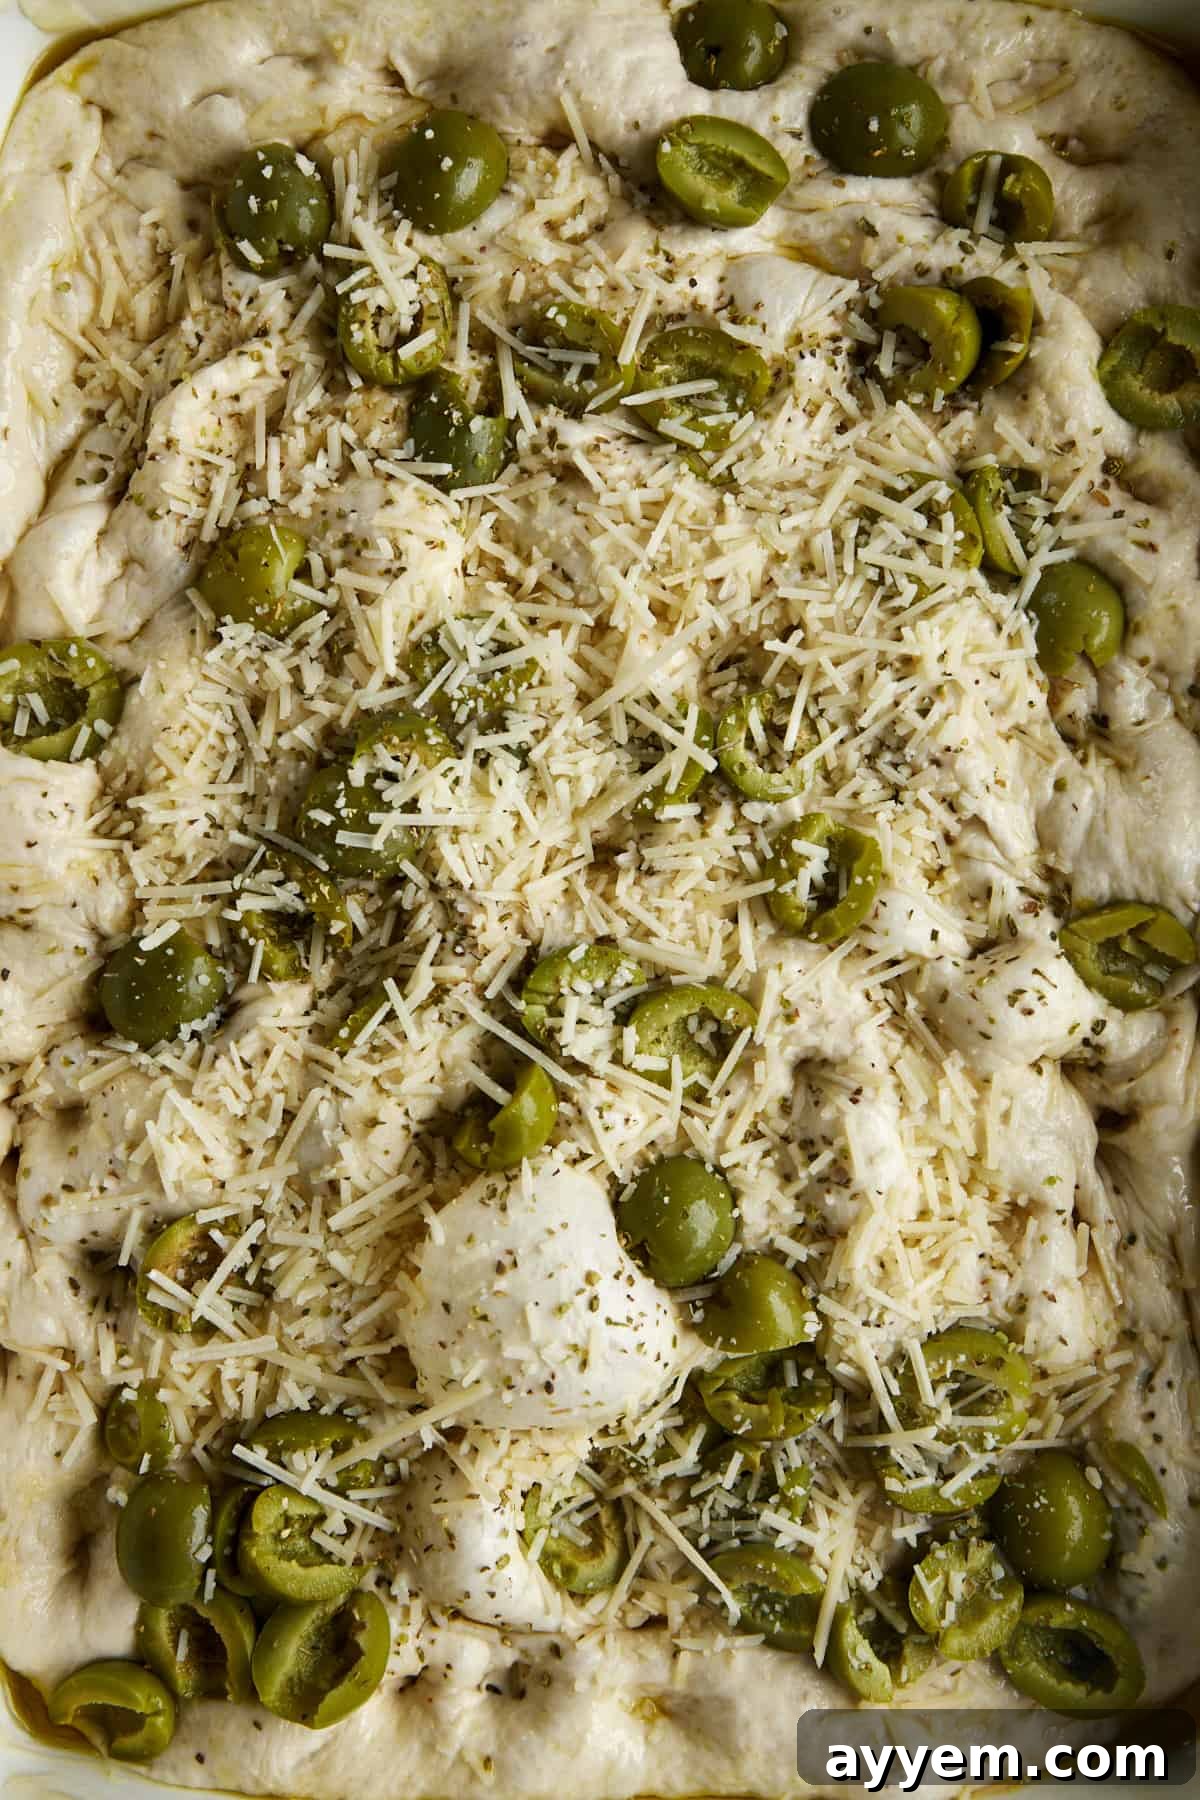
- Top and Dimple: Once the dough has risen beautifully and is bubbly, it’s time for the signature focaccia dimples and delicious toppings. Evenly sprinkle the fresh rosemary leaves, dried oregano, flaky sea salt, grated Parmesan cheese, and chopped olives over the surface of the dough. Pour a little more olive oil over the top. Now, using oiled fingertips, gently press deep dimples into the dough, stretching it slightly as you go to encourage it to fill the entire pan. Be careful not to press too hard and deflate all the air out.
- Bake: Preheat your oven to 425°F (220°C) with a rack in the center. Carefully transfer the focaccia to the preheated oven and bake for 25 to 30 minutes. Keep an eye on it—the focaccia is ready when the edges are golden brown and lightly crisp, and the top is beautifully puffed and golden.
- Cool and Serve: Once baked, immediately transfer your **olive focaccia** to a wire cooling rack. Allow it to cool for at least 10-15 minutes before slicing and serving. This cooling period is crucial as it allows the internal structure of the bread to set, ensuring it holds its shape and doesn’t crumble. Enjoy your homemade focaccia warm, perhaps with more olive oil for dipping. Store any leftovers in an airtight container at room temperature for 1-2 days, or freeze for longer storage.
Foolproof Tips for No-Knead Focaccia Success
If the thought of baking bread has ever seemed daunting, this **no-knead olive focaccia bread** is here to change your mind. It’s incredibly forgiving and comes together with surprising ease, especially when you keep these expert tips in mind. With a little patience, you’ll be enjoying perfectly puffed, flavorful focaccia every time:
- Measure Carefully, Preferably by Weight: While cup measurements are provided, for the most consistent and best results, we highly recommend using a digital food scale to measure your flour and water. Even slight variations in flour density or packing can significantly impact the dough’s hydration, which in turn affects the taste and texture of your bread. Precision in bread making often leads to superior outcomes.
- Embrace the Rest: Do not rush or skip the resting (proofing) process! This is where the magic of the no-knead method truly happens. The long fermentation periods allow the yeast to work its wonders, developing complex flavors and creating the light, airy structure without any manual kneading. Allow at least 12 hours for the first cold proof in the refrigerator, and another two to three hours for the second proof at room temperature. Patience is key to a superior focaccia.
- Find a Warm Spot for the Second Proof: Yeast thrives in warmth. For the second proof, after you’ve transferred the dough to the baking pan, finding a warm environment will help your focaccia rise beautifully and become wonderfully bubbly. If your kitchen is cool, try placing the covered pan in a turned-off oven with just the oven light on. The gentle warmth from the light creates the ideal microclimate for the dough to proof effectively. Just be absolutely sure not to turn on the oven’s heat!
- Get Creative with Toppings: While the olive, rosemary, and Parmesan combination is classic and delicious, feel free to experiment with other savory toppings. Focaccia is a fantastic canvas for culinary creativity! Use any leftover vegetables or cheeses you have on hand to create stunning **focaccia bread art**. Thinly sliced tomatoes, asparagus spears, caramelized onions, roasted garlic, sun-dried tomatoes, or even thinly sliced potatoes all taste incredible and add visual appeal.
- Allow for Ample Cooling: It can be tempting to slice into your warm, fragrant focaccia right out of the oven, but resist the urge! Allowing the bread plenty of time to cool, ideally to at least room temperature, is crucial. This cooling period allows the steam within the bread to redistribute, solidifying its internal structure and preventing it from becoming gummy or crumbling when sliced. A properly cooled focaccia maintains its shape and offers the best texture.
- Storage and Reheating: Store any leftover focaccia in an airtight container at room temperature for 1-2 days. For longer storage, freeze individual slices wrapped tightly in plastic wrap and then foil for up to 2-3 months. To reheat, simply warm slices in a toaster oven or a regular oven at 350°F (175°C) until lightly crisp and heated through.
Common Questions About This Easy Focaccia with Olives
Focaccia stands out with its signature soft, pillowy interior that contrasts beautifully with a crisp, golden crust. It’s distinctively dimpled with olive oil and generously topped with savory ingredients like herbs, olives, or other seasonal additions, giving it a unique flavor and texture that’s less dense than regular bread and more airy than pizza.
Absolutely! The beauty of the no-knead method is that you don’t need to perform any strenuous kneading. A long, slow fermentation period, especially a cold proof in the refrigerator, allows the dough to develop its gluten structure naturally. This results in that desired chewy, airy texture without any physical effort, making it a perfect **beginner-friendly focaccia**.
For the most vibrant flavor, Kalamata or Castelvetrano olives are fantastic choices. Kalamatas offer a rich, fruity, and slightly tangy flavor, while Castelvetranos are buttery and mild. Both bring a delightful salty, briny pop that complements the soft bread and fragrant olive oil beautifully. Feel free to use your favorite variety or a mix of both green and black olives for added complexity.
Yes, it’s an ideal **easy focaccia recipe** for beginners! It’s incredibly forgiving and doesn’t require any advanced baking techniques or specialized tools. The process is straightforward: just mix the ingredients, allow ample rest time, spread it in a pan, add your toppings, and bake. It’s a low-stress way to achieve truly impressive homemade bread.
Definitely! In fact, making this **no-knead focaccia** ahead of time is part of its charm. The dough benefits significantly from a long, cold proof in the refrigerator (up to 3 days), which deepens its flavor. You can prepare the dough, let it chill, and then simply bring it to room temperature for the second proof and baking when you’re ready to enjoy fresh bread.
This versatile **savory bread** can be served in countless ways! It’s perfect as an appetizer with olive oil and balsamic vinegar for dipping, alongside a charcuterie board, or as a side with soups and salads. It also makes an incredible base for sandwiches, or simply enjoyed on its own as a delicious snack. Its robust flavors make it a fantastic accompaniment to many Mediterranean and Italian dishes.
More Easy Focaccia Recipes to Explore
Once you fall in love with the simplicity and deliciousness of this **no-knead olive focaccia**, you’ll likely crave more. Dive into a world of diverse flavors and textures with these other mouthwatering focaccia recipes, perfect for expanding your home baking repertoire:
- Easy Focaccia Recipe with Tomatoes: A vibrant, fresh twist showcasing juicy burst tomatoes.
- Quick Focaccia Recipe with Za’atar Seasoning: A Middle Eastern inspired focaccia, rich with aromatic spices.
- No-Knead Cheesy Focaccia Bread: Indulge in the irresistible pull of melted cheese baked into fluffy focaccia.
- Slow Cooker Easy Focaccia Recipe: An ingenious method for baking focaccia with minimal fuss, perfect for warmer months or when your oven is occupied.
No-Knead Olive Focaccia Bread
Print Recipe
Email Recipe
Ingredients
- 4 cups all-purpose flour or bread flour
- 2 teaspoons kosher salt
- 2 teaspoons instant yeast
- 2 cups lukewarm water
- Butter for greasing
- 4 Tablespoons olive oil divided
- 1-2 teaspoons whole rosemary leaves optional
- 2 teaspoons dried oregano optional
- flaky sea salt such as Maldon
- ½ cup parmesan cheese freshly grated
- ¾ cup chopped olives
Instructions
Make the Dough:
-
In a large bowl, whisk the flour, salt, and instant yeast. Add the water, and use a rubber spatula to mix until the liquid is absorbed and a sticky dough ball is formed. Lightly rub olive oil on around the surface of the dough.4 cups all-purpose flour or bread flour, 2 teaspoons kosher salt, 2 teaspoons instant yeast, 2 cups lukewarm water
Proof the Dough:
-
Cover the bowl with a cloth cover or plastic wrap, and transfer it to the fridge for at least 12 hours or up to 3 days.
Prepare the Pan:
-
Line a 9×13 baking dish with parchment paper, and grease with butter or cooking oil spray. Then, pour 2 Tablespoons of oil into the center, and spread it around.Butter for greasing, 4 Tablespoons olive oil
Deflate the Dough:
-
Use two forks to deflate the dough by gently pulling it away from the sides of the bowl, rotating the bowl with each pull. Roll the dough into a ball, and let it rest at room temperature for 3 to 4 hours.
Preheat the Oven:
-
Place a rack in the center of the oven, and preheat it to 425 degrees Fahrenheit.
Top the Bread:
-
Transfer the dough to the prepared baking dish. Sprinkle the rosemary, oregano, salt, parmesan, and olives over the dough. Pour a drizzle of oil on top. Using oiled hands, gently press fingers into the dough to create dimples, stretching it as needed to fill the dish.flaky sea salt, 1-2 teaspoons whole rosemary leaves, 2 teaspoons dried oregano, ½ cup parmesan cheese, ¾ cup chopped olives
Bake:
-
Transfer the focaccia to the preheated oven, and bake for 25 to 30 minutes or until the edges are golden and lightly crisp.
Cool:
-
Transfer the bread to a cooling rack, and let it rest for at least 10 minutes before serving.
-
Enjoy immediately! Store leftovers in an airtight container at room temperature for 1-2 days.
Equipment


Notes
Nutrition
Nutrition information is automatically calculated, so should only be used as an approximation.