
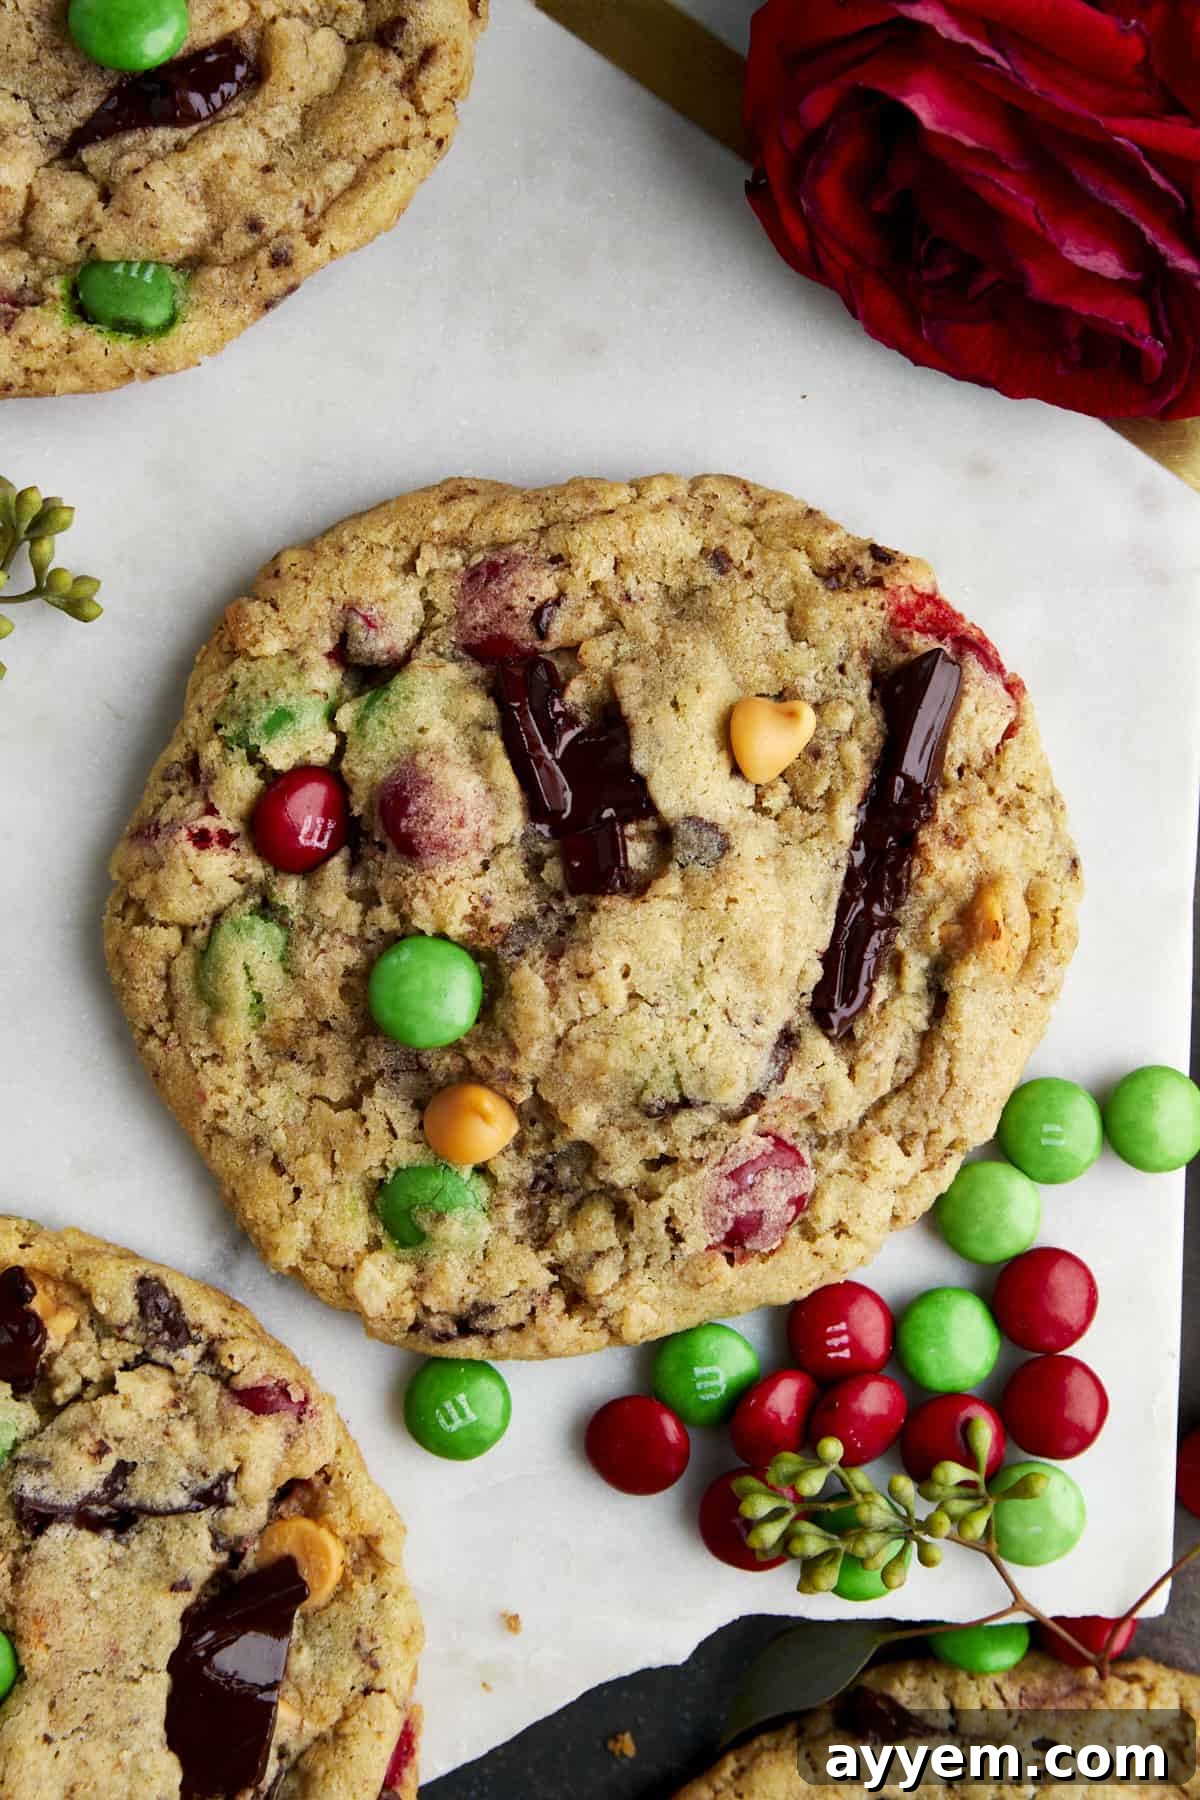
The Ultimate Guide to Festive Christmas Monster Cookies: Your Go-To Holiday Recipe
‘Tis the season for baking, and what better way to celebrate than with a batch of irresistible Christmas Monster Cookies? These delightful treats are not just incredibly soft and wonderfully chewy; they burst with a vibrant festive flair that makes them an absolute highlight on any holiday platter. Imagine a rich, hearty oatmeal batter, generously studded with cheerfully colored red and green M&M’s, creamy peanut butter chips, and luscious dark chocolate chunks – each bite is a symphony of textures and flavors, perfectly capturing the spirit of the holidays.
Whether you’re gearing up for lively cookie exchanges, hosting cozy family gatherings, or searching for the perfect homemade gift that spreads warmth and cheer, these Christmas monster cookies are a guaranteed crowd-pleaser. Their playful appearance and satisfying taste make them ideal for adding a splash of colorful fun and sweet indulgence to all your seasonal celebrations. Get ready to bake a memory that everyone will cherish!
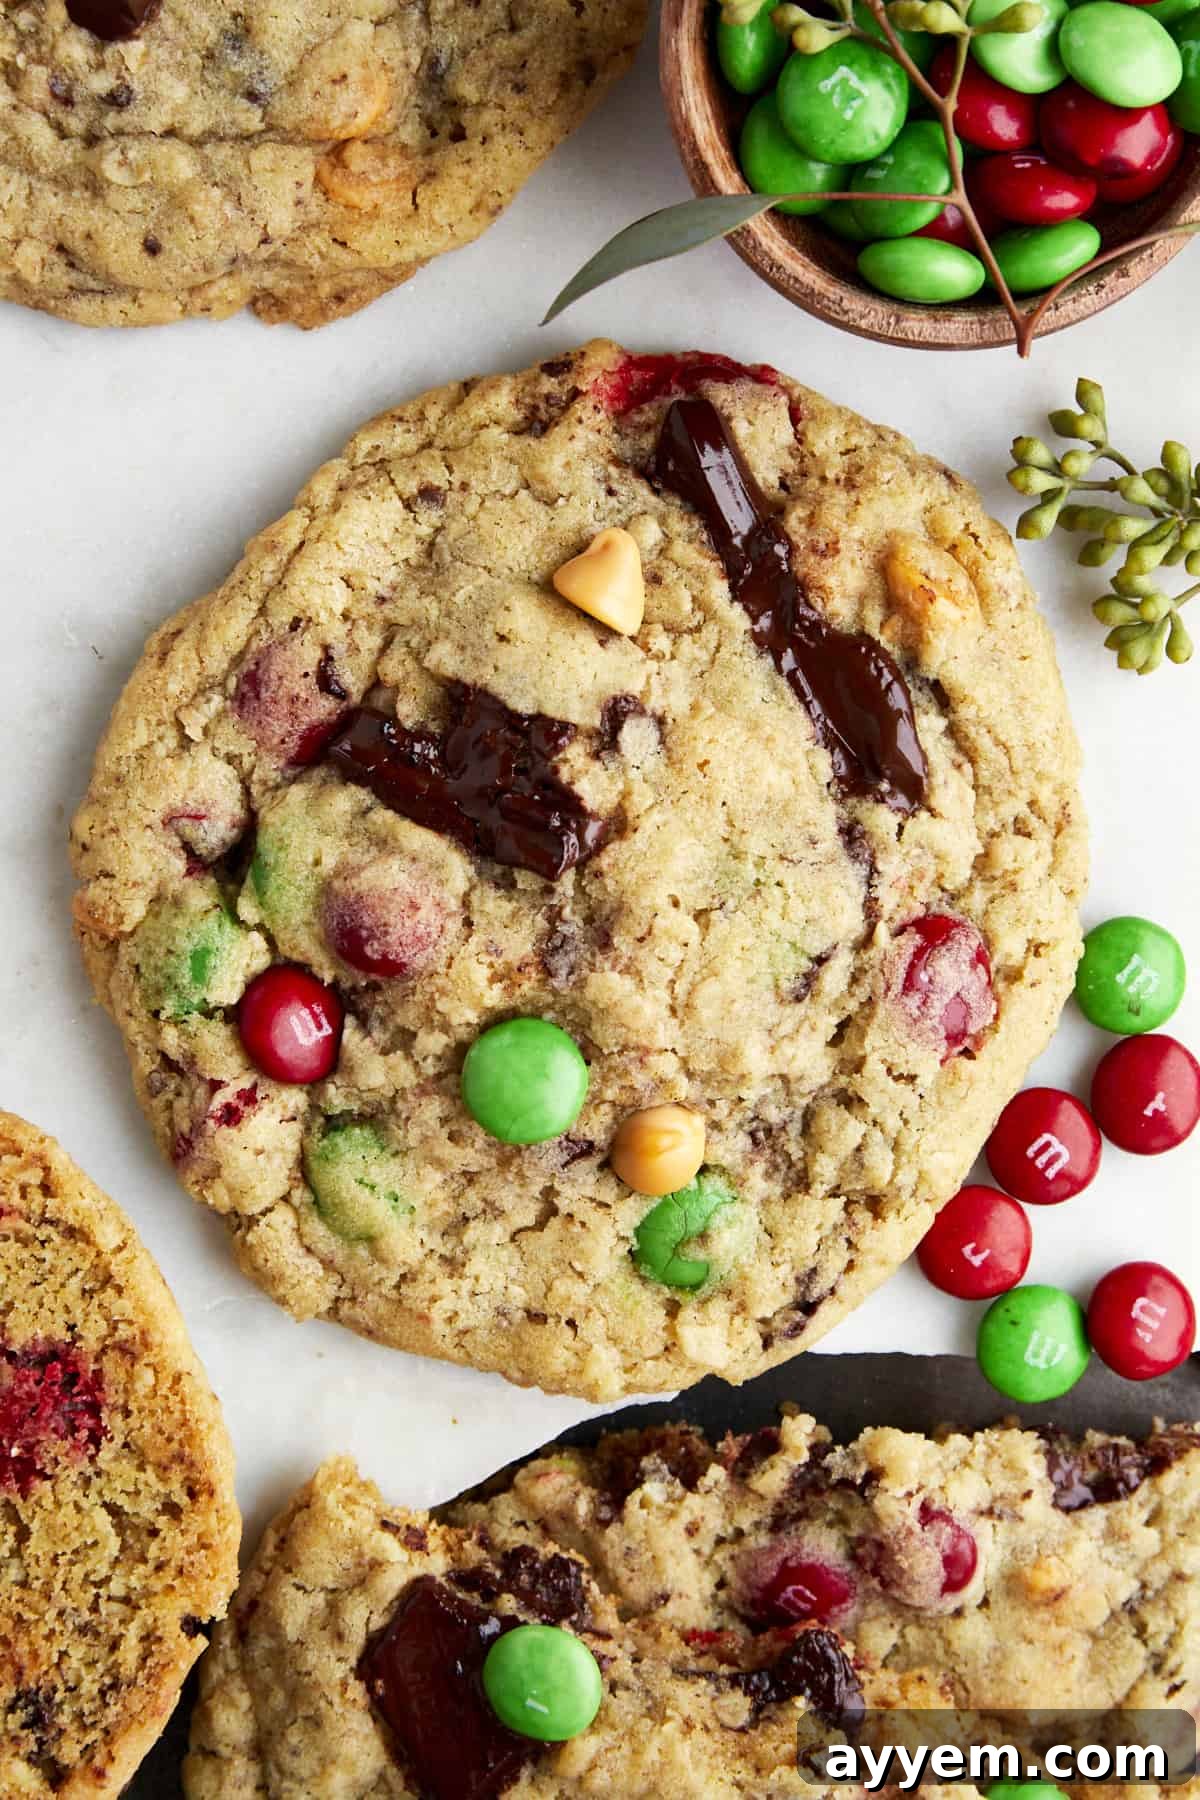
What Exactly Are Monster Cookies? The Culinary Frankenstein Explained
In the vast world of cookies, monster cookies hold a special, almost legendary status. Often dubbed the “Frankensteins” of the cookie realm, they are a magnificent fusion of various beloved ingredients, designed to satisfy virtually every craving in a single, glorious bite. Similar in spirit to “everything but the kitchen sink” cookies, monster cookies embrace abundance, bringing together a harmonious blend of sweet and savory, crunchy and chewy elements.
The concept of a traditional monster cookie typically revolves around a robust oatmeal cookie dough base. This hearty foundation then becomes a canvas for an impressive array of mix-ins. Common additions include creamy peanut butter chips, buttery butterscotch chips, classic chocolate chips in various forms (milk, semi-sweet, dark), and an assortment of colorful candy pieces. The beauty of the monster cookie lies in its versatility and its ability to deliver a complex flavor profile that appeals to diverse palates. It’s a cookie that promises a delightful surprise with every mouthful, ensuring no two bites are exactly the same.
Our easy Christmas monster cookies recipe takes this classic concept and infuses it with an unmistakable holiday spirit. We incorporate all the ingredients you’d expect in an authentic monster cookie, but with an added burst of festive red and green colors from holiday-themed M&M’s. This simple yet impactful twist transforms a universally loved cookie into a seasonal sensation, perfect for brightening any holiday table or gifting to friends and family. It’s the ultimate combination of comfort, indulgence, and celebratory cheer, all baked into one delightful package.
Why These Christmas Monster Cookies Are a Must-Try This Season
Beyond their charming festive appearance, these Christmas monster cookies offer a multitude of reasons to make them your go-to holiday baking project. Firstly, their texture is simply divine: a perfect balance of soft, tender centers and slightly crisp edges, thanks to the quick-cooking oats and a thoughtful blend of sugars. This ensures a satisfying chewiness that holds up beautifully, whether fresh from the oven or enjoyed days later.
Secondly, the flavor profile is incredibly rich and complex. The wholesome earthiness of the oats, combined with the deep sweetness of brown sugar, provides a comforting base. This is elevated by the irresistible combination of peanut butter chips and dark chocolate chunks, creating a classic flavor pairing that’s universally adored. The colorful M&M’s not only add visual appeal but also introduce a delightful candy crunch and extra sweetness, making each cookie an exciting adventure for your taste buds.
Moreover, these cookies are remarkably versatile. While we’ve tailored them for Christmas, the base recipe is incredibly adaptable, allowing for endless customization to suit any occasion or preference. They’re also relatively straightforward to make, requiring no fancy equipment or advanced baking skills, which is perfect for busy holiday schedules. Finally, they store and freeze exceptionally well, making them an excellent make-ahead option for stress-free entertaining or ensuring you always have a stash of homemade goodness on hand. These Christmas monster cookies aren’t just a dessert; they’re a joyous, flavorful experience, designed to bring smiles and holiday magic to everyone who tries them.
Essential Ingredients for Your Festive Monster Cookies
Crafting the perfect Christmas monster cookie starts with a carefully selected list of ingredients. Each component plays a vital role in achieving that signature soft, chewy texture and rich, complex flavor that makes these cookies so irresistible. Here’s a closer look at what you’ll need and why each item is important:
- Salted Butter: We opt for salted butter because it naturally enhances all the other flavors in the dough, providing a subtle savory balance to the sweetness. If you only have unsalted butter on hand, simply increase the amount of kosher salt in the recipe by about ¼ teaspoon to compensate. Ensure your butter is softened to room temperature for optimal creaming with the sugars, which is crucial for a light and fluffy cookie dough.
- Sugar: A dynamic duo of both dark brown sugar and granulated sugar (white sugar) is key to these cookies’ incredible texture. Dark brown sugar provides moisture, depth of flavor, and contributes to the chewy consistency, thanks to its molasses content. Granulated sugar, on the other hand, aids in spreading and creates those slightly crispy edges that everyone loves. This combination ensures a cookie that is both sweet and satisfyingly soft.
- Large Egg + Two Egg Yolks: This specific egg combination is a secret weapon for rich, tender, and perfectly structured cookies. The large egg binds the ingredients, while the additional two egg yolks contribute extra fat and lecithin, resulting in a more luxurious, chewy texture and a deeper, more indulgent flavor. They also help prevent the cookies from becoming too dry.
- Vanilla Extract: Use high-quality pure vanilla extract. Vanilla is not just a flavor; it’s a flavor enhancer that marries all the other ingredients together, adding warmth and depth to the cookie base. Avoid imitation vanilla for the best results.
- All-Purpose Flour: This forms the fundamental structure of our cookie batter. It provides the necessary gluten to hold everything together without making the cookies tough. For those with dietary restrictions, a 1:1 all-purpose gluten-free flour blend can be successfully substituted, though the texture might vary slightly.
- Baking Soda and Baking Powder: These are our leavening agents, working in tandem to create tender, fluffy cookies with a slight lift. Baking soda reacts with the acidic brown sugar to encourage spread and chewiness, while baking powder contributes to the cookie’s rise and softness. Always make sure both are fresh for maximum effectiveness!
- Kosher Salt: Essential for balancing and amplifying the sweetness of the sugars and chocolates. A good pinch of salt prevents the cookies from tasting one-dimensionally sweet, instead highlighting the various nuances of the other ingredients.
- Quick-Cooking Oats: The heart of any true monster cookie, quick-cooking oats provide that characteristic chewiness and slightly nutty flavor. It’s crucial not to substitute rolled oats or steel-cut oats, as their coarser texture will significantly alter the final consistency of the cookies, making them less soft and more dense.
- Mix-Ins: This is where the holiday magic truly comes alive! We’re talking festive holiday-themed M&M’s (red and green, of course!), rich peanut butter chips (or creamy butterscotch chips for a different twist), and generous chunks of decadent dark chocolate. These additions not only define the “monster” aspect but also provide bursts of flavor and varying textures that make each cookie exciting.
Unleash Your Creativity: Exciting Flavor Variations
The beauty of Christmas monster cookies lies in their adaptability. While our classic recipe is undeniably delicious, don’t hesitate to get creative with your mix-ins to tailor them to your personal preferences or theme them for other occasions. Here are some fantastic flavor variations to inspire your inner baker:
- Chocolate Galore: Dive deeper into the world of chocolate by experimenting with different types of chocolate chips. Use creamy semi-sweet chocolate chips for a balanced sweetness, rich milk chocolate chips for a sweeter, more familiar taste, or delicate white chocolate chips for a milder, creamier profile. For an even more intense chocolate flavor, consider mixing a teaspoon or so of unsweetened cocoa powder into the batter alongside the flour.
- Nutty Crunch: Introduce an extra layer of texture and earthy flavor with chopped nuts. Almonds offer a delicate crunch, pecans contribute a buttery richness, and walnuts provide a robust, slightly bitter note that pairs wonderfully with the sweet elements. Toasting the nuts lightly before adding them can amplify their flavor.
- Sweet Toffee Bits: For a buttery, caramelized indulgence, fold toffee bits into the batter. They melt slightly during baking, creating pockets of rich, chewy sweetness that are absolutely divine and add a sophisticated twist to these rustic cookies.
- Caramel Dreams: If you’re a fan of gooey, decadent caramel, replace some of the peanut butter or butterscotch chips with soft caramel bits. These will melt into luscious pockets throughout the cookie, offering a delightful chewiness and a rich, buttery sweetness. A drizzle of caramel sauce over the baked cookies could also be a stunning finish.
- Coffee Kick: For a subtle yet sophisticated flavor, mix in a tablespoon of high-quality espresso powder (or instant coffee granules). Coffee enhances the flavor of chocolate and adds a pleasant, warm complexity without making the cookies taste overtly like coffee. It’s a wonderful way to deepen the overall flavor profile.
- S’mores Inspired: Recreate the campfire classic in cookie form! Fold in mini marshmallows during the last stage of mixing. For an even richer s’mores experience, you could also add graham cracker crumbs to the dry ingredients, along with milk chocolate chips.
- Fruity Zing: Add a burst of fruity brightness with dried fruits. Tart dried cranberries complement the richness of the chocolate and nuts beautifully, while plump raisins offer a classic, comforting sweetness. Chopped dried cherries or apricots could also be unique and delicious additions.
- Extra Sprinkles: For an additional pop of color and celebratory fun, sprinkle the tops of your cookies with an assortment of holiday sprinkles immediately after they come out of the oven. The residual heat will help them adhere, creating an even more visually appealing and joyful treat. This is especially fun for kids or themed parties!
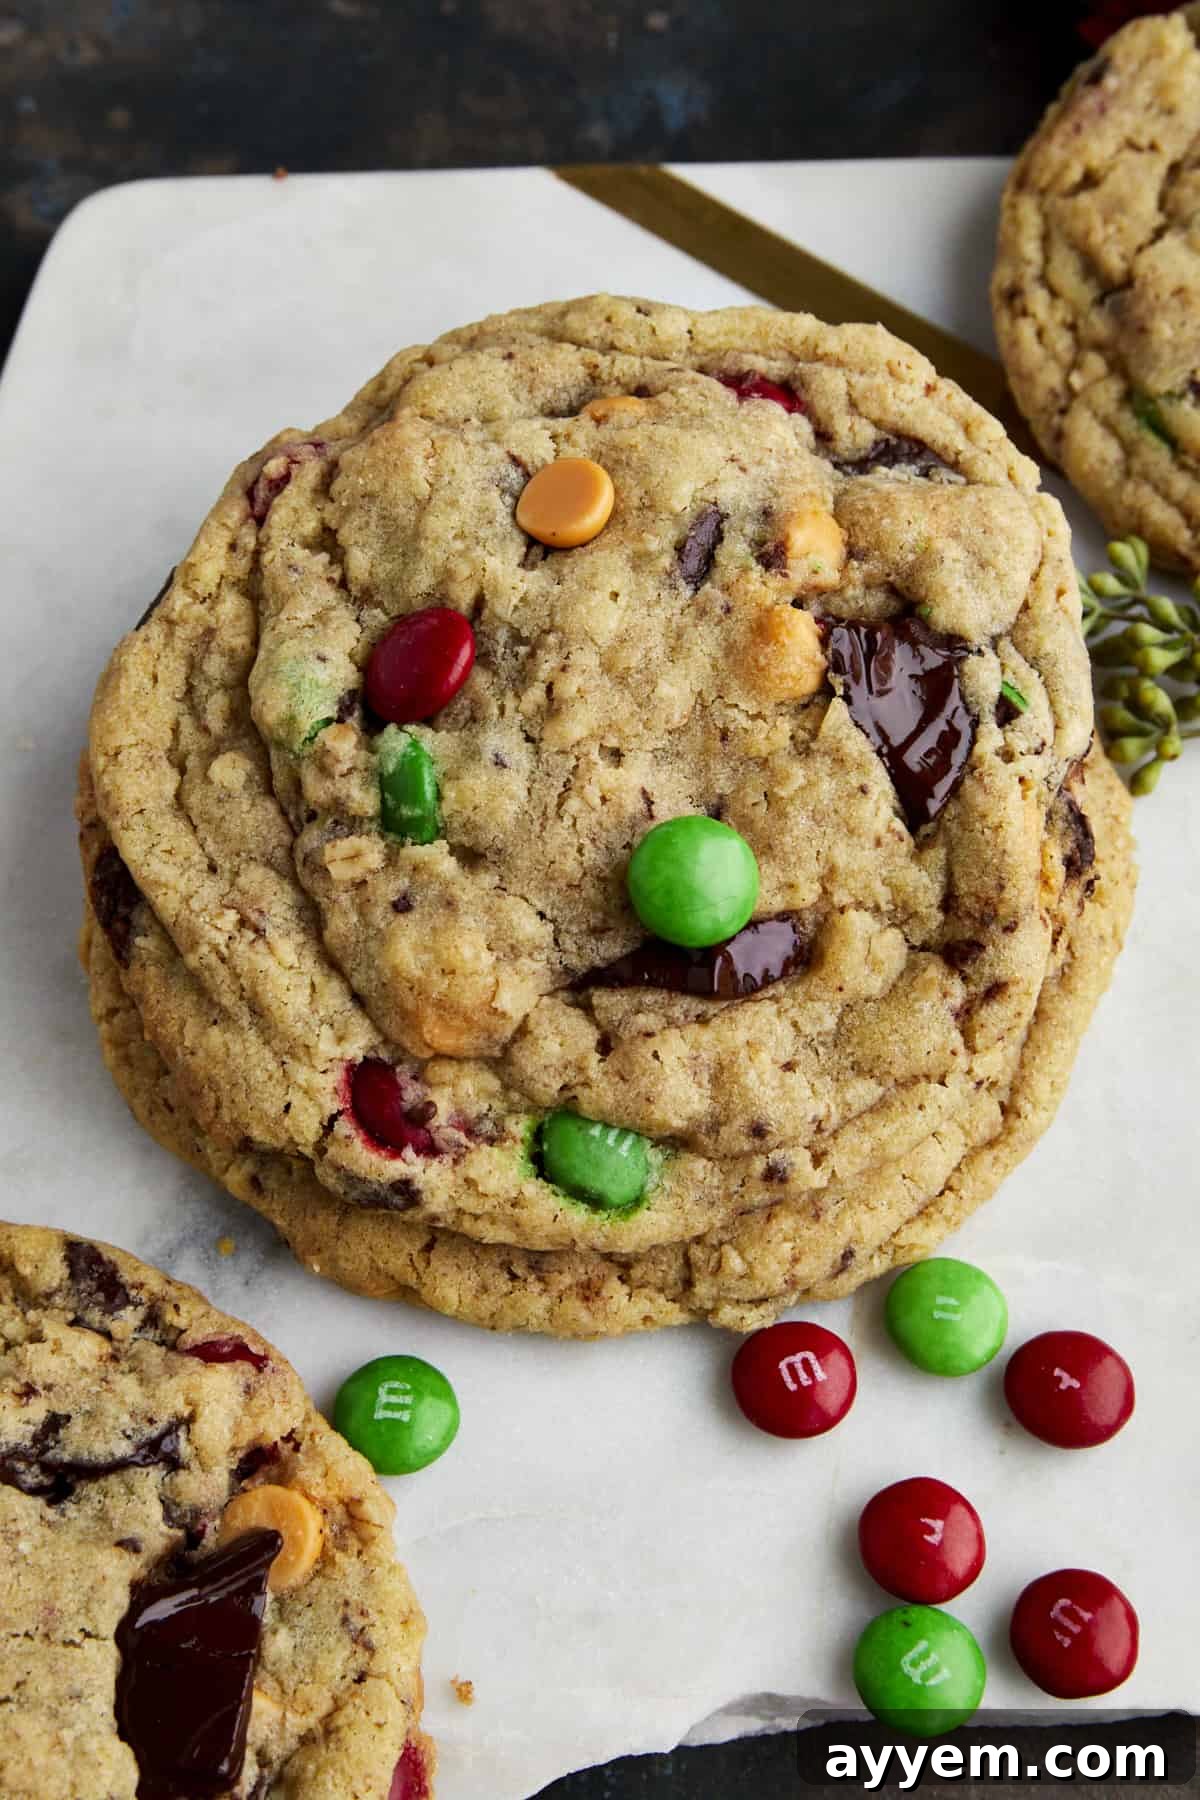
Crafting Perfection: How to Make the Best Christmas Monster Cookies
Making these festive Christmas monster cookies is a straightforward process that yields incredibly delicious results. Follow these simple steps to bake a batch of holiday cheer:
- Prepare Your Baking Station: Start by preheating your oven to 350 degrees Fahrenheit (175 degrees Celsius). This ensures your oven is at the correct temperature for even baking from the moment your cookies go in. Next, line a couple of large baking sheets with parchment paper or silicone baking mats. This prevents sticking and makes for easy cleanup.
- Cream the Wet Ingredients: In a large mixing bowl, combine the softened salted butter, dark brown sugar, and granulated sugar. Using an electric mixer, cream these ingredients together on medium speed until the mixture is light, fluffy, and pale in color, usually 2-3 minutes. This process incorporates air, which contributes to the cookies’ tender texture. Then, beat in the large egg, the two extra egg yolks, and the pure vanilla extract until everything is well combined and smooth, scraping down the sides of the bowl as needed.
- Whisk the Dry Ingredients: In a separate, medium-sized bowl, whisk together the all-purpose flour, baking soda, baking powder, and kosher salt. This step is crucial for ensuring that the leavening agents and salt are evenly distributed throughout the dough, preventing pockets of unmixed ingredients.
- Combine Wet and Dry: Gradually add the whisked dry ingredients to the bowl of wet ingredients. Mix on low speed, or by hand with a spatula, until just combined. Be careful not to overmix at this stage; overmixing can develop too much gluten, resulting in tough cookies. Stop mixing as soon as no streaks of flour remain.
- Fold in the Festive Mix-Ins: Now for the fun part! Gently fold in the quick-cooking oats, holiday-themed M&M’s, peanut butter chips, and dark chocolate chunks. Stir just until the mix-ins are evenly distributed throughout the dough. You want every cookie to be packed with deliciousness!
- Portion and Arrange: Using a cookie scoop (a 1.5-inch scoop works well for standard-sized cookies) or two spoons, portion the dough into uniform balls. Place the cookie dough balls onto your prepared baking sheets, ensuring you leave at least 2 inches of space between each cookie. This allows them to spread without merging into one giant cookie.
- Bake to Golden Perfection: Transfer the baking sheets to your preheated oven. Bake for approximately 10-12 minutes, or until the edges are lightly golden brown and the centers still look slightly soft. Remember, cookies continue to bake for a few minutes after they are removed from the oven, so slightly underbaked centers are desirable for a chewy result.
- Cool and Enjoy: Once baked, remove the cookies from the oven and let them cool on the baking sheets for about 5 minutes. This allows them to set up and prevents them from falling apart when moved. After this initial cooling, carefully transfer them to a wire rack to cool completely. Allowing them to cool fully on a wire rack ensures air circulation, preventing soggy bottoms and setting their final texture.
Mastering the Bake: Expert Tips for Success
Achieving bakery-quality Christmas monster cookies is simpler than you might think with a few key tips. These pointers will help you avoid common pitfalls and ensure your cookies are perfectly chewy, flavorful, and visually appealing every time:
- The M&M Finishing Touch: For that picture-perfect, professional bakery look, here’s a simple trick: as soon as the cookies emerge from the oven, while they are still warm and pliable, gently press a few extra holiday-themed M&M’s onto the tops of each cookie. This ensures a vibrant display of color on the surface, making them even more irresistible and festive.
- The Importance of Chilling Dough: If you find your cookie dough is too soft or difficult to handle, or if you’re concerned about your cookies spreading too much during baking, don’t skip chilling the dough. Place the bowl of dough (covered) in the refrigerator for at least 30 minutes, or even up to an hour. Chilled dough spreads less, resulting in thicker, chewier cookies. It also makes the dough easier to scoop and shape, especially in a warm kitchen.
- Avoid the Dreaded Overbaking: This is perhaps the most crucial tip for soft and chewy cookies. Keep a very close eye on your oven, as baking times can vary. Remove the cookies as soon as their edges turn a light golden brown. The centers may still appear slightly underdone or soft, but trust the process! They will continue to “bake” and firm up as they cool on the hot baking sheet, achieving that ideal chewy texture. Overbaked cookies will be dry and crumbly.
- Proper Cooling for Perfect Structure: Patience is a virtue when it comes to cooling cookies. After removing them from the oven, allow your cookies to cool on the baking sheets for a solid 5-10 minutes before attempting to transfer them. This crucial resting period allows their delicate structure to set and firm up. Attempting to move them too soon can cause them to fall apart. Once they’ve firmed up, transfer them gently to a wire rack to cool completely. Cooling on a wire rack ensures air circulates around the entire cookie, preventing condensation and keeping the bottoms from becoming soggy.
- Room Temperature Ingredients: Always ensure your butter and eggs are at proper room temperature. Room temperature butter creams better with sugar, creating a light, airy base, and room temperature eggs emulsify more smoothly into the batter, leading to a more consistent dough and better-textured cookies. Plan ahead and take them out of the fridge at least 30-60 minutes before you start baking.
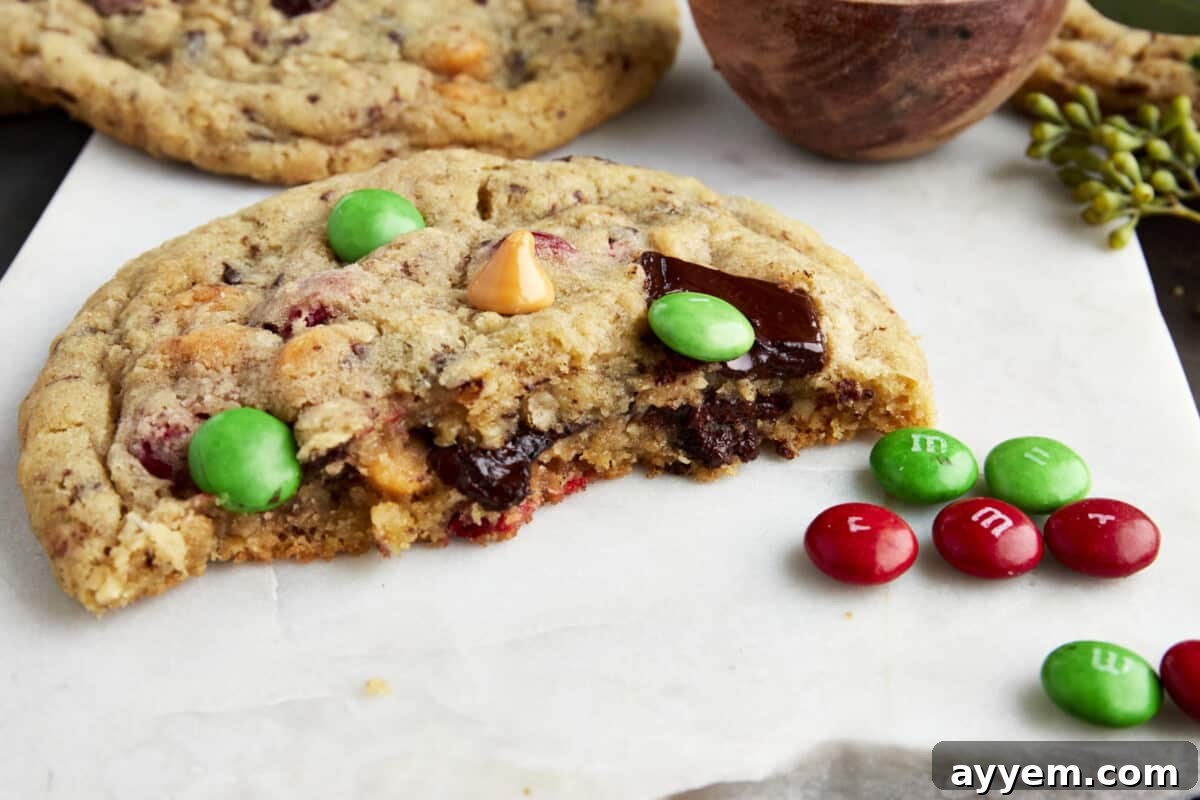
Plan Ahead: Make Ahead, Storage, and Freezing Options
One of the many benefits of these Christmas monster cookies is how well they lend themselves to make-ahead preparation and various storage methods. This flexibility makes them perfect for busy holiday seasons, ensuring you always have a delightful treat ready to go.
- Make Ahead: Preparing the cookie dough in advance is a fantastic time-saver. Simply mix the dough as directed, then cover the bowl tightly with plastic wrap and store it in the refrigerator for up to two days. Chilling the dough also has the added benefit of deepening the flavors and often results in thicker, chewier cookies. When you’re ready to bake, remove the dough from the fridge and allow it to come to room temperature for about 20-30 minutes to make it easier to scoop. Then, proceed with portioning and baking as normal.
- Storage: Once your delicious Christmas monster cookies have cooled completely (this is important to prevent moisture buildup), transfer them to an airtight container. They will maintain their freshness and wonderful chewy texture when stored at room temperature for up to five days. To keep them extra soft, you can place a slice of bread in the container with the cookies; the cookies will absorb moisture from the bread.
- Freezing Baked Cookies: For longer-term enjoyment, baked Christmas monster cookies freeze beautifully. Once fully cooled, arrange them in a single layer on a baking sheet and flash freeze for about 30 minutes until solid. Then, transfer them to a freezer-safe container or a heavy-duty freezer bag. To prevent them from sticking or clumping together, place a sheet of parchment paper between each layer of cookies. They can be stored in the freezer for up to three months. Thaw them at room temperature, or warm them slightly in the microwave for a fresh-out-of-the-oven experience.
- Freezing Cookie Dough: You can also freeze the unbaked cookie dough! Portion the cookie dough balls onto a baking sheet lined with parchment paper. Transfer the entire baking sheet to the freezer until the dough balls are solid, typically 1-2 hours. Once frozen, transfer the solid dough balls to a sealable freezer bag or airtight container. They will keep well in the freezer for up to three months. When you’re ready to bake, you can bake them directly from frozen; simply add a few extra minutes to the baking time (usually 2-4 minutes) until the edges are golden. This is incredibly convenient for having fresh, warm cookies whenever the craving strikes!
Common Questions About Christmas Monster Cookies Answered
Curious about these delightful holiday treats? Here are some frequently asked questions to help you master your Christmas monster cookie baking!
The primary holiday twist comes from incorporating vibrant red and green M&M’s, which instantly evoke the festive spirit of Christmas. You can further enhance this theme by adding holiday sprinkles, crushed candy canes, or other seasonal candies. It’s all about creating that cheerful, colorful, and joyful vibe that defines holiday baking!
Authentic monster cookies are typically known for their wonderfully soft and chewy centers, often with a delightful slight crispness around the edges. The quick-cooking oats contribute significantly to their characteristic chewiness, while the array of candies and chocolate chips ensures every bite is rich, sweet, and fun. They are definitely designed to be more soft and substantial than crisp.
Absolutely! Monster cookies are all about customization. For even more holiday flair, consider adding chopped peppermint bark, crushed candy canes for a refreshing minty crunch, or white chocolate chips to complement the red and green M&M’s. Mini marshmallows can also be a fun addition for a s’mores-like twist. Feel free to experiment with your favorite holiday treats!
Yes, monster cookies tend to spread a fair bit due to the amount of butter and sugar in the dough, along with the various mix-ins. It’s crucial to space them out adequately on your baking sheet, leaving at least 2 inches between each cookie. If you prefer a thicker, less spread-out cookie, a great tip is to chill the dough in the refrigerator for 30 minutes to an hour before baking. This helps solidify the fat and reduces spreading.
Using a cookie scoop is the easiest and most effective way to ensure all your cookies are of uniform size. This not only makes for a more aesthetically pleasing batch but also ensures they bake evenly, preventing some from burning while others are still raw. A 1.5 to 2-inch cookie scoop is ideal for most monster cookie recipes.
Discover More Festive Christmas Dessert Recipes
Are you in the mood for even more festive and fun handheld holiday treats? Dive into our collection of delightful Christmas cookies and sweet confections that are perfect for sharing, gifting, or simply indulging in during the most wonderful time of the year!
- Peanut Butter Blossom Cookies
- Easy Pecan Sandies Recipe
- Pecan Snowball Cookies
- Chocolate Crinkle Cookies
- 5-Ingredient Chocolate Peppermint Bark
- Easy Christmas Crack
- Spritz Cookies
- Easy Jam Thumbprint Cookies
Christmas Monster Cookies
Servings: 12 servings
Prep Time: 10 mins
Cook Time: 10 mins
Total Time: 20 mins
Make these Christmas monster cookies with holiday M&M’s, peanut butter chips, and chocolate chunks to satisfy all your sweet tooth cravings!
Ingredients
- 1 cup (2 sticks) salted butter, softened at room temperature
- 1 cup dark brown sugar
- 3/4 cup granulated sugar
- 1 large egg plus 2 egg yolks
- 1 Tablespoon vanilla extract
- 2 1/4 cups all-purpose flour
- 1 teaspoon baking soda
- 1 teaspoon baking powder
- 3/4 teaspoon kosher salt
- 1 cup quick-cooking oats
- 1 1/4 cups holiday-themed M&M’s
- 1/2 cup peanut butter chips OR butterscotch chips
- 1 cup dark chocolate chunks
Instructions
- Preheat the oven to 350 degrees Fahrenheit (175 degrees Celsius). Line baking sheets with parchment paper or silicone mats.
- In a large mixing bowl, cream together the softened butter, dark brown sugar, and granulated sugar until light and fluffy.
- Beat in the egg, egg yolks, and vanilla extract until well combined.
- In a separate bowl, whisk together the all-purpose flour, baking soda, baking powder, and kosher salt.
- Gradually add the dry ingredients to the wet ingredients, mixing until just combined.
- Fold in the quick-cooking oats, holiday M&M’s, peanut butter chips (or butterscotch chips), and dark chocolate chunks until evenly distributed throughout the dough.
- Using a cookie scoop or spoon, drop rounded tablespoons of dough onto the prepared baking sheets, leaving space between each cookie for spreading.
- Bake in the preheated oven for 10-12 minutes or until the edges are lightly golden.
- Remove from the oven, and allow the cookies to cool on the baking sheets for 5 minutes before transferring them to a wire rack to cool completely.
Equipment
- 2 Baking Sheets
- 2 Mixing Bowls
- 1 Hand Mixer
- 1 Cookie Scoop
- 1 Wire Rack
Nutrition
Serving: 1 serving |
Calories: 592 kcal |
Carbohydrates: 75 g |
Protein: 8 g |
Fat: 29 g |
Saturated Fat: 17 g |
Polyunsaturated Fat: 1 g |
Monounsaturated Fat: 7 g |
Trans Fat: 1 g |
Cholesterol: 120 mg |
Sodium: 446 mg |
Potassium: 212 mg |
Fiber: 3 g |
Sugar: 48 g |
Vitamin A: 636 IU |
Vitamin C: 0.1 mg |
Calcium: 93 mg |
Iron: 4 mg
Nutrition information is automatically calculated, so should only be used as an approximation.
Like this recipe?
Please leave a comment and share your thoughts!
There you have it – everything you need to bake a truly memorable batch of Christmas Monster Cookies this holiday season. These vibrant, chewy, and utterly delicious treats are more than just a dessert; they’re a celebration of flavor, texture, and festive joy. Whether you’re baking for friends, family, or simply to treat yourself, these cookies are guaranteed to bring smiles and satisfy even the strongest sweet tooth. So gather your ingredients, turn on your favorite holiday tunes, and get ready to create some edible holiday magic. Happy baking!