
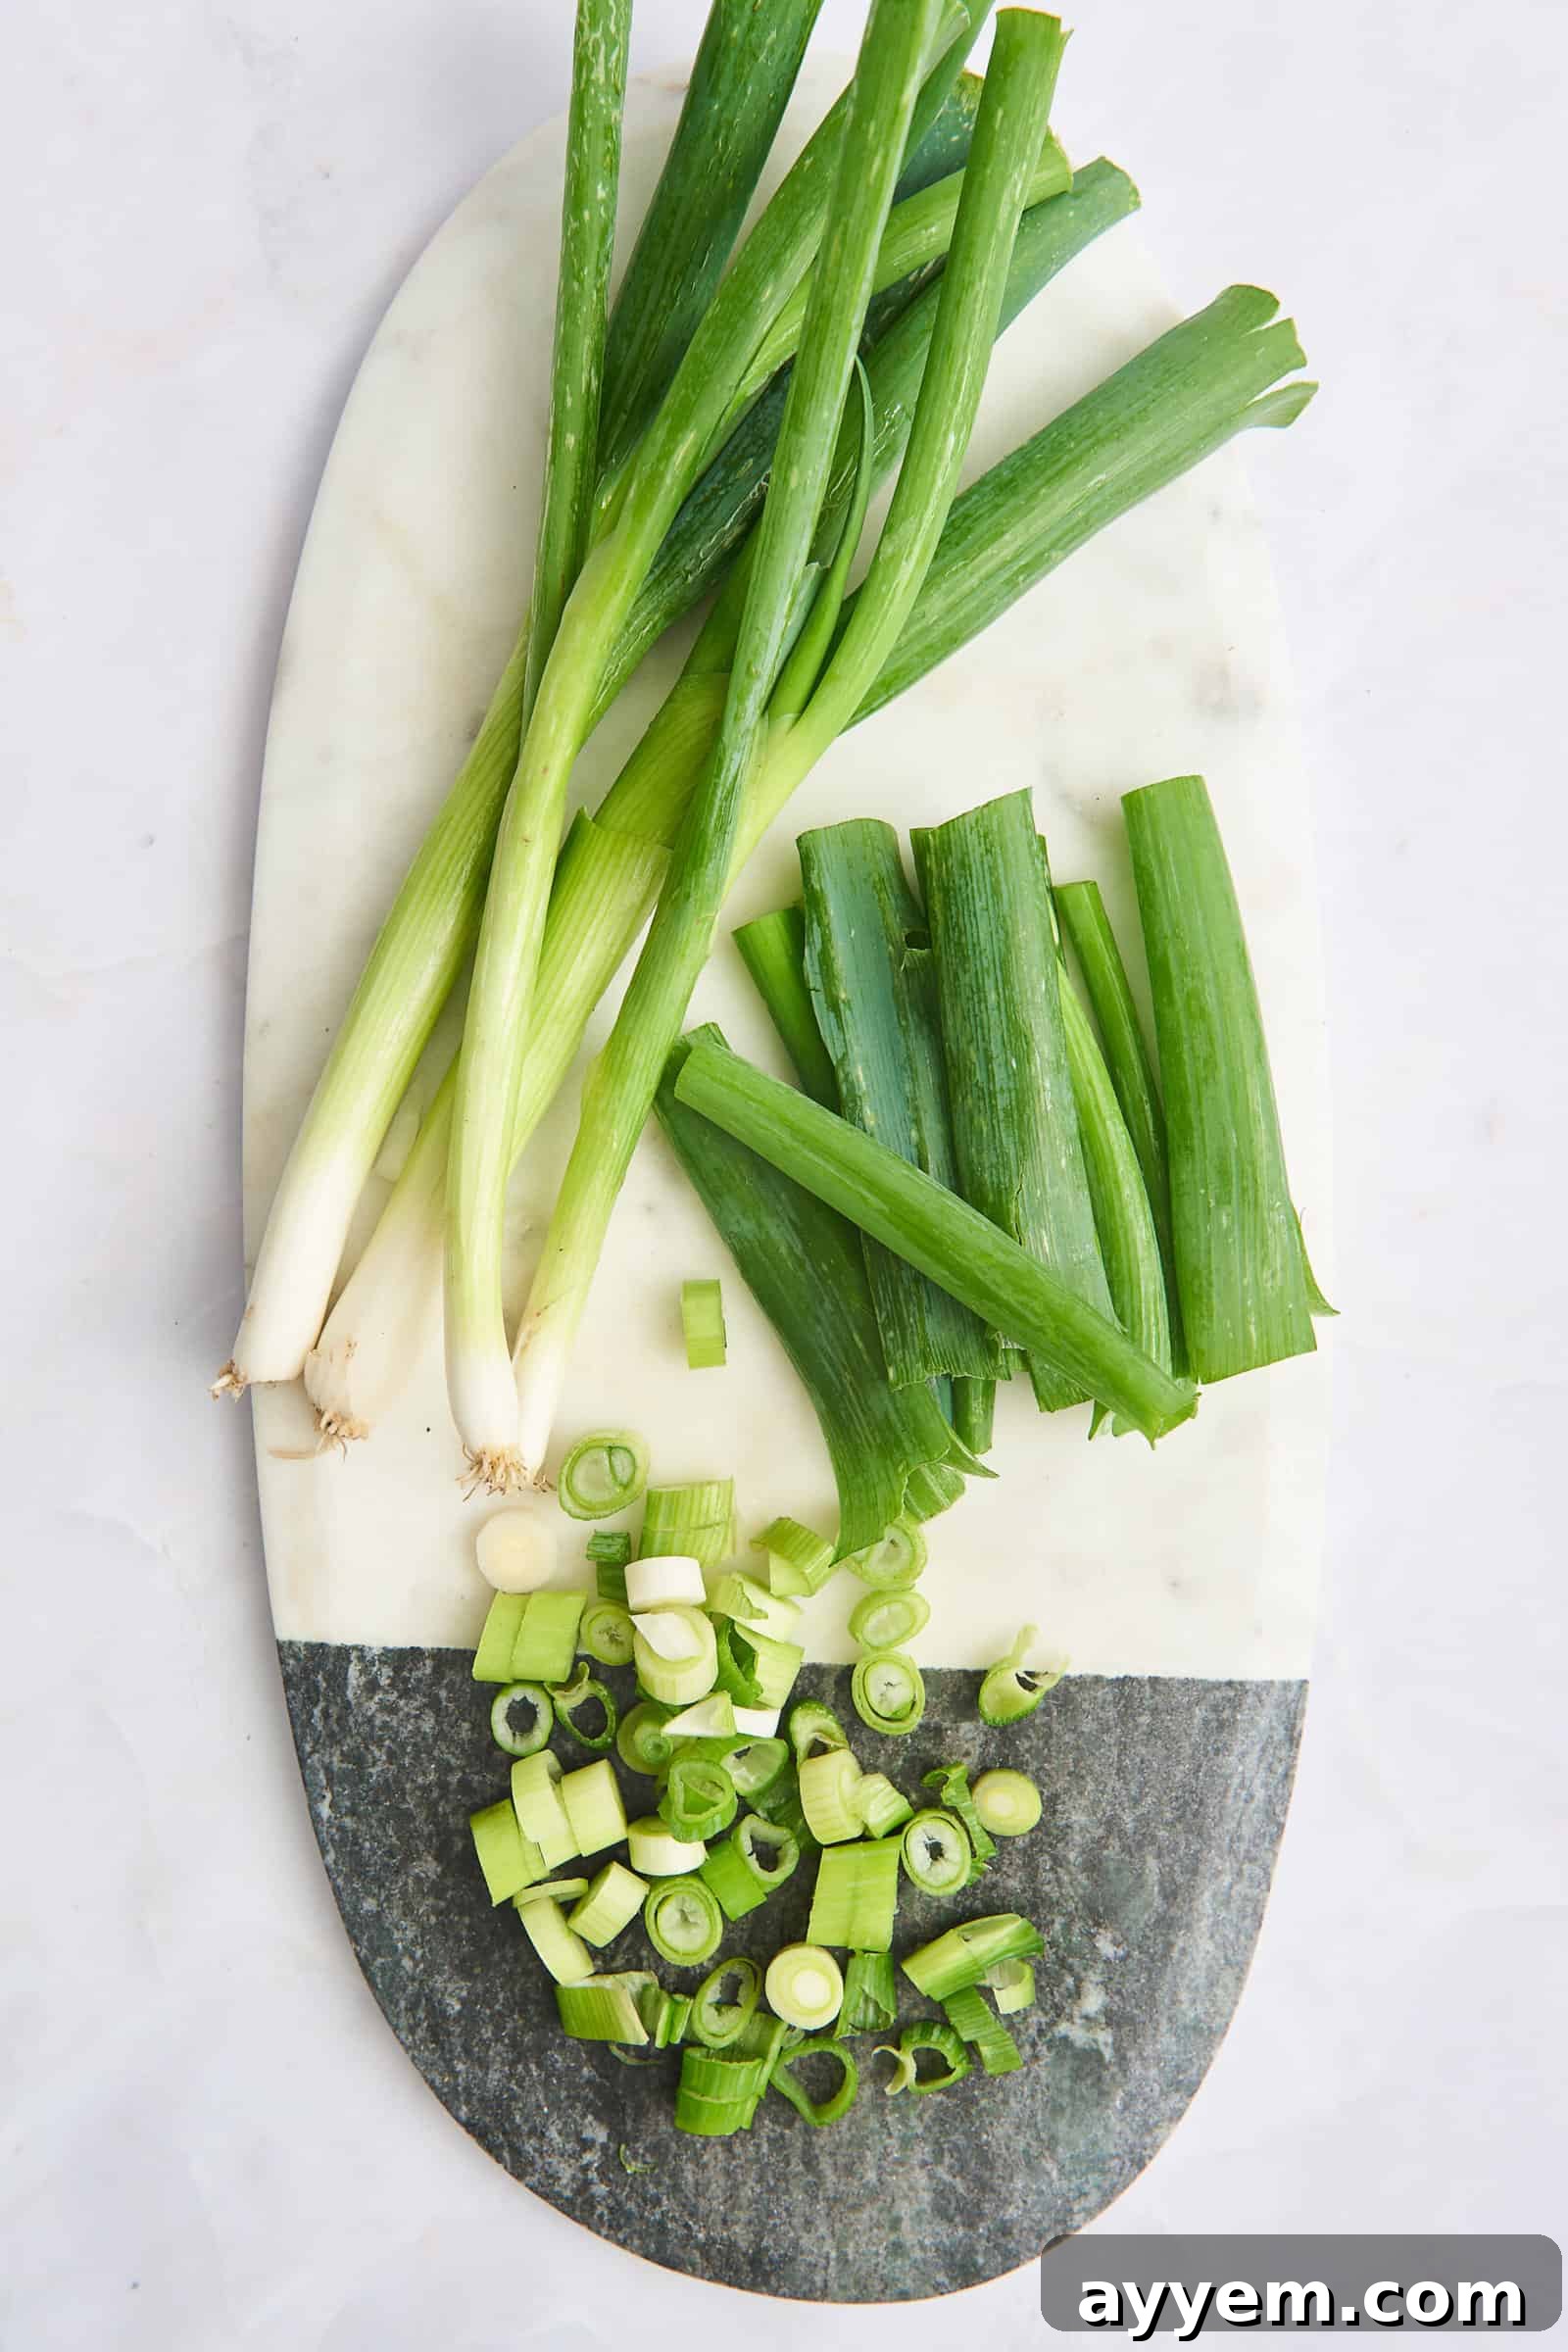
Transform your cooking with perfectly prepared green onions! This ultimate guide will turn you into a scallion-chopping pro, teaching you how to master both horizontal and diagonal cuts. Learn to effortlessly add their distinct flavor, satisfying crunch, and vibrant green color to a wide array of your favorite recipes, elevating everything from salads to stir-fries.
Mastering Green Onions: Your Guide to Cutting, Storing, and Using Scallions
What Exactly Are Green Onions?
Often used interchangeably, “green onions” and “scallions” refer to the same delicious, slender member of the onion family. These versatile vegetables are essentially young onions harvested before their bulbs fully mature, or they can be a distinct variety that never forms a prominent bulb. They are characterized by their long, hollow green stalks and a small, undeveloped white or pale green bulb at the base.
Green onions offer a milder, more delicate onion flavor compared to larger, mature onions, making them a fantastic addition when you want a subtle oniony bite without overwhelming other ingredients. The white and light green sections possess the most potent flavor and are typically favored in cooked dishes or where a stronger taste is desired. However, the dark green tops are entirely edible and widely prized for their vibrant color and delicate onion notes, often used as a fresh garnish or added towards the end of cooking for a burst of freshness.
Beyond their culinary appeal, green onions are also a good source of vitamins K and C, and a decent source of fiber. Their low-calorie count and high flavor impact make them a healthy and flavorful addition to nearly any meal. Understanding their distinct parts and flavor profiles will help you utilize them most effectively in your kitchen.
How to Cut Green Onions: A Step-by-Step Guide for Perfection
Whether you’re aiming for a fine dice, elegant diagonal slices, or simple rings, the foundational steps for preparing green onions remain consistent. The key to successful cutting lies in a sharp knife and understanding how to adjust your angle for different culinary applications. Always ensure your cutting board is stable and non-slip for safety.
Essential Preparation Steps:
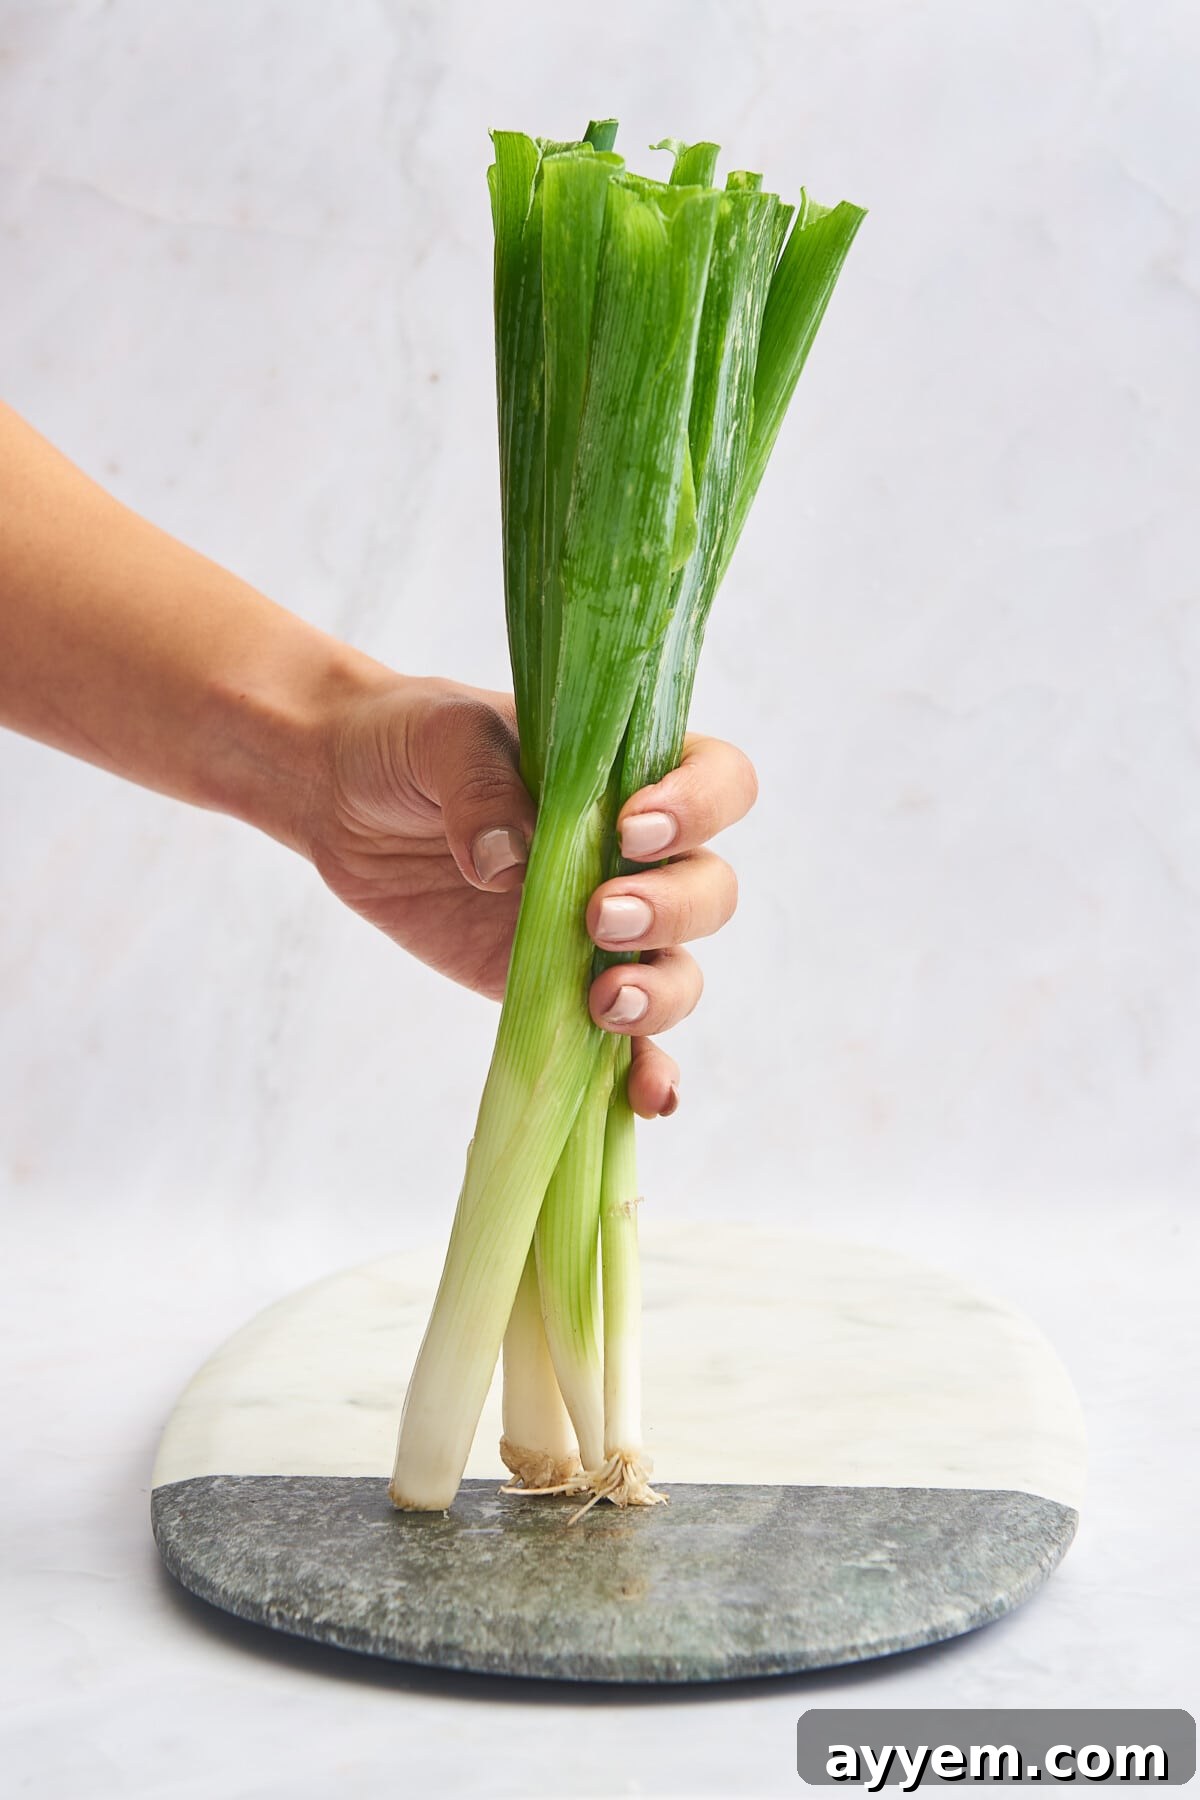
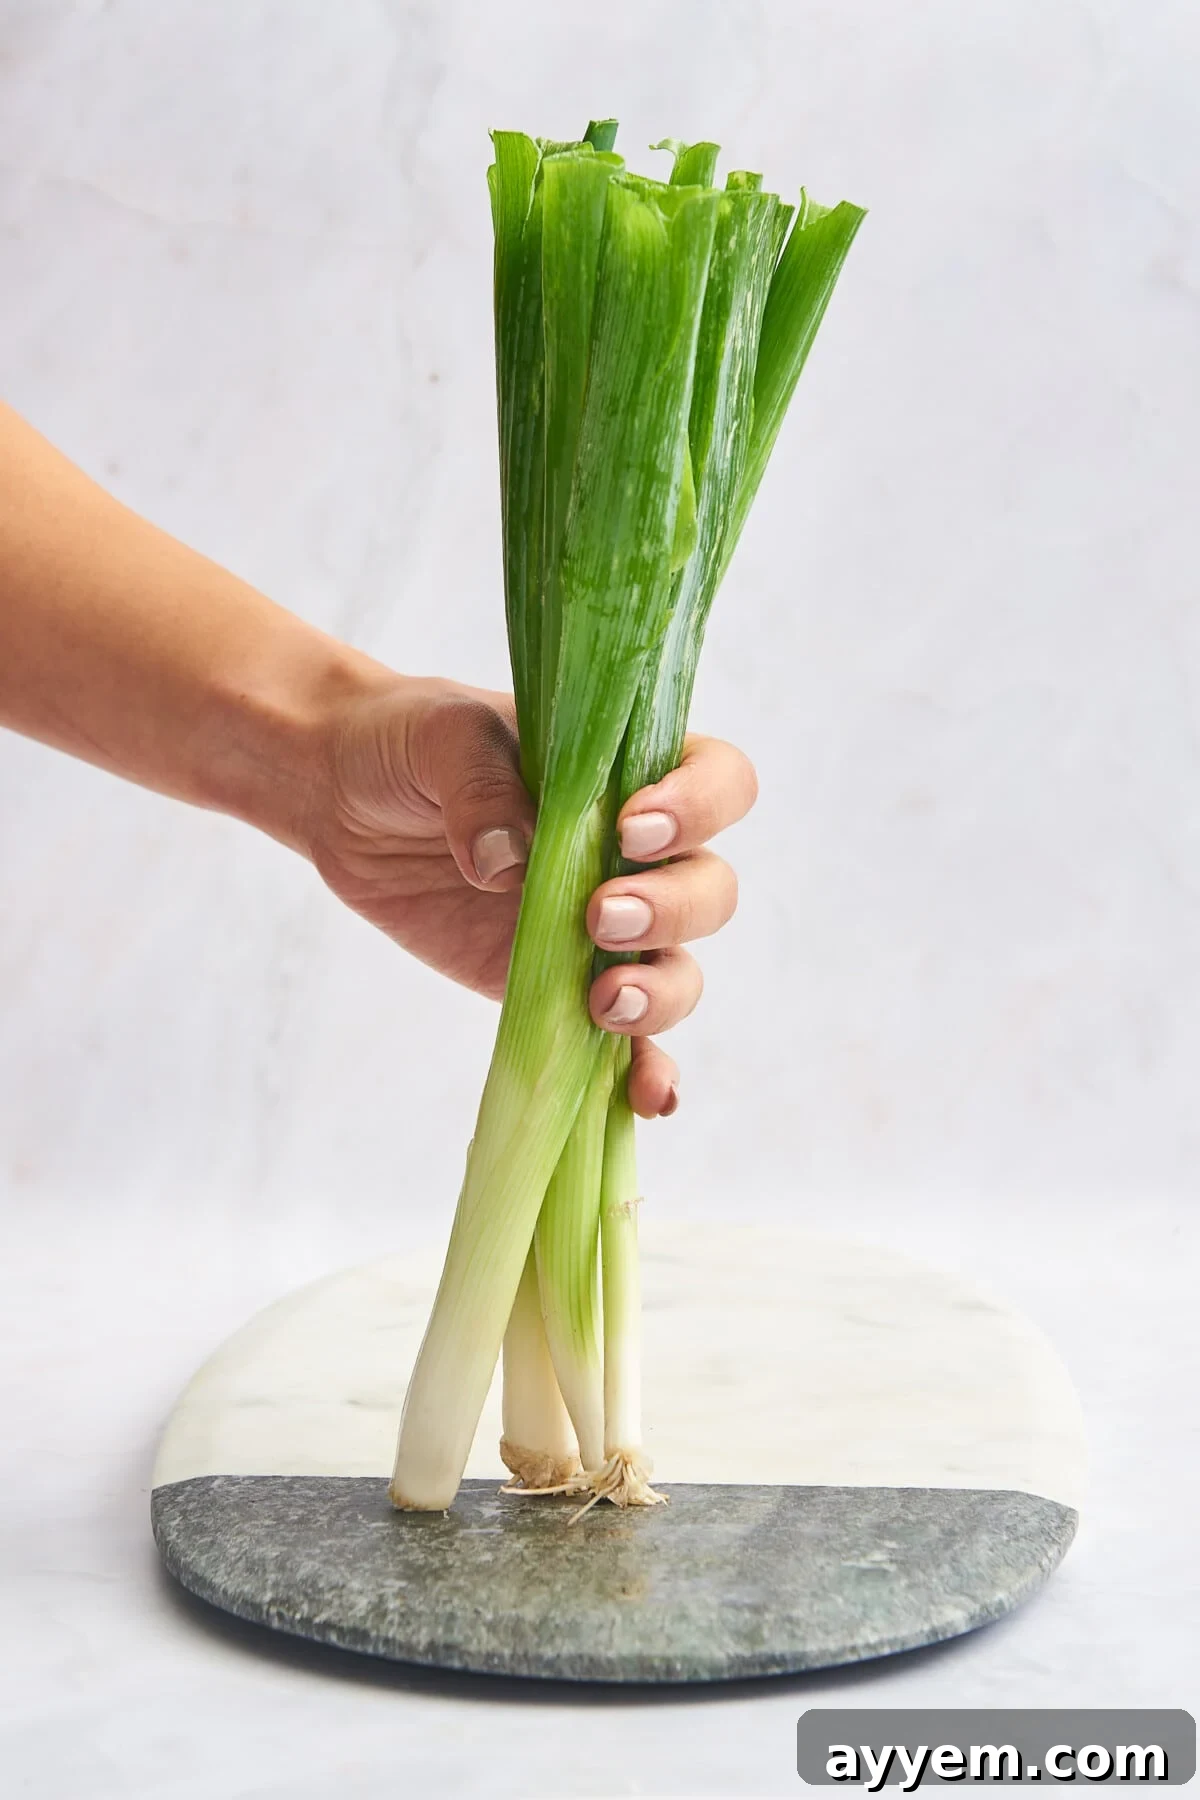
- Rinse Thoroughly: Begin by holding the green onions under cool, running water. Pay meticulous attention to the white base, where dirt and grit can often accumulate between the layers. Gently separate the layers at the bulb end to ensure all soil is removed. Inspect the entire length of the stalks, removing any thin, slimy, wilted, or discolored outer layers.
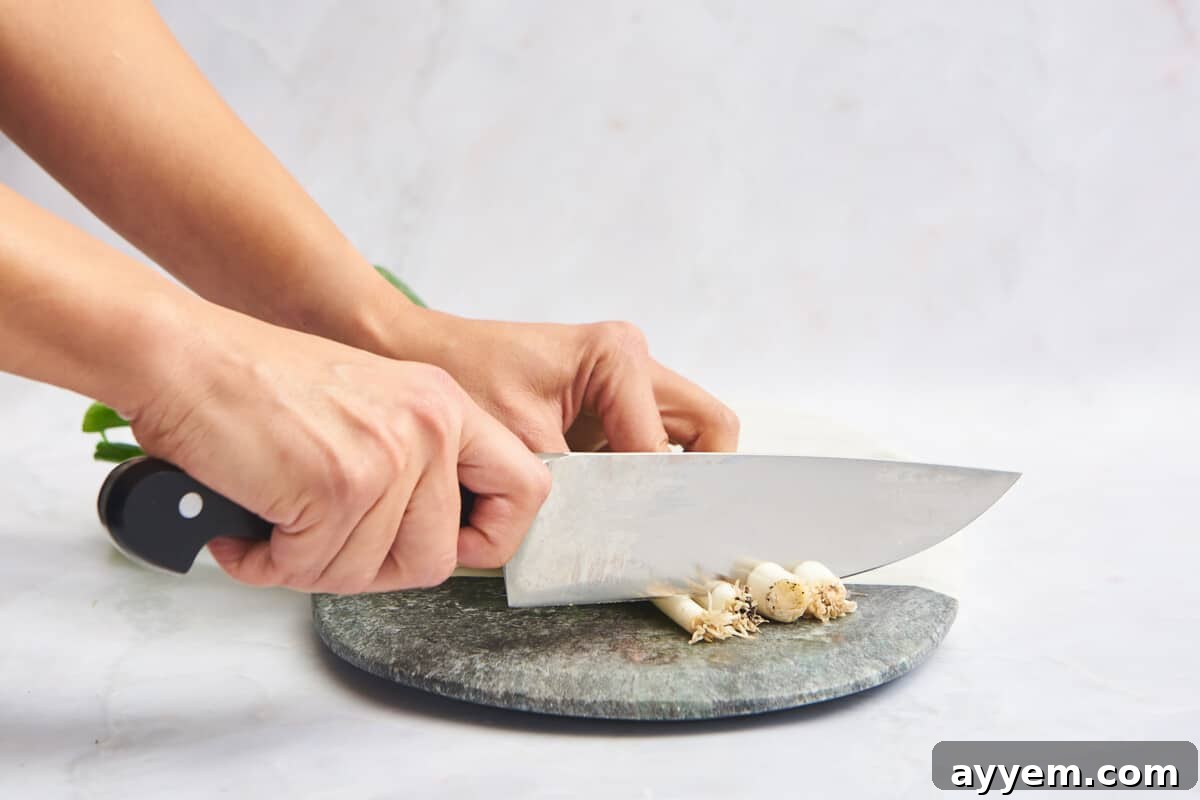
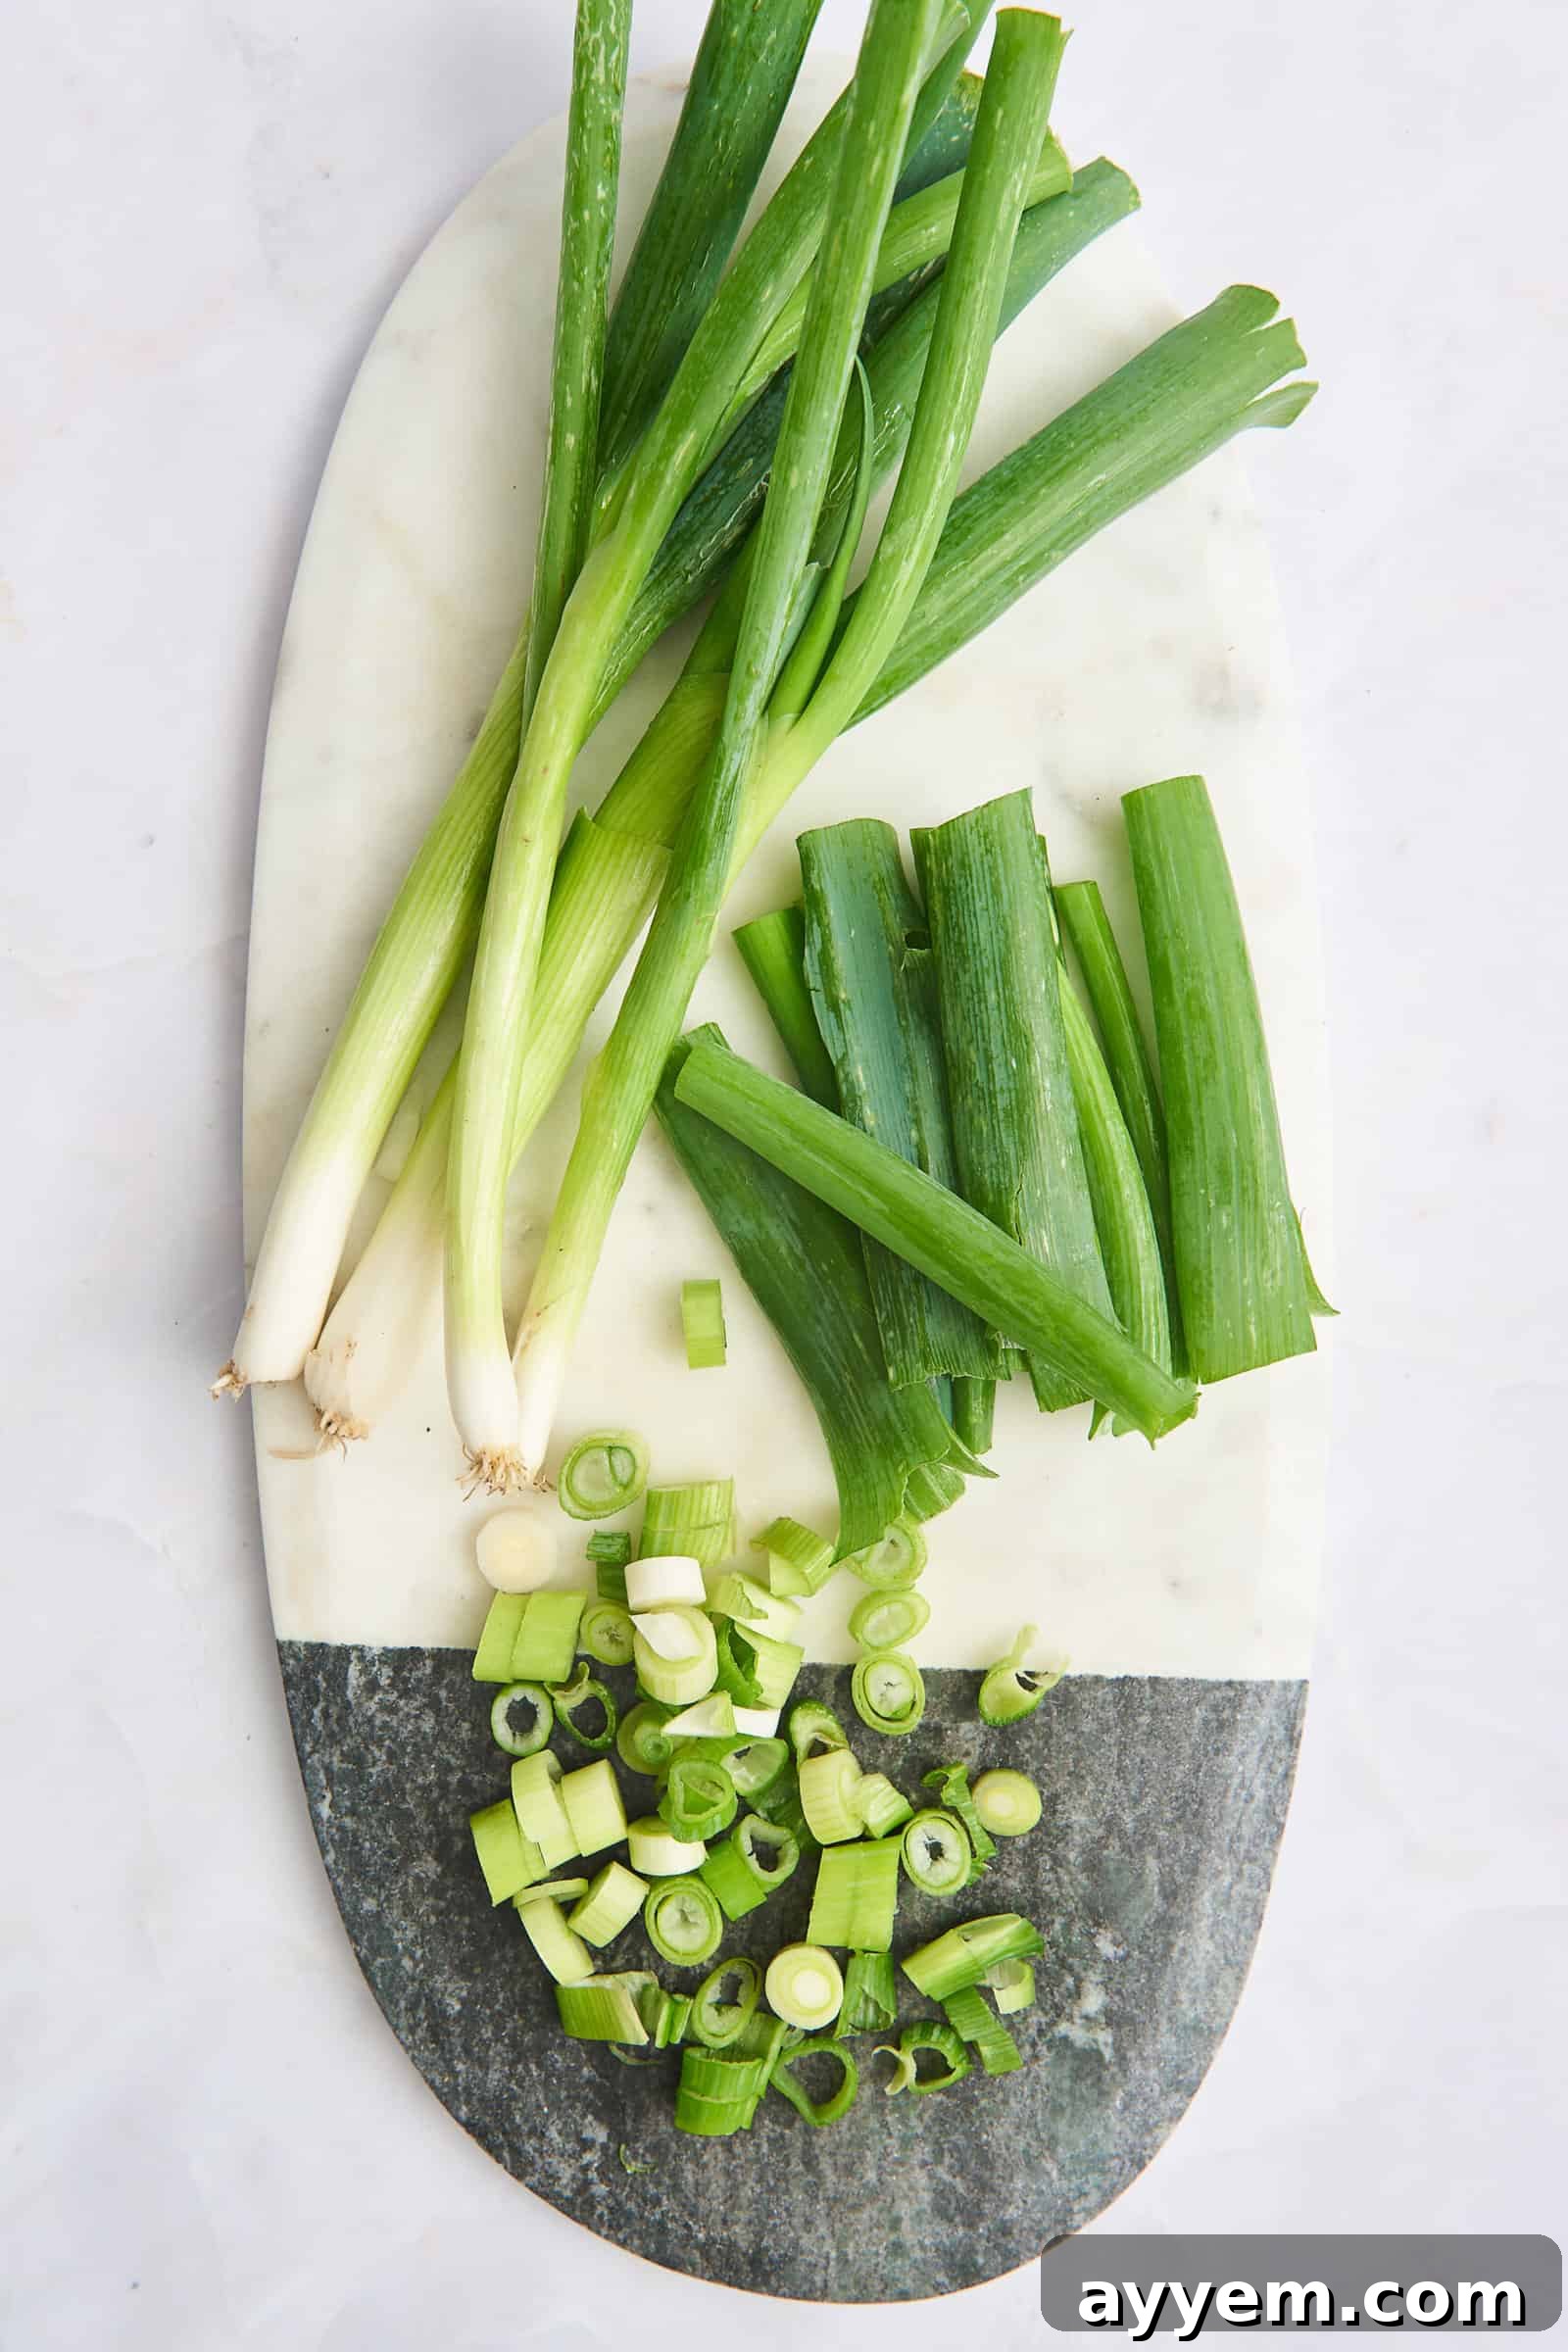
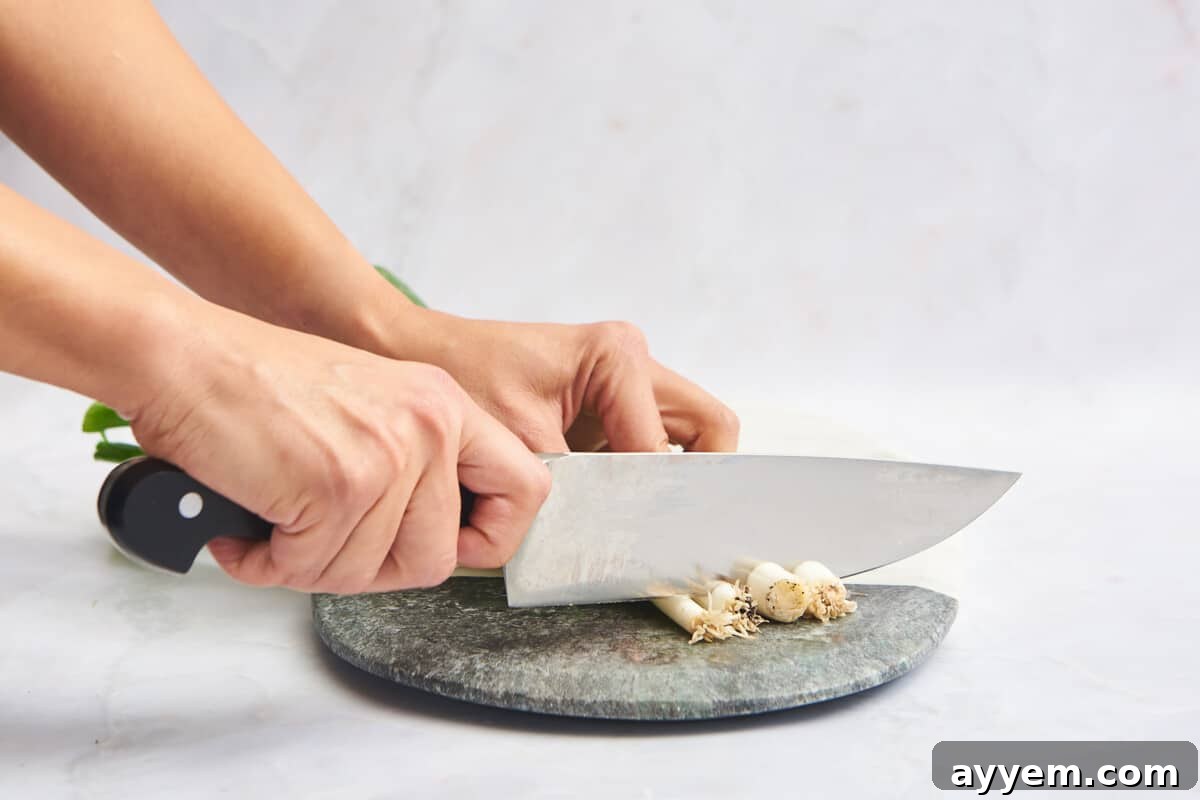
- Trim the Roots: Using a sharp chef’s knife or a utility knife, carefully chop off the very tip of the white end, just above where the roots begin. This removes the tough, fibrous root system, leaving only the tender, edible parts of the onion. These roots can be saved for regrowing, as detailed in our storage section.
Mastering the Cuts:
Once prepped, you have two primary methods for slicing green onions, each offering a distinct aesthetic and mouthfeel:
- Horizontal (Circular) Slices:
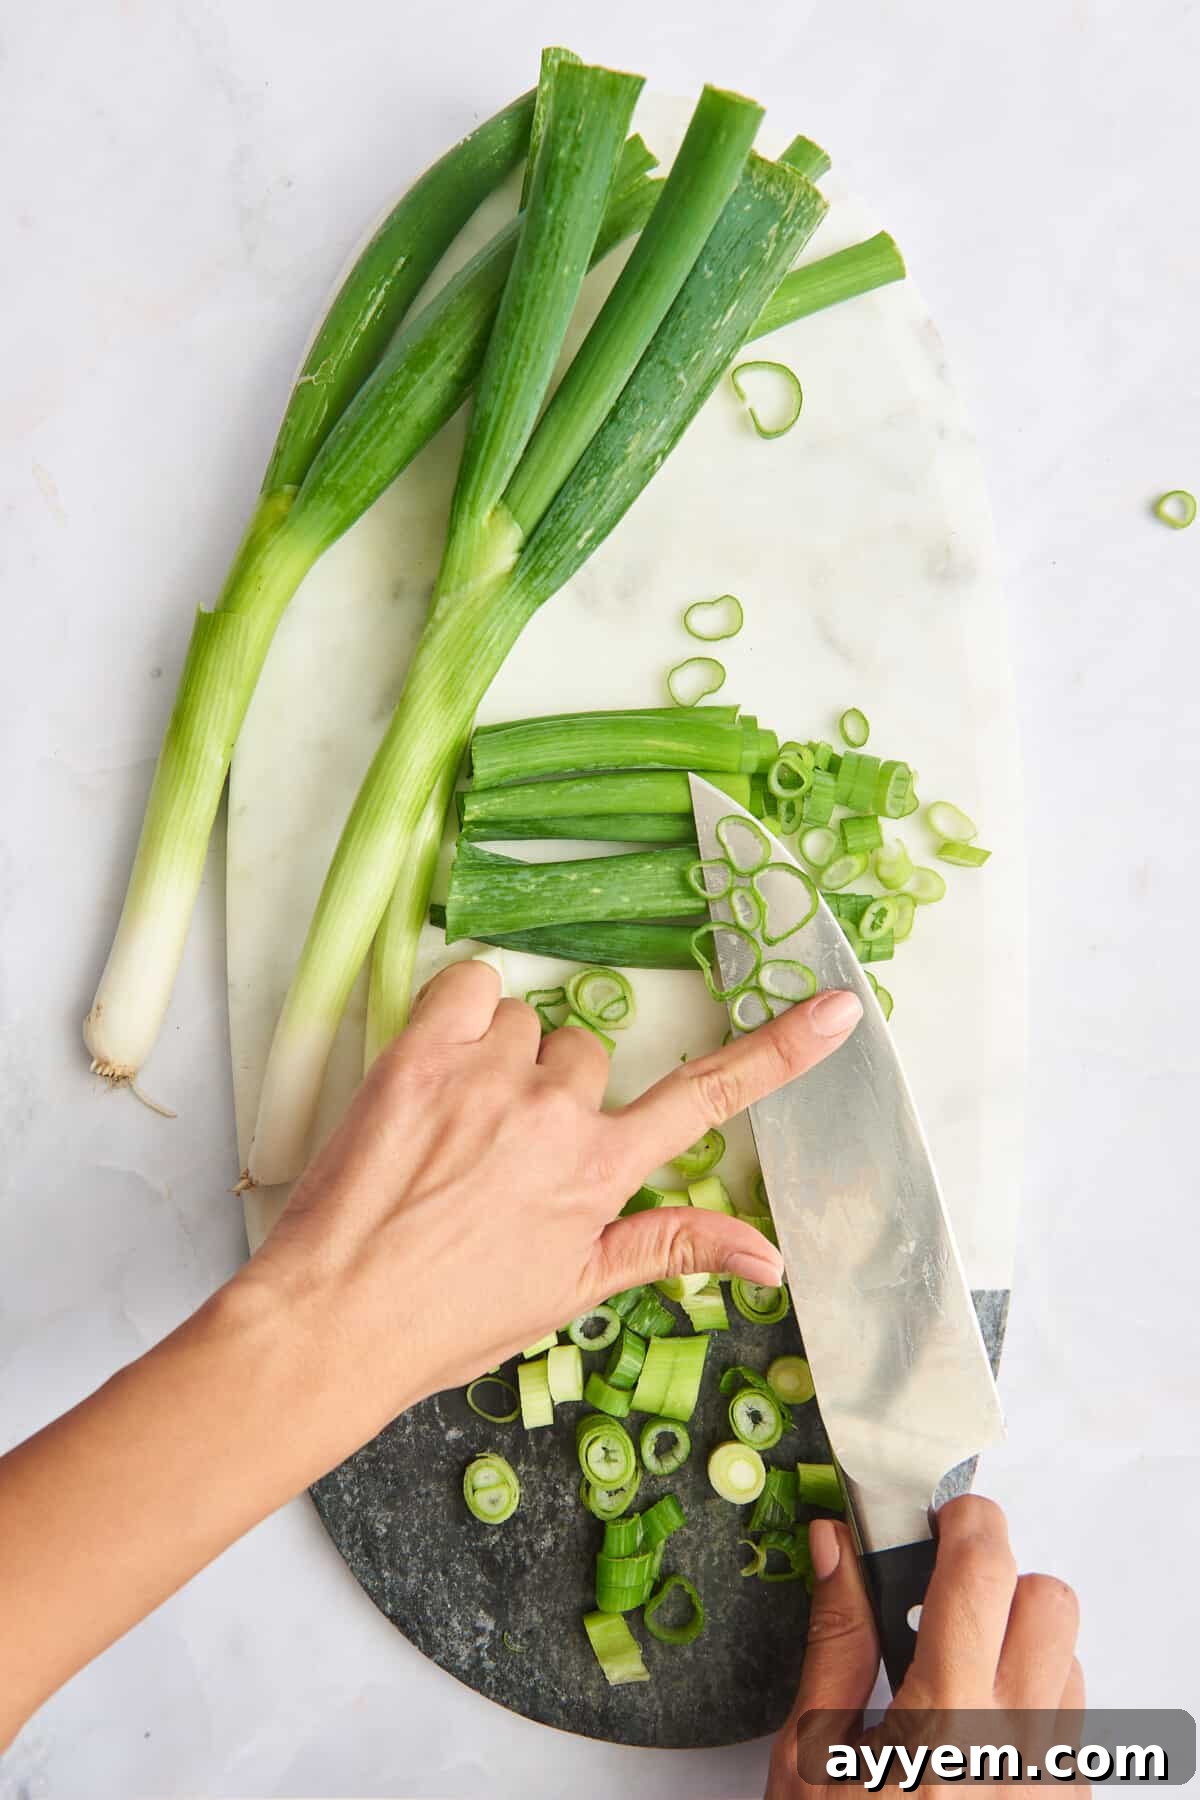
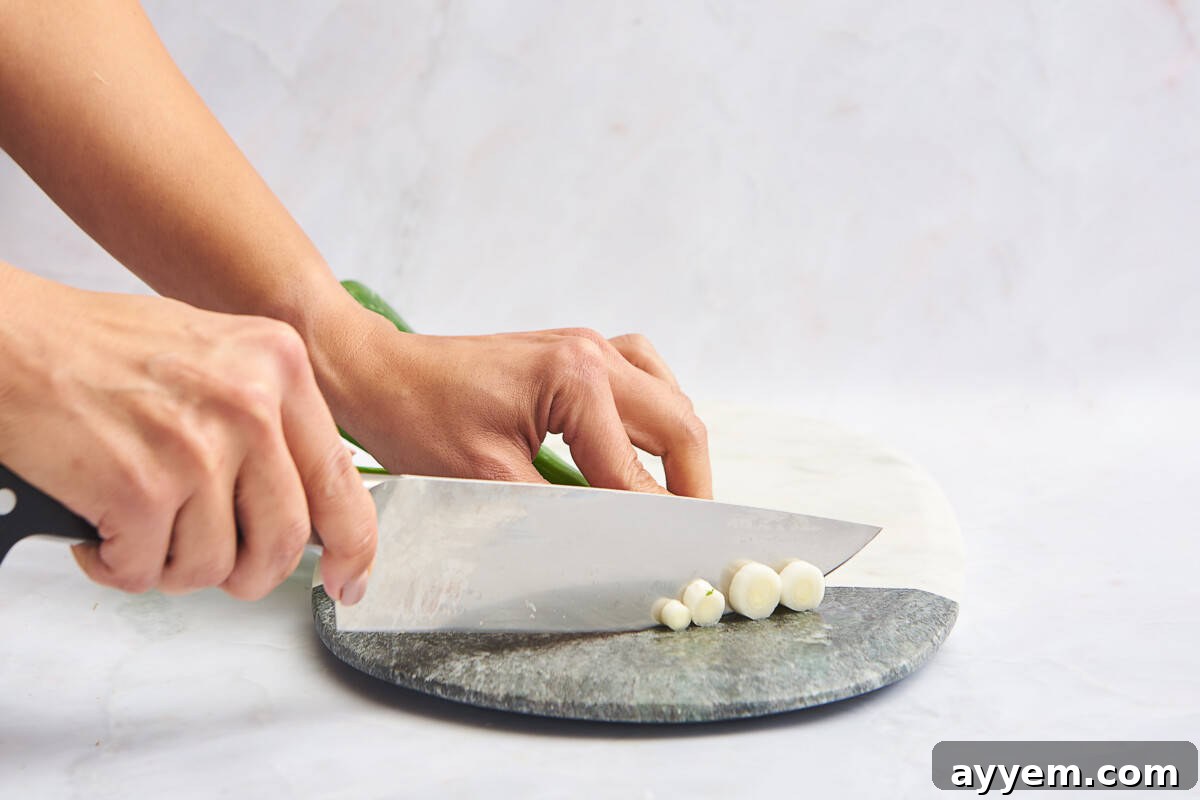
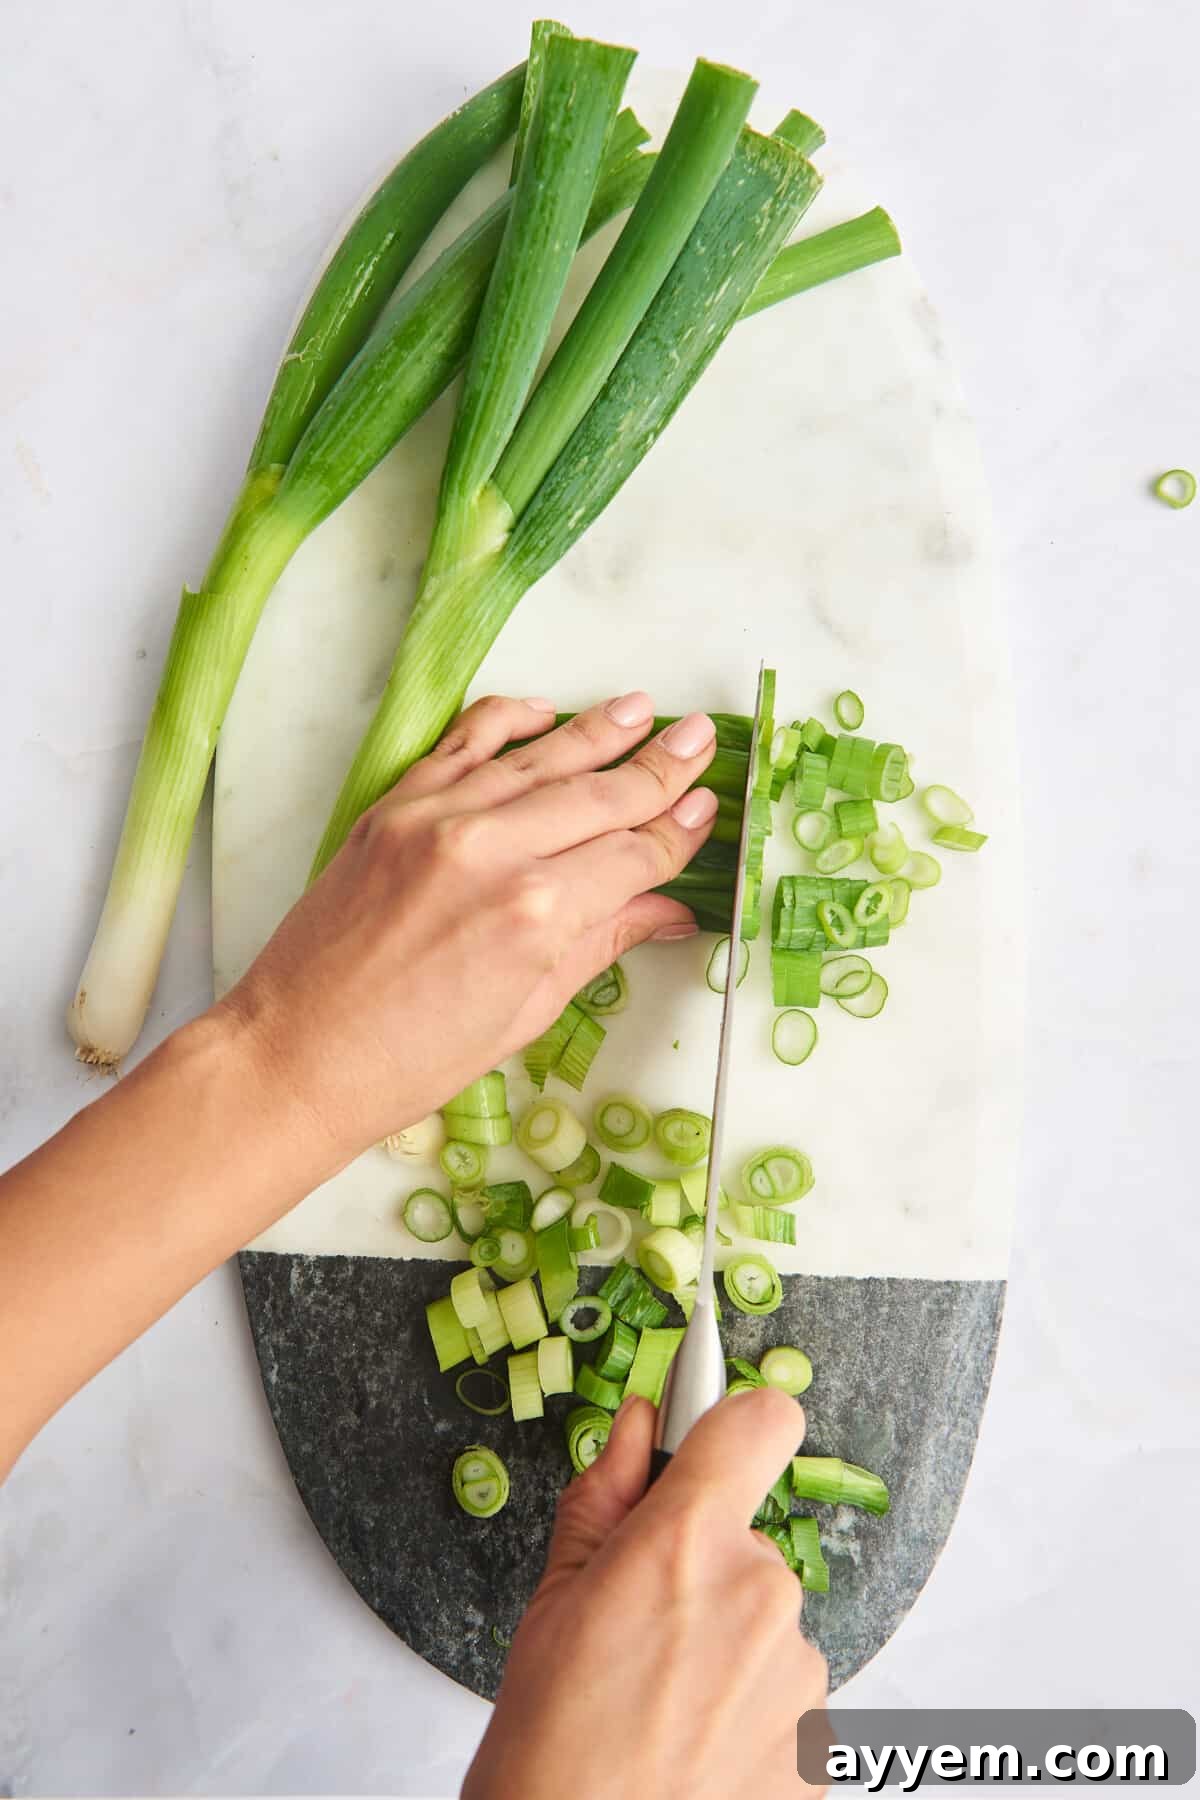
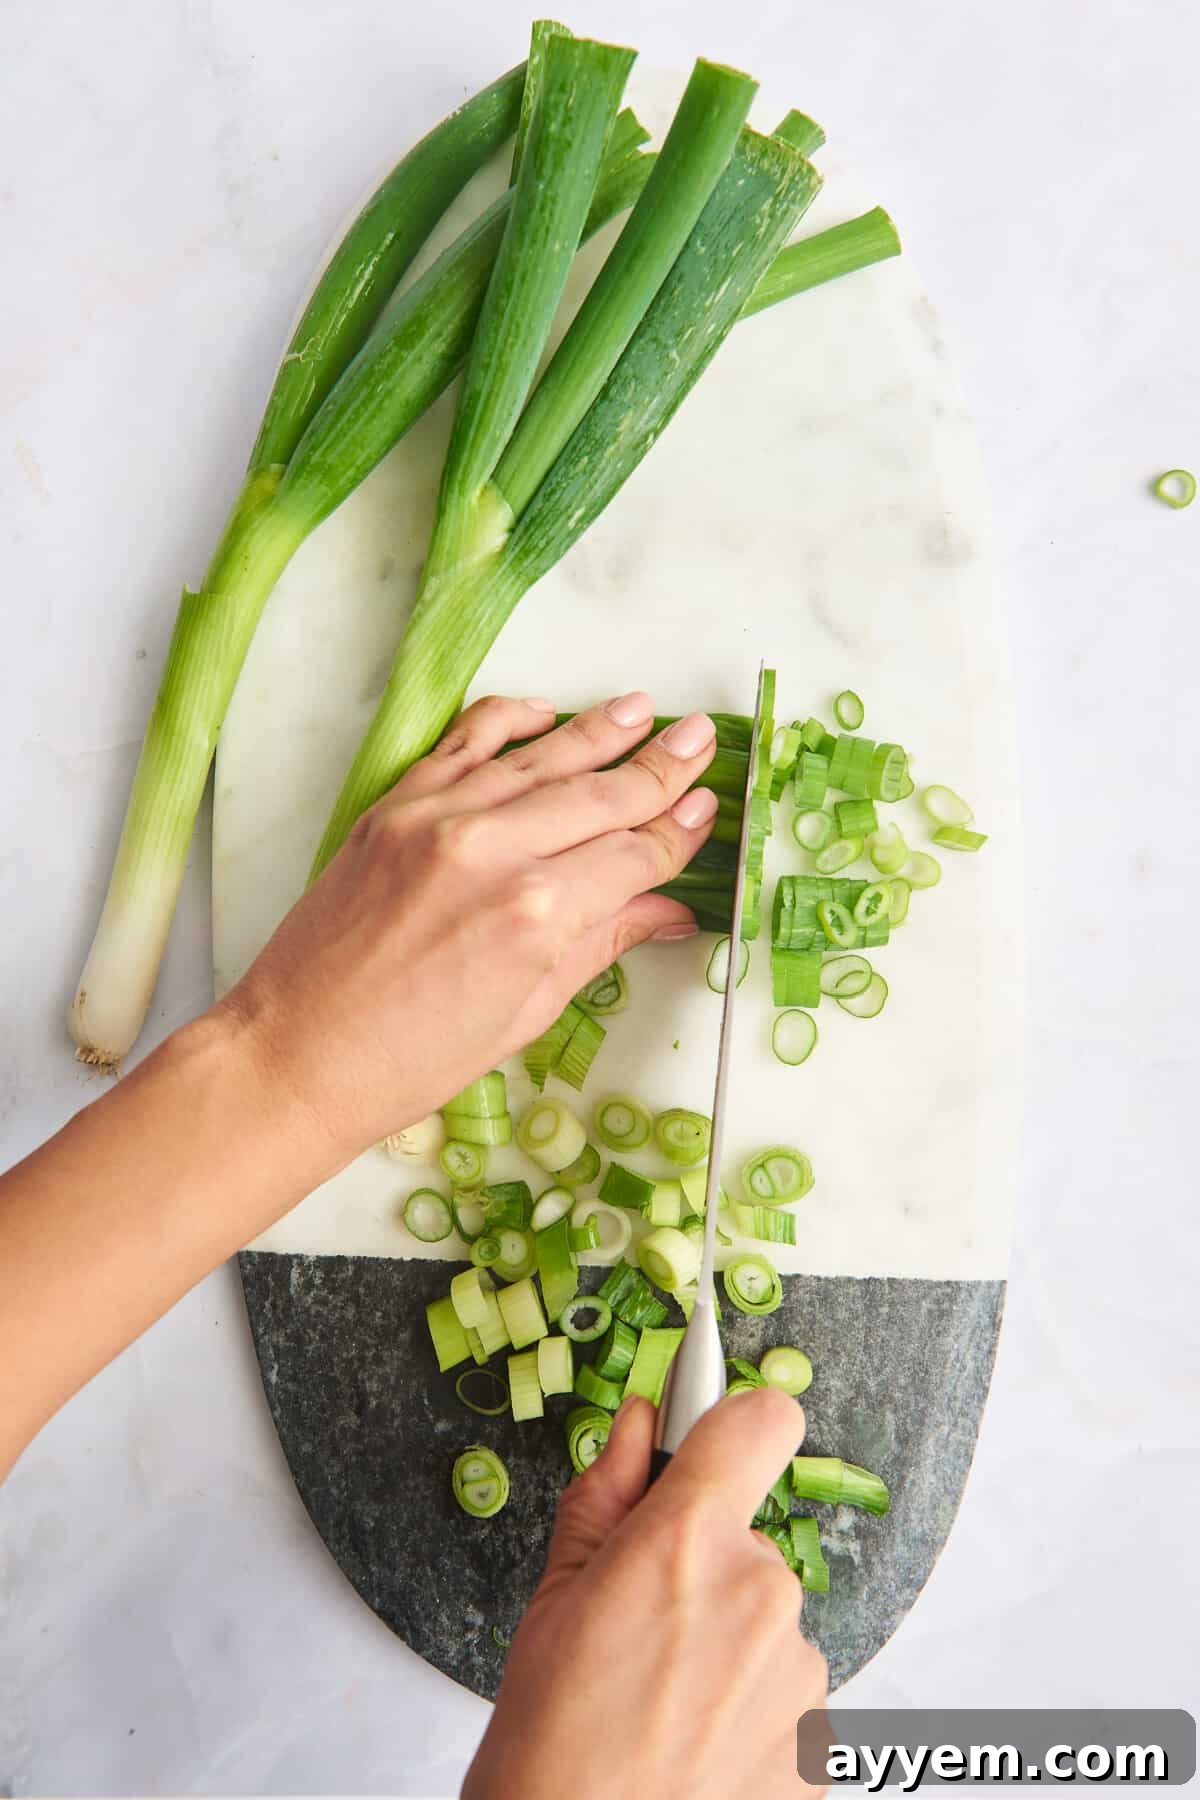
For uniform, coin-shaped pieces, often referred to as “rings” or “rounds,” line up your trimmed green onions on a cutting board. Hold the bunch firmly with one hand, tucking your fingertips in (forming a “claw” grip) to guide the knife and protect your fingers. Use your sharp knife to slice the green onions thinly in a circular motion, moving from the green tops down towards the white ends. Aim for consistent thickness, typically ⅛ to ¼ inch (3-6mm), depending on your recipe’s requirements. This cut is perfect for garnishes where a clean, uniform look is desired, or when you want the pieces to integrate smoothly into a dish.
- Diagonal (Bias) Slices:
To create elegant, elongated pieces that offer a larger surface area and a more visually appealing presentation, particularly in stir-fries or salads, place your knife at a sharp angle (typically 30 to 45 degrees) against the green onions. Maintain this angle as you use the same circular chopping motion to slice the scallions. These angled cuts, often called “on the bias,” not only look beautiful but can also slightly alter the texture, creating a softer bite in certain applications. This technique is excellent for highlighting the green onions as a distinct ingredient in your dish.
Remember, safety first! Always use a sharp knife for clean cuts and minimal effort, and keep your guiding hand’s fingertips curled under to prevent accidents.
Optimal Green Onion Preparation and Storage Techniques
Proper preparation and storage are crucial for extending the life of your green onions and ensuring they retain their crispness and potent flavor. Here’s how to keep them fresh and ready for use.
- Prep Ahead: You can clean and trim green onions up to one to two weeks in advance. After rinsing them thoroughly under running water and removing any wilted outer layers, pat them completely dry with a paper towel. Moisture is the enemy of freshness! Once dry, transfer the whole, untrimmed scallions to an airtight container or a plastic bag lined with a damp paper towel. Store them in the crisper drawer of your refrigerator. This method keeps them crisp and prevents them from drying out.
- Short-Term Storage (Once Cut): Once green onions are chopped, their shelf life significantly decreases due to increased exposure to air. Store cut green onions in an airtight container in the refrigerator for up to five days. For best results and to preserve their distinct textures and flavors, it’s often beneficial to store the white and light green parts separately from the darker green stalks. The white parts tend to stay fresh longer and have a more robust flavor, while the green tops are best used sooner.
PRO TIP: Regrow Your Own Green Onions!
Don’t discard those root ends! Green onions are incredibly easy to regrow. After trimming the white tip and roots, save about 1-2 inches of the white base with the roots still attached. Place these root ends upright in a small glass of water, ensuring the roots are submerged and the top portion remains exposed to air. Place the glass on a sunny windowsill. Change the water every day or two to prevent mold. Within a few days, you’ll notice new green shoots emerging. You can snip off the green growth as needed, and they will continue to regrow multiple times. For even more robust growth, once the roots are established (after about a week), you can plant the ends directly into a pot with soil, leaving the green shoots exposed above the soil line.
- Freezing for Long-Term Storage: Green onions can be frozen, either whole or chopped, for up to three months. The key to successful freezing is to wash and thoroughly dry them first. Any residual moisture will lead to freezer burn and clumping. For chopped green onions, spread them in a single layer on a baking sheet and freeze until solid. Once frozen, transfer them to a freezer-safe bag or airtight container. This prevents them from sticking together, allowing you to grab just the amount you need. Whole green onions can also be wrapped tightly and frozen. When ready to use, thaw them overnight in the refrigerator or add them directly to cooked dishes. Note that frozen green onions may lose some of their crispness, but their flavor will remain intact, making them ideal for cooked applications rather than fresh garnishes.
Common Questions When Learning How to Cut Green Onions
For culinary use, you typically cut off and discard only the very end of the white bulb where the roots emerge. The entire white and green stalk is edible. If you’re planning to regrow your green onions, leave about two to three inches of the white base with the roots attached to encourage new growth.
While often confused, green onions and spring onions are not quite the same, though they are closely related. The main difference lies in their maturity and bulb formation. Green onions (scallions) are harvested very young and have a thin, undeveloped bulb. Spring onions are slightly more mature, harvested when their bulbs have begun to swell and become noticeably rounder, offering a slightly stronger flavor than green onions but still milder than a mature onion.
Generally, if a recipe simply calls for “scallions” or “green onions” without further specification, it’s best to use both the white and light green parts. These sections offer the most concentrated onion flavor. Recipes will typically specify if only the “green tops” or “white parts” are required. The green tops are often reserved for garnish or for adding towards the end of cooking to maintain their fresh flavor and vibrant color.
To regrow green onions, you should plant the white base of the stalk, ensuring about 1 to 2 inches of the stalk remains with the roots intact. Place this section in a shallow glass of water or directly into soil. New green shoots will sprout from the top, allowing for multiple harvests.
Creative Ways to Use Your Perfectly Chopped Green Onions
Now that you’ve mastered the art of chopping green onions, it’s time to unleash their full potential in the kitchen! Their mild, pungent flavor and crisp texture make them incredibly versatile. They are not just a garnish; green onions can be a foundational aromatic, a crunchy topping, or a fresh finishing touch that brightens any dish.
Green onions shine in a wide variety of cuisines. They are a staple in Asian cooking, featuring prominently in stir-fries, noodle dishes, and dumplings. In Mexican cuisine, they add a fresh bite to tacos, salsas, and guacamole. They also elevate classic American comfort foods like baked potatoes, chili, and egg dishes. Their vibrant green hue also makes them an excellent garnish, instantly adding visual appeal to any plate.
Here are some of our favorite ways to incorporate green onions into your meals:
- Quick Couscous Salad with Chicken: Adds a refreshing zest and crunch.
- Easy Fried Rice with Veggies: Essential for aromatic depth and fresh texture.
- Baked Queso Dip: A perfect topping for a fresh, savory contrast.
- Cobb Salad Recipe with Green Goddess Dressing: Contributes to the complex flavors and textures of a hearty salad.
- Asian Cucumber Salad Recipe: Provides a crucial aromatic and a subtle oniony kick.
- Soups and Stews: Stir in chopped green onions just before serving for a fresh finish.
- Egg Dishes: Excellent in scrambled eggs, omelets, or frittatas for added flavor and color.
- Dips and Spreads: Mix into cream cheese, hummus, or yogurt dips for a tangy boost.
- Stir-fries: Use the white parts as an aromatic base and the green parts as a fresh topping.
Explore More Essential Kitchen Guides
Enhance your culinary skills with our other helpful kitchen preparation guides:
- How to Cut a Papaya
- How to Cut a Cantaloupe (3 Ways)
- How to Cut Sweet Potatoes (4 Ways)
- How to Cut a Tomato (3 Ways)
- How to Cut a Kiwi
How to Cut Green Onions
Food Dolls
1
serving
8 minutes
8 minutes
Ingredients
-
▢
1
bunch
green onions
Instructions
-
Wash off any debris, and remove the outer layers of the onions.1 bunch green onions

-
Use a large knife to chop off the root of the onions at the white end.
-
Line up the onions on a cutting board, and use a knife to slice in circular motions, creating thin rounds. Or, angle the knife diagonally, and use the same circular cutting motion to cut the onions on the bias (angle).
Equipment
Nutrition
Serving:
1
serving
|
Calories:
8
kcal
|
Carbohydrates:
2
g
|
Protein:
0.4
g
|
Fat:
0.1
g
|
Saturated Fat:
0.01
g
|
Polyunsaturated Fat:
0.02
g
|
Monounsaturated Fat:
0.01
g
|
Sodium:
4
mg
|
Potassium:
66
mg
|
Fiber:
1
g
|
Sugar:
1
g
|
Vitamin A:
239
IU
|
Vitamin C:
5
mg
|
Calcium:
17
mg
|
Iron:
0.4
mg
Nutrition information is automatically calculated, so should only be used as an approximation.
Like this recipe?
Please leave a comment!