
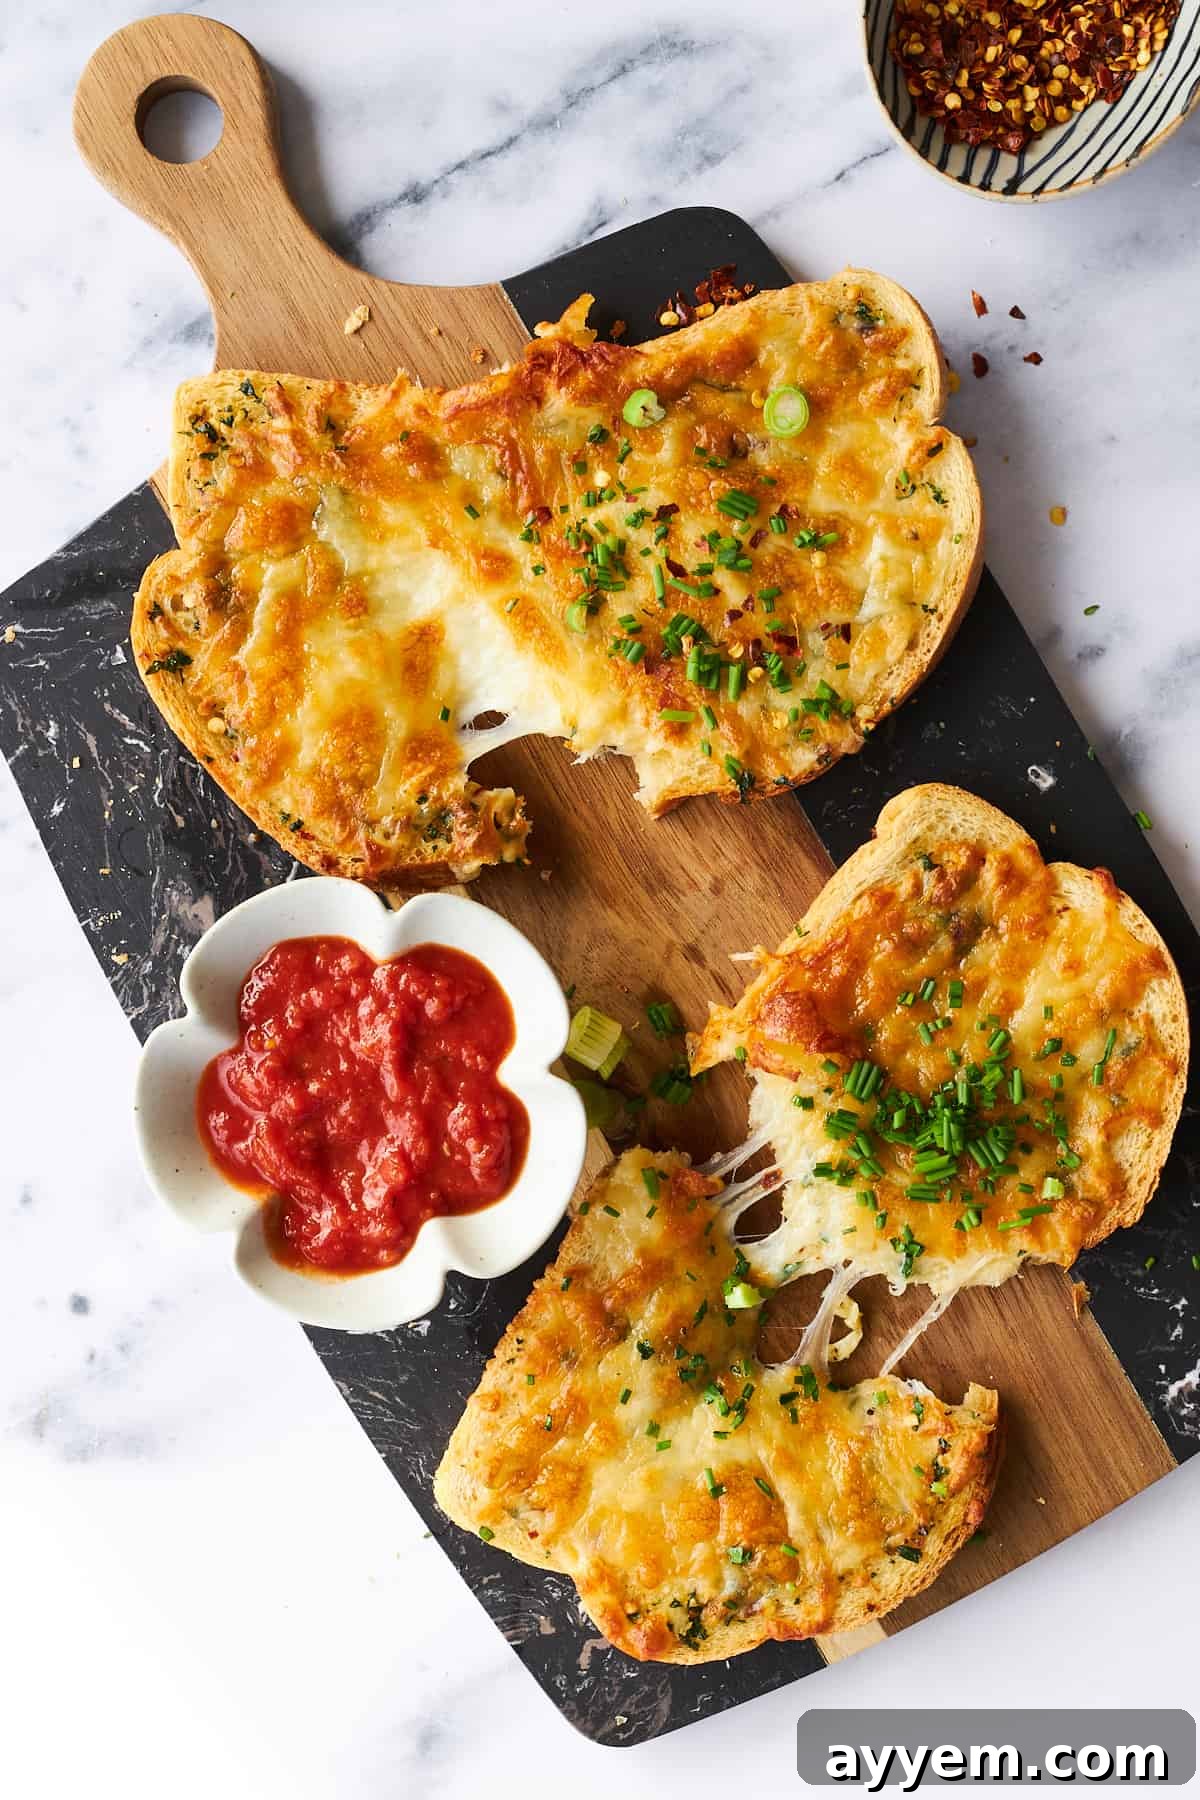
Get ready to transform your snacking and meal prep with our absolutely irresistible Air Fryer Cheesy Garlic Toast recipe! Whether you’re seeking a speedy, satisfying snack to curb those afternoon cravings or a delightful, easy-to-prepare side dish to complement your family dinner, this recipe is designed to impress and deliver pure comfort in every bite. Forget complicated cooking methods; your trusty air fryer is about to become your new best friend for achieving perfectly golden, cheesy perfection.
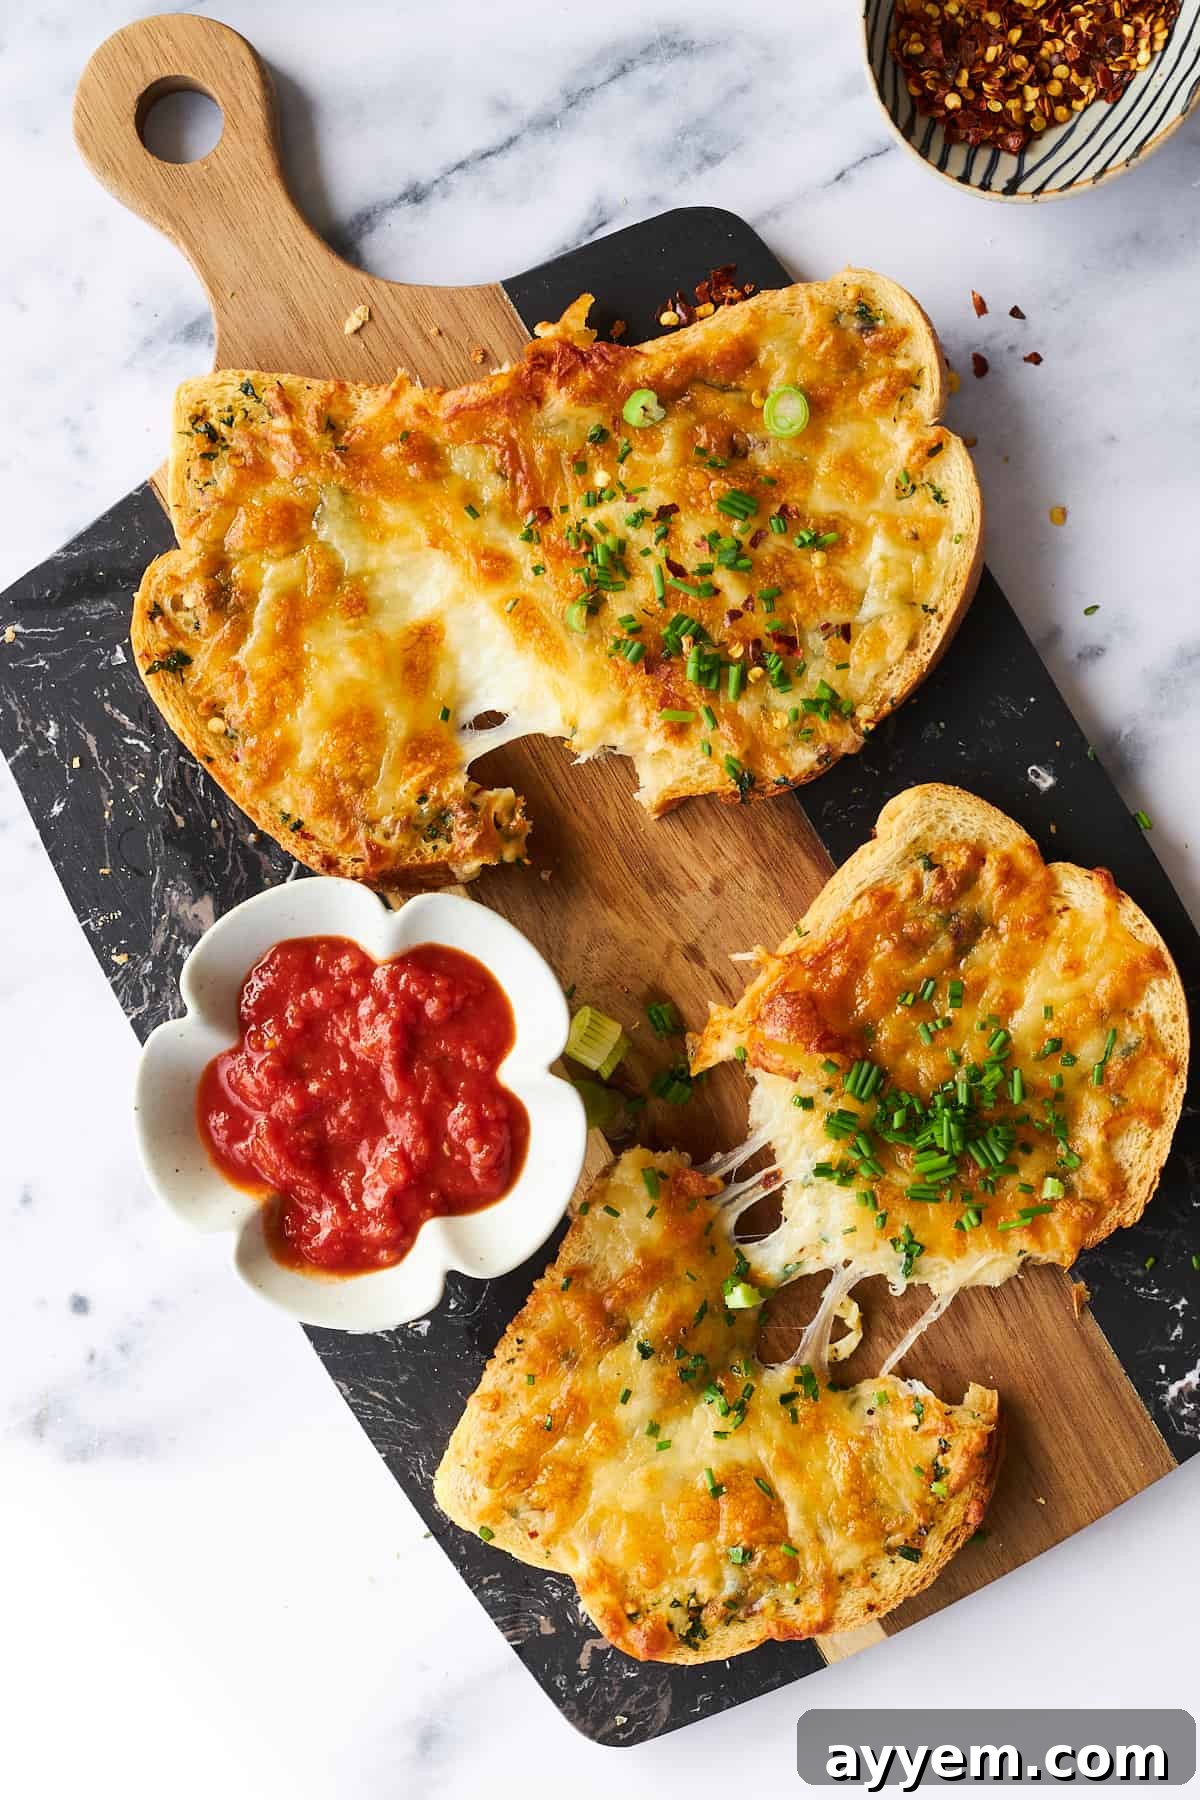
Imagine sinking your teeth into slices of perfectly crunchy bread, each generously slathered with a pungent, aromatic garlic butter spread. Now, elevate that experience with a blanket of gooey, melted cheese, bubbling and golden from the heat of the air fryer. The symphony of flavors and textures in this homemade air fryer garlic bread is truly a culinary revelation, promising a burst of savory goodness that is simply out of this world.
Crafting this ultimate comfort food requires just a handful of straightforward ingredients and the incredible efficiency of your air fryer. You’ll be amazed at how quickly you can whip up a batch of decadent cheesy garlic toast that’s ready to be devoured. It’s the ideal treat to satisfy those deep cravings, suitable for any time of day, and guaranteed to become a household favorite.
Why You’ll Absolutely Love This Air Fryer Cheesy Garlic Toast
If you haven’t yet discovered the magic of making garlic bread in an air fryer, prepare to be seriously impressed! This method not only simplifies the process but also elevates the classic dish to new heights. Here’s why this air fryer cheesy garlic toast will become a staple in your kitchen:
- The Ultimate Side Dish: This garlic toast is incredibly versatile, pairing beautifully with a vast array of your favorite recipes. From hearty stews and creamy tomato soup to pasta dishes and grilled meats, it adds a delightful, savory crunch that completes any meal. Its rich flavor complements everything from a simple green salad to an elaborate Italian feast, making it a go-to choice for any occasion.
- Remarkably Quick and Easy: In today’s fast-paced world, finding recipes that are both delicious and time-efficient is a game-changer. This garlic toast boasts an unbelievably short cook time of just a few minutes, making it perfect for busy weeknights or when unexpected guests drop by. The preparation is straightforward, requiring minimal effort for maximum flavor. You’ll spend less time in the kitchen and more time enjoying your culinary creation.
- Effortless Cleanup: One of the often-overlooked benefits of air frying is the ease of cleanup. All the cooking happens within the non-stick air fryer basket, containing any potential mess and dramatically reducing the amount of scrubbing required afterwards. Say goodbye to greasy baking sheets and multiple pots and pans – with the air fryer, cleanup is truly a breeze, leaving you more time to savor your meal.
- Consistently Crispy Perfection: Unlike traditional oven methods that can sometimes result in soggy or unevenly toasted bread, the air fryer utilizes convection heating to circulate hot air evenly around each slice. This ensures a consistently golden-brown, wonderfully crispy exterior and a perfectly melted, bubbly cheese topping every single time. The texture contrast is simply divine!
- A Healthier Indulgence: While still wonderfully rich and flavorful, air frying requires significantly less oil compared to deep frying or pan-frying, making this cheesy garlic toast a slightly healthier alternative. You get all the decadent taste and satisfying crunch without the excessive grease, allowing you to enjoy this comfort food guilt-free.
This recipe is not just about making garlic toast; it’s about experiencing convenience, incredible flavor, and consistent results, all thanks to the power of your air fryer. Prepare for rave reviews!
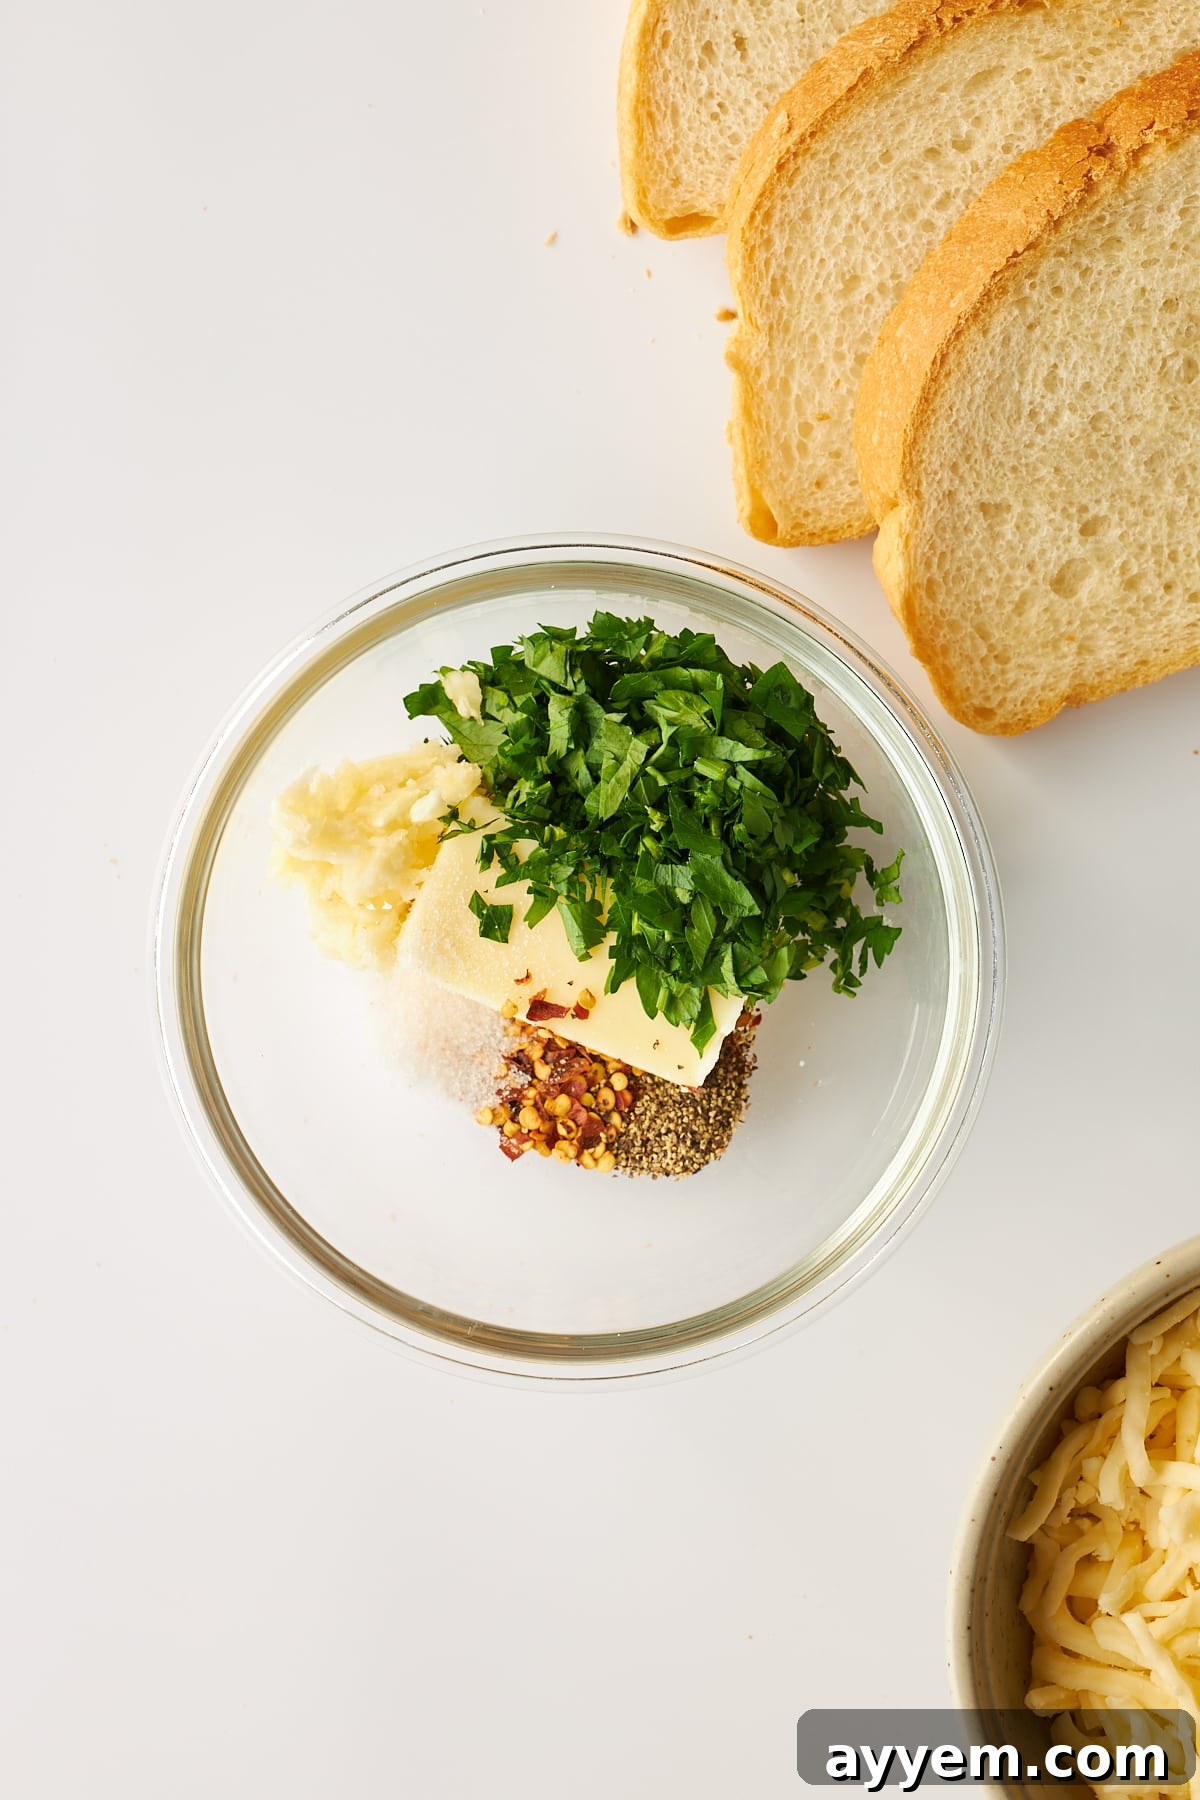
Essential Ingredients You Need for Air Fryer Cheesy Garlic Toast
Crafting the perfect batch of air fryer cheesy garlic toast starts with selecting high-quality ingredients. Each component plays a crucial role in achieving that harmonious balance of flavor and texture. Here’s a detailed look at what you’ll need:
- Unsalted Butter: This forms the rich, flavorful base of our garlic spread. Using unsalted butter allows you to control the overall saltiness of the dish. It melts beautifully, creating a luscious texture and aiding in the golden-browning process of the toast in the air fryer. If you only have salted butter, simply reduce or omit the added salt in the seasoning mix. For a dairy-free or vegan option, a good quality plant-based butter alternative works wonderfully.
- Fresh Parsley: Chopped fresh parsley adds a vibrant, herbaceous note and a touch of color to the garlic butter. Its bright, slightly peppery taste perfectly complements the robust garlic and rich butter. While fresh is always best, in a pinch, you can use dried parsley, but remember to use about half the amount as its flavor is more concentrated. Other fresh herbs like chives or oregano can also be delightful additions.
- Garlic: The star of the show! We highly recommend using whole garlic cloves and mincing them yourself. Freshly minced garlic delivers the most intense and authentic flavor, far superior to pre-minced jarred garlic. For an even more pungent kick, finely grate the garlic cloves using a microplane. The aroma and taste of fresh garlic are what truly define this classic dish.
- Seasonings:
- Salt: Essential for enhancing all the other flavors. Add to taste, keeping in mind if your butter is salted.
- Black Pepper: A dash of freshly ground black pepper adds a subtle warmth and depth.
- Crushed Red Pepper Flakes: These are optional but highly recommended! Just a touch adds a mild, pleasant heat that beautifully cuts through the richness of the butter and cheese. Adjust the amount to your preference for a gentle warmth or a more noticeable kick. For a smoky flavor, a pinch of paprika can also be a lovely addition.
- Thick Slices of Bread: The foundation of your toast! The type of bread you choose significantly impacts the final texture. We suggest using thick slices from a sturdy loaf such as sourdough, Texas toast, or a good quality artisanal white bread. These thicker slices stand up well to the butter and cheese, preventing them from becoming soggy and ensuring a satisfyingly crispy exterior. A fresh baguette, sliced lengthwise, also makes fantastic garlic bread.
- Mozzarella Cheese: For that irresistible gooey, stretchy, melted goodness! Shredded mozzarella is our top choice due to its excellent melting properties and mild flavor, which allows the garlic to shine. However, feel free to experiment with other cheeses. A blend of mozzarella and provolone, or a sprinkle of Parmesan for a sharper, saltier kick, can also be fantastic. Cheddar cheese or an Italian cheese blend are great alternatives if you’re looking for different flavor profiles.
Having these ingredients ready will ensure a smooth and enjoyable cooking experience, leading to the best air fryer cheesy garlic toast you’ve ever made!
What Equipment Do You Need to Make Air Fryer Cheesy Garlic Toast?
Preparing this incredibly simple yet satisfying recipe requires minimal kitchen equipment, making it accessible for almost everyone. The star appliance, of course, is the air fryer, but we’ll also discuss a helpful tool for the garlic butter and offer alternatives for those without specific items.
To be honest, this recipe is super straightforward. You primarily need two key pieces of equipment to make it authentically delicious:
- An Air Fryer
- And a Mortar and Pestle
If you’re missing one of these, or don’t currently own either, worry not! We’ll guide you on how to adapt this recipe using common kitchen tools you likely already have.
We absolutely love our air fryer! This revolutionary kitchen appliance uses convection air circulation to cook food quickly and efficiently, often with just a small amount of oil, or sometimes none at all. The rapid circulation of hot air creates a crispy, golden exterior similar to deep frying, but in a much healthier way. Air fryer cooking is fast, incredibly easy, and results in significantly less mess compared to traditional frying or baking methods. It’s such a versatile and convenient tool to have in your kitchen, perfect for everything from snacks to main courses.
No Air Fryer? No Problem! If you don’t have an air fryer, you can absolutely still make this delicious cheesy garlic toast. Simply preheat your conventional oven to 350 degrees Fahrenheit (175 degrees Celsius). Arrange the prepared garlic toast slices on a baking sheet, ensuring they are in a single layer. Bake for approximately 8-12 minutes, or until the cheese is beautifully melted and bubbly, and the bread is golden and crispy. Keep a close eye on it to prevent burning, as oven temperatures can vary.
We use a mortar and pestle to thoroughly combine and mash the fresh garlic, parsley, butter, and seasonings for our garlic butter spread. A solid marble or stone mortar and pestle is a fantastic traditional kitchen tool that not only grinds ingredients to a perfect paste, releasing maximum flavor, but also looks elegant on your countertop. However, it’s certainly not a necessity for this recipe.
No Mortar and Pestle? Easy Adaptations! If you don’t have a mortar and pestle, you can still achieve a perfectly blended garlic butter. You’ll just need a medium-sized mixing bowl and a sturdy spoon or a fork to grind and mix the ingredients together. Alternatively, for very finely minced garlic, you can use a garlic press or even a food processor for a larger batch of garlic butter, ensuring everything is well combined into a smooth, aromatic paste.
With these simple tools and flexible alternatives, you’re well-equipped to create mouth-watering air fryer cheesy garlic toast with ease!
How to Make Air Fryer Cheesy Garlic Toast: Step-by-Step Guide
Crafting this delightful air fryer cheesy garlic toast is a remarkably simple process that yields incredibly delicious results. Follow these easy steps for perfectly crispy, cheesy, and garlicky toast every time:
Important First Step: Always preheat your air fryer before you begin! Preheating ensures that the air fryer reaches the optimal cooking temperature, allowing the bread to crisp up immediately and the cheese to melt evenly without drying out.
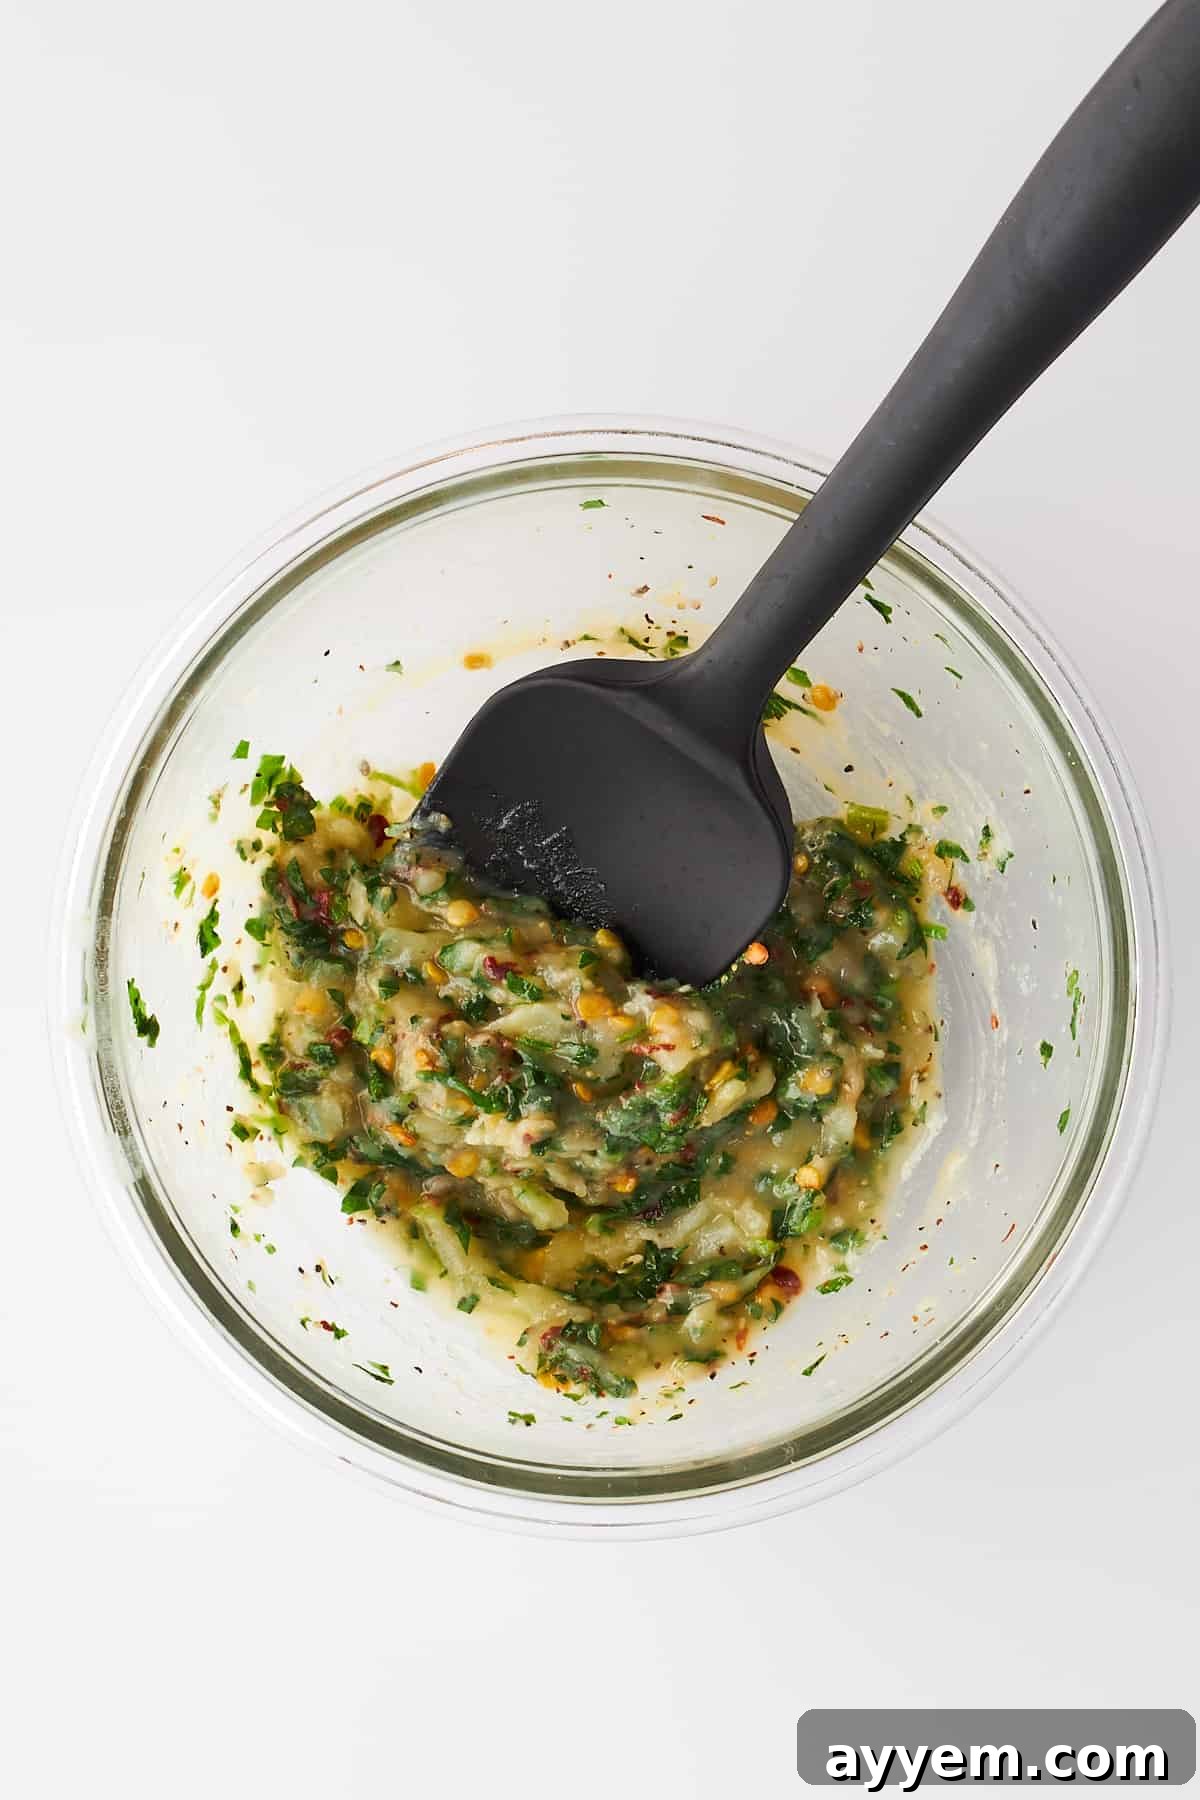
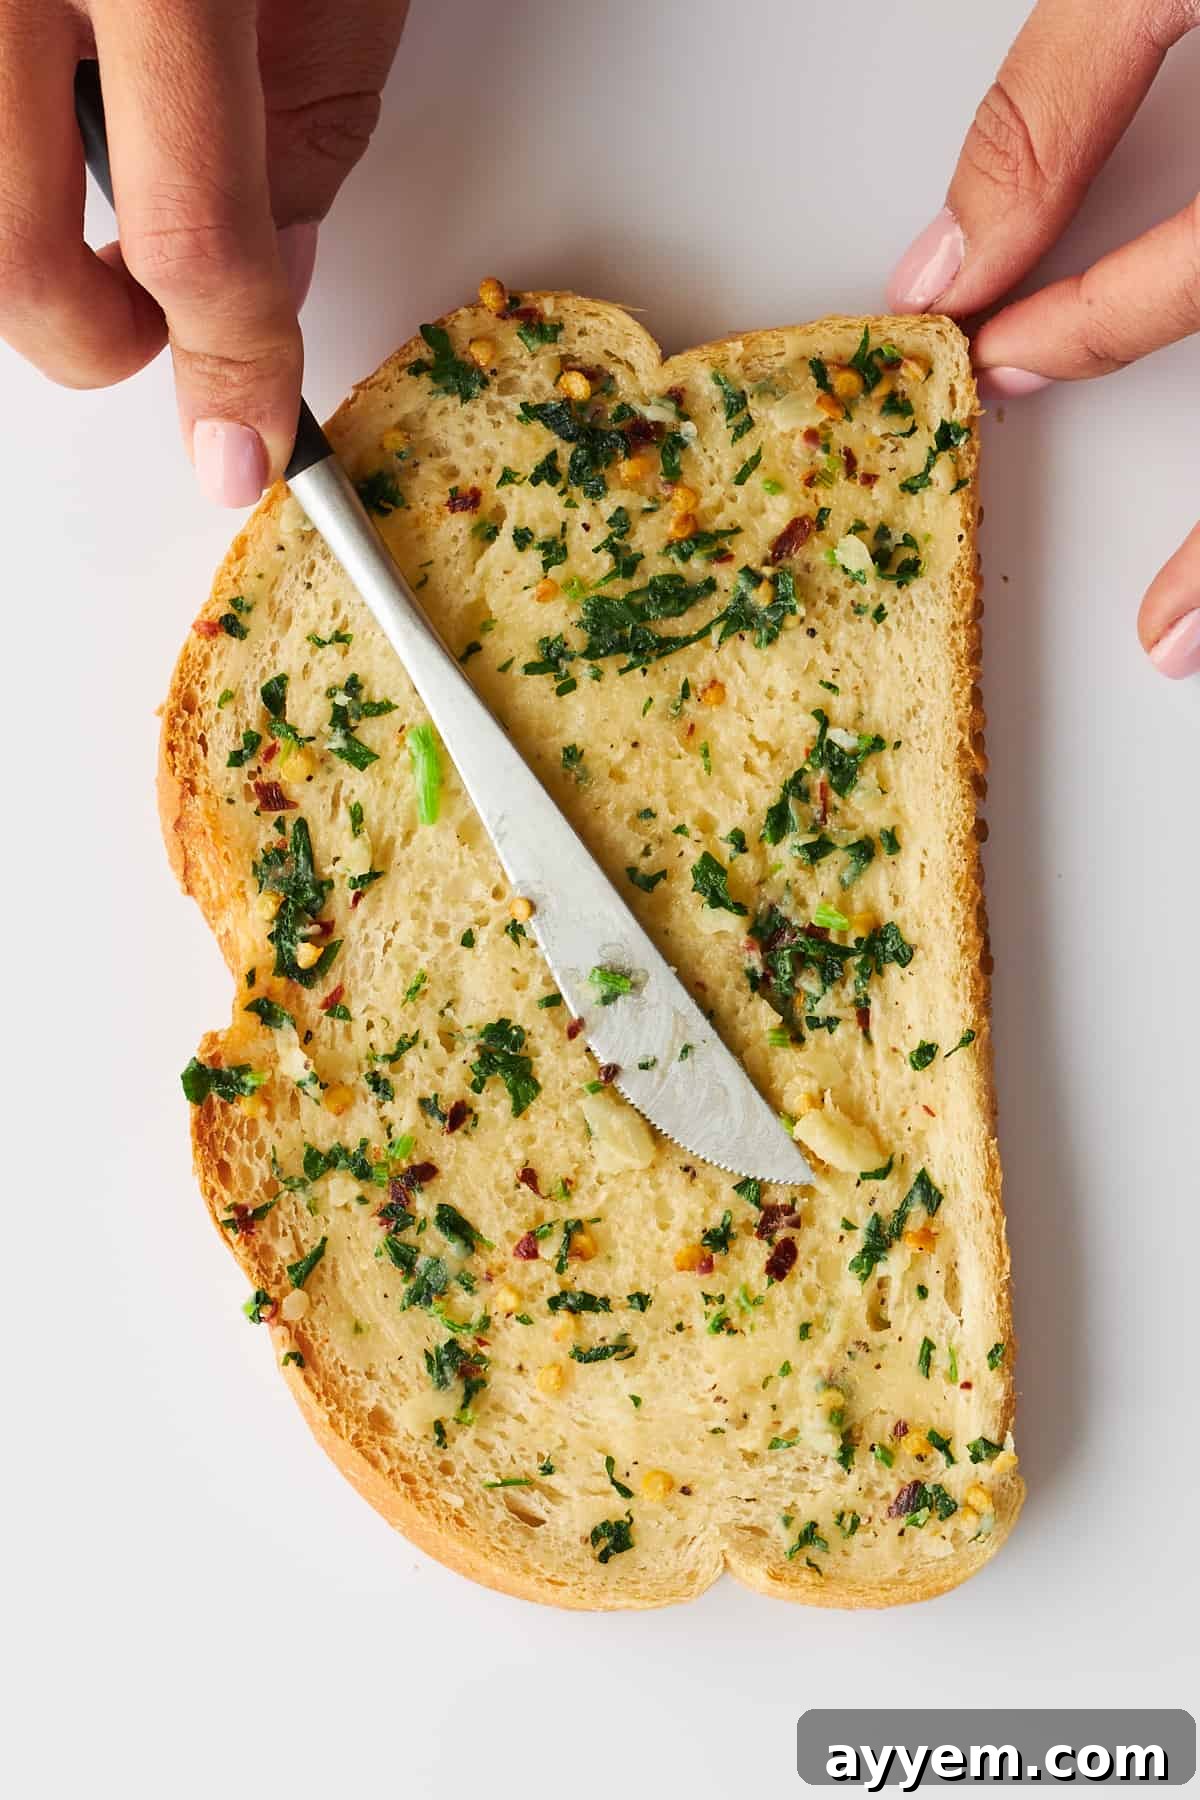
- Prepare the Garlic Butter Mixture: In the bowl of your mortar and pestle (or a medium-sized mixing bowl if you’re using an alternative method), add the softened unsalted butter, freshly chopped parsley, minced or grated garlic, salt, black pepper, and crushed red pepper flakes (if using). Begin mashing and mixing the ingredients thoroughly. Continue until everything is well combined and forms a smooth, fragrant compound butter. The goal is to distribute the garlic and herbs evenly throughout the butter, allowing all the flavors to meld beautifully. If you’re not using a mortar and pestle, simply use a sturdy spoon or fork to press and stir the ingredients together until uniform.
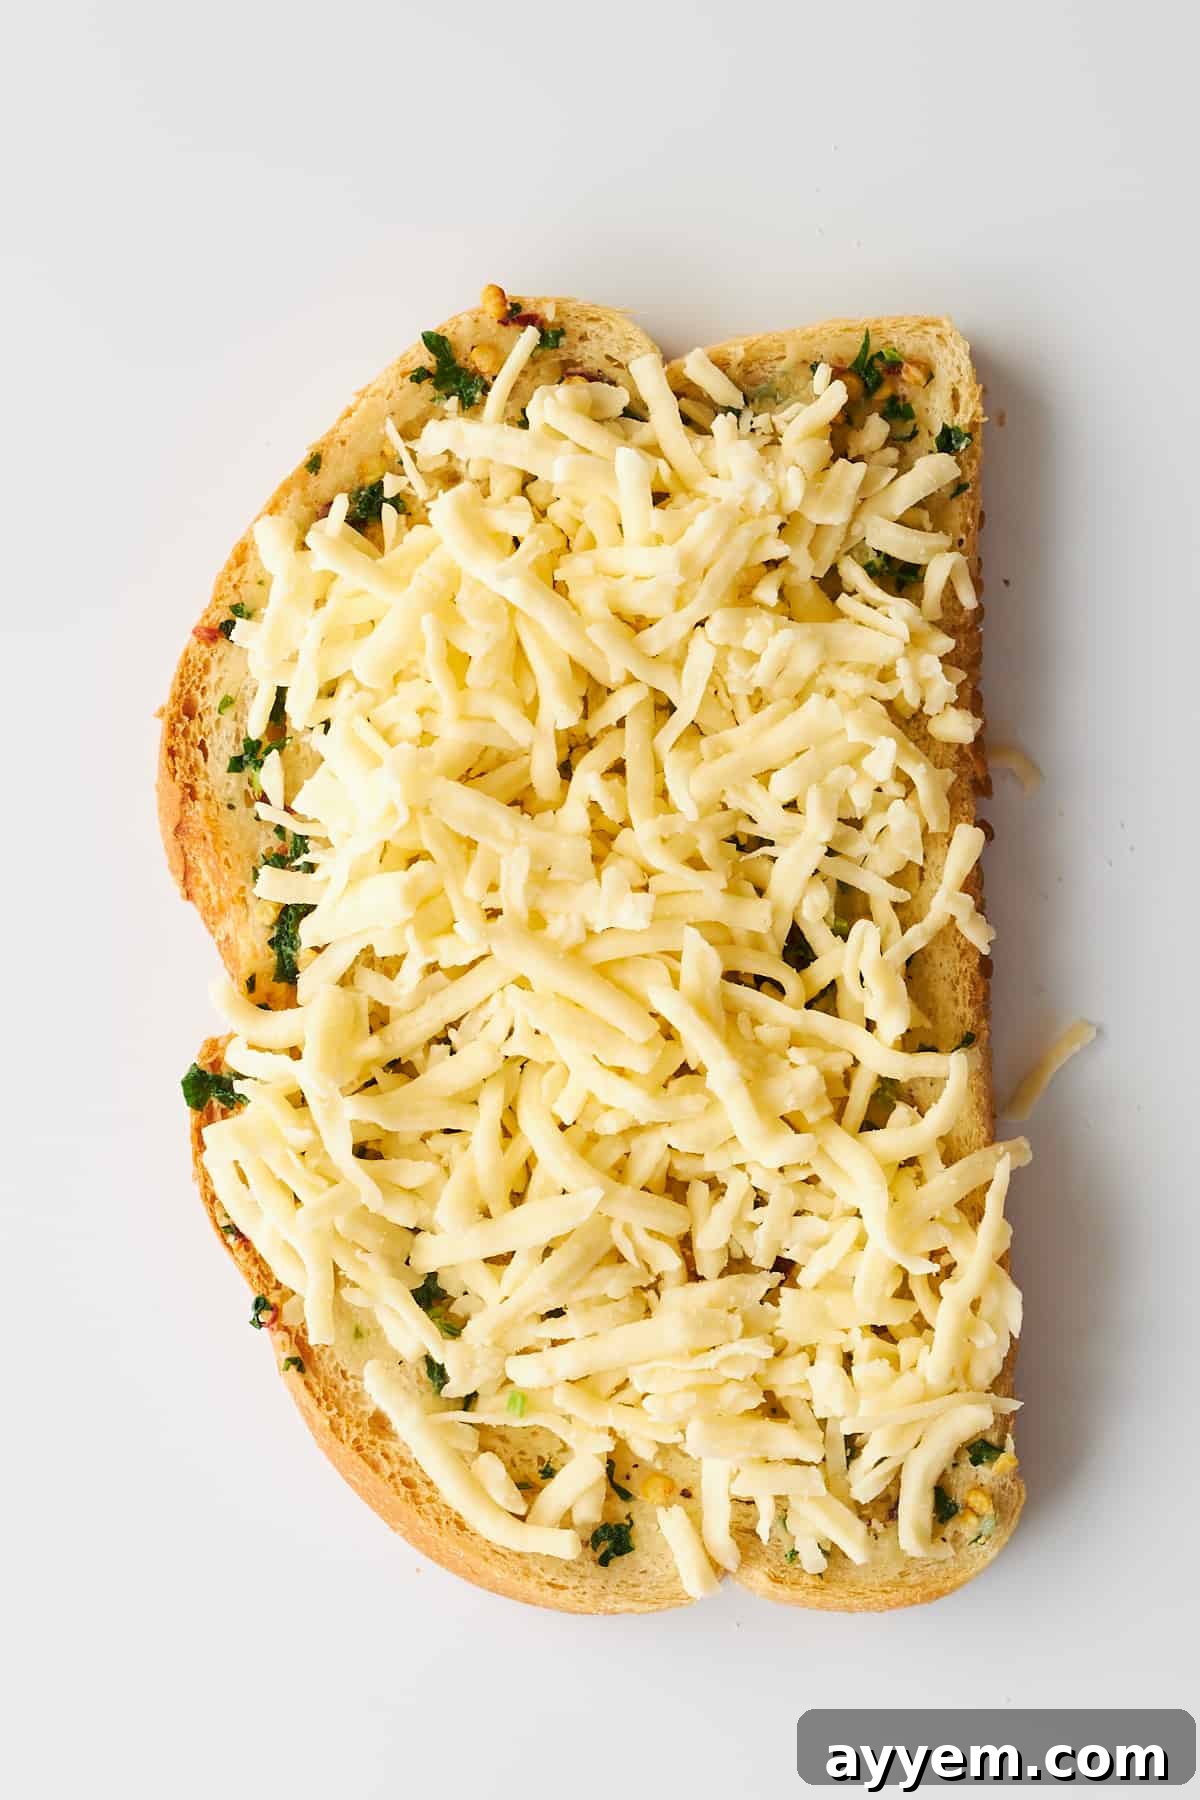
- Spread and Top the Bread: Take your thick slices of bread and generously spread the prepared garlic butter mixture evenly over one side of each slice. Don’t be shy – a good layer of butter is key to flavor and crispiness. Once the butter is spread, sprinkle a generous amount of shredded mozzarella cheese over the buttered surface of each slice. For best results and to prevent the cheese from potentially flying around in the air fryer, gently press the cheese into the buttered bread to help it adhere.
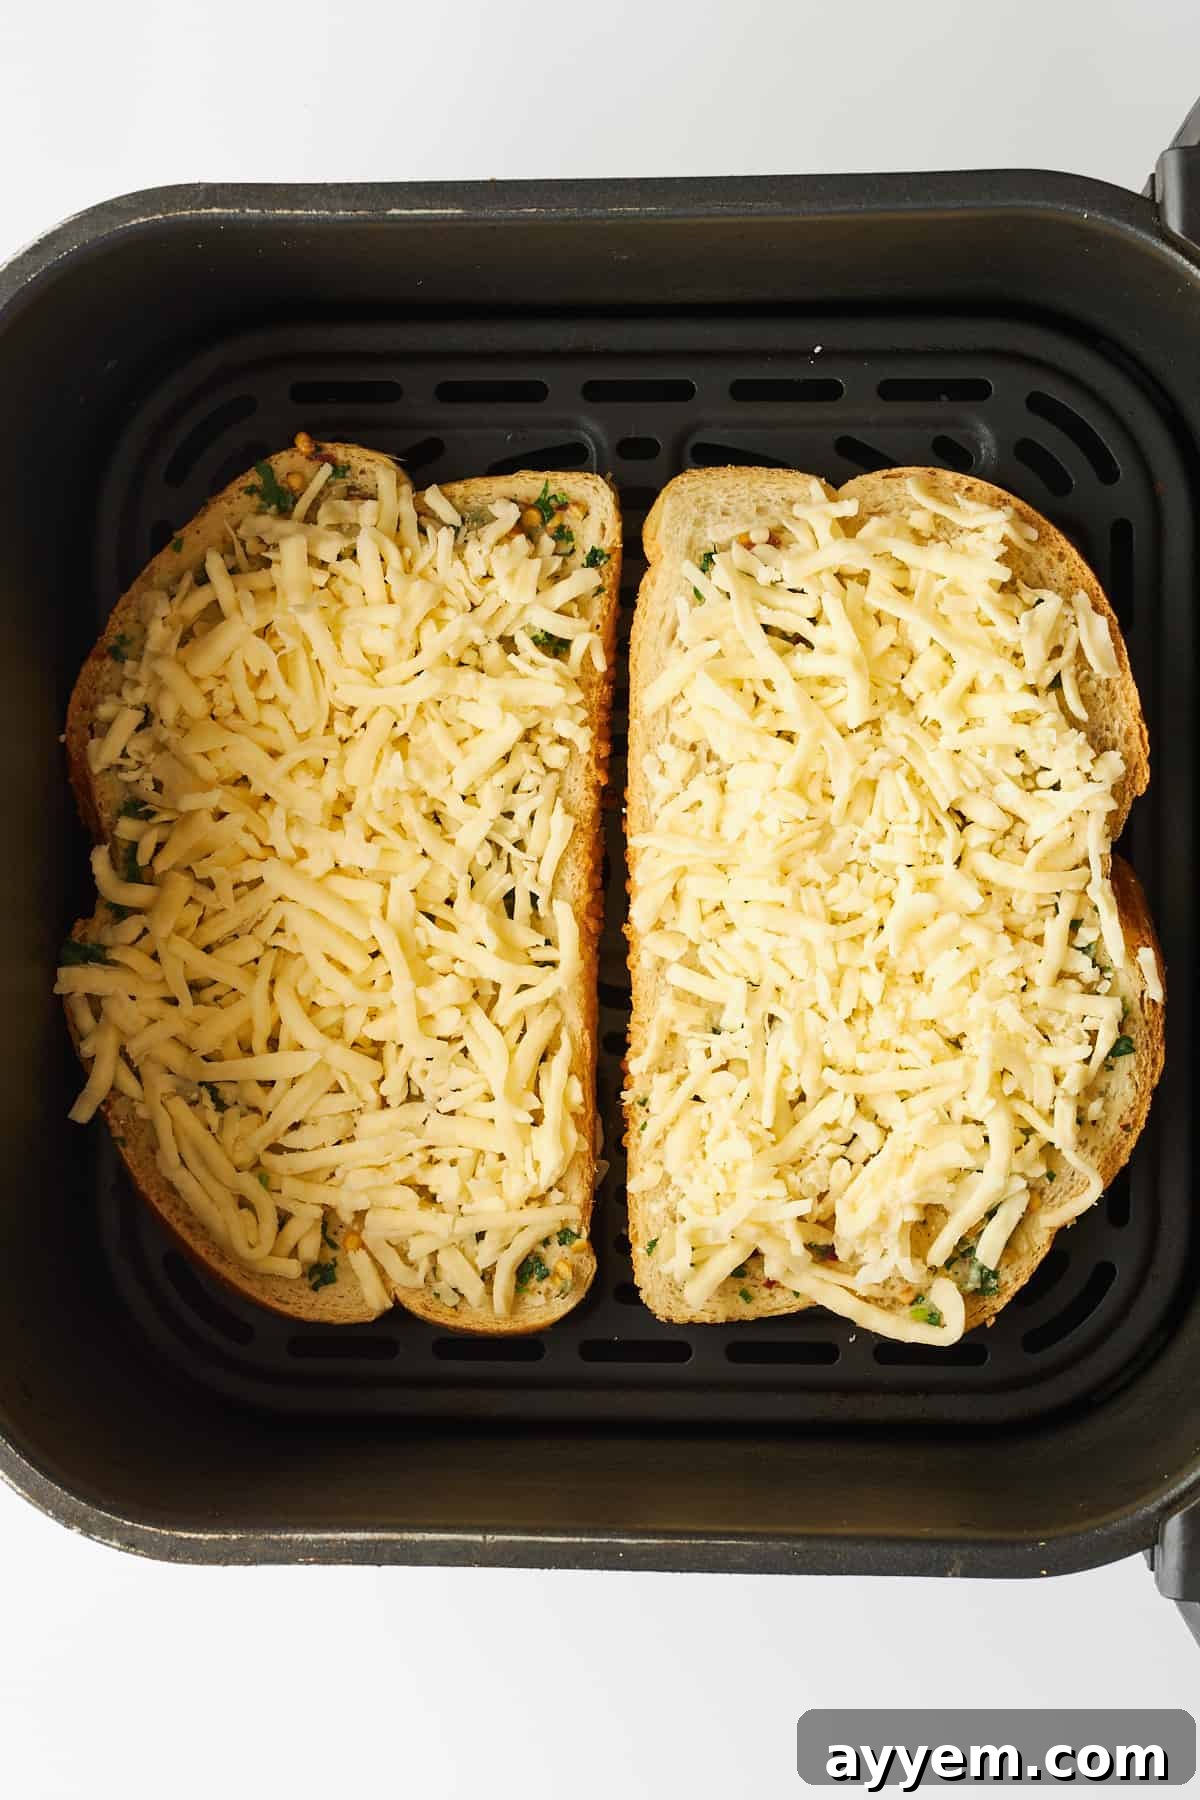
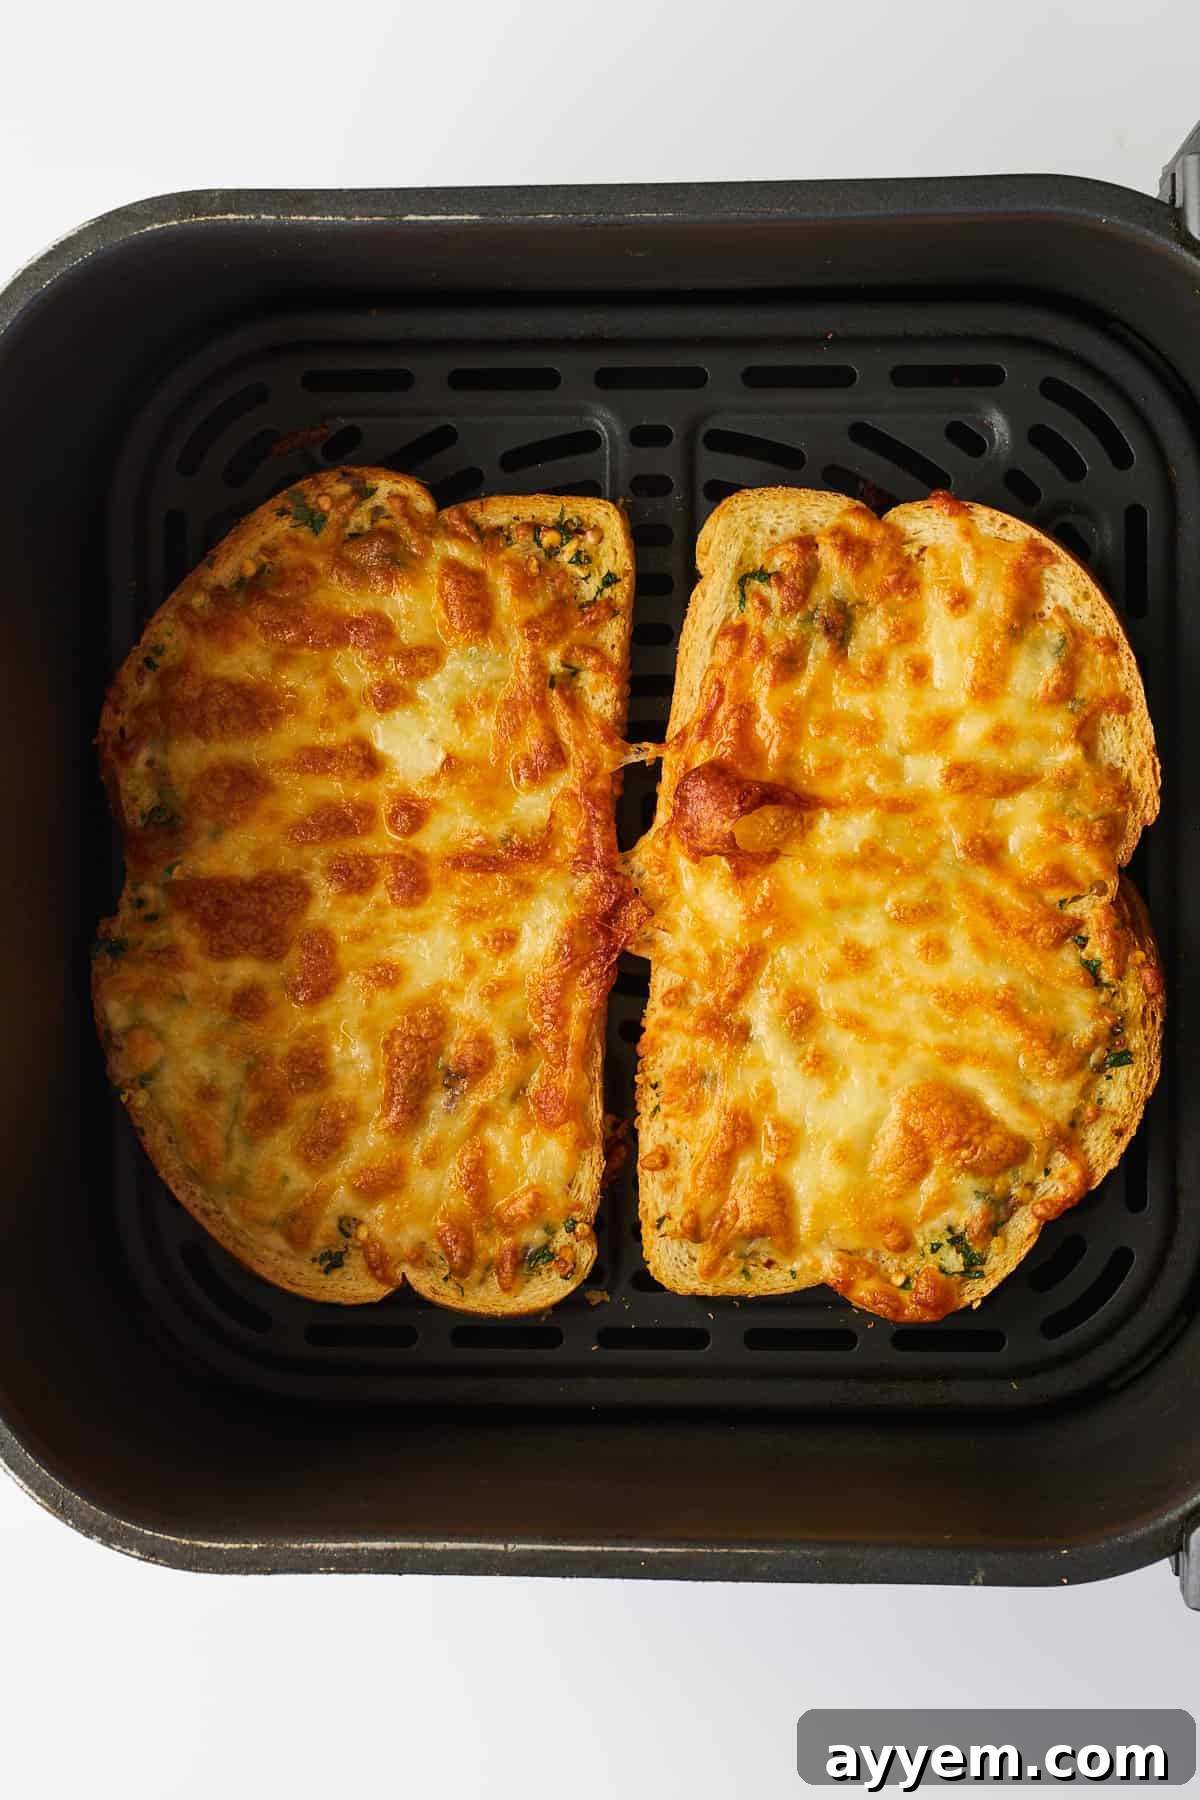
- Air Fry to Golden Perfection: Carefully arrange the prepared bread slices in your preheated air fryer basket. It’s crucial to place the pieces in a single layer, ensuring there’s a bit of space in between each slice. This allows for proper air circulation, which is essential for achieving that desirable crispy texture and even melting. Avoid overcrowding the basket; if necessary, cook in batches. Air fry at 350°F (175°C) for approximately 5-7 minutes, or until the cheese is beautifully golden brown, bubbly, and melted, and the edges of the toast are wonderfully crispy. Keep an eye on it, as air fryer models can vary in cooking time.
Pro Tip for Texas Toast Lovers: To save even more time and enjoy an extra-thick, satisfying bite, opt for pre-sliced Texas toast! Simply follow the same steps: spread with garlic butter, top with cheese, and cook them in the air fryer until golden and cheesy for an incredibly easy and delicious air fryer Texas toast experience!
Serve immediately and enjoy the warm, savory goodness of your homemade air fryer cheesy garlic toast!
Tips for Achieving the Perfect Air Fryer Cheesy Garlic Toast
While making air fryer cheesy garlic toast is simple, a few expert tips can elevate your results from great to absolutely extraordinary. Follow these suggestions to ensure every batch is a resounding success:
- Mind Your Bread Choice: The foundation is key! Thick-cut bread, such as sourdough, Texas toast, or a robust artisanal white bread, is ideal. Thin slices can become overly crispy or even burn before the cheese has a chance to properly melt and brown. Thick slices provide a satisfying bite and a better base for your toppings.
- Soften Your Butter: Ensure your unsalted butter is at room temperature. Softened butter is much easier to mix with the garlic and herbs, creating a smooth, spreadable compound butter that adheres beautifully to the bread. Hard butter will be difficult to spread and could tear the bread.
- Fresh Garlic is Best: For the most authentic and potent garlic flavor, always use fresh garlic cloves and mince them yourself. While garlic powder can work in a pinch, it simply doesn’t compare to the pungent aroma and taste of fresh garlic.
- Don’t Overcrowd the Basket: This is one of the most crucial air frying rules. Arranging the bread in a single layer with a little space between each slice allows the hot air to circulate freely around every piece. Overcrowding will steam the toast rather than crisp it, leading to a less-than-perfect texture. Cook in batches if necessary.
- Press the Cheese Down: To prevent the lighter shredded cheese from flying around in the air fryer due to the strong convection currents, gently press it into the garlic butter layer before cooking. This helps it stick securely and ensures it melts beautifully in place.
- Monitor Cooking Time (Air Fryers Vary): Air fryer models can differ significantly in wattage and efficiency. The suggested cooking time is a guideline. Always keep a close eye on your toast, especially during the first batch. Look for visual cues: golden-brown edges, bubbly and melted cheese.
- Customization is Key: Feel free to experiment with your garlic butter. Add a pinch of onion powder, dried oregano, or a touch of smoked paprika for different flavor profiles. You can also mix a sprinkle of grated Parmesan cheese with your mozzarella for a sharper taste.
- Serve Immediately: Garlic toast is best enjoyed fresh from the air fryer when it’s hot, crispy, and the cheese is still gooey. The longer it sits, the softer the bread will become.
- Storage and Reheating: If you have leftovers (which is rare!), store them in an airtight container in the refrigerator for up to 2-3 days. To reheat and recrisp, simply place them back in the air fryer at 300°F (150°C) for 2-4 minutes, or until warmed through and crispy again.
By following these tips, you’ll consistently create professional-quality cheesy garlic toast in your air fryer that will impress everyone!
What Should I Serve with Air Fryer Garlic Toast?
The beauty of this air fryer cheesy toast lies in its versatility. It’s not just a standalone snack but also a fantastic companion to a wide array of main courses. Here are some of our favorite options to pair with your delicious garlic toast, making any meal more memorable:
- Hearty Soups: There’s nothing quite like dipping a crispy piece of cheesy garlic toast into a warm bowl of soup. It’s the ultimate comfort food pairing.
- Easy Roasted Tomato Soup: The richness of the toast perfectly complements the bright, acidic flavors of a well-made tomato soup.
- Creamy Mushroom Soup: Adds a savory depth to a milder soup.
- Classic Minestrone or Lentil Soup: A satisfying addition to any chunky, vegetable-laden soup.
- Pasta Dishes: Garlic bread is a timeless partner for Italian-inspired meals, and our air fryer version is no exception.
- Easy Baked Million Dollar Spaghetti: The cheesy goodness of the toast is a match made in heaven with layers of rich spaghetti and meat sauce.
- Creamy Alfredo or Pesto Pasta: Offers a delightful textural contrast to creamy sauces.
- Classic Lasagna or Manicotti: A perfect side to soak up all the delicious excess sauce.
- Fresh Salads: For a lighter meal, use garlic toast to add substance and flavor to a vibrant salad.
- Tomato and Burrata Salad with Za’atar: The fresh, tangy flavors of the salad are beautifully balanced by the savory, crispy toast.
- Caesar Salad or Greek Salad: Provides a more substantial element, turning a side salad into a full meal.
- Other Comfort Foods:
- Warm Italian Pasta Salad: A fantastic companion, offering a different texture and temperature contrast.
- Chili or Stews: Excellent for scooping up every last drop of a hearty stew.
- Grilled Cheese or Sandwiches: Serve as an elevated side instead of chips for an extra indulgent lunch.
No matter what you choose, this air fryer garlic toast is sure to be a crowd-pleaser and a perfect enhancement to your meal!

Common Questions About Air Fryer Cheesy Garlic Toast
Here are some frequently asked questions to help you master your air fryer cheesy garlic toast and ensure a perfect outcome every time:
Can I use different types of cheese for this recipe?
Absolutely! While mozzarella is our favorite choice for its classic melt and mild flavor, you are encouraged to experiment with a variety of cheeses to suit your preference. Cheddar offers a sharper, tangier taste, provolone provides a creamy, nutty flavor, and an Italian blend (like pre-shredded mixes of mozzarella, provolone, and parmesan) can add more complexity. For an extra punch of flavor, you could even sprinkle a small amount of freshly grated Parmesan or Pecorino Romano on top of the mozzarella. The key is to choose cheeses that melt well and complement the garlic butter.
What kind of bread works best for this recipe?
Thicker slices of bread are generally ideal for air fryer garlic toast. Bread types like sourdough, Texas toast, ciabatta, or a good quality artisanal white bread (sliced thick) hold up exceptionally well to the generous toppings and achieve an amazingly crispy texture in the air fryer without becoming soggy or burnt. Avoid very thin or soft breads, as they can crisp up too quickly or absorb too much butter, leading to an undesirable texture. A French baguette sliced lengthwise also works beautifully.
How can I prevent the cheese from flying around in the air fryer?
The powerful fan in air fryers can sometimes cause lighter ingredients, like shredded cheese, to fly around. To keep your cheese firmly in place, gently press the shredded mozzarella into the buttered bread before placing it in the air fryer basket. This helps it adhere to the butter, ensuring it melts evenly and stays on the toast. Additionally, ensure you don’t overcrowd the air fryer basket, as this can create more turbulent airflow.
Is it possible to make this recipe vegan?
Yes, absolutely! Making a vegan version of this delicious garlic toast is quite simple. Substitute the unsalted butter with your favorite plant-based butter alternative, ensuring it’s a brand known for its good flavor and melting properties. For the cheese, use a high-quality dairy-free shredded mozzarella or an Italian blend. Many excellent vegan cheese options are available that melt beautifully and provide a similar gooey texture. The fresh parsley, garlic, and seasonings are naturally vegan, so no substitutions are needed there.
Can I prepare the garlic butter ahead of time?
Yes, you can! Preparing the garlic butter in advance is a fantastic time-saving tip. Simply mix all the butter, garlic, parsley, and seasonings together as directed. Once combined, transfer the compound butter to an airtight container or roll it into a log using parchment paper or plastic wrap, and store it in the refrigerator for up to a week. When you’re ready to make your toast, just let the butter soften slightly at room temperature for about 15-20 minutes before spreading it on your bread.
How do I store leftovers and reheat them?
While air fryer cheesy garlic toast is best enjoyed immediately, leftovers can be stored. Allow any cooled toast to reach room temperature, then place it in an airtight container or a Ziploc bag. Store in the refrigerator for up to 2-3 days. To reheat, place the toast back in your preheated air fryer at 300°F (150°C) for 3-5 minutes, or until it’s warmed through and the edges are crispy again. Avoid the microwave, as it will make the toast soggy.
Can I use pre-made garlic bread or frozen garlic toast?
Yes, you can definitely use pre-made or frozen garlic bread in your air fryer! This is a super quick and convenient option. For pre-made, un-toasted garlic bread (like a store-bought loaf with garlic spread), simply follow the air fryer instructions for fresh bread, adjusting time as needed. For frozen garlic toast, usually found in the freezer aisle, preheat your air fryer to around 350-375°F (175-190°C) and air fry for 6-10 minutes, or according to package directions, flipping halfway if necessary, until golden and crispy. Adding a little extra cheese on top of frozen garlic bread is always a good idea!
More Easy Air Fryer Recipes to Try
- Air Fryer Mozzarella Cheese Sticks
- Garlic Parmesan Potato Wedges (Air Fryer)
- Crispy Air Fryer Chicken Wings
- Air Fryer Sesame Crusted Feta
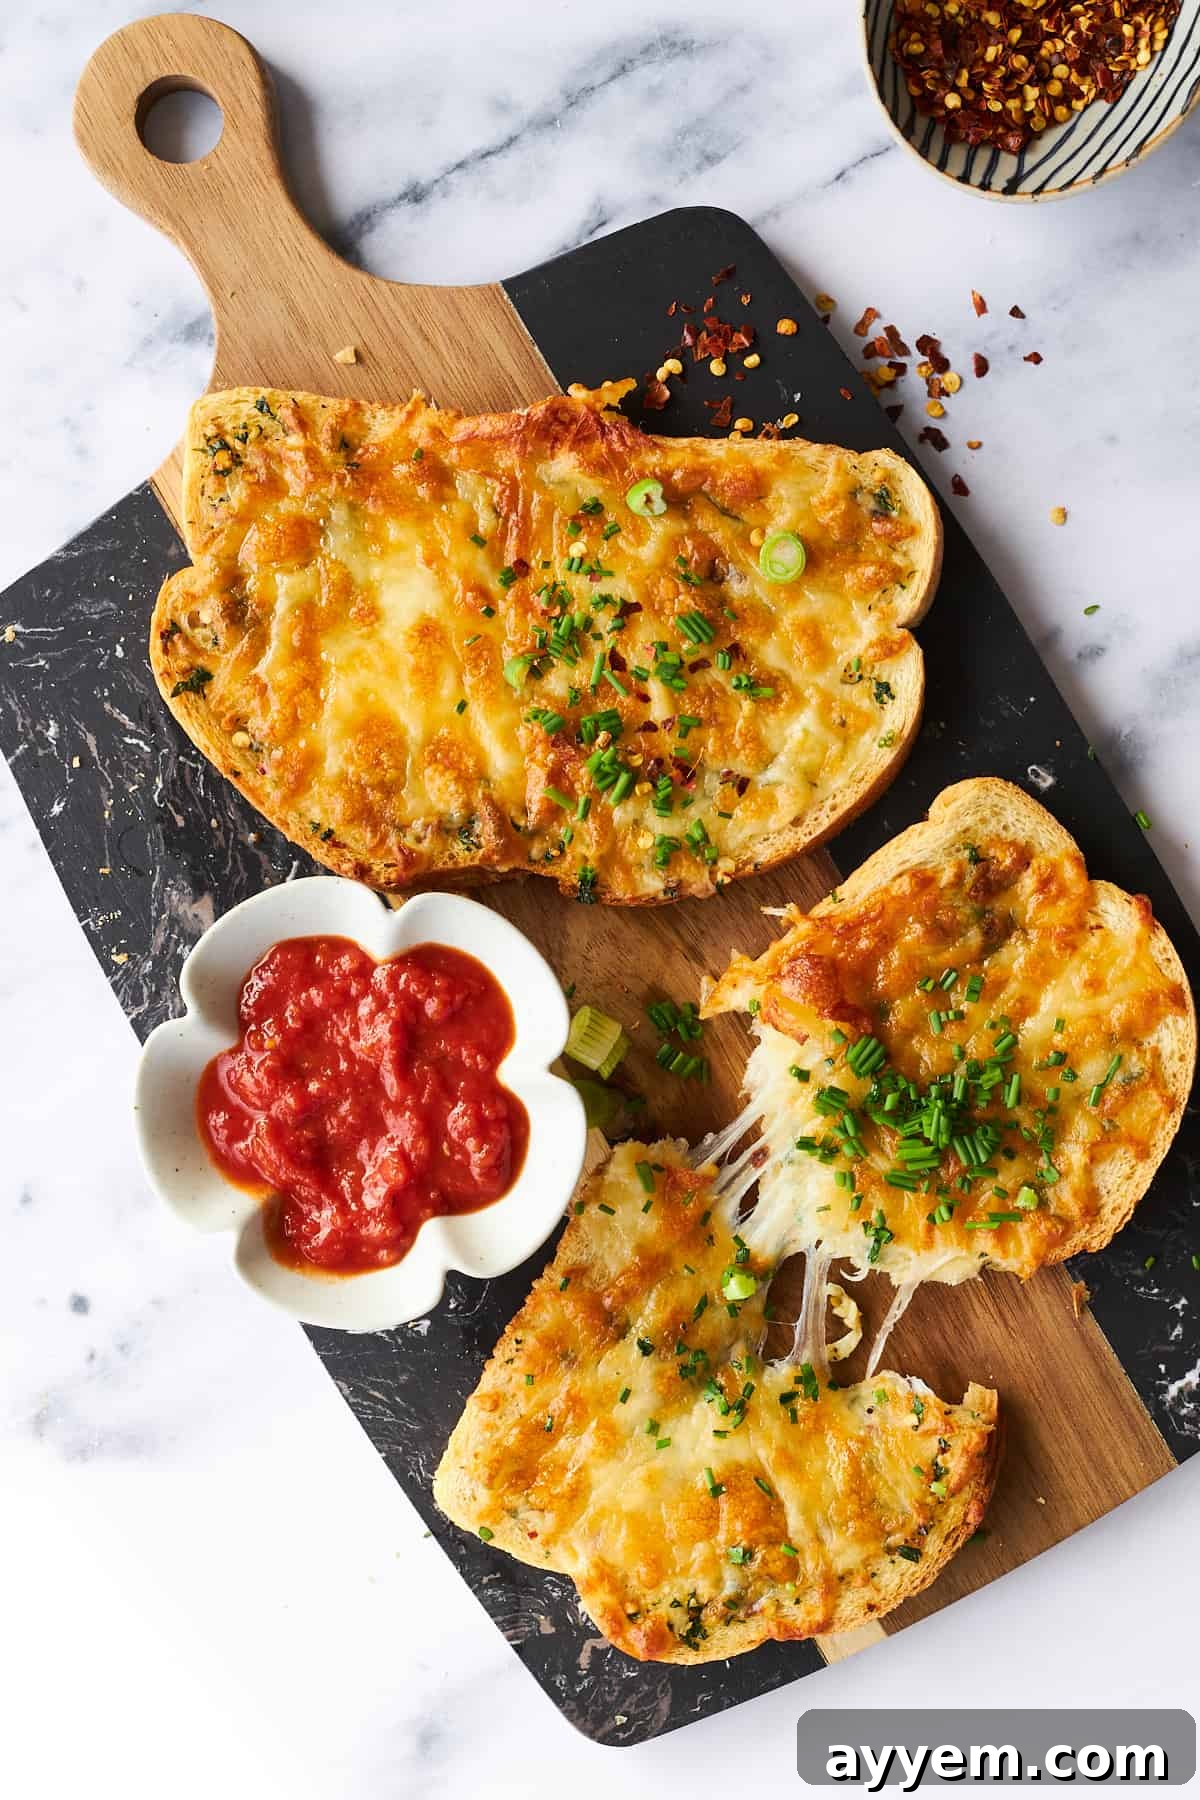
Air Fryer Cheesy Garlic Toast
Ingredients
- 4 Tablespoons room temperature unsalted butter
- 2 Tablespoons chopped parsley
- 2 cloves grated garlic
- Salt to taste
- Black pepper to taste
- Crushed red pepper to taste
- 2 sourdough sliced bread or your favorite bread
- 3/4 cup shredded mozzarella cheese
Instructions
- In a bowl add butter, parsley, garlic, salt, pepper, crushed red pepper and mix together until combined.
- Spread compound butter on toast.
- Top with shredded mozzarella cheese.
- Air fry at 350 degrees F. for 6 minutes, until cheese is golden brown and melted.
Equipment
Nutrition
Nutrition information is automatically calculated, so should only be used as an approximation.