
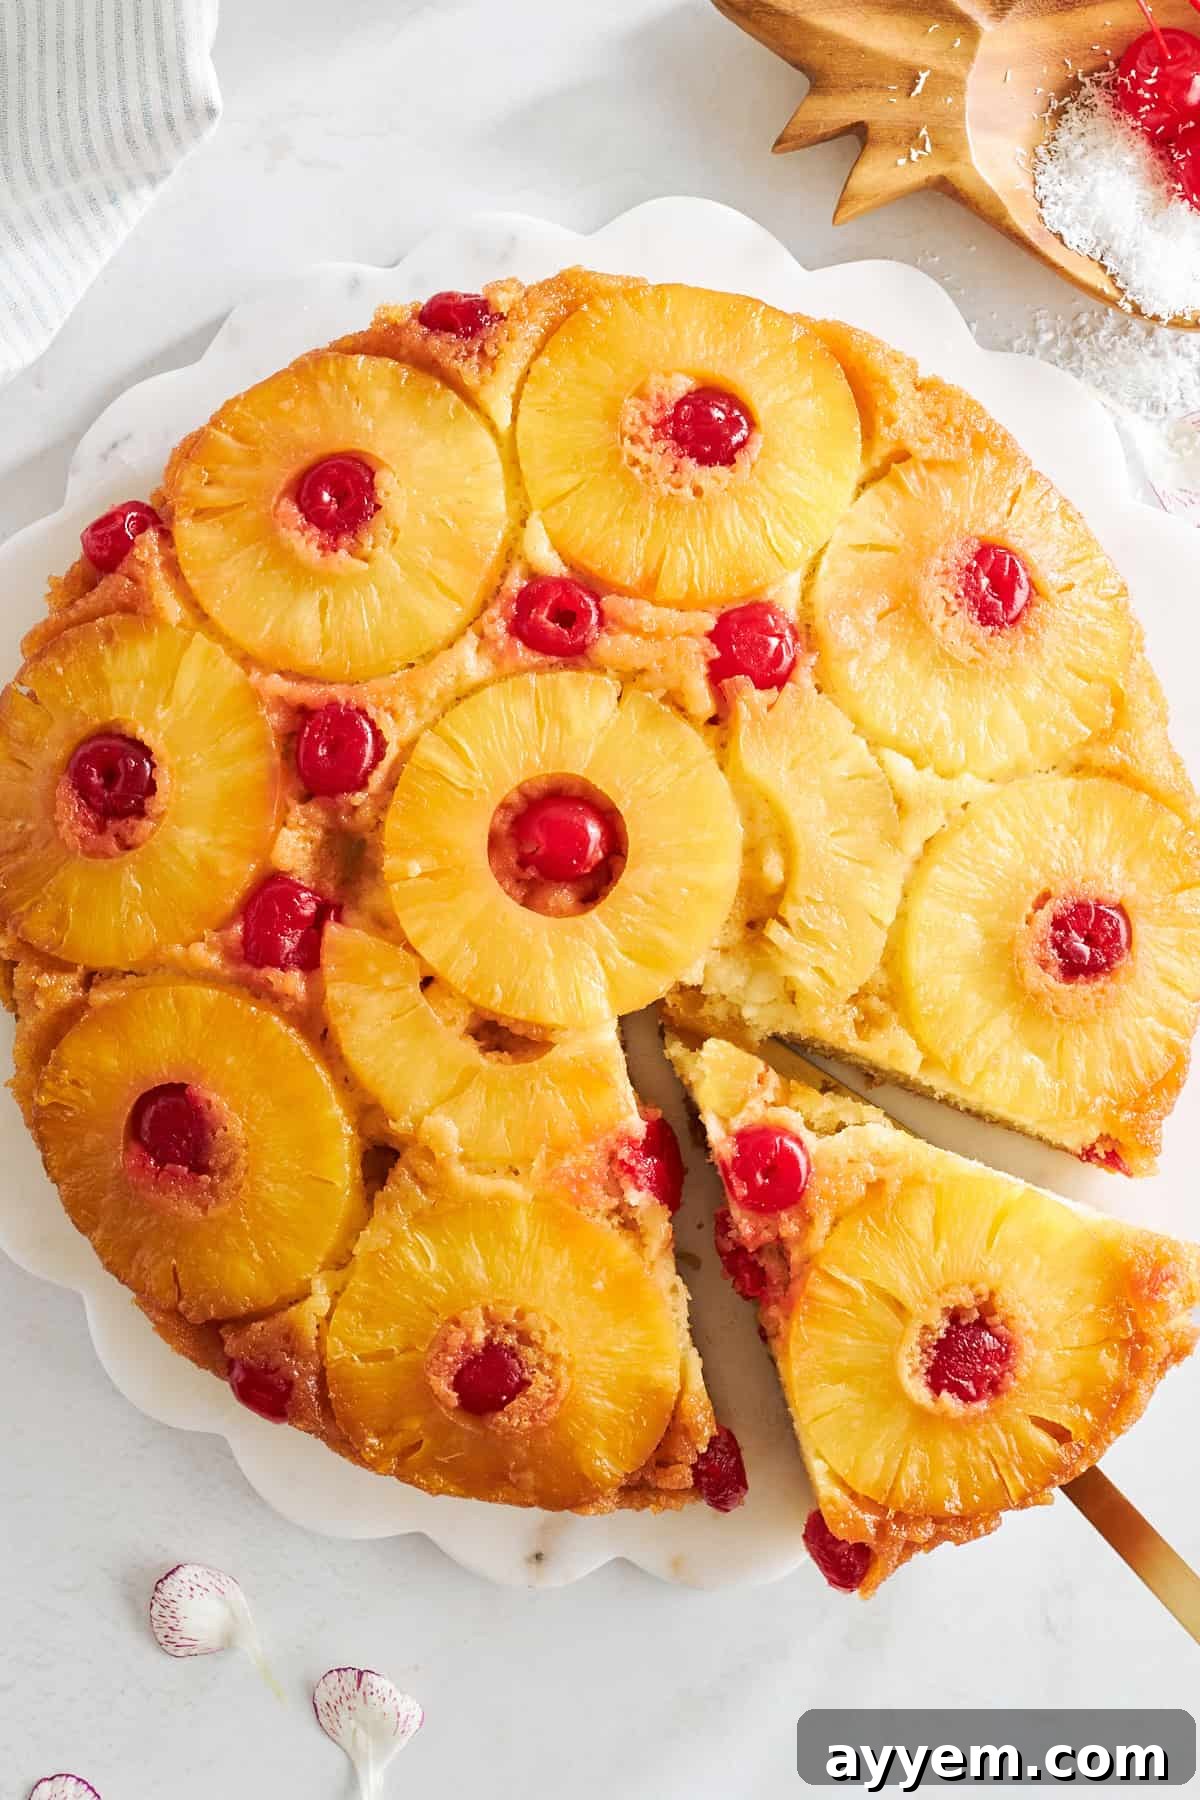
Welcome to a culinary adventure that promises to delight your senses and transport you to a world of tropical flavors! This comprehensive guide will walk you through creating the most exquisite Pineapple Upside Down Cake you’ve ever tasted. Forget everything you thought you knew about baking a dessert that’s both stunning and supremely satisfying. Our recipe ensures a sweet, moist, and wonderfully fruity cake, crowned with a vibrant, caramelized pineapple and cherry topping that will undeniably become the star of any gathering or a cherished treat for your family.
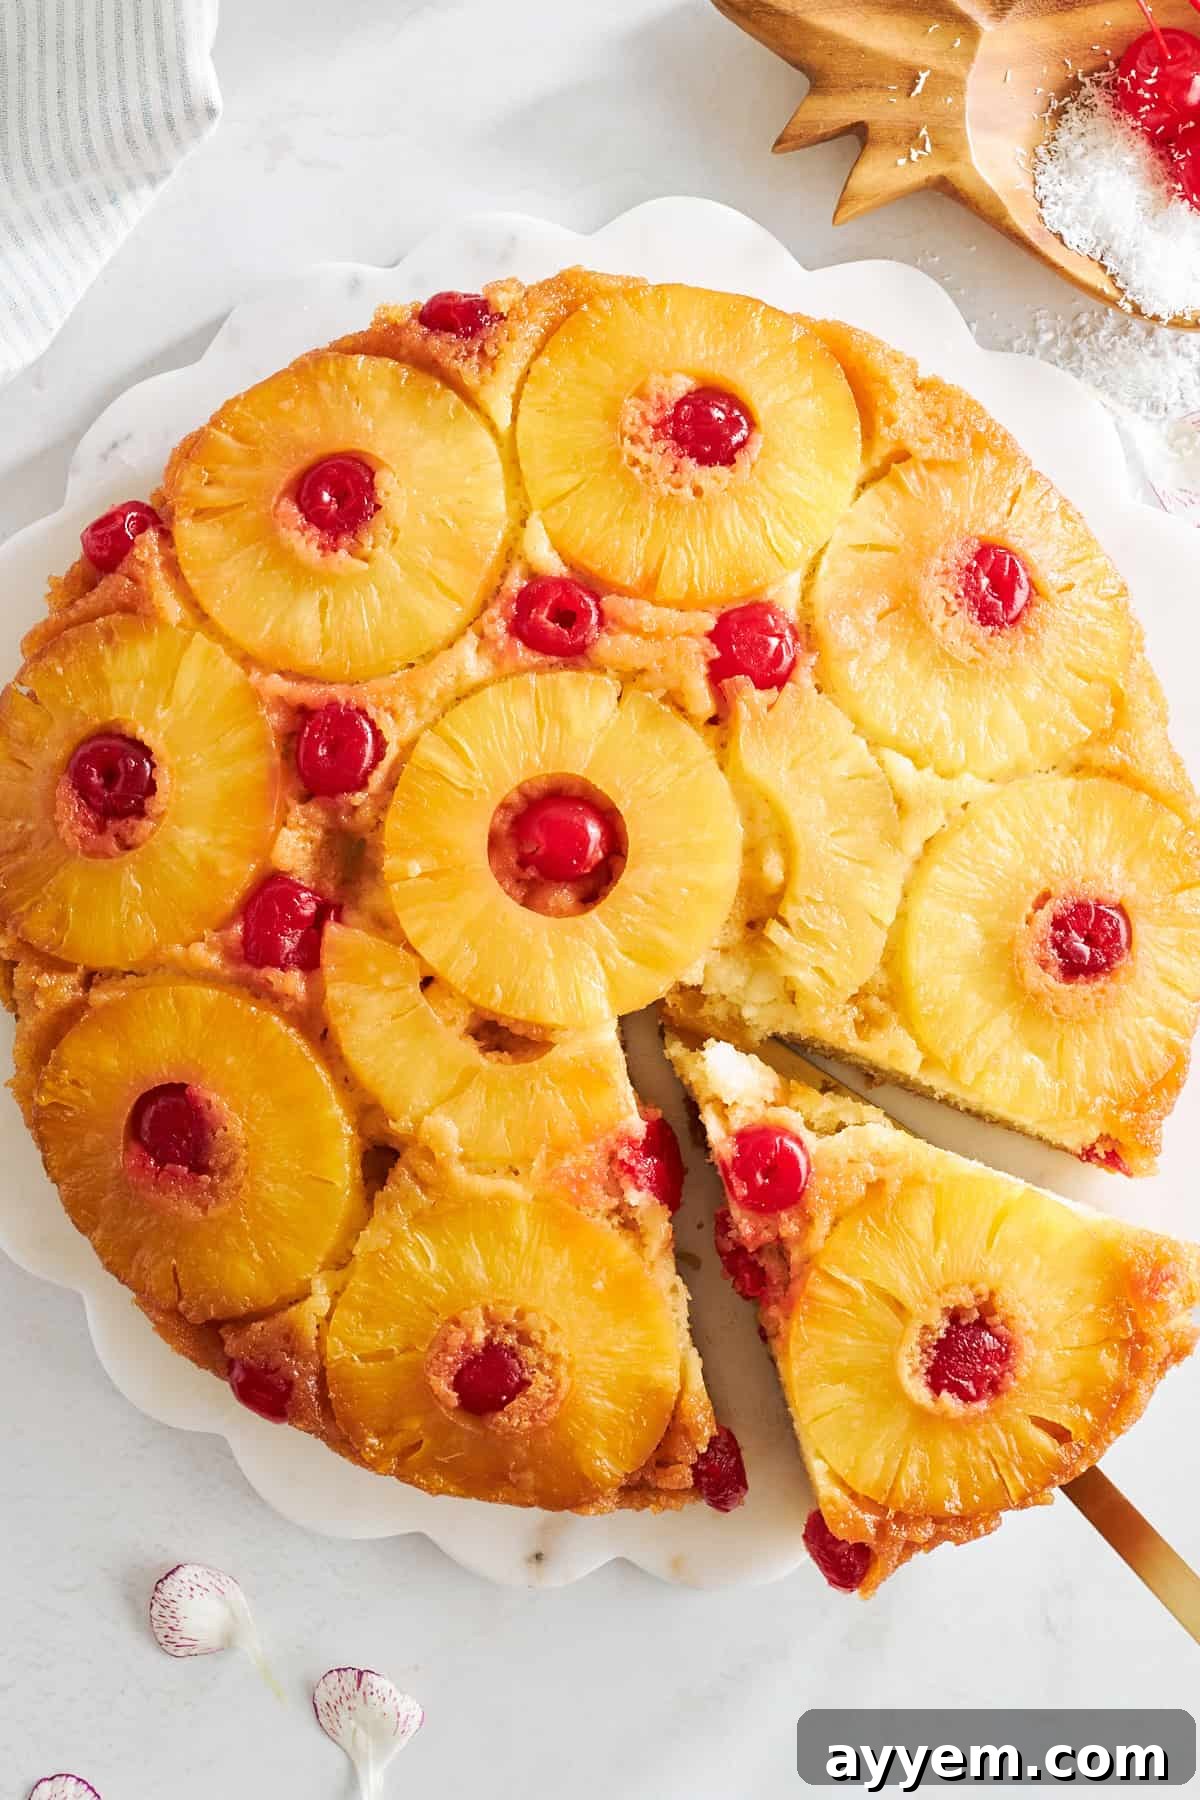
What Exactly is Pineapple Upside Down Cake?
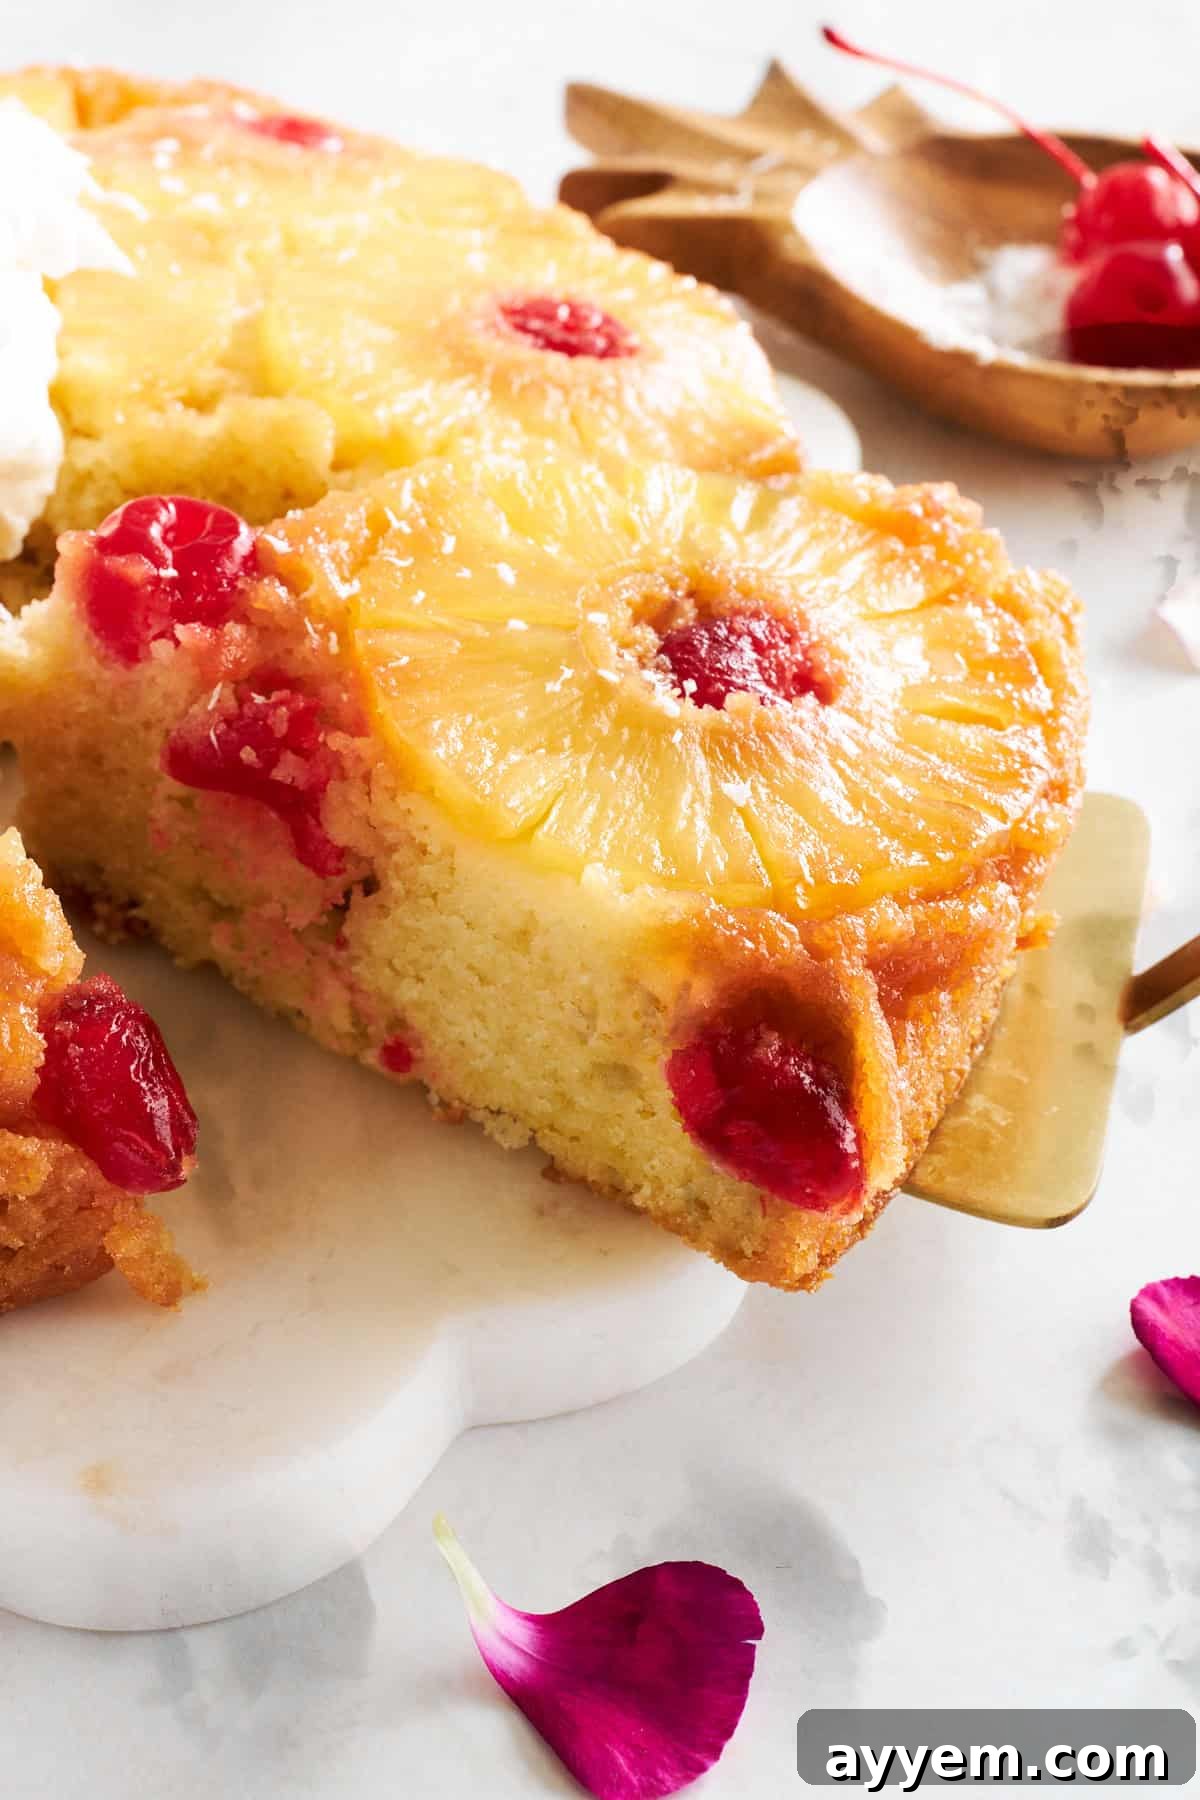
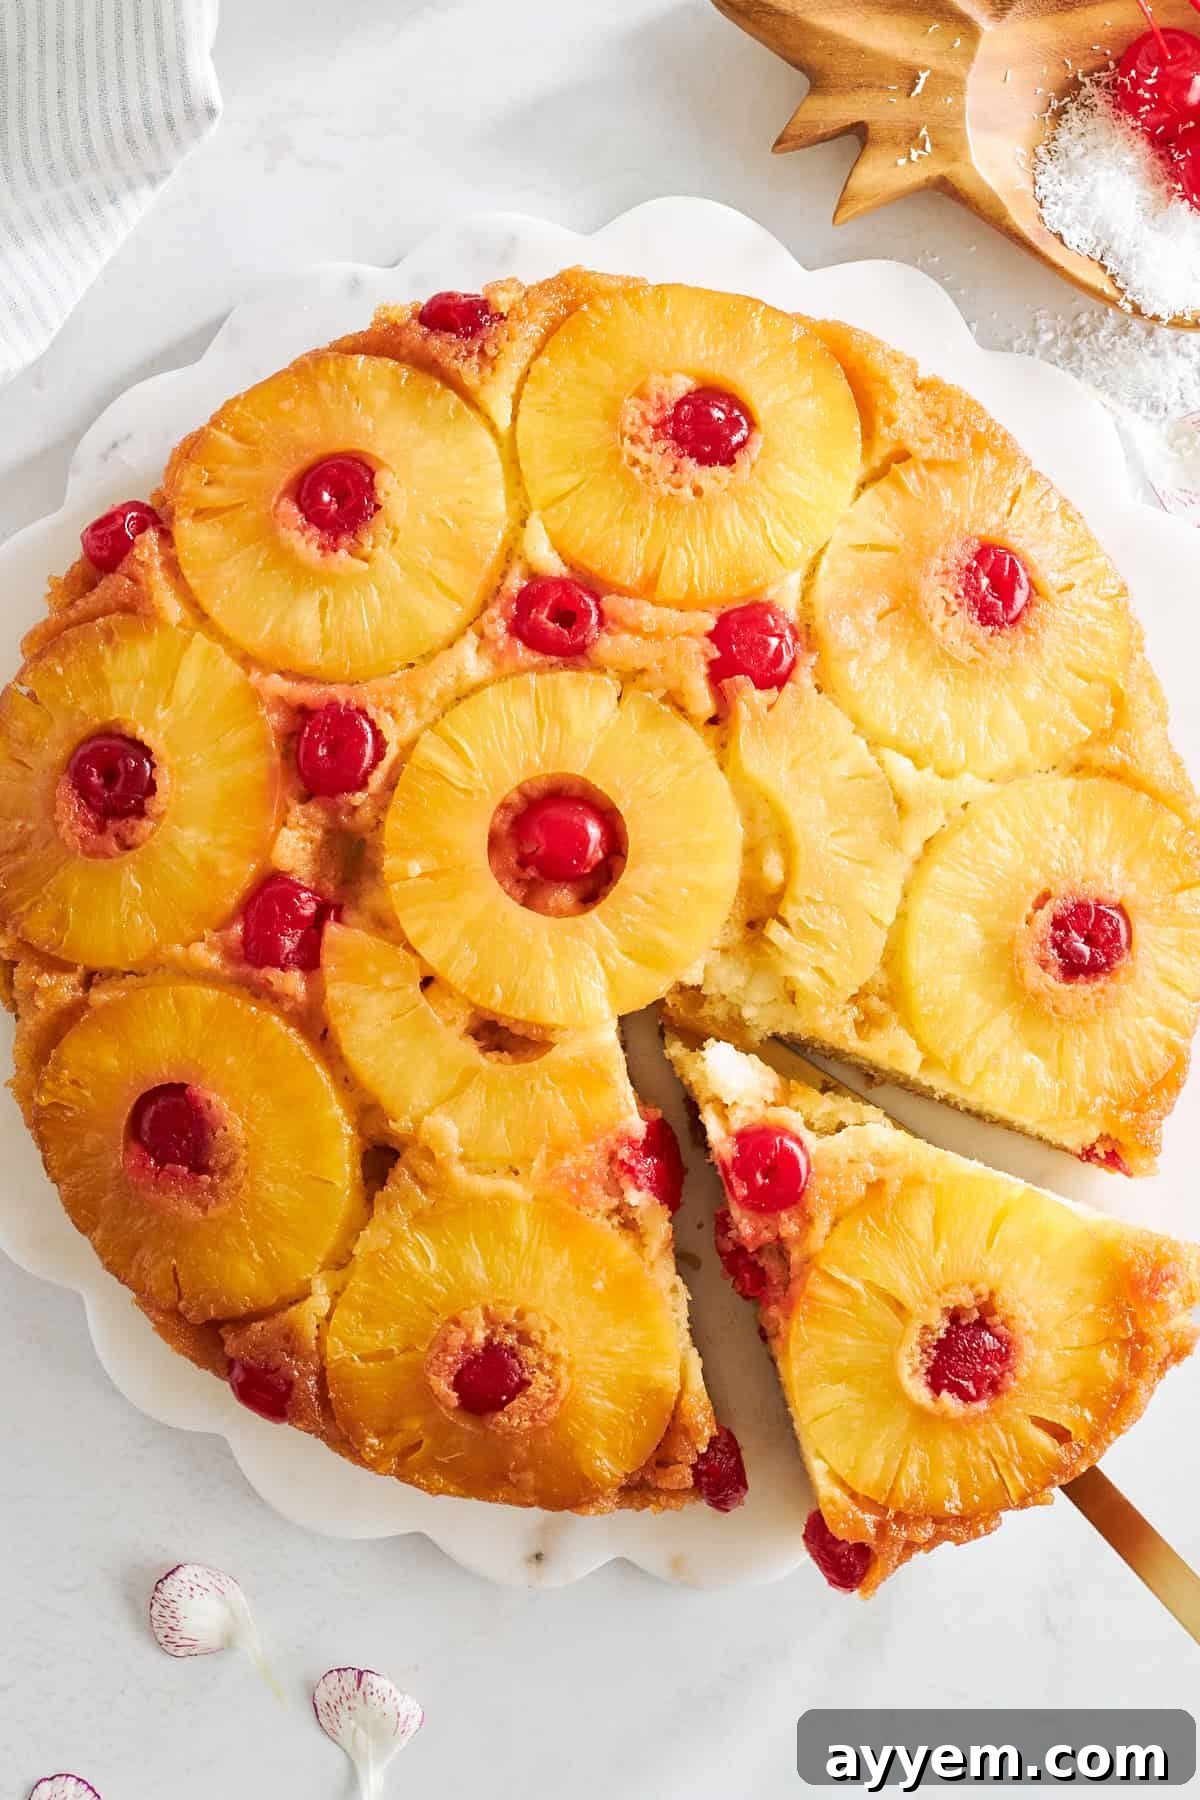
The Pineapple Upside Down Cake is a classic American dessert revered for its distinctive presentation and irresistible flavor profile. What sets this cake apart is its unique baking method: the fruit topping, typically slices of pineapple and bright maraschino cherries, is artfully arranged at the bottom of the baking pan before the cake batter is poured over it. During baking, the butter and brown sugar beneath the fruit caramelize, creating a luscious, glossy glaze. The magic truly unfolds when the cake is inverted onto a serving platter after baking, revealing a spectacular, jewel-toned fruit mosaic on top. This “upside down” technique not only creates a visually stunning dessert but also infuses the cake with incredible moisture and a burst of juicy sweetness in every single bite.
The origins of upside-down cakes date back centuries, when home bakers would arrange fruits like apples, berries, or even meat at the bottom of a skillet and cover them with batter, then flip them once baked. However, the pineapple version gained widespread popularity in the early 20th century, especially with the increased availability of canned pineapple. This made it an accessible and relatively easy dessert to prepare, quickly becoming a staple in American homes and a beloved symbol of retro charm. Its vibrant color, delightful combination of tangy pineapples and sweet cherries, and the tender, rich cake base make it a timeless classic that continues to captivate dessert lovers worldwide.
Essential Ingredients for Your Perfect Pineapple Upside Down Cake
Crafting this iconic dessert requires a careful selection of ingredients, each playing a crucial role in achieving the perfect balance of flavor, texture, and visual appeal. Here’s a detailed look at what you’ll need:
For the Irresistible Topping:
- Canned Pineapple Slices in Juice: Choosing pineapple slices packed in their own juice rather than heavy syrup is essential. This helps to control the overall sweetness of the cake, allowing the natural tanginess of the pineapple to shine through without being overly cloying. Drain the pineapple well, but be sure to reserve some of the juice for the cake batter!
- Maraschino Cherries: These vibrant red cherries add a delightful pop of color and a subtle, sweet counterpoint to the pineapple. While primarily for aesthetic appeal, their slight almond-like flavor marries beautifully with the fruit. They are optional but highly recommended for the classic look.
- Unsalted Butter (Melted): Melted butter forms the rich, foundational layer for our caramelized topping. It blends with the brown sugar to create that signature sticky, golden glaze that coats the fruit when the cake is inverted. Using unsalted butter allows you to control the total sodium content of the recipe.
- Brown Sugar: This isn’t just for sweetness; brown sugar contains molasses, which contributes a deeper, more complex, and caramel-like flavor to the topping. As it melts and cooks with the butter and pineapple juice, it transforms into a thick, glossy caramel that beautifully glazes the fruit.
For the Moist and Flavorful Cake:
- All-Purpose Flour: The backbone of our cake, all-purpose flour provides the necessary structure and contributes to its signature tender crumb. For best results, measure flour by weight or spoon it lightly into measuring cups and level off, avoiding packing it down.
- Baking Powder: A key leavening agent, baking powder is responsible for giving the cake its rise and airy, fluffy texture. Ensure your baking powder is fresh for optimal lift.
- Baking Soda: Working in conjunction with the baking powder and the acidic ingredients (like sour cream and pineapple juice), baking soda further aids in the cake’s rise and helps create a wonderfully soft and tender texture.
- Salt: Just a pinch of salt is vital. It doesn’t make the cake salty but rather enhances all the other flavors, balancing the sweetness and adding depth.
- Full-Fat Canned Coconut Milk: This ingredient is a secret weapon for extraordinary moisture and introduces a delightful, subtle coconut flavor that harmonizes perfectly with the pineapple. It’s crucial to use full-fat canned coconut milk, not the refrigerated beverage, for the richness and creamy texture it provides.
- Full-Fat Sour Cream: Another powerhouse for moisture and tenderness, sour cream also adds a slight tang that beautifully complements the sweet and fruity elements of the cake, ensuring it’s never bland. Ensure it’s at room temperature for smooth incorporation.
- Pineapple Juice (Reserved from Can): Don’t discard that precious juice! Reserving a portion from the canned pineapple ensures an extra layer of authentic, sweet, and tangy pineapple flavor is woven directly into the cake batter, tying all the components together.
- Vanilla Extract: A universal flavor enhancer, vanilla extract rounds out all the flavors in the cake, adding warmth and depth. Use a good quality pure vanilla extract for the best results.
- Unsalted Butter (Room Temperature): For the cake batter, room temperature unsalted butter is critical. It creams effortlessly with sugar, incorporating air that leads to a light and tender cake. Cold butter won’t cream properly, affecting the cake’s texture.
- Granulated White Sugar: This classic sweetener contributes to the cake’s structure and helps tenderize it, in addition to providing essential sweetness. When creamed with butter, it creates air pockets that contribute to the cake’s lightness.
- Large Eggs (Room Temperature): Eggs bind the ingredients, add richness, and contribute to the cake’s structure. Like butter, eggs should be at room temperature for better emulsification with the other ingredients, leading to a smoother batter.
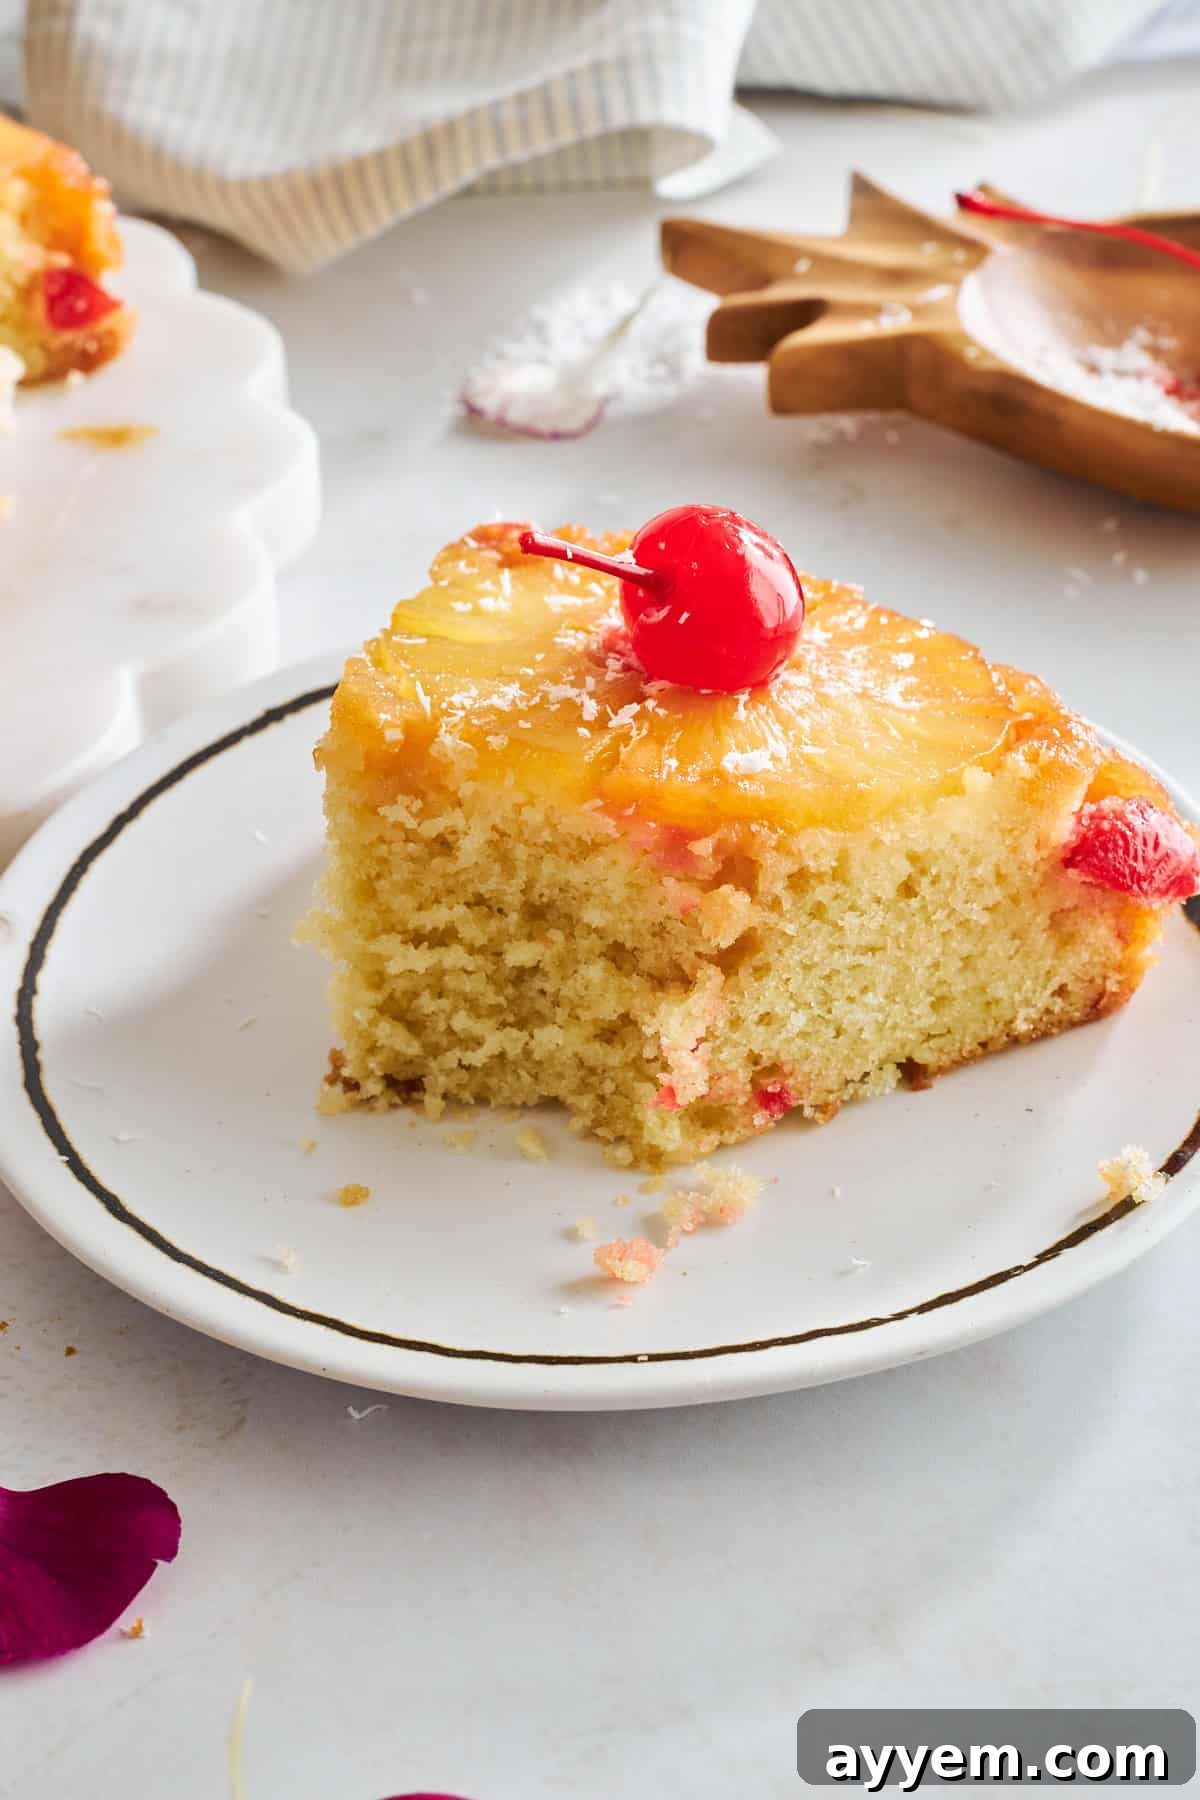
- Coconut Flakes (Optional): For those who truly love coconut, a sprinkle of coconut flakes in the batter adds wonderful texture and intensifies the tropical flavor profile. It’s a delightful addition but entirely up to your preference.
How to Craft This Amazing Pineapple Upside Down Cake
Follow these detailed steps to create a show-stopping dessert that’s as delightful to make as it is to eat:
- Prepare Your Pan and Preheat Oven: Begin by preheating your oven to 350°F (175°C). This ensures the oven is at the correct temperature when the cake goes in, promoting even baking. Take your 10-inch cake pan and generously brush the melted unsalted butter over the entire bottom and up the sides. This butter layer is crucial for both flavor and for ensuring the cake releases cleanly after baking.
- Form the Caramelized Base: Evenly sprinkle the brown sugar over the melted butter at the bottom of the pan. You can use the back of a spoon or a small spatula to ensure it forms a smooth, consistent layer. This brown sugar will melt and combine with the butter and fruit juices during baking to form the irresistible caramel topping.
- Artfully Arrange the Pineapple: Carefully place one whole pineapple ring in the very center of your brown sugar-coated pan. Then, arrange the remaining pineapple slices around it. For a classic look, you can halve the rings and place them in a decorative pattern, as often seen in traditional presentations. Ensure all pineapple pieces are snugly fitted and touching the bottom of the pan.
- Add the Cherries for Color: Place a maraschino cherry into the center of each pineapple ring. If you have extra spaces, you can scatter more cherries around the pineapple. Press the cherries and pineapple slices down firmly to ensure they are fully embedded in the butter and sugar mixture, which will help them stay in place and get beautifully caramelized.
- Combine Dry Ingredients: In a large mixing bowl, whisk together the all-purpose flour, baking powder, baking soda, and salt until they are thoroughly combined. Whisking ensures that the leavening agents are evenly distributed throughout the flour, leading to a consistent rise in your cake.
- Combine Wet Ingredients: In a separate medium bowl, combine the full-fat canned coconut milk, full-fat sour cream, reserved pineapple juice, and vanilla extract. Stir these wet ingredients together until they are smooth and well blended.
- Cream Butter and Sugar: In a third, even larger mixing bowl (preferably using a stand mixer with a paddle attachment or a handheld electric mixer), beat the room temperature unsalted butter and granulated white sugar together. Beat on medium-high speed for about 2-3 minutes, or until the mixture becomes light, fluffy, and pale in color. This creaming process incorporates air, which is vital for a tender cake.
- Incorporate Eggs Gradually: With the mixer still running on medium speed, add the large eggs one at a time. Beat well for about 20-30 seconds after each addition, scraping down the sides of the bowl as needed, to ensure each egg is fully incorporated before adding the next. This prevents the batter from curdling.
- Alternate Dry and Wet Ingredients: With the mixer on low speed, or by hand using a rubber spatula, begin adding the dry and wet mixtures to the butter-sugar-egg mixture. Start by adding about one-third of the dry ingredients and mix just until barely combined. Then, add half of the wet ingredients and mix. Repeat with another third of the dry ingredients, followed by the remaining wet ingredients, and finally the last of the dry ingredients. Mix just until no streaks of flour remain. Be careful not to overmix, as this can lead to a tough cake. If using, gently fold in the coconut flakes with your rubber spatula at this stage.
- Transfer the Batter: Gently pour the prepared cake batter over the pineapple and cherry layer in your baking pan. Use your rubber spatula to carefully spread the batter evenly, making sure it covers all the fruit and reaches the edges of the pan. Smooth the top surface of the batter.
- Bake to Perfection: Place the cake pan into your preheated oven. Bake for approximately 40-45 minutes. The cake is done when a wooden toothpick or cake tester inserted into the center comes out clean or with only a few moist crumbs attached.
- Cool and Perform the Grand Flip: Once baked, remove the pan from the oven and let the cake cool in the pan on a wire rack for exactly 20 minutes. This cooling period is crucial; it allows the caramel to set slightly but remain fluid enough to release. After 20 minutes, run a thin butter knife or offset spatula around the inner edge of the pan to ensure the cake is completely loosened from the sides. Place your chosen serving plate or platter directly over the cake pan. Holding both the pan and the plate firmly together, carefully and confidently invert them. Gently tap the bottom of the pan a few times, then slowly lift the pan away, revealing your beautifully caramelized pineapple upside down cake!
- Serve and Enjoy: Allow the cake to cool completely on the serving dish to room temperature before slicing and serving. This resting period allows the flavors to meld and the cake to firm up, making it easier to cut. Serve plain, or with a scoop of vanilla ice cream or a dollop of whipped cream for an extra special treat.
Exciting Variations to Explore
While the classic Pineapple Upside Down Cake is perfect as is, it’s also a fantastic canvas for creative twists. Here are some ideas to customize your cake:
- Embrace Fresh Pineapple: For an even more intense and vibrant pineapple flavor, along with a slightly firmer texture, consider using fresh pineapple rings. You’ll need to peel, core, and slice a fresh pineapple yourself, but the effort is well worth it for a truly gourmet experience. Make sure to cut slices of even thickness for uniform baking.
- A Splash of Rum: Infuse your cake with a sophisticated depth of flavor by adding a tablespoon or two of dark rum to the cake batter. The rum complements the tropical notes of the pineapple beautifully and adds a subtle warmth. You could also brush a little rum over the warm cake after flipping for an extra kick.
- Warm Spices: Introduce a cozy twist by adding a teaspoon of ground cinnamon, nutmeg, or even a blend of allspice to your dry ingredients. These warm spices pair wonderfully with pineapple and will give your cake a comforting, aromatic dimension.
- Nutty Crunch: For an added layer of texture and flavor, sprinkle chopped pecans, walnuts, or even macadamia nuts over the brown sugar and butter layer before arranging the pineapple. As the cake bakes, the nuts will toast slightly and become delightfully crunchy, adding a wonderful contrast to the soft cake and fruit.
- Double Coconut Delight: If you’re a true coconut enthusiast, increase the amount of coconut flakes in the batter. You can also toast some additional coconut flakes and sprinkle them over the finished cake just before serving for an extra layer of tropical goodness and crunch.
- Other Fruit Combinations: Don’t limit yourself to pineapple! This cake recipe can be adapted for other fruits. Try thinly sliced apples (like Granny Smith or Honeycrisp) with a sprinkle of cinnamon, or use peaches, nectarines, or even a mix of berries for different seasonal variations.
- Citrus Zest: Grate some orange or lime zest into your cake batter for a bright, aromatic lift that enhances the tropical flavors. About 1 tablespoon of zest would be perfect.
- Gluten-Free Option: For those with dietary restrictions, this recipe can often be made gluten-free by substituting the all-purpose flour with a good quality 1:1 gluten-free baking flour blend. Ensure the blend contains xanthan gum for structure.
- Dairy-Free Option: While the current recipe uses coconut milk for some moisture, to make it fully dairy-free, substitute the unsalted butter with a plant-based butter alternative and the sour cream with a dairy-free sour cream or coconut cream.
Storing Your Delicious Leftovers
You can absolutely store any leftover Pineapple Upside Down Cake, allowing you to enjoy its delightful flavors for days. However, do keep in mind that the cake might become slightly extra-moist due to the juicy fruit topping over time.
To preserve its freshness, store any leftovers in an airtight container. This prevents the cake from drying out and shields it from absorbing any refrigerator odors. Place the airtight container in the refrigerator, where it will stay delicious for up to three days. For the best flavor and texture, allow individual slices to come to room temperature for about 15-20 minutes before serving.
If you wish to extend the life of your cake even further, you can freeze it. Wrap individual slices or the entire cooled cake tightly in plastic wrap, then wrap again in aluminum foil. This double layer of protection helps prevent freezer burn. Store the wrapped cake in the freezer for up to a month. When you’re ready to enjoy it, simply thaw the cake overnight in the refrigerator. Once thawed, you can warm slices gently in the microwave or a low oven for a few minutes if you prefer a warm cake, or serve at room temperature.
Common Questions About Easy Pineapple Upside Down Cake
Is pineapple upside down cake good for parties?
Absolutely! Pineapple Upside Down Cake is an outstanding choice for parties and gatherings. Its vibrant, decorative fruit topping makes it inherently impressive and a fantastic centerpiece on any dessert table. Beyond its visual appeal, its sweet and tangy flavor profile is universally appealing, pleasing a wide range of palates. Furthermore, it’s remarkably easy to slice and serve, making it a convenient option for hosts. Guests always appreciate the cheerful golden pineapple and juicy cherries, making it a memorable and standout dessert that sparks conversation.
Does pineapple upside down cake taste sweet?
Yes, Pineapple Upside Down Cake definitely tastes sweet, but in a beautifully balanced and harmonious way. The natural sweetness of the pineapple and the rich caramel topping provide a lovely sweetness, which is perfectly complemented by the tangy notes of the pineapple and sour cream in the cake batter. This combination prevents the cake from being overly sugary, instead offering a rich yet refreshing finish. The depth of flavor from the brown sugar and butter also adds complexity to the sweetness.
Is pineapple upside down cake kid-friendly?
Definitely! Pineapple Upside Down Cake is a fantastic kid-friendly dessert. Children are often drawn to its bright, inviting colors and the fun, juicy pineapple slices. The soft, buttery cake provides a comforting texture that kids love, and its natural sweetness means it doesn’t rely on excessive frosting or decorations. It’s a delightful treat that’s both visually appealing and satisfying for younger palates, often becoming a nostalgic favorite.
What goes well with pineapple upside down cake?
To truly elevate the Pineapple Upside Down Cake experience, a scoop of creamy vanilla ice cream is a classic and highly recommended pairing. The melting ice cream creates a delightful contrast with the warm cake and adds another layer of indulgence. Alternatively, a dollop of freshly whipped cream can lighten the richness and provide a delicate, airy counterpoint. For an extra-special dessert, consider adding fresh berries or a drizzle of a simple caramel or coconut sauce. A light dusting of powdered sugar can also add a touch of elegance.
What kind of pan should I use for Pineapple Upside Down Cake?
The most common and recommended pan for this cake is a standard 9 or 10-inch round cake pan. A cast iron skillet of similar size can also be used, which lends itself well to even caramelization and a rustic presentation. If using a springform pan, ensure it is completely leak-proof, as the melted butter and sugar can seep out. Regardless of the pan type, always grease it thoroughly and ensure it has sufficient depth for the batter to rise without overflowing.
Why is my pineapple upside down cake soggy or dry?
A soggy cake can result from not properly draining the pineapple slices, leading to too much liquid in the topping. It can also happen if the cake is underbaked, meaning the excess moisture hasn’t evaporated. Conversely, a dry cake is typically a sign of overbaking. Keep a close eye on the baking time and rely on the toothpick test to ensure it’s cooked through but still moist. The right balance of wet and dry ingredients is also key, so precise measuring is essential.
Can I make Pineapple Upside Down Cake ahead of time?
Yes, this cake is an excellent make-ahead dessert! You can bake it a day in advance and store it, covered, at room temperature or in the refrigerator. The flavors often deepen overnight, making it even more delicious. If refrigerated, allow it to come to room temperature for about 30 minutes before serving for the best texture and flavor. It’s perfect for stress-free entertaining.
Explore More Fruity Dessert Recipes
If you’ve fallen in love with the tropical charm of this Pineapple Upside Down Cake recipe, we invite you to discover an array of other delightful fruity desserts that are sure to tantalize your taste buds and bring a smile to your face. From creamy tarts to playful individual servings, there’s a fruity treat for every occasion:
- Cheesecake Fruit Tart with Shortbread Crust
- Strawberry Shortcake Shooters
- Fruit Pizza Cookies
- Orange Cake
Easy Pineapple Upside Down Cake Recipe
This easy pineapple upside down cake recipe is sweet, soft, and buttery with a hint of coconut flavor you’ll love!
Author: Food Dolls
Servings: 6 servings
Prep Time: 15 mins
Cook Time: 45 mins
Cooling Time: 15 mins
Total Time: 1 hr 15 mins
Ingredients
Topping:
- 8 Tablespoons unsalted butter, melted
- 2/3 cup brown sugar
- 20 ounces canned pineapple slices in juice (not in syrup)
- 10 – 12 + maraschino cherries
Cake:
- 1 3/4 cups all-purpose flour
- 1 1/2 teaspoons baking powder
- 1/4 teaspoon baking soda
- 1/4 teaspoon salt
- ½ cup full-fat canned coconut milk (do not use refrigerated milk)
- 1/4 cup full-fat sour cream
- 1/3 cup pineapple juice (reserved from can)
- 2 teaspoons vanilla extract
- 10 Tablespoons unsalted butter (room temperature)
- 1 cup granulated white sugar
- 3 large eggs (at room temperature)
- 1/3 cup coconut flakes (optional)
Instructions
- Preheat Oven and Prepare Pan: Preheat your oven to 350°F (175°C). Pour the 8 tablespoons of melted butter into a 10-inch cake pan. Using a pastry brush, spread the butter evenly over the bottom and up the sides of the pan.
- Layer the Brown Sugar: Sprinkle the 2/3 cup brown sugar evenly over the butter at the base of the pan, ensuring it forms a consistent layer.
- Arrange Pineapple Slices: Place one pineapple ring in the center of the pan. Arrange the remaining 20 ounces of pineapple slices around it. You can halve them for a decorative pattern or use them whole, pressing them gently into the brown sugar.
- Add Cherries: Place 10-12+ maraschino cherries into the center of each pineapple ring. Press them and the pineapple slices down firmly to ensure they are in direct contact with the bottom of the pan, which aids in caramelization.
- Combine Dry Ingredients: In a large bowl, whisk together the 1 3/4 cups all-purpose flour, 1 1/2 teaspoons baking powder, 1/4 teaspoon baking soda, and 1/4 teaspoon salt until thoroughly combined.
- Combine Wet Ingredients: In a separate bowl, stir together the ½ cup full-fat canned coconut milk, 1/4 cup full-fat sour cream, 1/3 cup reserved pineapple juice, and 2 teaspoons vanilla extract.
- Cream Butter and Sugar: In a third, large mixing bowl, using a handheld mixer or stand mixer, beat the 10 tablespoons room temperature unsalted butter and 1 cup granulated white sugar on medium-high speed for 2 minutes, until the mixture is light and fluffy.
- Incorporate Eggs: Gradually add the 3 large eggs one at a time to the butter and sugar mixture, beating for about 20 seconds after each addition until fully incorporated.
- Combine Wet and Dry Mixtures: Using a rubber spatula, gently fold in a portion (about 1/3) of the dry ingredients into the butter mixture, mixing just until combined. Then, add half of the wet ingredients and mix. Repeat this process, adding the remaining dry and wet ingredients alternately, finishing with the dry. Mix just until no dry streaks remain. If desired, fold in the 1/3 cup coconut flakes.
- Pour Batter into Pan: Carefully spread the prepared cake batter evenly over the arranged pineapple and cherries in the pan, smoothing the surface with your spatula.
- Bake the Cake: Place the cake pan in the preheated oven and bake for 40-45 minutes, or until a wooden toothpick inserted into the center of the cake comes out clean.
- Cool and Flip: Remove the pan from the oven and allow the cake to cool in the pan on a wire rack for 20 minutes. This allows the caramel to set slightly. After 20 minutes, run a butter knife around the inner edge of the pan to loosen the cake from the sides. Place a serving plate or platter over the cake pan, then carefully and confidently invert the pan onto the dish. Gently tap the base of the pan and shake it slightly before slowly lifting the pan to release the cake.
- Final Cooling and Serving: Allow the cake to cool completely on the serving dish to room temperature before slicing and serving for the best texture and flavor.
Equipment
- 1 (10 inch) Cake Pan
- 3 Mixing Bowls
- 1 Handheld Mixer (or Stand Mixer)
- Pastry Brush
- Rubber Spatula
- Wire Rack
Nutrition
Serving: 1 serving | Calories: 856kcal | Carbohydrates: 108g | Protein: 8g | Fat: 46g | Saturated Fat: 30g | Polyunsaturated Fat: 2g | Monounsaturated Fat: 10g | Trans Fat: 1g | Cholesterol: 178mg | Sodium: 301mg | Potassium: 330mg | Fiber: 3g | Sugar: 76g | Vitamin A: 1280IU | Vitamin C: 11mg | Calcium: 143mg | Iron: 4mg
Nutrition information is automatically calculated and should only be used as an approximation.