
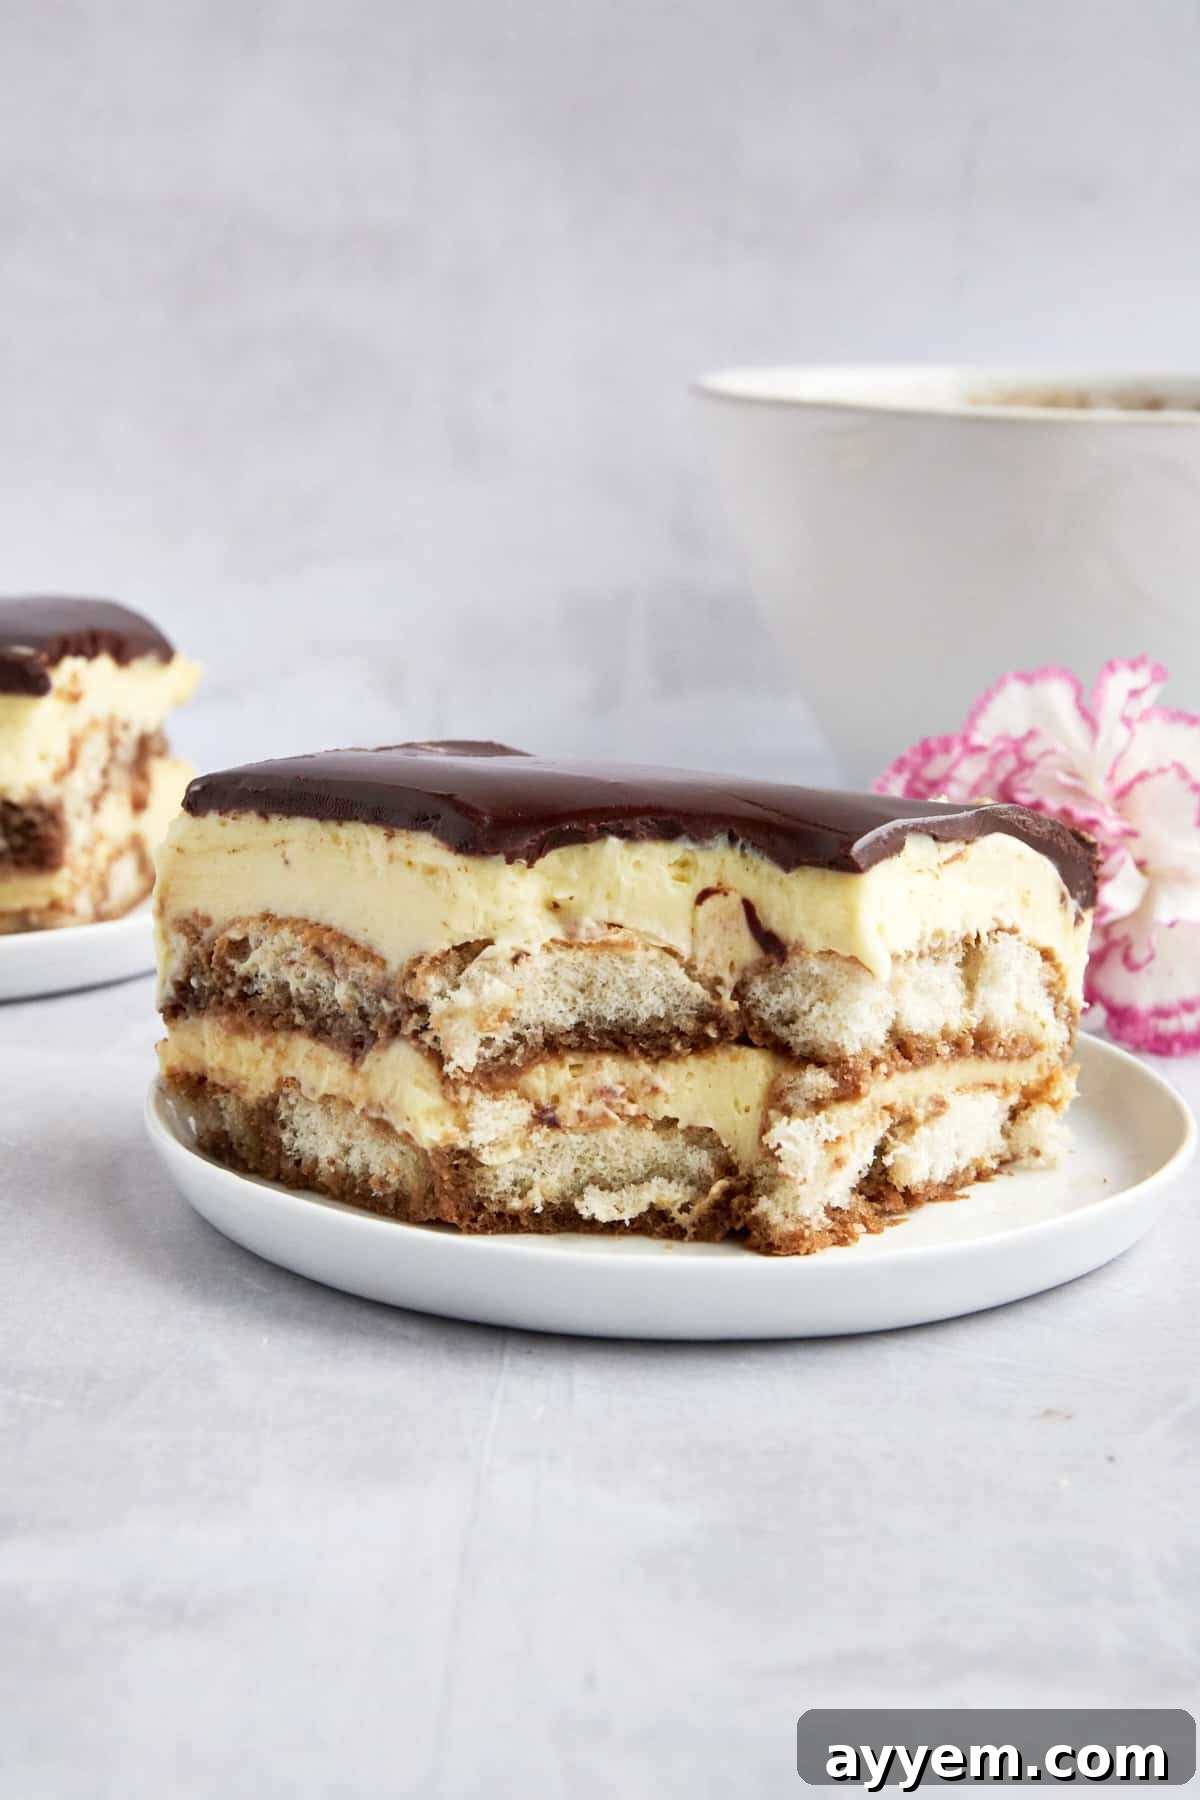
Get ready to indulge in the best of both worlds with our incredible Easy Tiramisu Eclair Cake recipe! This decadent, no-bake dessert seamlessly blends the sophisticated, coffee-infused flavors of classic Italian tiramisu with the light, creamy delight of a French eclair, creating a truly irresistible treat that’s surprisingly simple to make. Perfect for any gathering or a quiet evening indulgence, this unique dessert promises to impress with its rich layers and elegant presentation, all without ever needing to turn on your oven.
Featuring an exquisite symphony of coffee-soaked ladyfingers and a luscious, velvety cream filling, crowned with a smooth chocolate ganache, this no-bake marvel is designed to be a crowd-pleaser. Whether you’re hosting a grand celebration, seeking a scrumptious showstopper for your holiday table, or simply craving something extraordinary to satisfy your sweet tooth, our Tiramisu Eclair Cake will exceed all your expectations and become a cherished addition to your dessert repertoire.
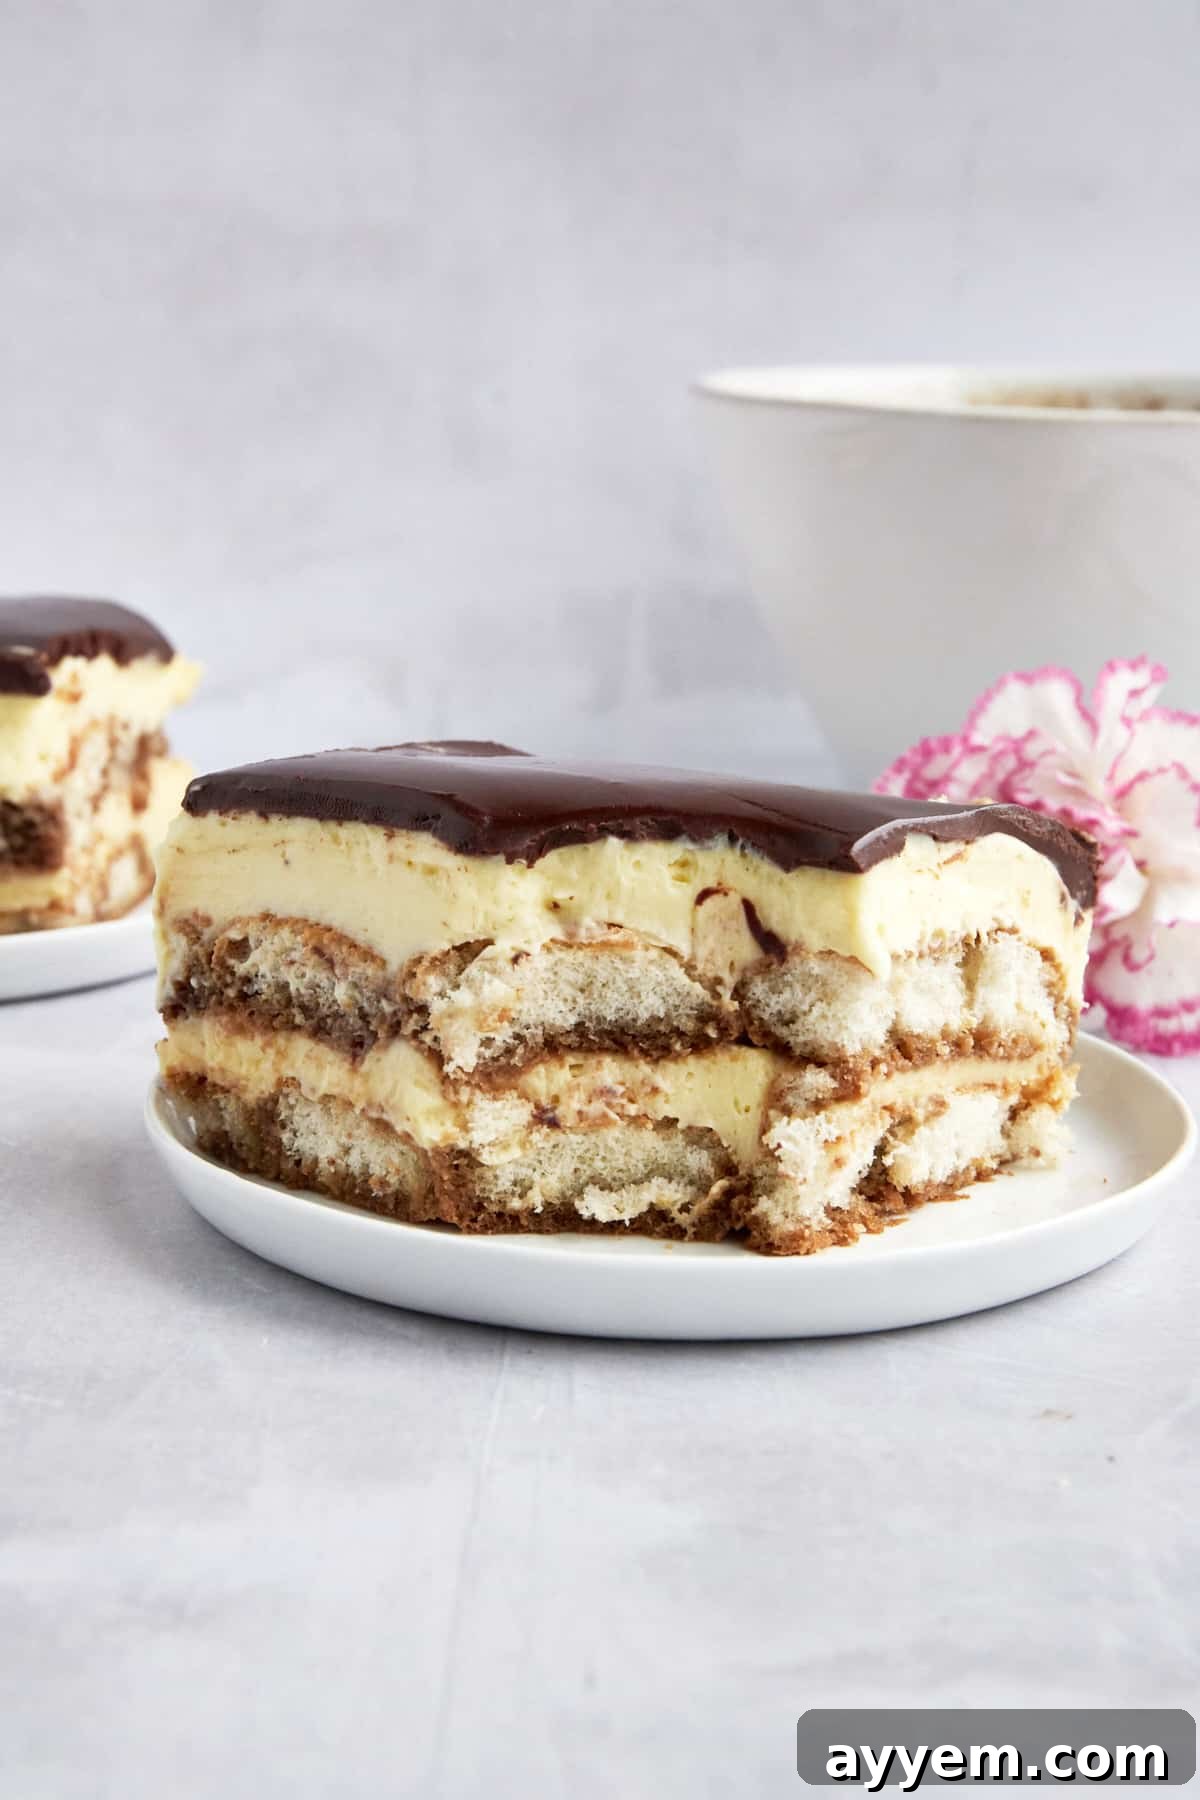
What is an Eclair Cake? A Delectable Fusion Unveiled
While the term “eclair cake” might conjure images of complex pastry work, this no-bake wonder reimagines the essence of the classic French eclair into an accessible, layered dessert. Traditionally, an eclair is a sophisticated French pastry made from delicate choux pastry, baked until airy and golden, then filled with a rich pastry cream or custard, and finally topped with a sweet, often chocolate, icing. The name “éclair” itself, meaning “flash of lightning” in French, is said to describe how quickly this delightful treat is eaten.
Unlike the traditional eclair, which relies on steam to puff up its choux pastry, eclair cakes, particularly the no-bake variety, ingeniously capture the spirit of the eclair without the baking. They typically feature layers of graham crackers or, in our case, ladyfingers, interspersed with a creamy pudding-based filling, and topped with a decadent chocolate glaze, mirroring the core components of its namesake without the baking fuss. It’s a genius shortcut to enjoying those beloved eclair flavors in an easy-to-assemble format.
Our Tiramisu Eclair Cake elevates this concept further by infusing the beloved flavors of tiramisu. It’s not just an eclair cake; it’s a marriage of two iconic desserts. We swap out standard graham crackers for coffee-soaked ladyfingers, building on the foundational elements of an authentic tiramisu. The creamy filling is reminiscent of the rich mascarpone layer, enhanced with vanilla pudding, and the chocolate ganache provides that essential luxurious finish. This unique combination ensures every bite delivers a harmonious blend of coffee, cream, and chocolate, creating a dessert that is both familiar and excitingly new.
Crafting the Perfect No-Bake Tiramisu Eclair Cake: Essential Ingredients
The beauty of our Easy Tiramisu Eclair Cake lies in its simplicity and the thoughtful selection of ingredients that bring out its signature flavors. Each component plays a crucial role in building the layers of taste and texture that make this dessert so special. Here’s a closer look at what you’ll need and why each ingredient is key:
For the Coffee Infusion: The Heart of Tiramisu
- Espresso or Strong Brewed Coffee: This is the soul of the tiramisu element. Freshly brewed espresso offers the most authentic, robust coffee flavor, but strong brewed coffee can be an excellent alternative. The key is potency – you want a deep coffee essence to infuse the ladyfingers. Remember to let it cool completely before dipping to prevent soggy cookies and to maintain the integrity of your cake. For those sensitive to caffeine or serving children, decaffeinated espresso or coffee works just as well, allowing everyone to enjoy this delightful treat.
- Granulated Sugar: A small amount of granulated sugar is added to the coffee mixture. This subtle sweetness balances the bitterness of the coffee, creating a perfectly flavored syrup for soaking the ladyfingers. It’s a minor detail that makes a major difference in the overall harmony of flavors.
For the Velvety Cream Filling: The Eclair’s Embrace
The luscious, creamy filling is where the eclair influence truly shines, providing a rich, smooth contrast to the coffee-soaked ladyfingers. Our recipe draws inspiration from the classic pastry cream while making it incredibly easy to prepare.
- Whole Milk: The foundation of our creamy filling, whole milk provides a rich, full-bodied base that contributes to the luxurious texture. While other milk varieties can be used, whole milk guarantees the optimal creaminess and flavor depth.
- Heavy Cream: Whipped heavy cream is essential for achieving the light, airy, yet incredibly smooth consistency of the filling. It’s what gives the “pudding” layer its indulgent, melt-in-your-mouth quality, mimicking the light sensation of traditional eclair cream.
- Powdered Sugar (Confectioners’ Sugar): This is a non-negotiable ingredient for the filling. Unlike granulated sugar, powdered sugar dissolves instantly and completely, ensuring a silky-smooth cream without any grainy texture. Do not substitute with granulated sugar, as it will compromise the delicate consistency.
- Vanilla Extract: A touch of pure vanilla extract enhances all the other flavors, adding a warm, aromatic note that rounds out the sweetness and richness of the cream filling. Choose a high-quality extract for the best results.
- Instant Vanilla Pudding Mix: This is the secret to our incredibly easy, no-bake filling. It acts as a thickening agent and flavor base, creating a perfectly set, creamy pudding layer without any cooking. It’s crucial to use an instant pudding mix, not a cook-and-serve or pre-made pudding, as the consistency and setting properties are entirely different.
For the Layered Foundation: The Ladyfinger Canvas
- Ladyfingers (Savoiardi Cookies): These delicate, sponge-like cookies are a hallmark of classic tiramisu and are perfect for absorbing the coffee mixture, creating soft, flavorful layers. They provide structure and a tender texture to the cake. If ladyfingers are unavailable, graham crackers or even thin slices of pound cake can be used as alternatives, though the flavor profile will differ slightly.
For the Decadent Chocolate Ganache: The Crowning Glory
No eclair-inspired dessert is complete without a rich chocolate topping, and our silky ganache provides the perfect finishing touch, adding a layer of luxurious chocolate flavor and a beautiful sheen.
- Heavy Cream: Used again, this time to create the ganache. When heated and combined with chocolate, it melts into a gloriously smooth, pourable topping.
- Chocolate Chips or Chopped Chocolate: High-quality chocolate is key here. Semisweet or dark chocolate chips work wonderfully, but you can also use finely chopped chocolate bark or a good quality chocolate bar for a more gourmet ganache. The better the chocolate, the richer and more intense your ganache will be.
Step-by-Step Guide: Crafting Your Easy Tiramisu Eclair Cake
Creating this magnificent dessert is a breeze, even for novice bakers. Follow these detailed steps to assemble your no-bake Tiramisu Eclair Cake perfectly.
1. Prepare the Aromatic Coffee Mixture
- Combine Ingredients: In a small bowl, whisk together the freshly brewed espresso (or strong coffee) and the granulated sugar. Stir until the sugar is completely dissolved.
- Cool Completely: It’s crucial that the coffee mixture cools down to room temperature, or even chills slightly in the fridge, before you use it. Hot or warm coffee will make your ladyfingers instantly soggy, compromising the cake’s structure. Set it aside while you prepare the other components.
2. Whip Up the Dreamy Tiramisu Filling
- Combine Wet and Dry: In a large mixing bowl, add the whole milk, heavy cream, powdered sugar, vanilla extract, and the instant vanilla pudding mix.
- Beat Gradually: Begin beating the mixture on low speed to gently combine all the ingredients without splattering.
- Increase Speed & Achieve Peaks: Gradually increase the mixer speed to medium-high. Continue beating until medium stiff peaks begin to form. The mixture should be thick, creamy, and hold its shape when lifted with the whisk, but not be overly stiff or dry.
- Avoid Overmixing: Be very careful not to overmix the filling. Overbeating heavy cream can lead to a curdled, grainy texture, which we want to avoid for a smooth, luscious filling. Stop as soon as the desired consistency is reached.
3. Assembling the Layers to Perfection
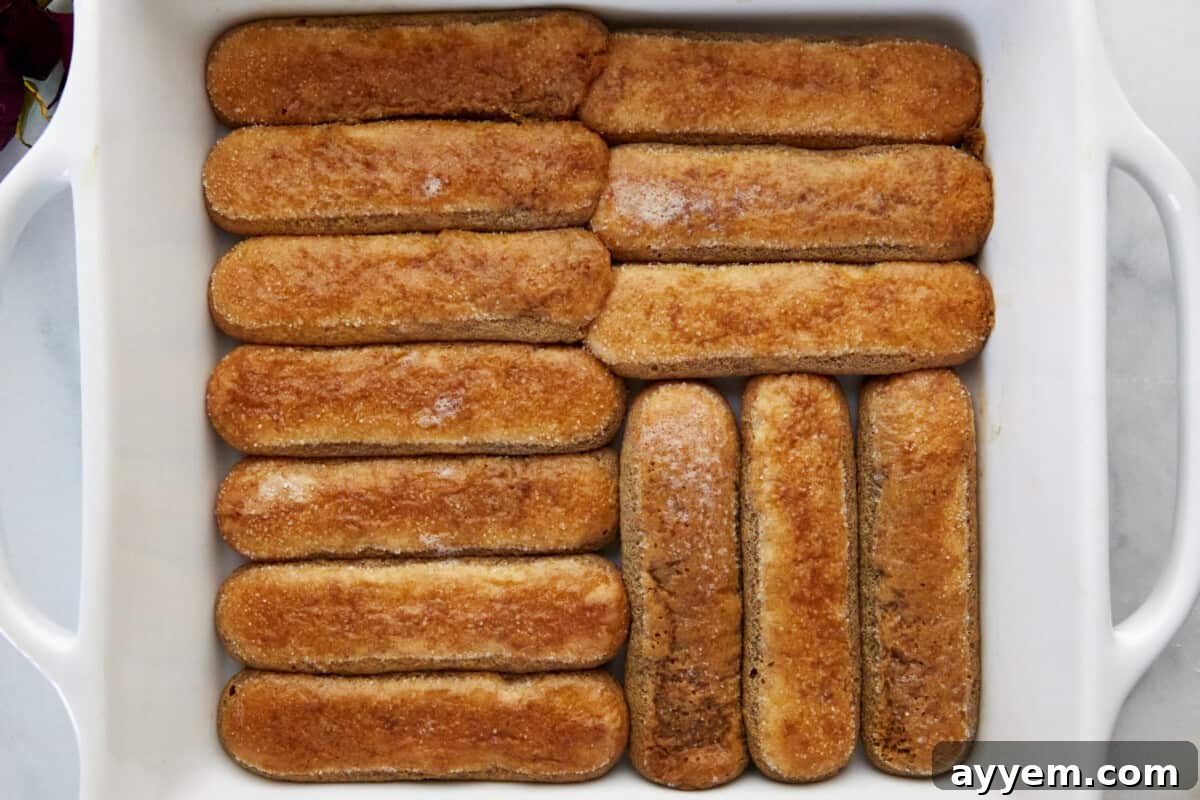
- Prepare Ladyfingers: Take each ladyfinger and quickly dip it into the cooled coffee mixture. It’s vital to dip them for only a couple of seconds per side. Ladyfingers are like sponges; if soaked too long, they will become overly saturated and mushy, making your cake fall apart. A quick dip ensures they absorb just enough flavor while retaining their structure.
- First Ladyfinger Layer: Arrange the dipped ladyfingers in a single, even layer at the bottom of an 8×8-inch baking dish. You may need to break some ladyfingers to fit snugly and cover the entire base.
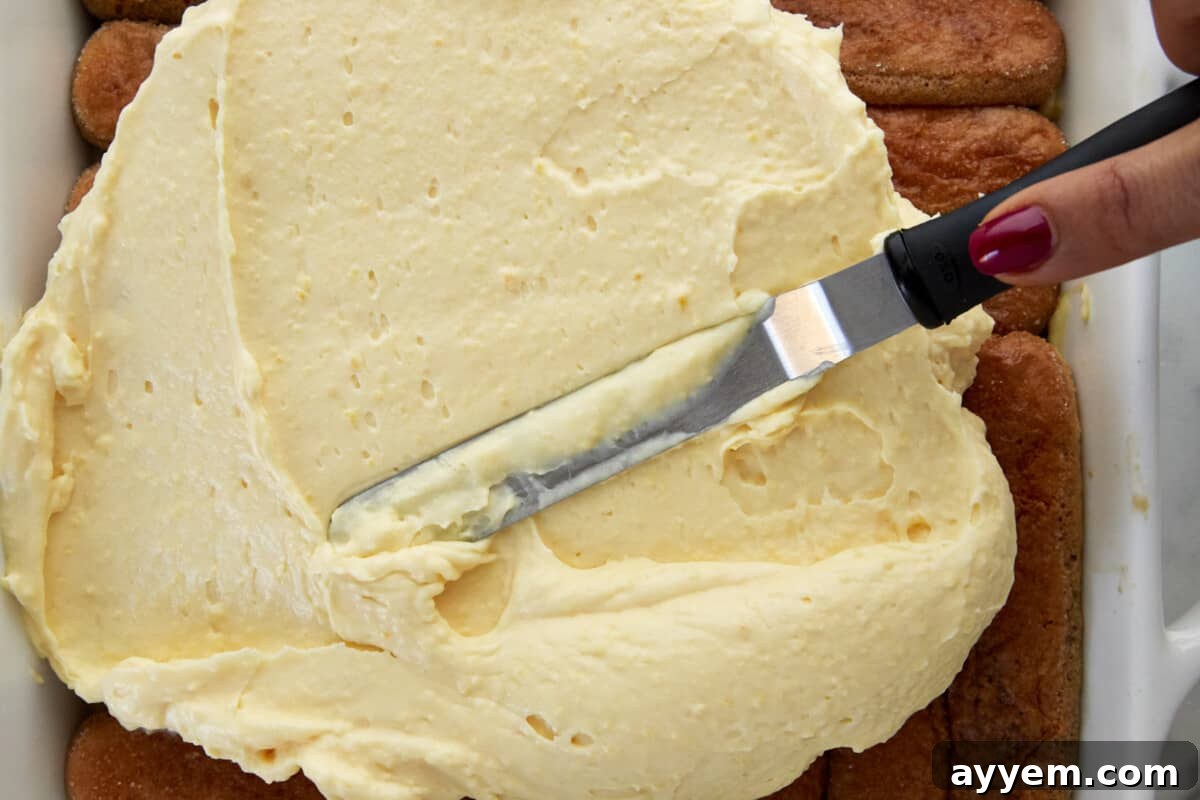
- First Cream Layer: Evenly spread half of your prepared creamy pudding filling over the layer of ladyfingers. Use a rubber spatula to create a smooth, consistent layer from edge to edge.
- Second Ladyfinger Layer: Repeat the dipping process and create a second layer of coffee-soaked ladyfingers on top of the cream.
- Second Cream Layer: Spread the remaining half of the pudding filling over this second layer of ladyfingers, ensuring it’s smooth and even.
- Initial Chill: Once assembled, cover the dish tightly with plastic wrap and transfer it to the refrigerator. Allow it to chill for at least 2 hours, or ideally, overnight. This crucial chilling period allows the flavors to meld, the ladyfingers to soften further, and the filling to set completely, ensuring a stable and delicious cake.
4. Creating the Silky Chocolate Ganache
Just before serving or once the cake has adequately chilled, prepare your chocolate ganache.
- Heat Heavy Cream: In a microwave-safe bowl, heat the specified amount of heavy cream. Microwave on high for approximately 1 minute, or until it is very hot but not boiling. Watch it closely to prevent it from boiling over.
- Melt Chocolate: Add the chocolate chips or chopped chocolate to the hot cream. Do not stir immediately. Let it sit undisturbed for 5 minutes. This allows the residual heat from the cream to melt the chocolate evenly.
- Whisk to Smoothness: After 5 minutes, gently whisk the chocolate and cream mixture until it becomes completely smooth, glossy, and uniform in color. You should have a luxurious, pourable ganache.
5. The Final Flourish and Chill
- Pour Ganache: Retrieve your chilled tiramisu eclair cake from the refrigerator. Pour the prepared chocolate ganache evenly over the top layer of the cake. Use a spatula to gently spread it if needed, ensuring full coverage.
- Final Chill to Set: Return the cake to the refrigerator for at least another 30 minutes, or until the chocolate ganache has fully set and hardened slightly. This makes for clean slices and a delightful contrast in texture.
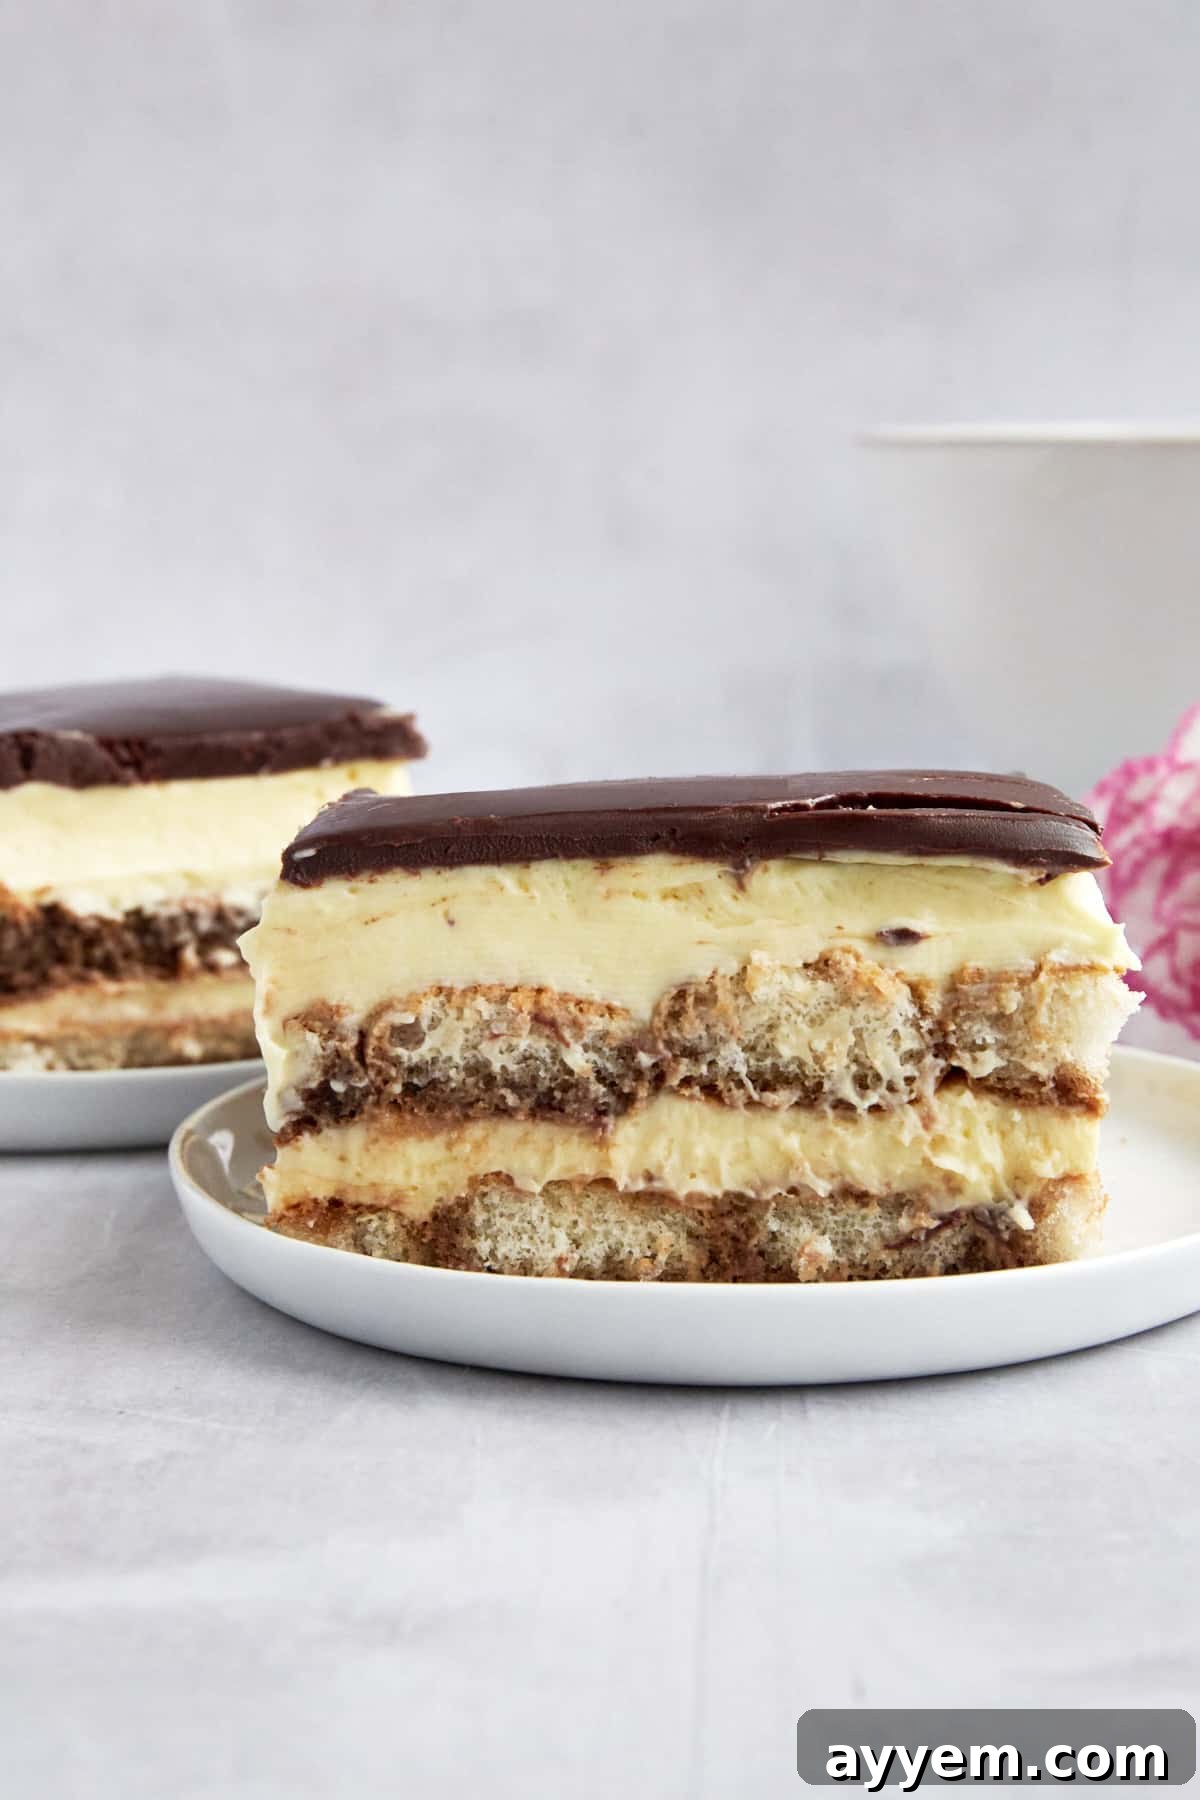
Tips for Tiramisu Eclair Cake Success
Achieving a perfect Tiramisu Eclair Cake is simple when you keep a few key tips in mind:
- Don’t Over-soak Ladyfingers: This is arguably the most critical tip. Ladyfingers are highly absorbent. A quick dip (1-2 seconds per side) is all you need. Over-soaked ladyfingers will make your cake mushy and difficult to serve.
- Ensure Coffee is Cool: Always use cooled coffee for dipping. Hot coffee will disintegrate the ladyfingers and can also affect the temperature of your cream filling, preventing it from setting properly.
- Avoid Overmixing the Filling: When beating the cream and pudding mixture, stop as soon as medium stiff peaks form. Overmixing can cause the mixture to curdle and lose its smooth, luscious texture.
- Quality Ingredients Matter: While simple, the flavors truly shine with good quality ingredients. Use fresh espresso, good heavy cream, and decent chocolate for the ganache.
- Patience with Chilling: The chilling time is not just for setting; it’s also for flavor development. Allow the cake to chill for at least 2 hours, but preferably overnight, for the best texture and deepest flavor fusion.
- Smooth the Layers: Take a moment to evenly spread each layer of filling. This not only makes for a more beautiful cake but also ensures consistent flavor in every bite.
- Use Powdered Sugar for Filling: Stick to powdered sugar for the cream filling. Granulated sugar will not dissolve as smoothly and can result in a grainy texture.
Delicious Variations and Customizations
While our Easy Tiramisu Eclair Cake is perfect as is, it’s also incredibly versatile! Feel free to experiment with these variations to suit your taste or occasion:
- Alcoholic Kick: For a more traditional tiramisu experience, you can add a tablespoon or two of coffee liqueur (like Kahlúa), rum, or Marsala wine to your coffee dipping mixture. This adds an extra layer of depth and sophistication.
- Chocolate Lover’s Dream: Dust the top of your chilled ganache with cocoa powder or finely grated chocolate before serving for an extra touch of chocolatey indulgence and visual appeal.
- Mint Chocolate Twist: Add a few drops of peppermint extract to your ganache for a refreshing mint chocolate flavor, or sprinkle crushed peppermint candies on top.
- Orange Zest Brightness: For a subtle citrus note, add a tiny bit of orange zest to the cream filling or sprinkle it over the ganache.
- Different Pudding Flavors: While vanilla is classic, you could experiment with instant chocolate pudding mix for an even richer chocolate flavor, or even banana pudding for a unique twist.
- Fruit Topping: Garnish with fresh berries like raspberries or strawberries just before serving. The tartness of the fruit offers a lovely contrast to the sweetness of the cake.
- Nutty Crunch: Sprinkle chopped toasted nuts (like almonds or hazelnuts) over the top for added texture and flavor.
- Espresso Powder Dusting: For a stronger coffee presentation, lightly dust the finished ganache with a fine layer of unsweetened cocoa powder or espresso powder.
Planning Ahead: Make, Store, and Freeze
This Tiramisu Eclair Cake is a fantastic dessert for making ahead, offering convenience and allowing flavors to develop beautifully. Here’s how to ensure it stays fresh and delicious.
Can I Make This Ahead of Time?
Absolutely! This recipe is ideal for advance preparation. In fact, making it ahead often enhances the flavors as the coffee has more time to meld with the creamy layers. We recommend assembling the cake (before adding the ganache) and chilling it overnight for the best results. You can then prepare and add the ganache a few hours before you plan to serve it. The cake is typically best enjoyed within two days of preparation when the ladyfingers have absorbed maximum flavor but are still pleasantly tender without becoming overly mushy.
Proper Storage for Freshness
To keep your Tiramisu Eclair Cake at its peak, proper storage is essential:
- Refrigeration: Always store the cake in the refrigerator. Cover it tightly with plastic wrap, ensuring no air can get in. For extra protection against odors and dryness, you can then add a layer of aluminum foil over the plastic wrap.
- Airtight Container: Alternatively, transfer slices or the entire cake (if it fits) to an airtight container. This helps maintain its freshness and prevents it from absorbing other food odors in the fridge.
- Shelf Life: Stored correctly, the Tiramisu Eclair Cake will keep well in the refrigerator for up to five days. However, be aware that the longer it sits, the softer the ladyfingers will become. While still delicious, they might lose some of their initial structural integrity.
Freezing for Future Indulgence
Yes, you can freeze this delightful eclair cake, making it perfect for meal prepping desserts or saving leftovers for a later date!
- Freezing Process: For best results, freeze the entire cake (or individual slices) in the baking dish. Wrap the dish tightly with several layers of plastic wrap, followed by a layer of heavy-duty aluminum foil. This double-layer protection helps prevent freezer burn.
- Freezer Life: The cake can be stored in the freezer for up to three months.
- Thawing: To serve, remove the cake from the freezer and transfer it to the refrigerator to thaw overnight. This slow thawing process helps maintain the texture and prevents excessive condensation. Once thawed, it’s ready to slice and enjoy.
Frequently Asked Questions (FAQs) About Tiramisu Eclair Cake
Here are answers to some common questions that arise when making this delicious no-bake dessert:
The key to stable layers is ensuring your cream filling is thick and evenly spread. As you beat the milk, heavy cream, powdered sugar, vanilla extract, and instant vanilla pudding, aim for a consistency that forms “medium stiff peaks” – it should be thick enough to hold its shape. Don’t worry if it feels a little loose during the initial layering process. The extensive chilling period (at least 2 hours, ideally overnight) is crucial; as the cake chills, all the layers will set beautifully and bind together, making for a perfectly stable and sliceable dessert.
For that quintessential tiramisu flavor, a strong brewed coffee or freshly made espresso works best. The intensity of the coffee is important as it infuses the ladyfingers and provides the characteristic bitter-sweet contrast. If you’re not a fan of strong coffee, you can use a lighter brew, or for a completely different flavor, try soaking the ladyfingers in hot chocolate or even milk with a little vanilla extract for a more neutral, kid-friendly dessert. Just ensure it’s cooled before dipping!
An 8×8-inch baking dish is the perfect size for this recipe, creating beautiful, tall layers that are easy to slice. Glass baking dishes are particularly great because they allow you to admire the stunning layers from all angles, making for an attractive presentation. However, any similar-sized square or rectangular dish made of ceramic, metal, or glass will work perfectly well to achieve the same delicious results.
Absolutely! Our recipe is already designed to be alcohol-free, and we believe it’s just as rich, creamy, and packed with flavor without any added spirits. Traditional tiramisu often includes coffee liqueur (like Kahlúa) or Marsala wine, but by using plenty of strong brewed coffee or espresso, you achieve that deep, authentic coffee taste without the alcohol. If you wish to add a touch, a tablespoon or two of your preferred coffee liqueur can be mixed into the cooled coffee solution before dipping the ladyfingers.
Ladyfingers are incredibly absorbent! If your ladyfingers turn out soggy, it’s almost always due to over-soaking. You only need a quick dip – a second or two on each side is usually sufficient. They will continue to soften as the cake chills in the refrigerator, absorbing moisture from the cream filling. Also, ensure your coffee is completely cooled; warm coffee will accelerate the softening process and make them mushy.
Yes, you can! While ladyfingers are traditional for tiramisu and work wonderfully here, you can substitute them with other similar cookies. Graham crackers are a popular choice for eclair cakes and would provide a slightly different texture and flavor. Vanilla wafers, shortbread cookies, or even thin slices of sponge cake could also be experimented with for varied results, though the overall character of the dessert might change.
More Irresistible No-Bake Dessert Recipes
If the ease and deliciousness of this Tiramisu Eclair Cake have you convinced that no-bake is the way to go, you’re in luck! We have plenty of other crave-worthy cakes and desserts that don’t require you to turn on your oven. Explore these fantastic options for more effortless indulgence:
- Mocha Oreo Icebox Cake
- No-Bake Lotus Biscoff Cake
- Mocha Chocolate Icebox Cake
- No-Bake Peanut Butter Lasagna
Easy Tiramisu Eclair Cake Recipe
Combine your two favorite desserts into one incredible treat with this easy no-bake tiramisu eclair cake recipe! With layers of coffee-soaked ladyfingers, a rich vanilla cream filling, and a luscious chocolate ganache, this dessert is a guaranteed crowd-pleaser.
Author: Food Dolls
Servings: 6 servings
Prep time: 10 mins
Cook time: 2 hrs 30 mins (Chilling time)
Total time: 2 hrs 40 mins
Ingredients
For the Coffee Mixture:
- 1 cup freshly brewed espresso or strong brewed coffee
- 1 Tablespoon granulated sugar
For the Tiramisu Cake:
- 1 cup whole milk
- 1 cup heavy cream
- 1/4 cup powdered sugar
- 1 teaspoon vanilla extract
- 1 (5.5 ounce) box of instant vanilla pudding mix
- 32 ladyfingers
For the Chocolate Ganache:
- 3/4 cup heavy cream
- 1 cup chocolate chips or chopped chocolate
Instructions
Prepare the Coffee Mixture:
- In a bowl, combine the espresso or brewed coffee and 1 tablespoon of sugar. Mix well until the sugar is dissolved. Allow the coffee to cool completely.
Make the Tiramisu Filling:
- In a separate large mixing bowl, beat together the milk, heavy cream, powdered sugar, vanilla extract, and the vanilla pudding mix. Start the mixer on low to combine all the ingredients. Slowly increase the speed and beat until medium peaks form. Be careful not to overbeat or the mixture will curdle. This will be the creamy pudding filling.
Assemble the Tiramisu:
- Dip each ladyfinger into the cooled coffee mixture for a couple of seconds, making sure not to soak them too long, as they can become too soggy. Place them in an 8×8-inch serving dish to form a bottom layer.
- Spread half of the prepared pudding filling over the ladyfingers in the dish, creating a smooth layer.
- Add another layer of dipped ladyfingers on top of the filling, followed by the remaining half of the pudding filling. Smooth the top layer. Refrigerate for at least 2 hours or overnight before adding the ganache.
Prepare the Chocolate Ganache:
- In a microwave-safe bowl, heat 3/4 cup of heavy cream in the microwave until it is hot but not boiling. Approx 1 minute – depending on the microwave.
- Add the chocolate chips or chopped chocolate to the hot cream and let it sit for 5 minutes without stirring. This will allow the chocolate to melt in the hot cream.
- After 5 minutes, whisk the chocolate and cream mixture until it becomes smooth and glossy.
Pour the Chocolate Ganache:
- Pour the prepared chocolate ganache evenly over the chilled tiramisu.
Chill and Set:
- Refrigerate for at least 30 minutes or until the chocolate ganache has set.
Serve:
- Once the tiramisu has set, slice and it’s ready to be served.
Equipment
- 3 Mixing Bowls
- 1 Hand Mixer
- 8×8 Baking Pan
Nutrition Information
Serving: 1 serving | Calories: 561kcal | Carbohydrates: 58g | Protein: 4g | Fat: 36g | Saturated Fat: 22g | Polyunsaturated Fat: 1g | Monounsaturated Fat: 7g | Cholesterol: 95mg | Sodium: 213mg | Potassium: 270mg | Fiber: 0.2g | Sugar: 49g | Vitamin A: 1116IU | Vitamin C: 0.5mg | Calcium: 122mg | Iron: 0.3mg
Nutrition information is automatically calculated, so should only be used as an approximation.