
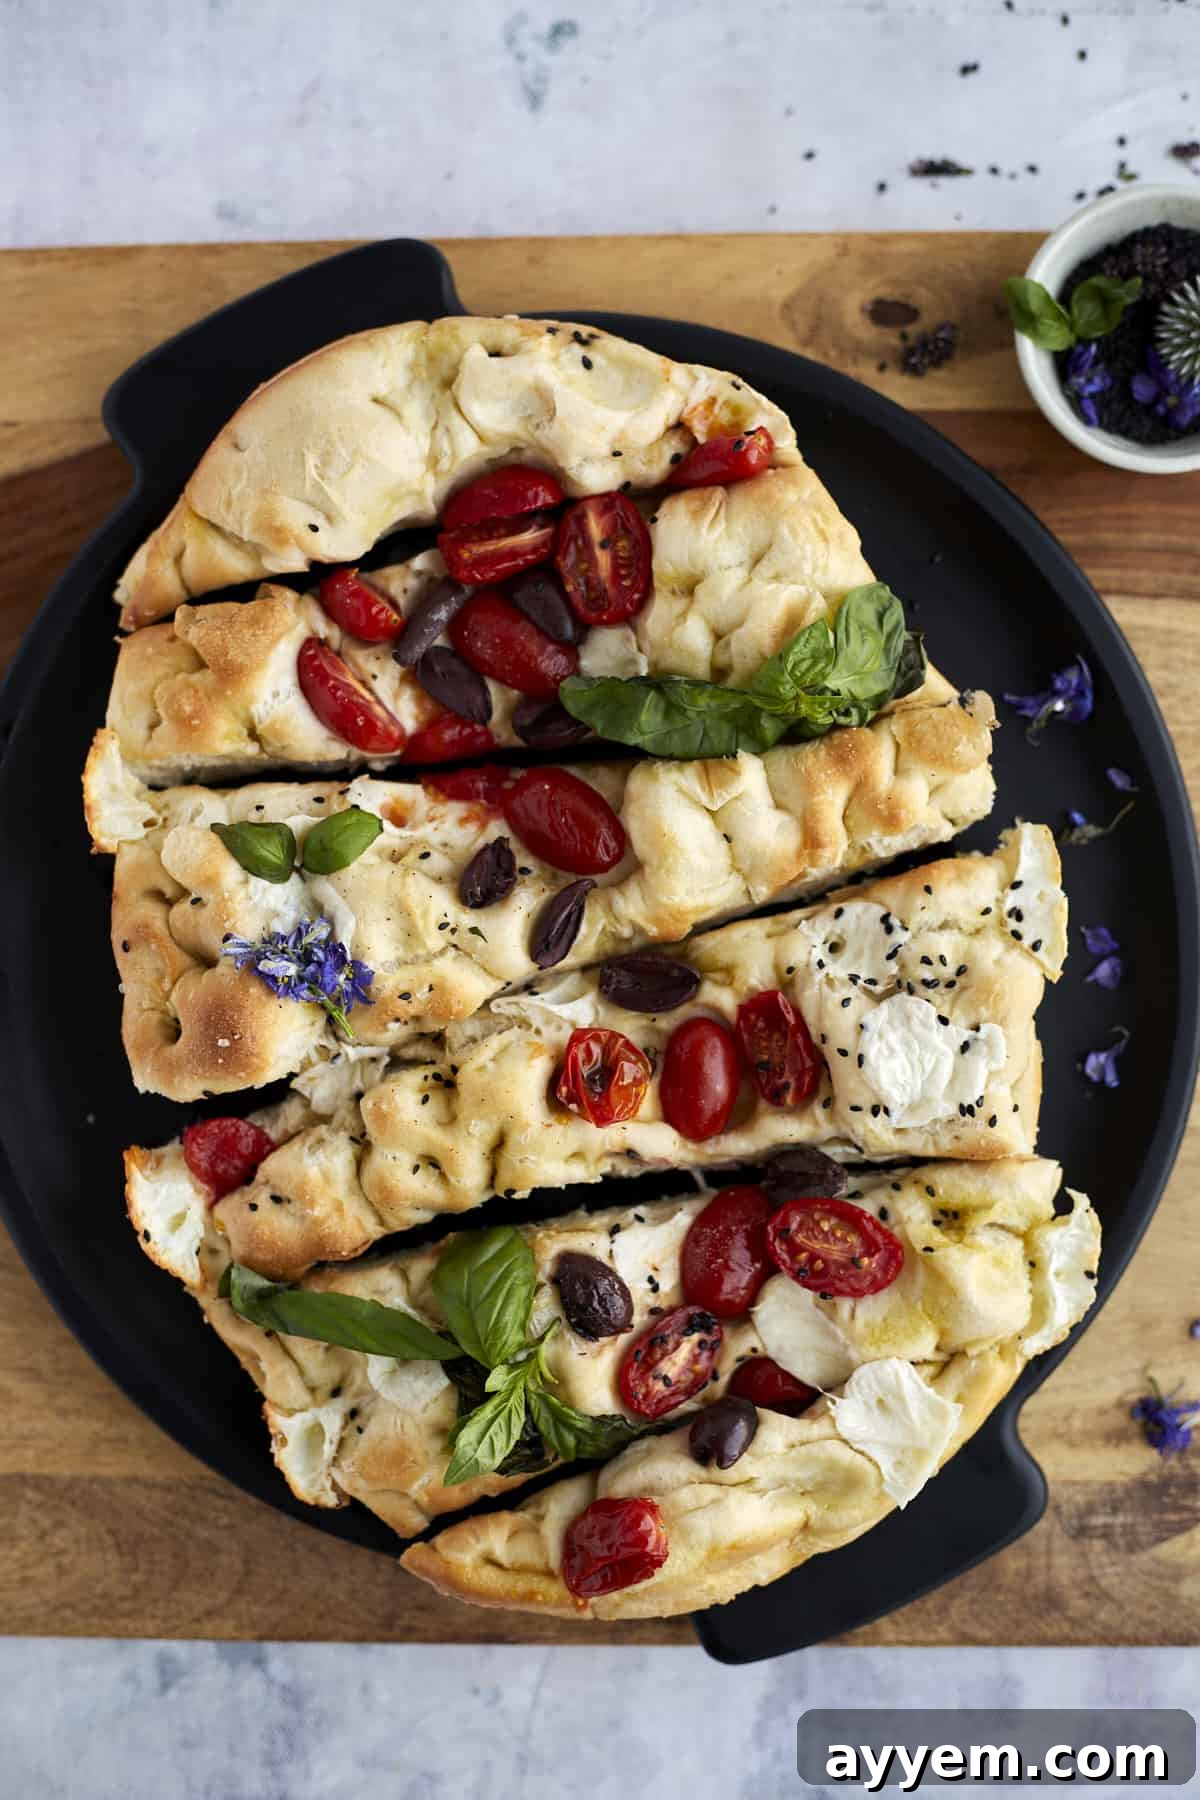
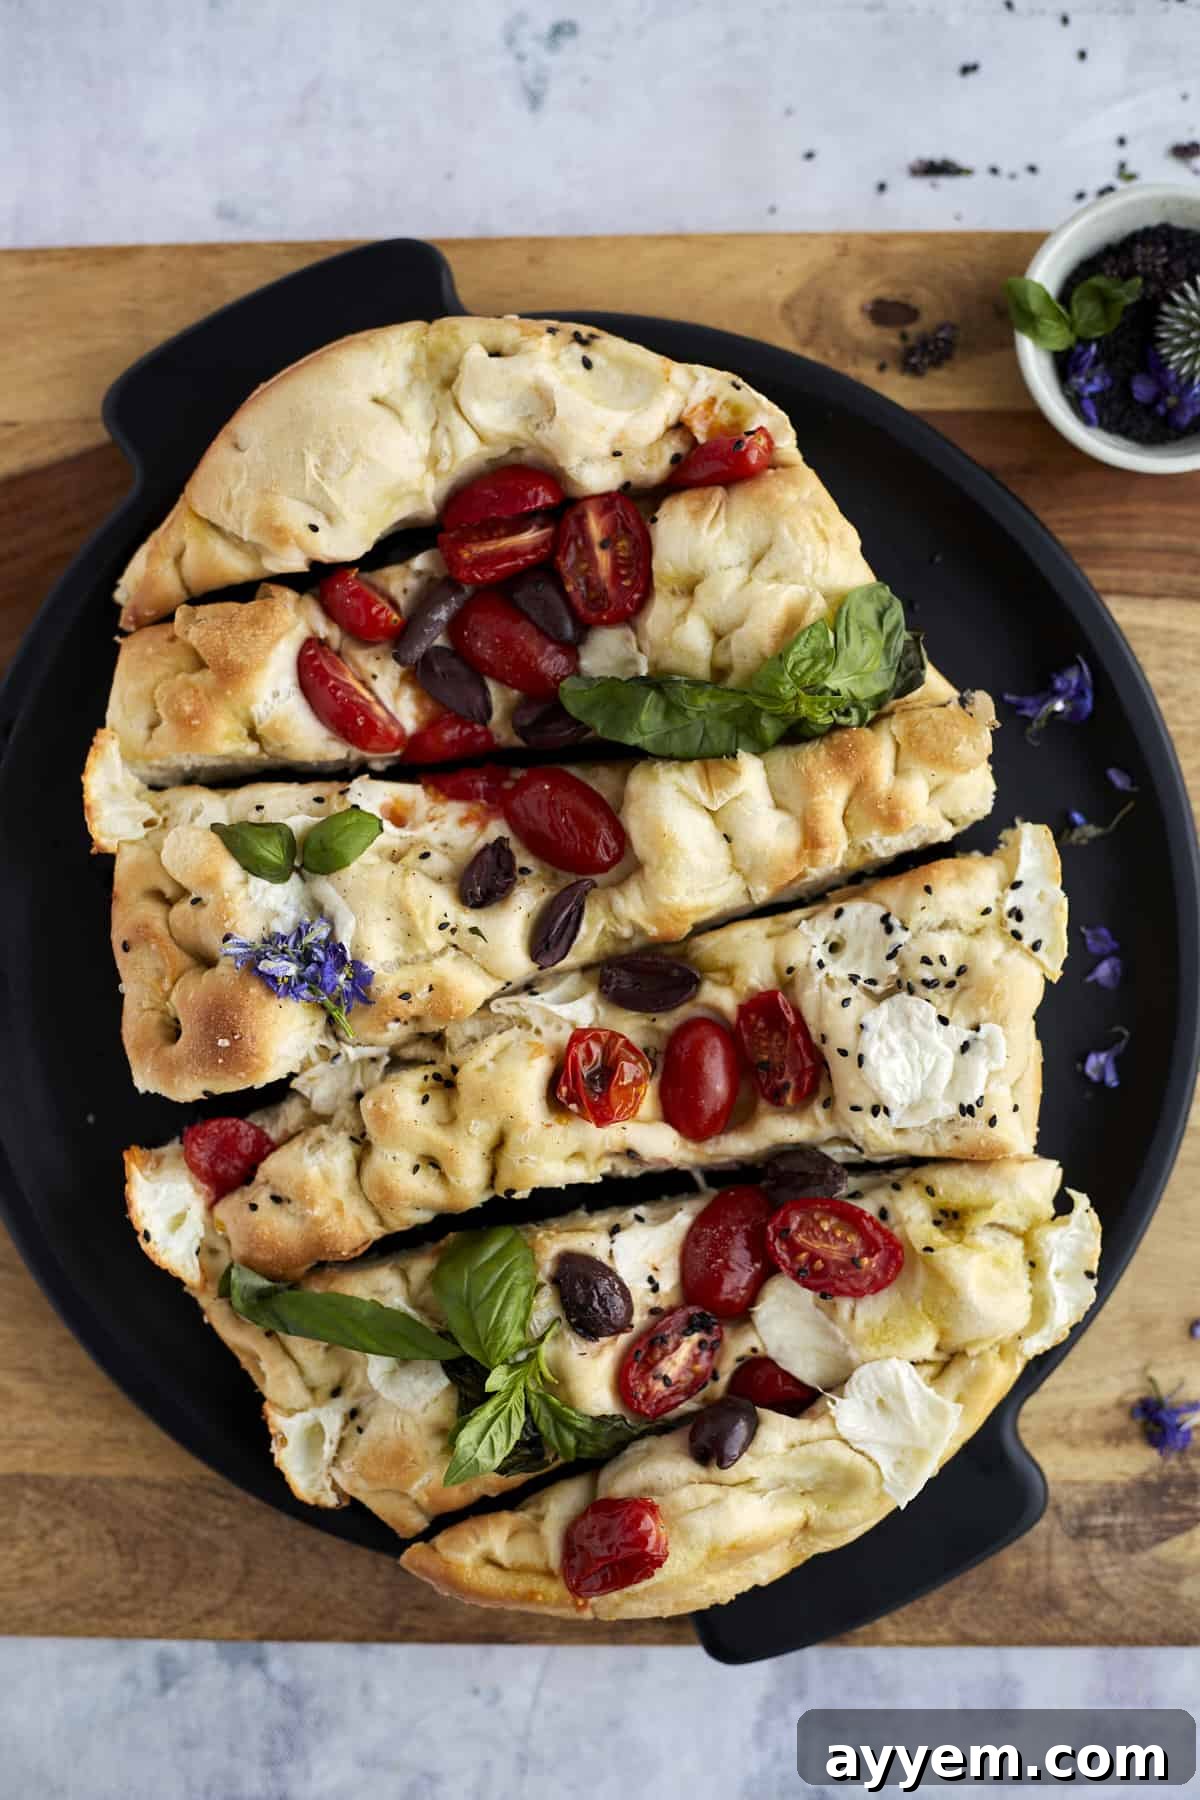
Forget complex doughs and endless kneading! This revolutionary no-knead focaccia bread art recipe simplifies the journey to a stunning, delicious homemade Italian flatbread. We’re embracing the ultimate kitchen hack: transforming humble store-bought frozen Rhodes dinner rolls into an artisanal masterpiece. Get ready to impress with minimal effort – because incredible flavor and presentation don’t have to be complicated.
Unveiling the Magic of Focaccia Bread Art: Easy & Impressive
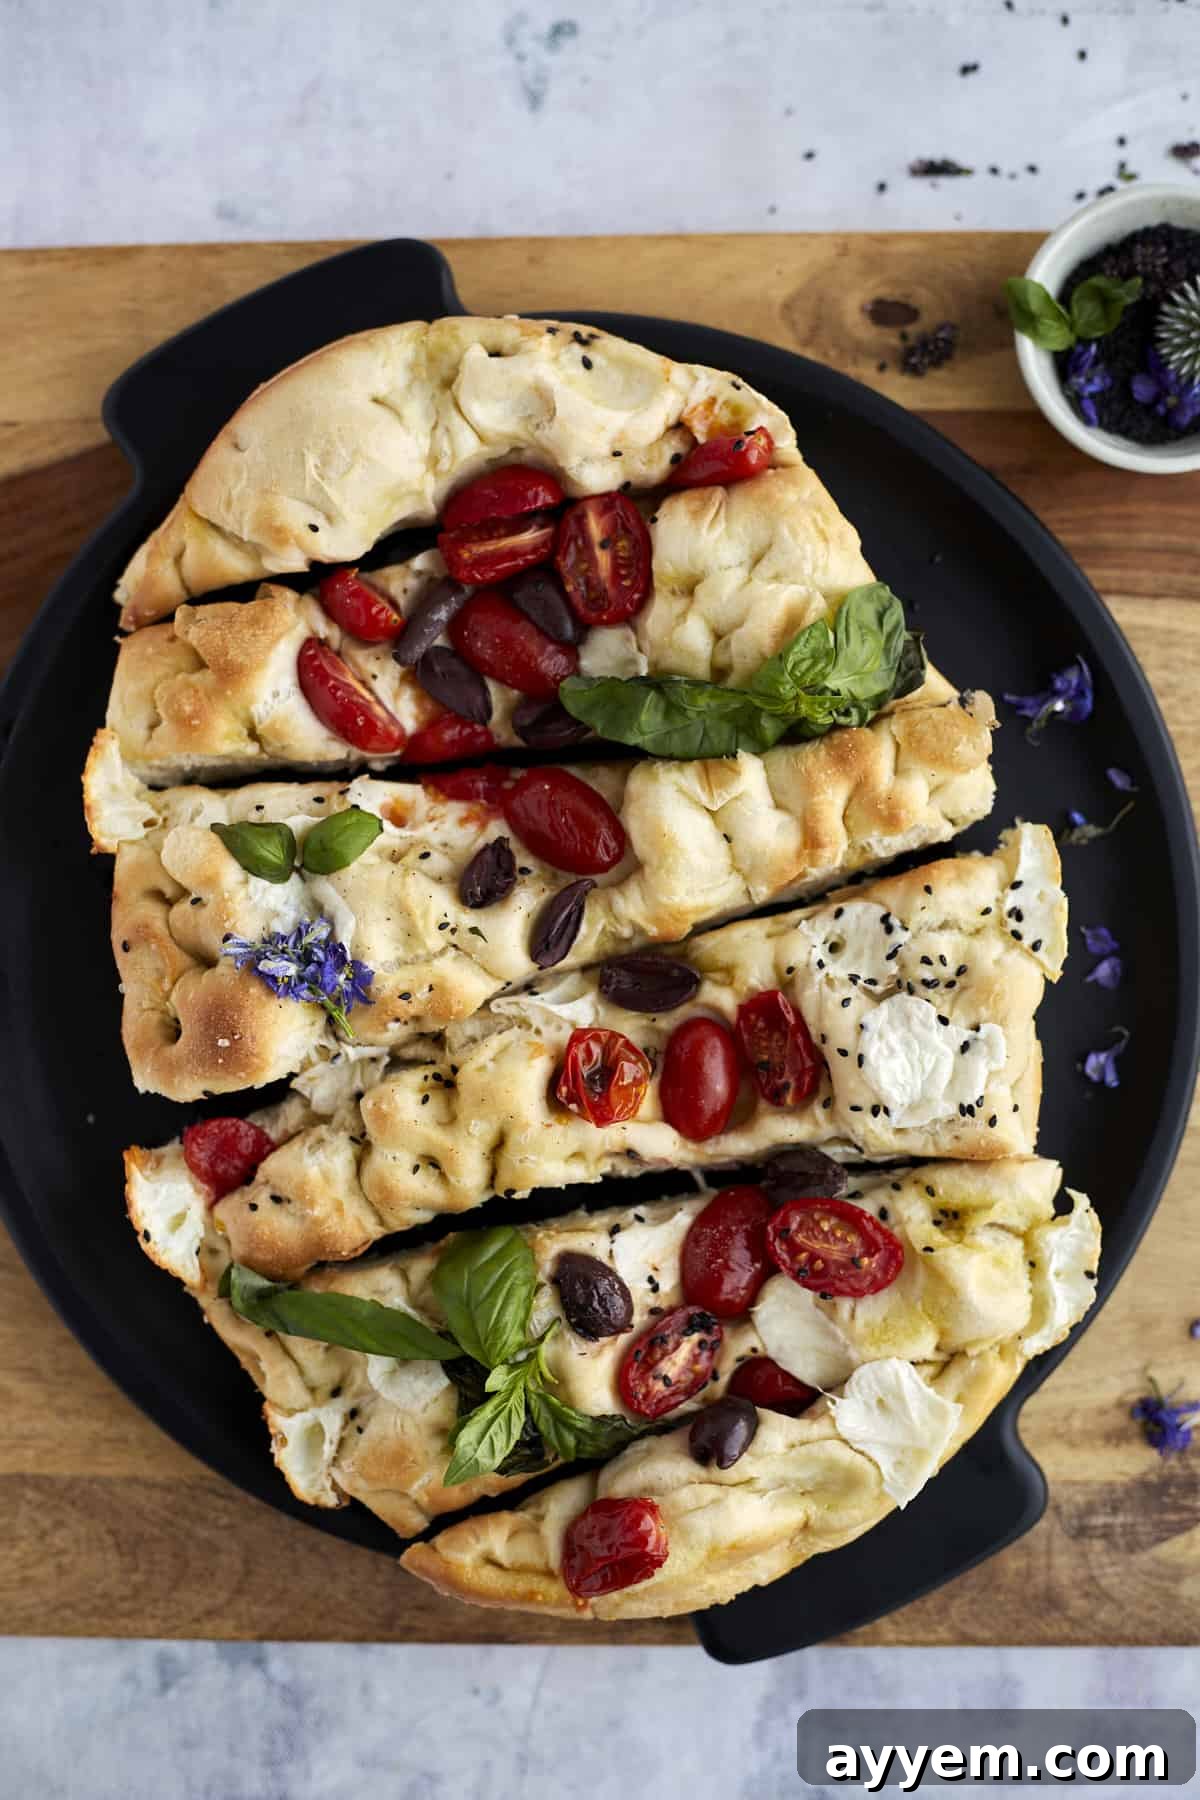
Focaccia, pronounced fo-kah-cha, is a beloved Italian flatbread, often likened to a thick pizza crust, that can be enjoyed both sweet and savory. Its origins trace back to the sun-drenched region of Liguria in Italy, particularly Genoa, where the classic “focaccia classica” reigns supreme. Traditionally, focaccia is characterized by its signature dimpled surface, usually about 1/2 to 1 inch thick, generously infused with fragrant olive oil and an array of herbs. Common toppings include coarse sea salt, rosemary, olives, and sometimes cheese or thinly sliced vegetables, turning each loaf into a canvas of culinary art. The charm of focaccia lies not only in its delightful chewy interior and crispy exterior but also in its versatility as a side dish, appetizer, or even a light meal.
While traditional focaccia typically involves a multi-step process of mixing, kneading, and long fermentation periods, our recipe is designed to bring this Italian staple into your kitchen with unparalleled ease. We believe that everyone should experience the joy of freshly baked focaccia without the intimidation of scratch-made dough. This guide focuses on a smart shortcut that delivers all the authentic flavor and texture you crave, making it perfect for busy weeknights, last-minute gatherings, or simply when you desire a taste of Italy without the extensive prep time.
The Traditional Focaccia Journey & Our Clever Shortcut
A classic focaccia dough is a simple blend of water, flour, yeast, and olive oil. The traditional process begins with activating the yeast, combining ingredients, and then engaging in a period of kneading – often vigorous – to develop the gluten. This is followed by one or two lengthy proofing (rising) periods, sometimes extending overnight, allowing the dough to develop its characteristic airy texture and deep flavor. Once sufficiently risen, the dough is gently stretched into a desired shape in an olive oil-greased baking dish. The final, and arguably most iconic, step involves drizzling more luscious extra virgin olive oil over the surface and using your fingertips to create those beautiful, irregular indentations. These dimples not only add visual appeal but also serve as reservoirs for the rich olive oil and any toppings, ensuring every bite is bursting with flavor. A sprinkle of your favorite herbs and a dash of coarse sea salt complete the preparation before baking.
For many home bakers, the time commitment and the kneading process can be a deterrent to making focaccia from scratch. This is where our innovative “no-knead focaccia” hack comes into play, transforming the entire experience. Instead of starting with raw ingredients and spending hours on dough development, we utilize a secret weapon: store-bought frozen Rhodes dinner rolls. This ingenious swap allows you to bypass the most time-consuming steps of traditional bread making while still achieving a remarkably similar, satisfying result. The frozen rolls are essentially pre-made dough, ready to be thawed, proofed, and transformed into your focaccia masterpiece. This means no measuring flour, no wrestling with sticky dough, and no extensive waiting for multiple rises. It’s a true game-changer for anyone craving homemade focaccia with minimal fuss.
Why This No-Knead Focaccia Hack is a Culinary Game-Changer
We often hear that baking bread is a labor of love, implying that it must be difficult or time-consuming. This no-knead focaccia recipe shatters that myth, making the entire process approachable and incredibly rewarding. Here’s why we wholeheartedly endorse this simple yet brilliant method:
- Effortless Preparation: The biggest draw is undoubtedly the elimination of kneading. Traditional focaccia requires significant physical effort to develop the gluten structure. By using pre-made frozen Rhodes dinner rolls, you skip this step entirely. The rolls are already perfectly formed and contain all the necessary ingredients, saving you valuable time and energy.
- Time-Saving Convenience: While there’s a rising period involved, it’s typically much shorter than the overnight fermentation often required for scratch-made focaccia. You can enjoy homemade focaccia art in just a few hours from start to finish, making it feasible for a spontaneous weekend bake or even a creative weeknight project.
- Consistent Results, Every Time: Frozen dough products are designed for consistency. This means you can count on a reliable rise and a wonderful texture, even if you’re a novice baker. No more worrying about yeast activation, dough hydration, or under/over-kneading – the hard work is already done for you!
- One-Pan Wonder: Say goodbye to a mountain of dirty dishes. This recipe comes together in a single baking dish, from thawing and rising to baking and serving. This not only simplifies cleanup but also streamlines your workflow in the kitchen.
- Unleash Your Inner Artist: The “bread art” aspect is truly where this recipe shines. The pre-portioned rolls provide an excellent base for arranging toppings creatively. Think of your focaccia as a blank canvas where cherry tomatoes become vibrant blossoms, olive slices form intricate patterns, and fresh herbs add a touch of lush greenery. It’s a fantastic way to engage kids in the kitchen or simply express your creativity.
- Versatile Topping Options: While our recipe features classic Mediterranean flavors like tomatoes, olives, and mozzarella, the possibilities are truly endless. Experiment with roasted garlic, caramelized onions, different cheeses (like feta or Parmesan), various herbs (rosemary, thyme), bell peppers, or even a sprinkle of chili flakes for a kick.
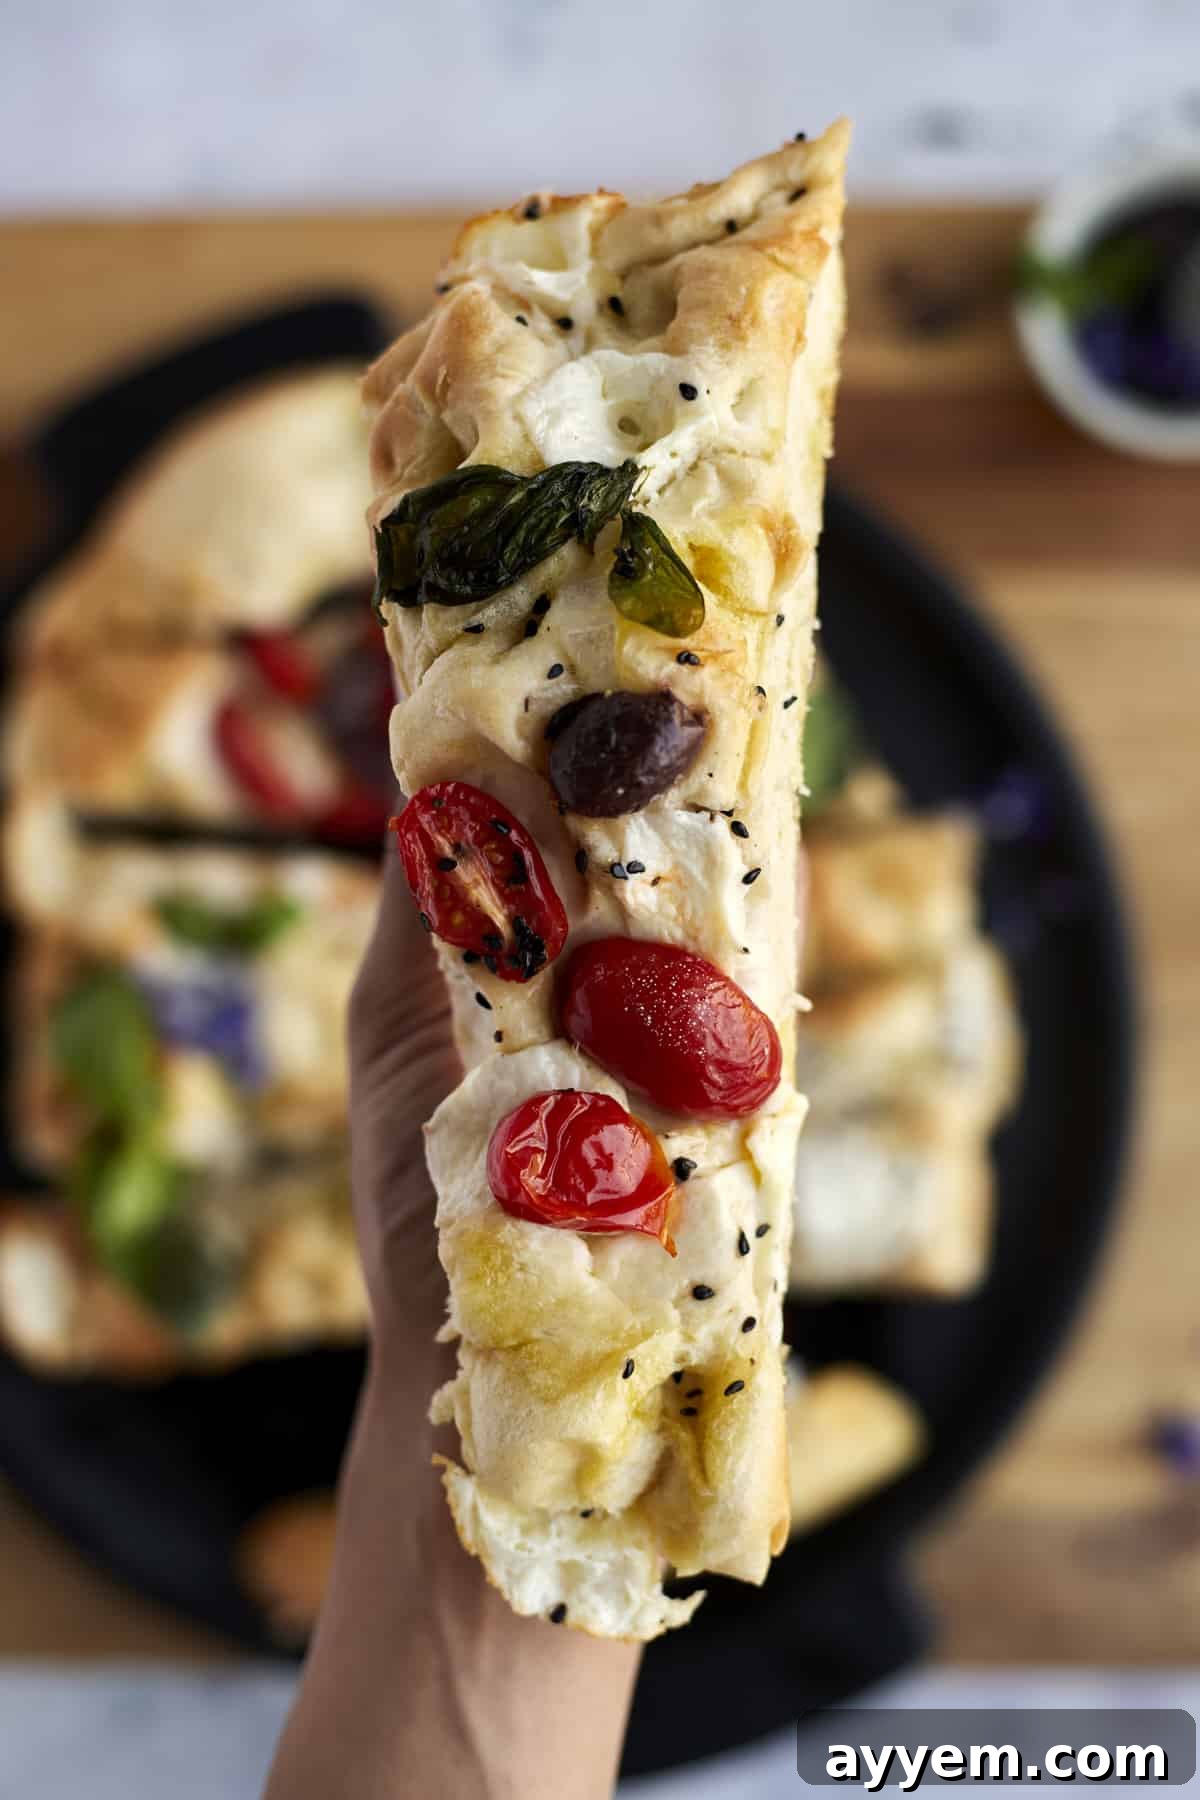
This hack isn’t just about saving time; it’s about making the joy of homemade bread accessible to everyone, regardless of their baking experience. The resulting focaccia is soft, aromatic, and perfectly golden, with that irresistible crispy, olive oil-rich crust that focaccia lovers adore.
Crafting Your No-Knead Focaccia Art: Step-by-Step
Creating this beautiful focaccia is a straightforward and enjoyable process. Here’s a detailed guide to ensure your success:
- Prepare Your Baking Dish: Begin by lightly buttering a 13×9 inch baking dish. This prevents sticking and contributes to a lovely golden crust.
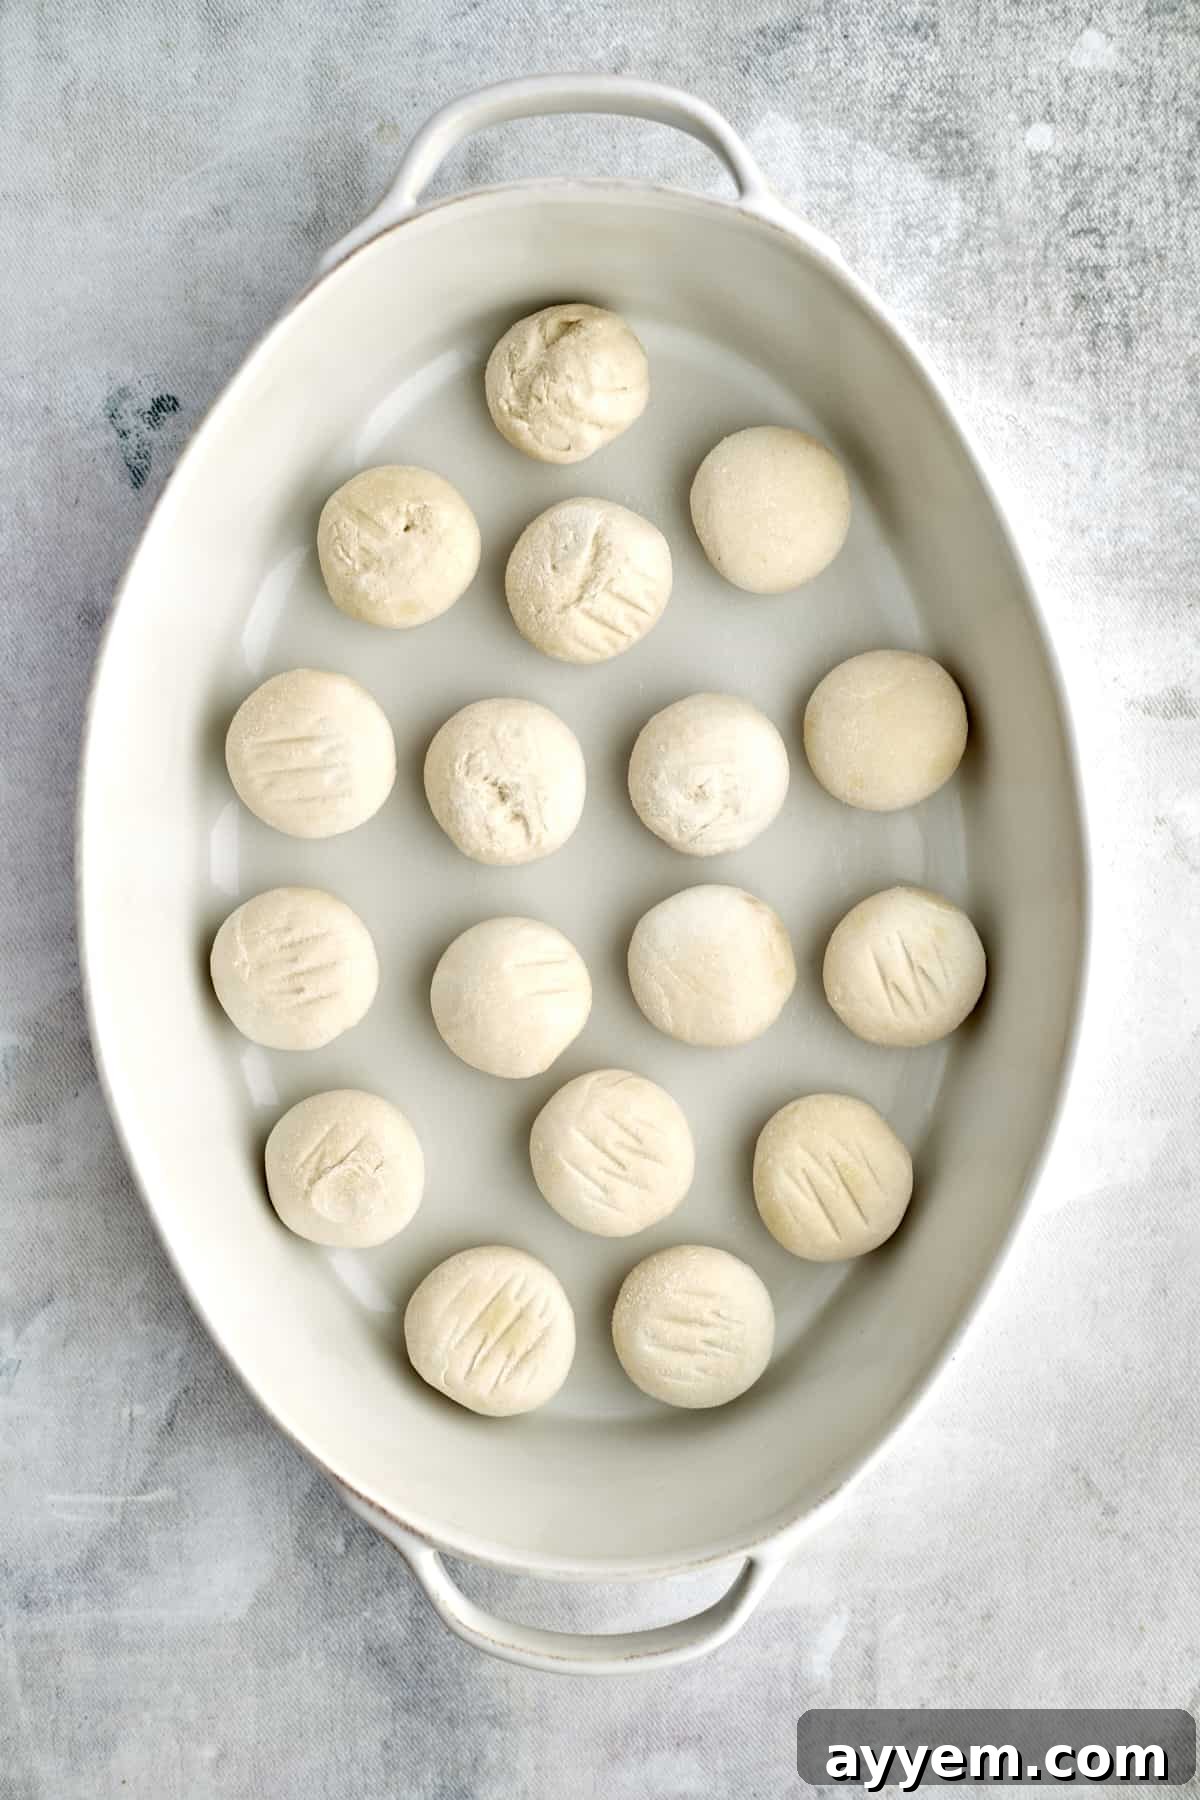
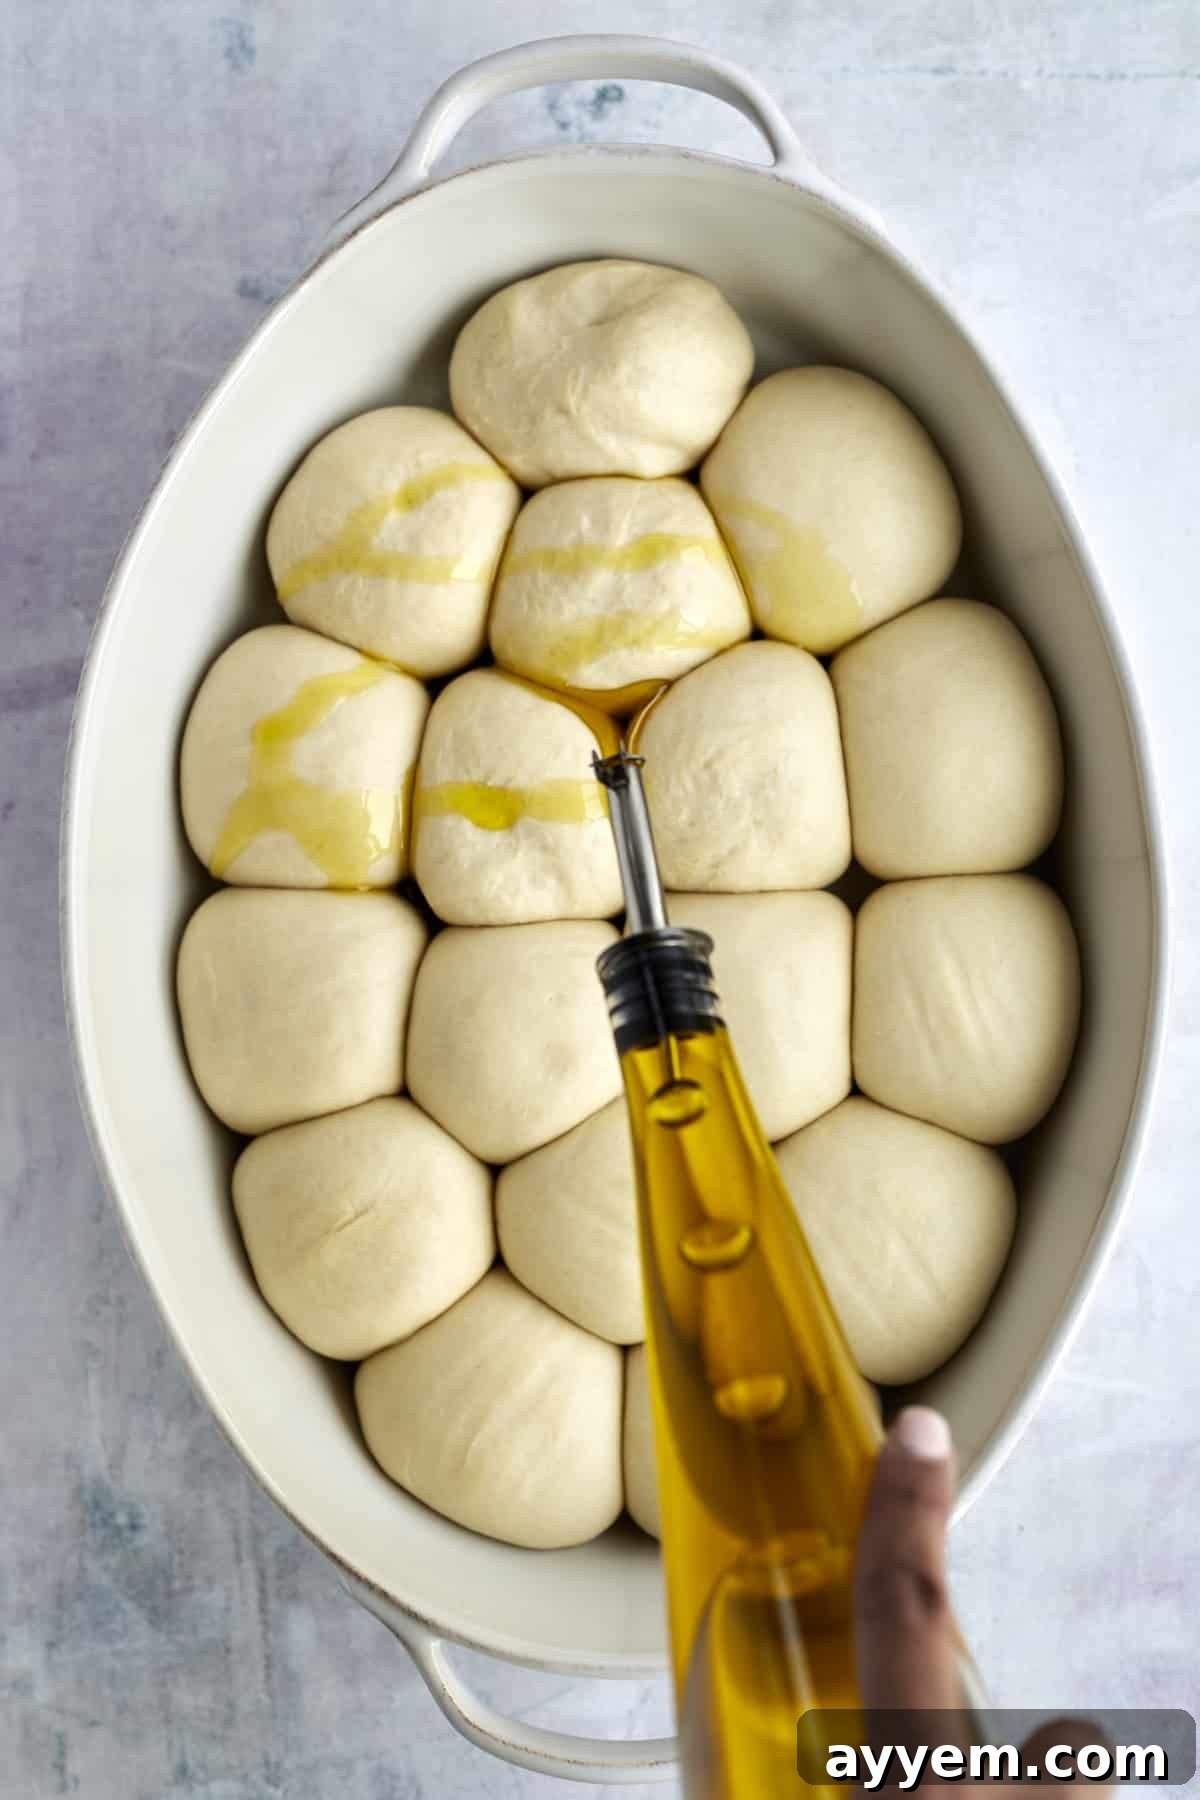
- Arrange the Rolls: Place 14-16 frozen Rhodes dinner rolls in the prepared dish, ensuring about a 1/2-inch space between each roll. They will expand significantly during the rising process.
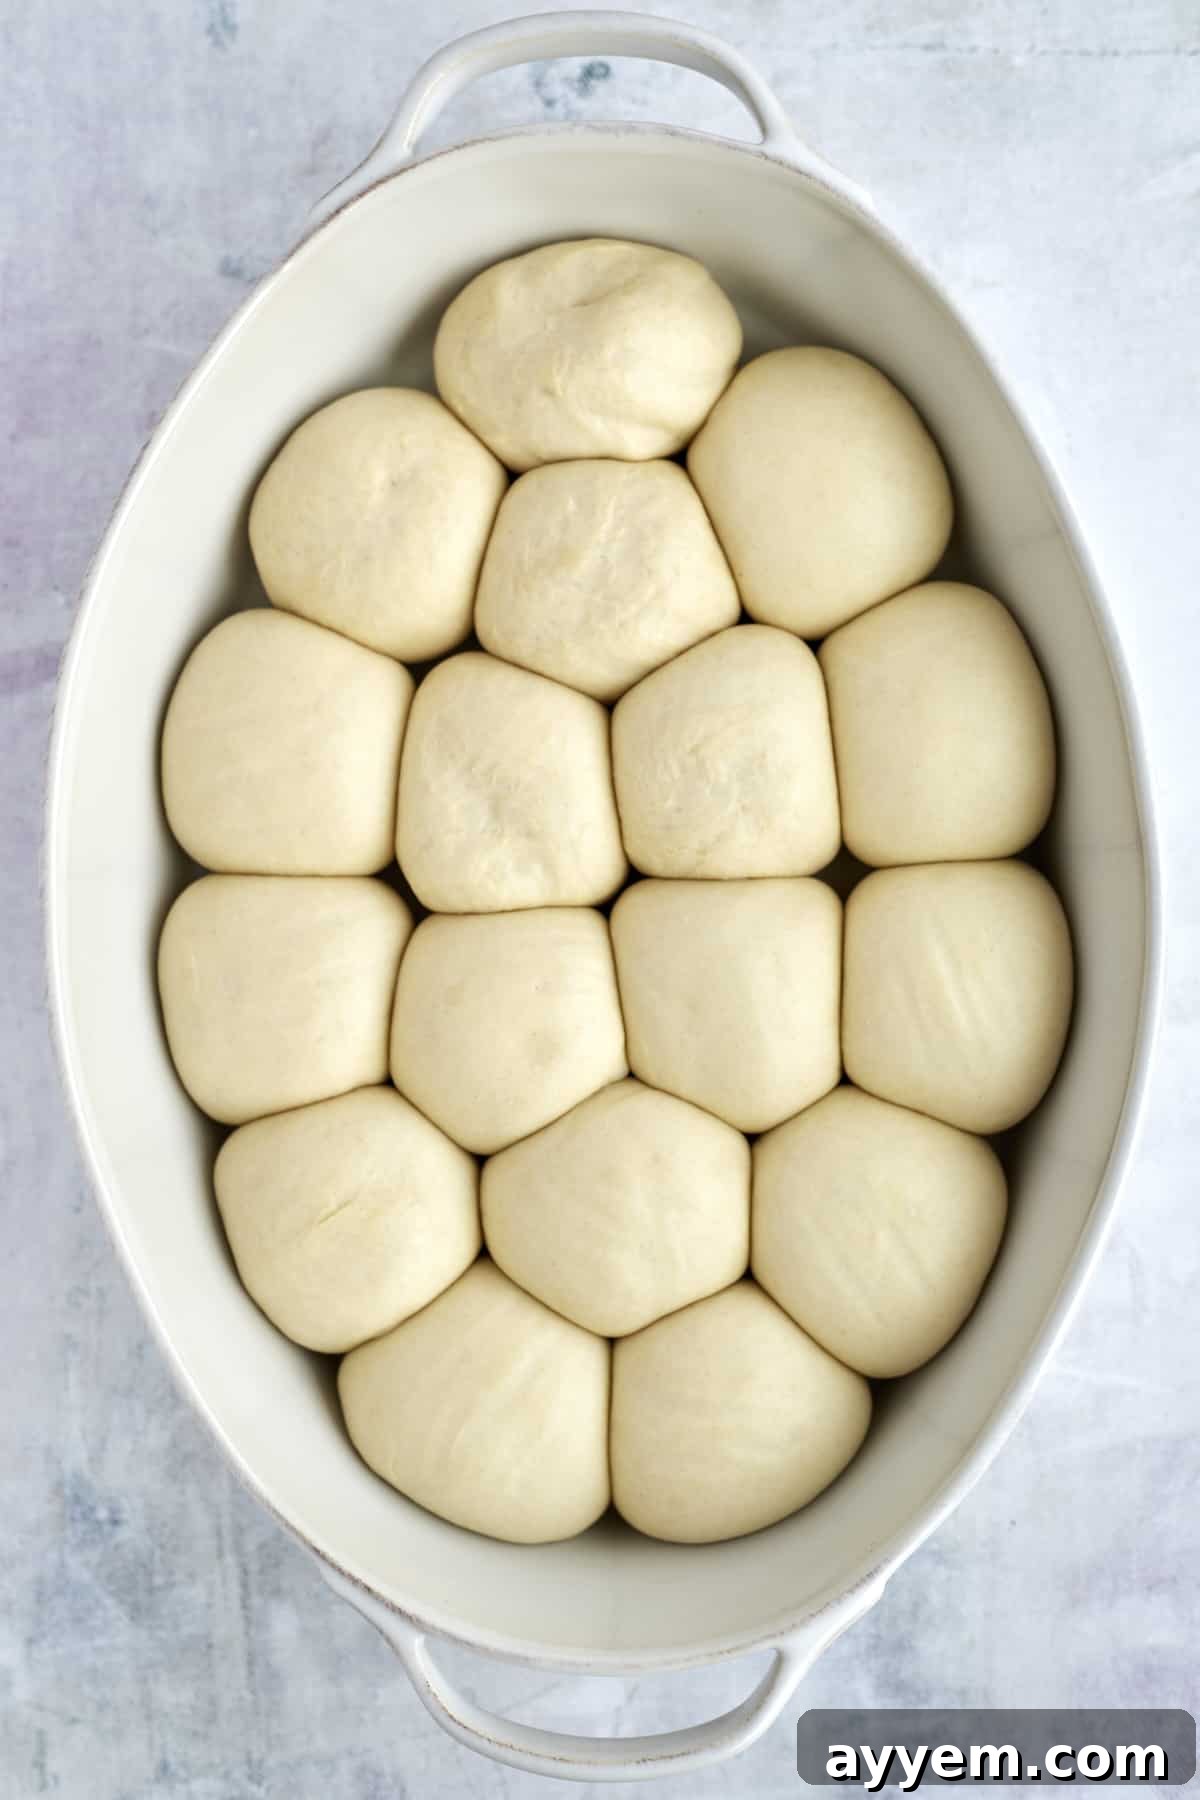
- Initial Rise & Proofing: Lightly brush each frozen roll with a small amount of extra virgin olive oil. Cover the dish loosely with plastic wrap (saran wrap) and let the rolls rise in a warm place for 4-6 hours, or until they have doubled in size and filled out the dish, merging into a single sheet of dough. Patience during this stage is key to achieving a light and airy focaccia.
- Preheat Oven: Once the dough has risen beautifully, preheat your oven to 350°F (175°C).
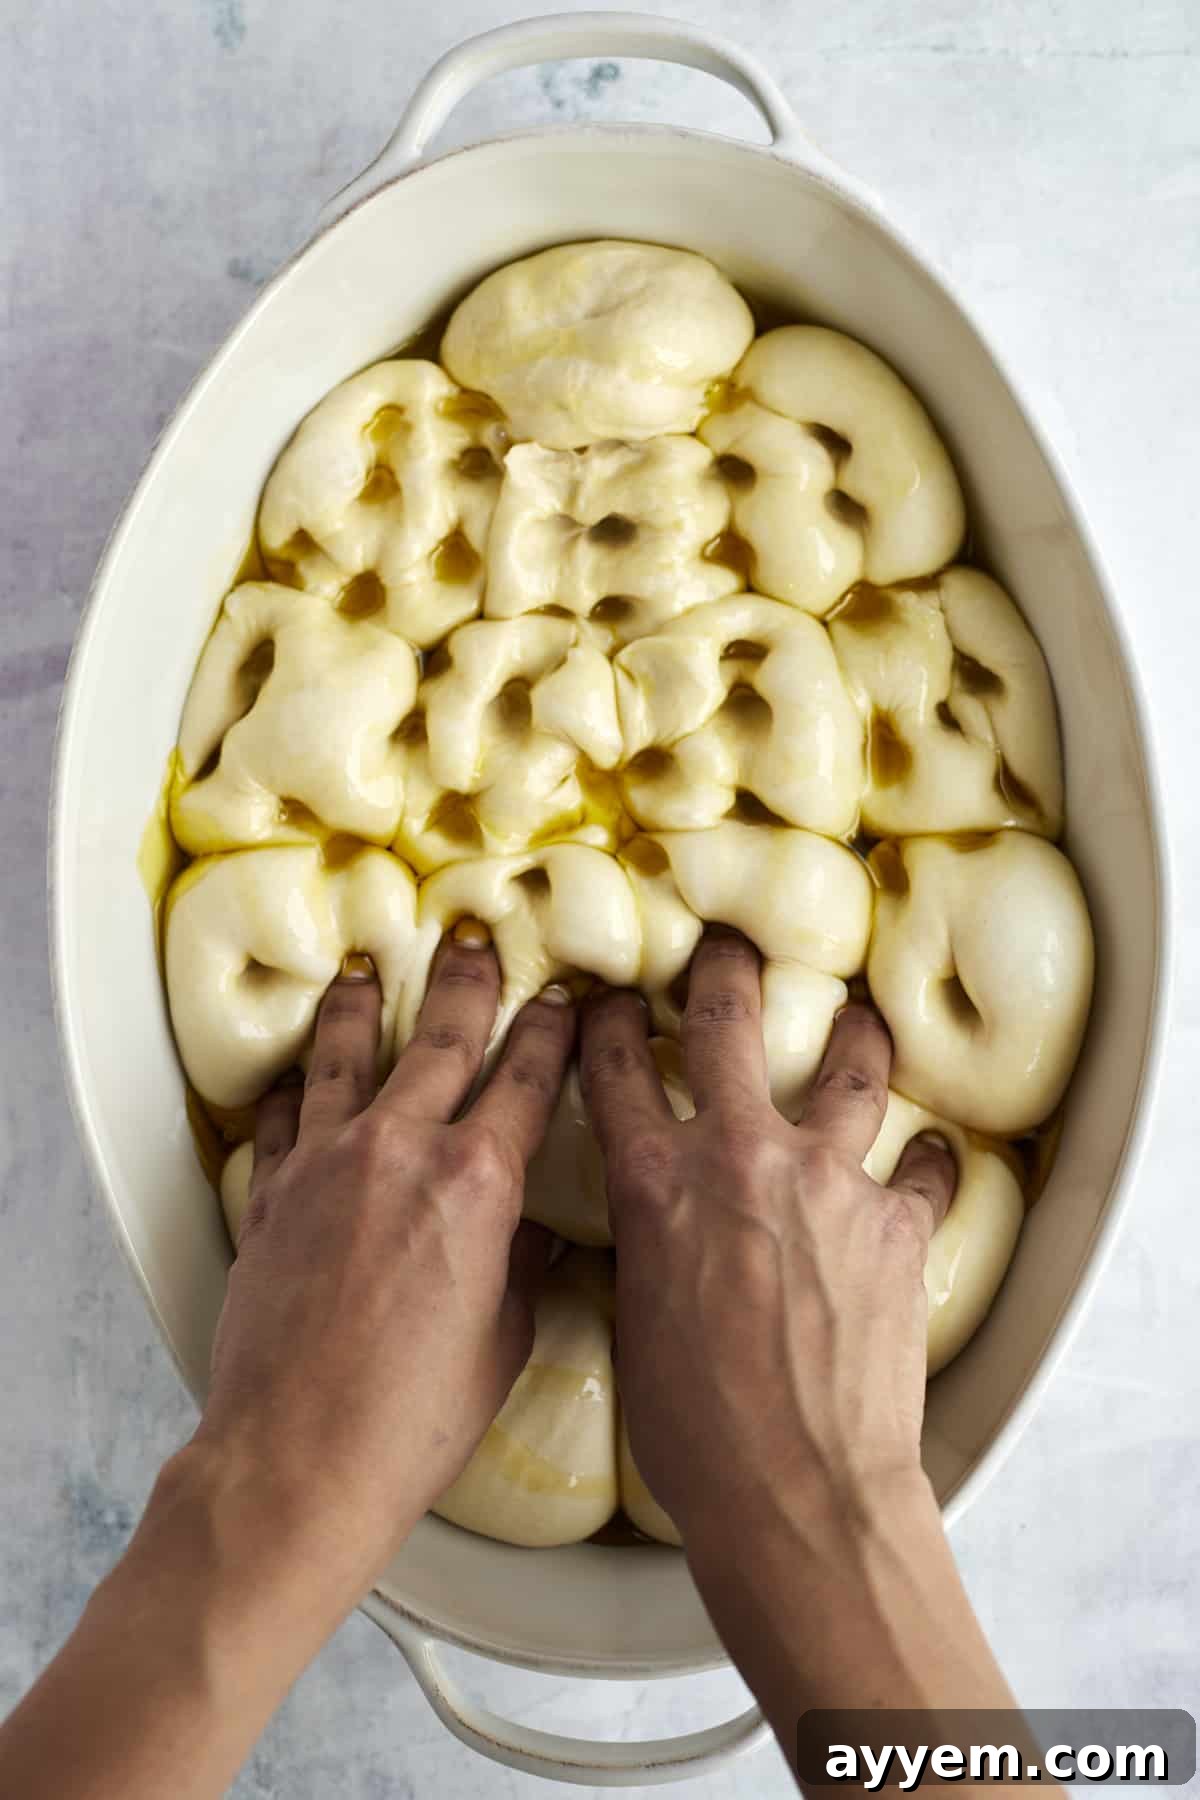
- The Dimpling Magic: Gently remove the plastic wrap. Now for the signature focaccia step! Drizzle a generous amount of extra virgin olive oil over the entire surface of the risen dough. Using your fingertips, press down firmly to create deep indentations across the surface. These dimples are crucial; they create pockets for the olive oil to pool, resulting in those irresistible crispy, flavorful spots after baking.
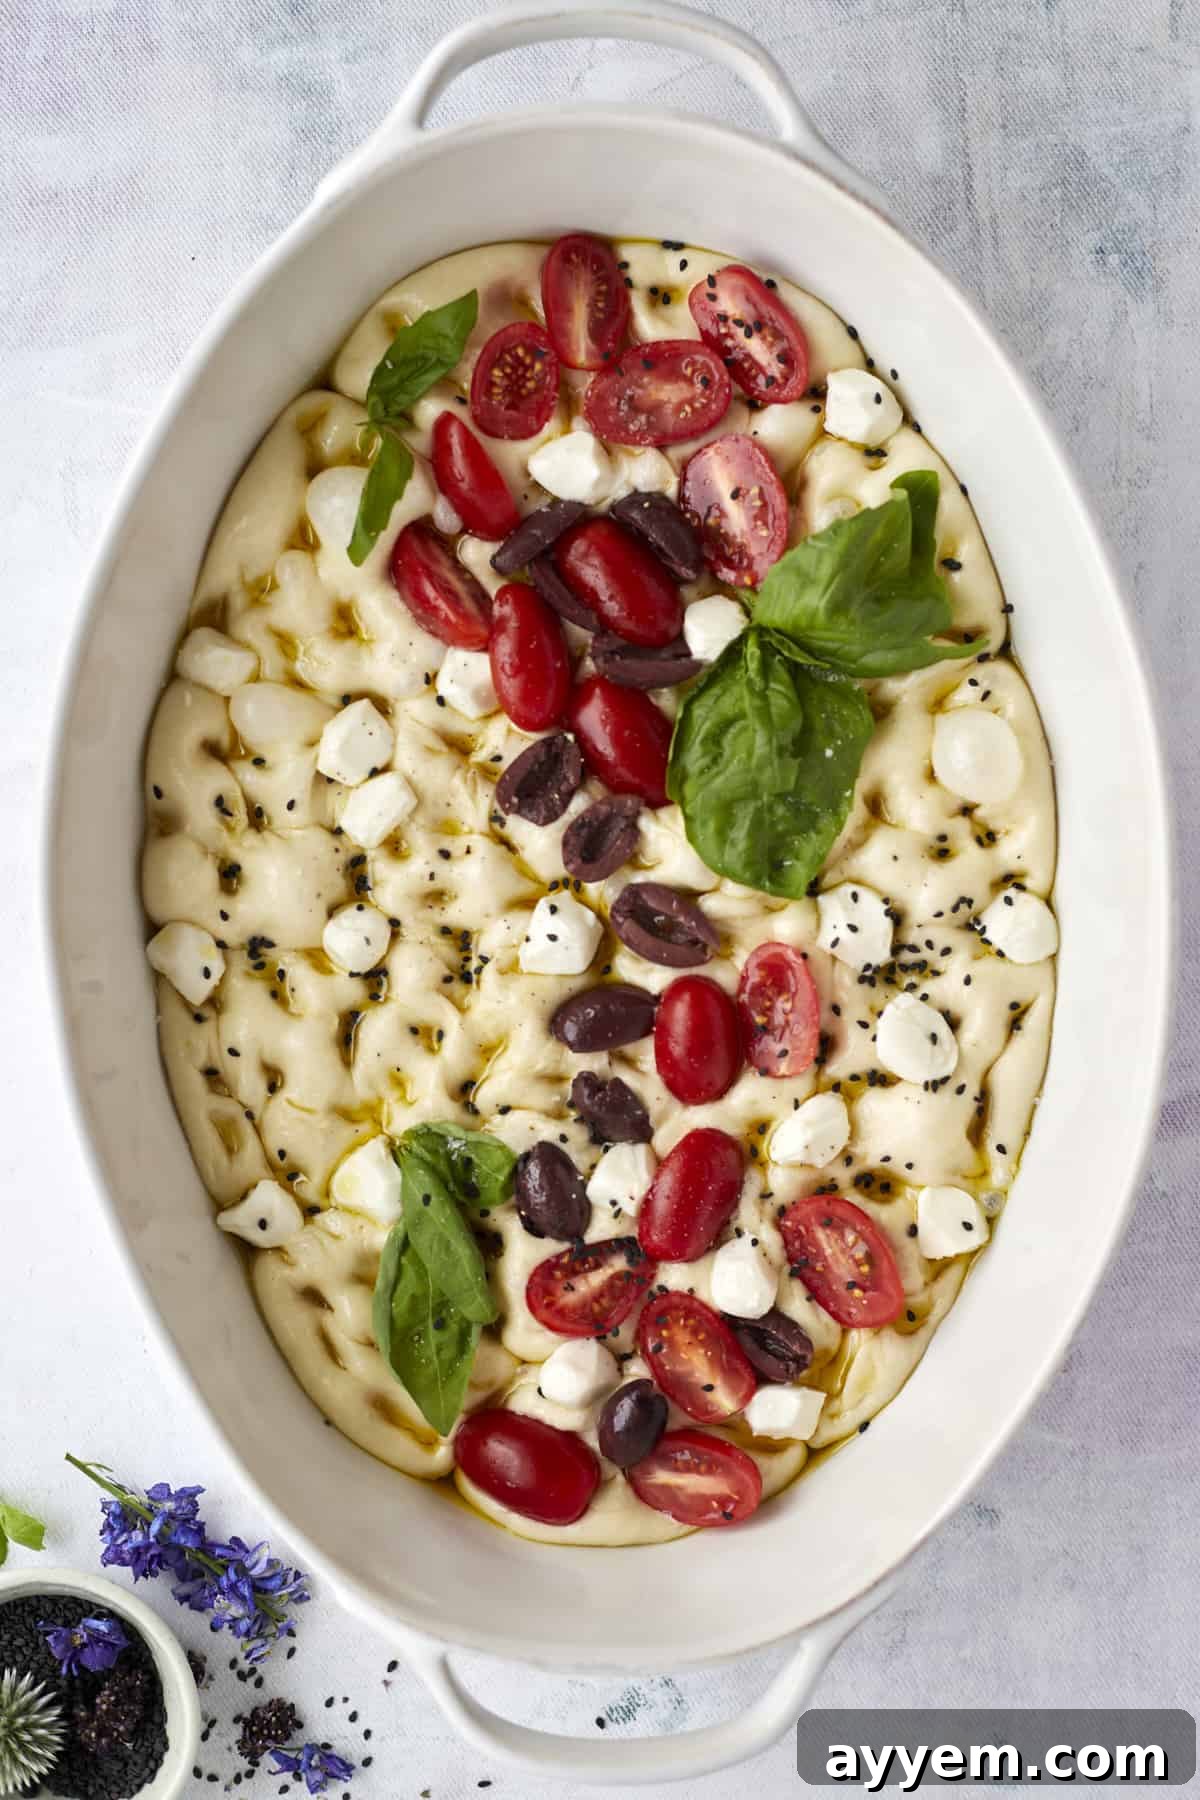
- Decorate with Toppings: This is where your creativity comes alive! Artfully arrange your chosen toppings—cherry tomatoes, kalamata olives, fresh mozzarella pearls, Italian seasoning, oregano, and black sesame seeds—into an appealing design. Think about color, texture, and pattern. A sprinkle of coarse sea salt and freshly ground black pepper will enhance the flavors.
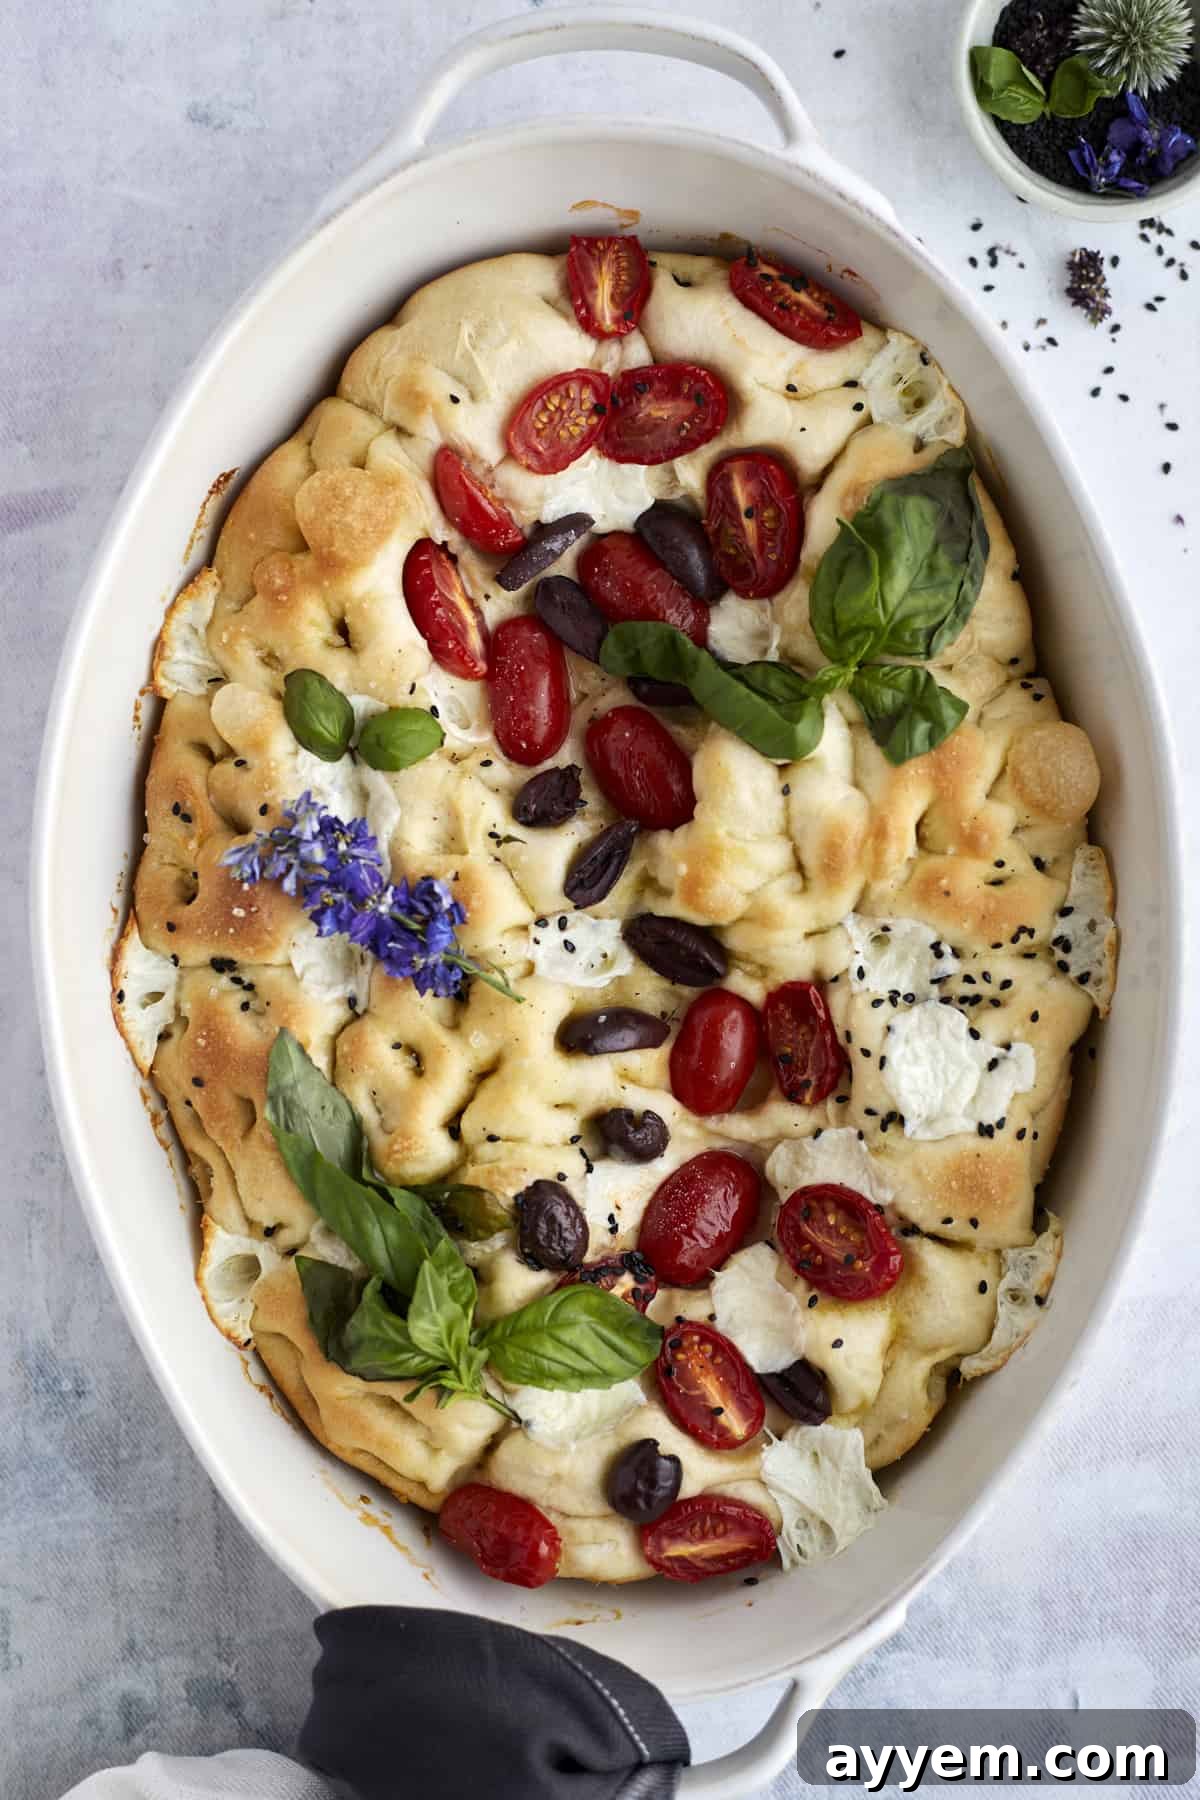
- Bake to Golden Perfection: Place the baking dish in the preheated oven and bake for 20-25 minutes. Keep an eye on it; you’re looking for a beautiful golden brown top and bottom. Avoid overbaking, as this can lead to a dry focaccia. If you find the top browning too quickly, you can loosely tent it with foil.
- Serve Warm: Once baked, remove the focaccia from the oven and allow it to cool slightly before slicing and serving. It’s best enjoyed warm, allowing its aromas to truly shine.
Serving Suggestions and Perfect Pairings
This versatile focaccia bread art is delicious on its own as a snack or appetizer, but it also makes a wonderful accompaniment to a variety of meals. Serve it alongside a hearty Italian soup, a crisp green salad, or as part of an antipasto platter with cured meats and cheeses. It can also be split and used as a base for gourmet sandwiches, elevated with fresh pesto, roasted vegetables, or grilled chicken. Don’t forget to tear off a piece and dip it into your favorite balsamic vinegar and olive oil blend for a truly authentic experience.
How to Keep Your Focaccia Fresh
Given the fresh toppings like tomatoes, olives, and mozzarella, this focaccia is truly at its best when consumed on the same day it’s baked. The flavors are vibrant, and the texture is perfect. However, if you find yourself with any delicious leftovers (a rare occurrence, we know!), they can be stored. Place them in an airtight container or a sealed bag and refrigerate for up to 3 days. To revive its crispy texture, we recommend reheating slices in the oven at 300°F (150°C) for a few minutes or in an
Common Questions about This No-Knead Focaccia Bread Hack
The most common reason for dense focaccia, even with this hack, is insufficient rising time. Ensure you give the Rhodes rolls plenty of time (4-6 hours) in a warm environment to double in size and become airy. Don’t rush this crucial step!
The secret to that coveted crispy, craggly top lies in two things: ample extra virgin olive oil and a hot oven. Be generous when drizzling oil before baking, ensuring it pools slightly in the deep dimples you create. A properly preheated oven ensures a quick and effective bake that crisps the surface beautifully.
Absolutely! Our recipe is a fantastic starting point, but the beauty of focaccia art is its endless customization. Feel free to experiment with roasted red peppers, fresh basil leaves, capers, thinly sliced onions, sun-dried tomatoes, different types of olives, or even a sprinkle of parmesan or feta cheese. Let your imagination guide your culinary creation!
Look for a beautifully golden brown color across the top and bottom of the bread. The dimpled areas should appear crispy and slightly caramelized. If you have an instant-read thermometer, the internal temperature should register around 190°F (88°C). A firm tap on the bottom should also produce a hollow sound.
You can certainly prepare the dough for its rise earlier in the day. However, for the best fresh taste and texture, we recommend baking it closer to when you plan to serve it. The toppings are best added just before baking for optimal freshness and appearance.
Dough rising can be sensitive to temperature. Ensure your rising environment is warm (around 70-80°F or 21-27°C). You can place the covered dish in a slightly warm, off oven, or near a sunny window. If your kitchen is cool, it might take longer than 4-6 hours. Be patient and wait for them to double in size before proceeding.
No Knead Focaccia Bread Art
Food Dolls
8
20 mins
20 mins
Ingredients
- 14-16 frozen Rhodes dinner rolls
- 8 oz cherry tomatoes quartered
- 4 oz pitted and sliced kalamata olives
- 4 oz fresh mozzarella cheese pearls/balls
- 1/4 cup extra virgin olive oil
- 1 tbsp Italian seasoning
- 2 tsp oregano
- 1 tbsp black sesame seeds
- salt and pepper to taste
Instructions
-
In a large buttered 13×9 baking dish, arrange 14-16 frozen dinner rolls, leaving approximately 1/2 inch space between each roll. Lightly brush each frozen roll with a little bit of olive oil. Cover with saran wrap and let rise for 4-6 hours until doubled in size and the rolls have merged into one dough sheet.
-
Preheat oven to 350 degrees F (175°C).
-
Once the bread has risen, gently remove the saran wrap.
-
Drizzle generously with extra virgin olive oil on top of the dough and create deep indentations with your fingers across the entire surface.
-
Artfully arrange your chosen toppings: quartered cherry tomatoes, sliced kalamata olives, fresh mozzarella pearls, Italian seasoning, oregano, and black sesame seeds. Sprinkle with a little salt and pepper to taste.
-
Bake for 20-25 minutes, or until the bread is golden brown and cooked through. Serve warm.
Video
Watch a video tutorial for this recipe here.
Equipment
Notes
Nutrition
Carbohydrates: 4g |
Protein: 4g |
Fat: 13g |
Saturated Fat: 3g |
Polyunsaturated Fat: 1g |
Monounsaturated Fat: 8g |
Cholesterol: 11mg |
Sodium: 323mg |
Potassium: 99mg |
Fiber: 1g |
Sugar: 1g |
Vitamin A: 309IU |
Vitamin C: 6mg |
Calcium: 113mg |
Iron: 1mg
Nutrition information is automatically calculated, so should only be used as an approximation.
Explore More Easy Recipes with Rhodes Frozen Dinner Rolls
If you’ve enjoyed the simplicity and deliciousness of this focaccia hack, you’ll love discovering other creative ways to use Rhodes frozen dinner rolls for quick and impressive meals. Here are a couple of our favorites:
- Spinach and Artichoke Bread Ring
- Spinach and Artichoke Bread Boats
And if you fell in love with the baking dish used in this recipe, you can find it here.