
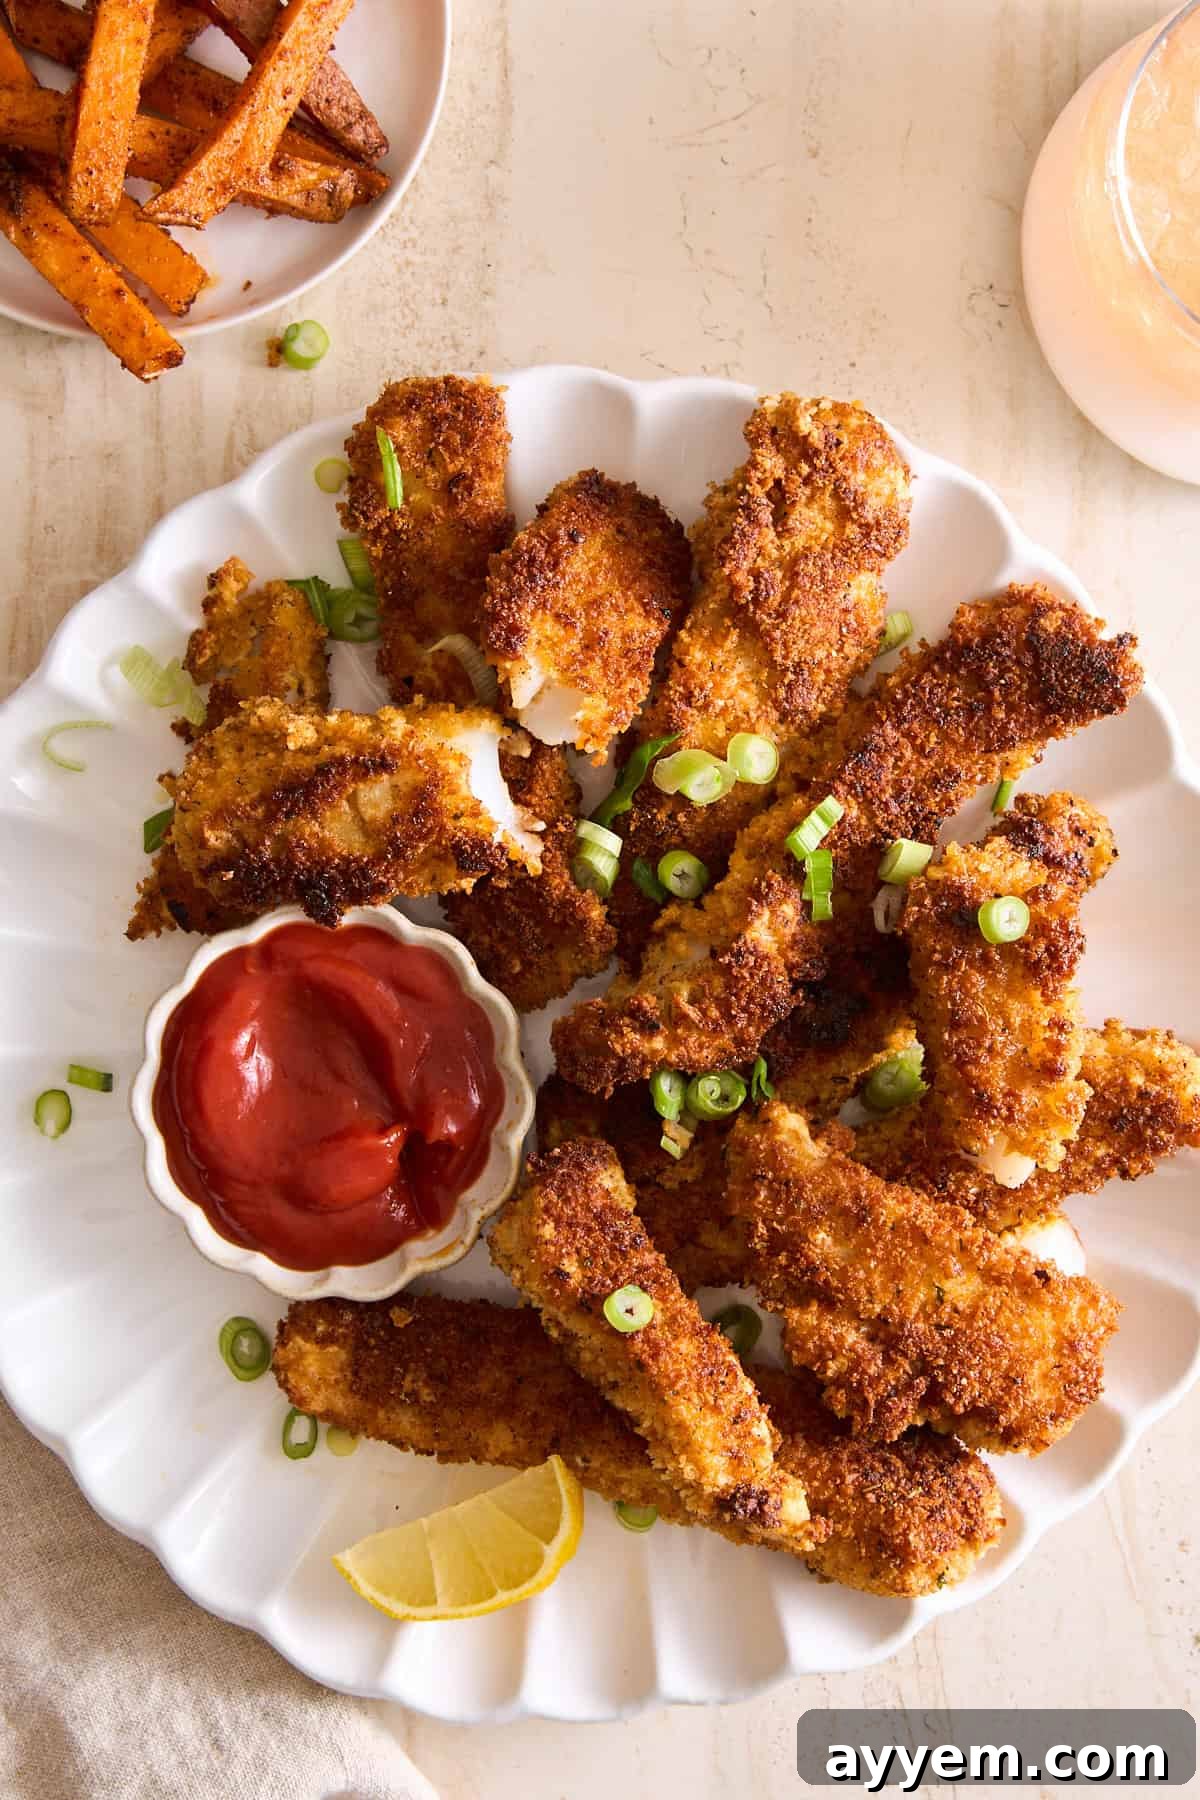
Homemade Fish Sticks transform a classic comfort food into a gourmet delight. Forget the frozen aisle – this recipe guides you to create perfectly golden, irresistibly crispy fish sticks with a tender, flaky interior, ideal for dipping into your favorite sauces. Prepare to elevate your seafood experience with this simple yet sensational dish!
What Are Fish Sticks and Why Homemade is Best?
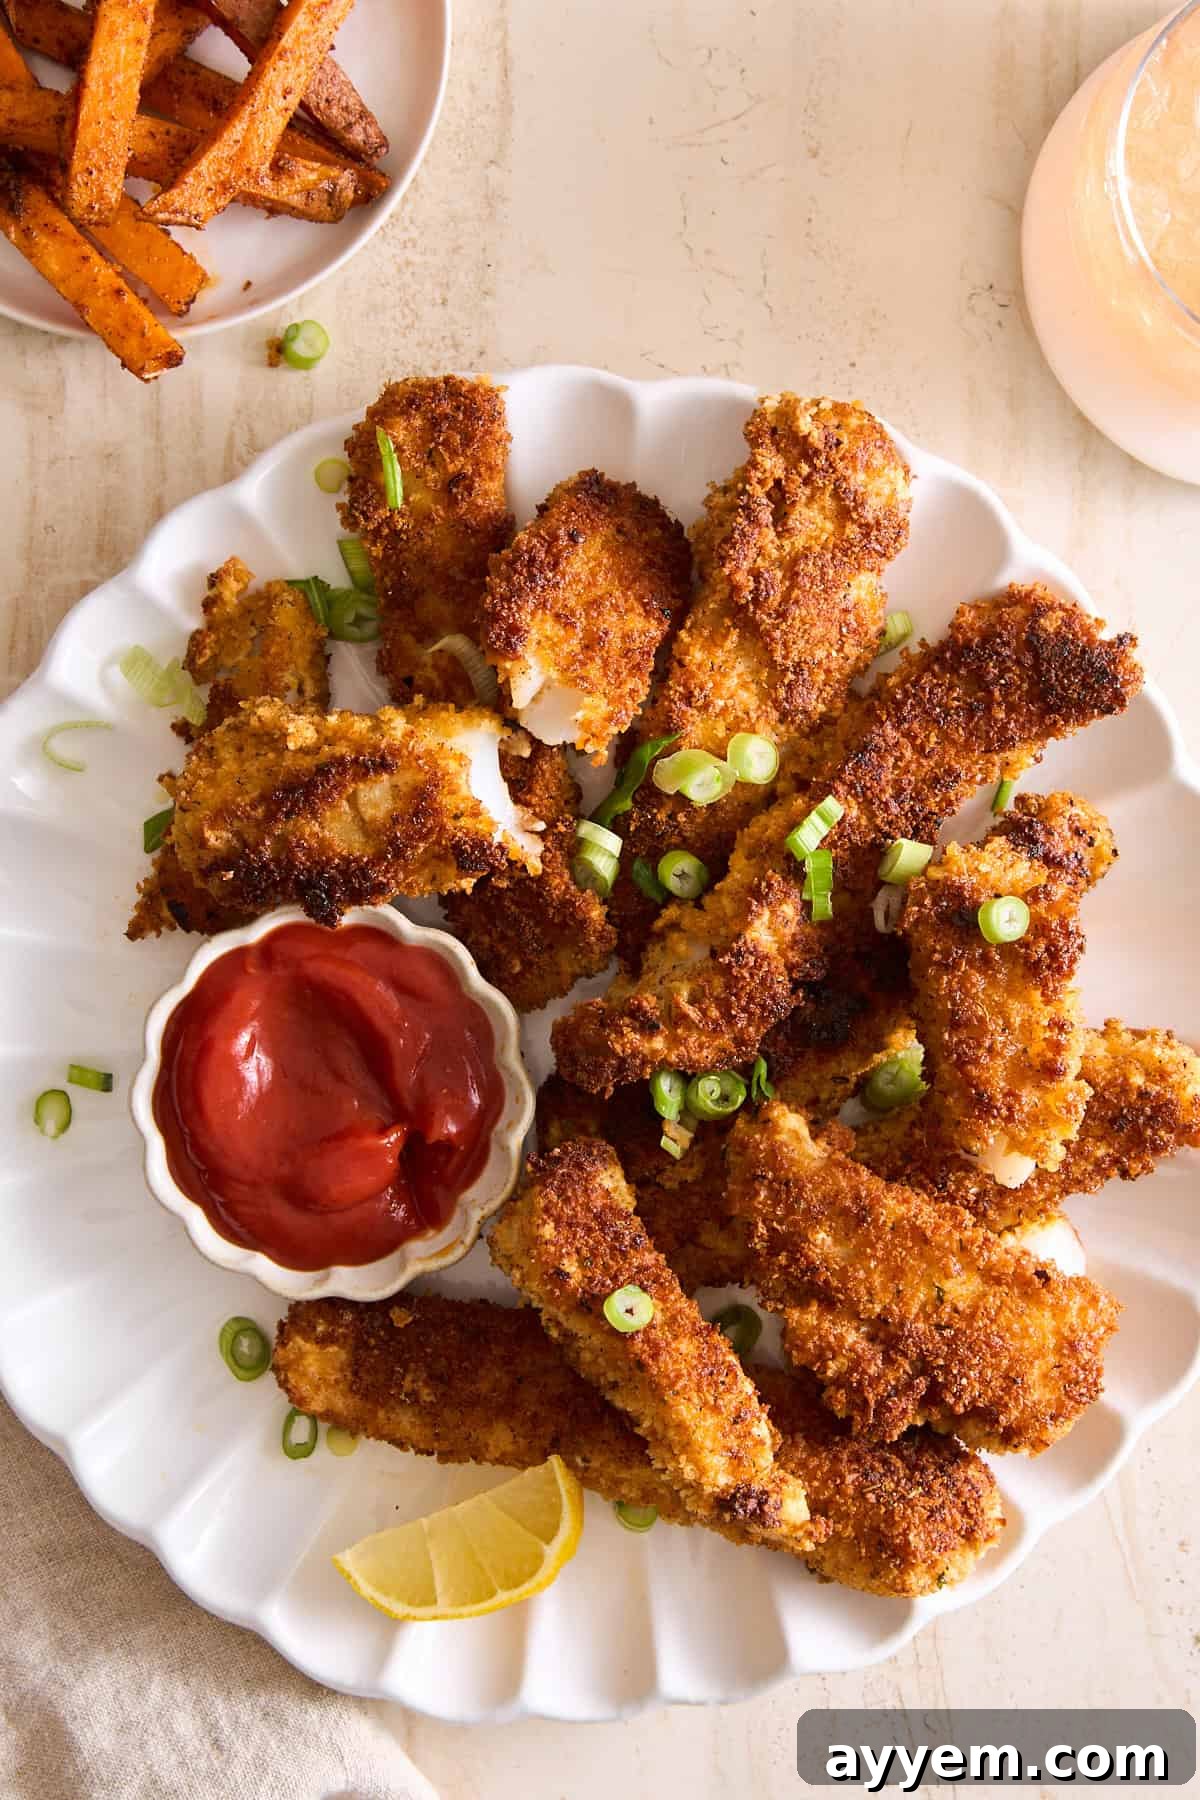
Fish sticks are beloved breaded and fried pieces of white fish, typically cut into convenient strips. While they’re a freezer staple in many homes, often seen as a quick meal solution, crafting them from scratch unlocks an entirely new dimension of flavor and texture. Homemade fish sticks boast an incredibly crispy exterior that shatters with each bite, giving way to a moist, tender, and flaky fish inside. This contrast is simply unparalleled by any boxed alternative, making the effort of cooking them yourself truly worthwhile.
Beyond their superior taste and texture, homemade fish sticks offer remarkable versatility. Though often relegated to kid-friendly menus, these savory seafood bites have immense appeal for adults too. By carefully selecting your seasonings and ingredients, you can customize them to suit any palate, adding a touch of heat or a medley of herbs. They’re perfect as a standalone snack, a protein-packed addition to a fresh salad, tucked into a vibrant sandwich, or served alongside a zesty coleslaw. Making them at home gives you complete control over the quality of ingredients, ensuring a healthier, fresher, and undeniably more delicious meal every time.
The Unrivaled Benefits of Crafting Your Own Fish Sticks
Ditching the frozen fish sticks for a homemade version comes with a myriad of advantages that go beyond just taste. Here’s why making them from scratch is the ultimate choice:
- Superior Taste and Texture: Factory-processed fish sticks often contain additives and are pre-fried, leading to a dull flavor and sometimes soggy breading when reheated. Homemade versions, especially when using fresh fish and panko breadcrumbs, deliver a vibrant, clean fish flavor encased in an unparalleled crunch.
- Healthier Ingredients: When you make fish sticks at home, you control exactly what goes into them. You can opt for high-quality, lean white fish, choose your preferred healthy oils for cooking, and avoid unwanted preservatives, excessive sodium, and artificial flavors often found in store-bought varieties. This makes for a significantly healthier meal for you and your family.
- Customization Options: This recipe provides a fantastic base, but it’s just the beginning. Want more spice? Add extra cayenne. Prefer a different herb blend? Italian seasoning can be swapped for Cajun, Old Bay, or a lemon-herb mix. You can even experiment with different types of fish or dipping sauces to create endless variations.
- Cost-Effective: Buying fresh fish and a few pantry staples can often be more economical in the long run than repeatedly purchasing pre-packaged, frozen fish sticks, especially when you factor in the quality difference.
- A Rewarding Culinary Experience: There’s immense satisfaction in preparing a delicious meal from scratch. The process of breading and frying your own fish sticks is not only simple but also a fun activity, potentially even for involving kids in the kitchen.
The Perfect Catch: Choosing Your Fish for Sticks
The foundation of an excellent fish stick lies in the quality and type of fish you choose. For optimal results, select a mild, flaky white fish that holds its shape well during cooking. Freshness is key, so look for fish fillets that are firm, translucent, and have a clean, oceanic smell.
Why Cod is King for Fish Sticks
In this recipe, we heartily recommend using cod fillets, and for good reason:
- Mild Flavor: Cod has a wonderfully mild, slightly sweet flavor that appeals to almost everyone, including picky eaters. It doesn’t overpower the delicious seasoned breading, allowing both the fish and the crust to shine.
- Flaky Texture: When cooked, cod naturally flakes into large, tender pieces, creating that desirable melt-in-your-mouth experience inside the crispy crust.
- Holds Up Well: Cod is firm enough to withstand the breading process and pan-frying without falling apart, ensuring perfectly shaped fish sticks every time. Its low oil content also means it cooks cleanly and doesn’t become greasy.
Other Excellent White Fish Options
If cod isn’t available or you’d like to try something different, several other white fish varieties make fantastic fish sticks:
- Haddock: Very similar to cod in flavor and texture, haddock is another excellent choice that cooks beautifully.
- Pollock: Often used in commercial fish sticks, pollock is a sustainable and affordable option with a mild taste and flaky texture.
- Tilapia: A very mild and lean fish, tilapia is readily available and cooks quickly. Ensure you choose responsibly sourced tilapia.
- Halibut: For a more luxurious take, halibut offers a firmer, sweeter white flesh that makes incredibly satisfying fish sticks, though it can be pricier.
Regardless of your choice, always ensure the fish is fresh, properly thawed (if using frozen), and patted thoroughly dry before breading to achieve the crispiest results.
Essential Ingredients for Crispy, Flavorful Perfection
Crafting superior fish sticks starts with a thoughtful selection of ingredients. Each component in this recipe plays a crucial role in delivering that irresistible golden crunch and savory flavor.
- Panko Breadcrumbs: This is arguably the most important ingredient for the crust. Panko, a Japanese-style breadcrumb, is renowned for its light, airy, and flaky texture. Unlike traditional breadcrumbs, panko creates an incredibly crispy coating that absorbs less oil and stays crunchy long after cooking.
- All-Purpose Flour: The initial coating of flour serves a vital purpose. It adheres to the patted-dry fish, creating a foundation that helps the egg mixture stick more effectively. This ensures a consistent and robust breading that won’t fall off during cooking.
- Nonstick Olive Oil Cooking Spray or Olive Oil: While you can pan-fry with a drizzle of olive oil, a cooking spray offers an even coating with less fat, contributing to a lighter, golden-brown crust without the need for deep frying.
- Salt: A fundamental seasoning, salt enhances the natural flavor of the fish and seasons every layer of the breading, ensuring no bland bites.
- Black Pepper: Freshly ground black pepper adds a subtle kick and aromatic depth, perfectly balancing the richness of the fish and the other spices.
- Italian Seasoning: This aromatic blend of herbs (like oregano, basil, rosemary, thyme, and marjoram) infuses the breading with a complex, savory, and Mediterranean-inspired flavor that complements white fish beautifully.
- Paprika: Beyond its vibrant color, paprika offers a mild, sweet, and slightly smoky flavor that adds warmth and character to the crust. It’s a subtle but impactful addition.
- Garlic Powder: A cornerstone of savory cooking, garlic powder provides a rich, aromatic, and umami note to the breading, creating a delicious synergy with the mild fish.
- Cayenne Pepper (Optional): For those who enjoy a little heat, cayenne pepper is a fantastic addition. It adds a pleasant warmth that awakens the palate without overwhelming the delicate fish flavor. Adjust to your personal spice preference.
- Large Eggs, Whisked: The whisked eggs act as the essential “glue” in the breading process. They create a sticky surface for the seasoned flour and panko to adhere to, ensuring a thick, uniform, and delicious crust.
- Cod Fillet, Cut into Sticks: As discussed, cod is our top recommendation for its mild flavor and flaky yet firm texture. Cutting it into uniform sticks (approximately 3-4 inches long and 1/2-1 inch wide) ensures even cooking and perfect portion sizes for dipping.
Step-by-Step Guide: Crafting Your Own Crispy Fish Sticks
Making delicious homemade fish sticks is a straightforward process when you follow these easy steps. Precision in each stage ensures a perfectly crispy exterior and a tender, juicy interior.
1. Prep Your Dipping Stations with Precision
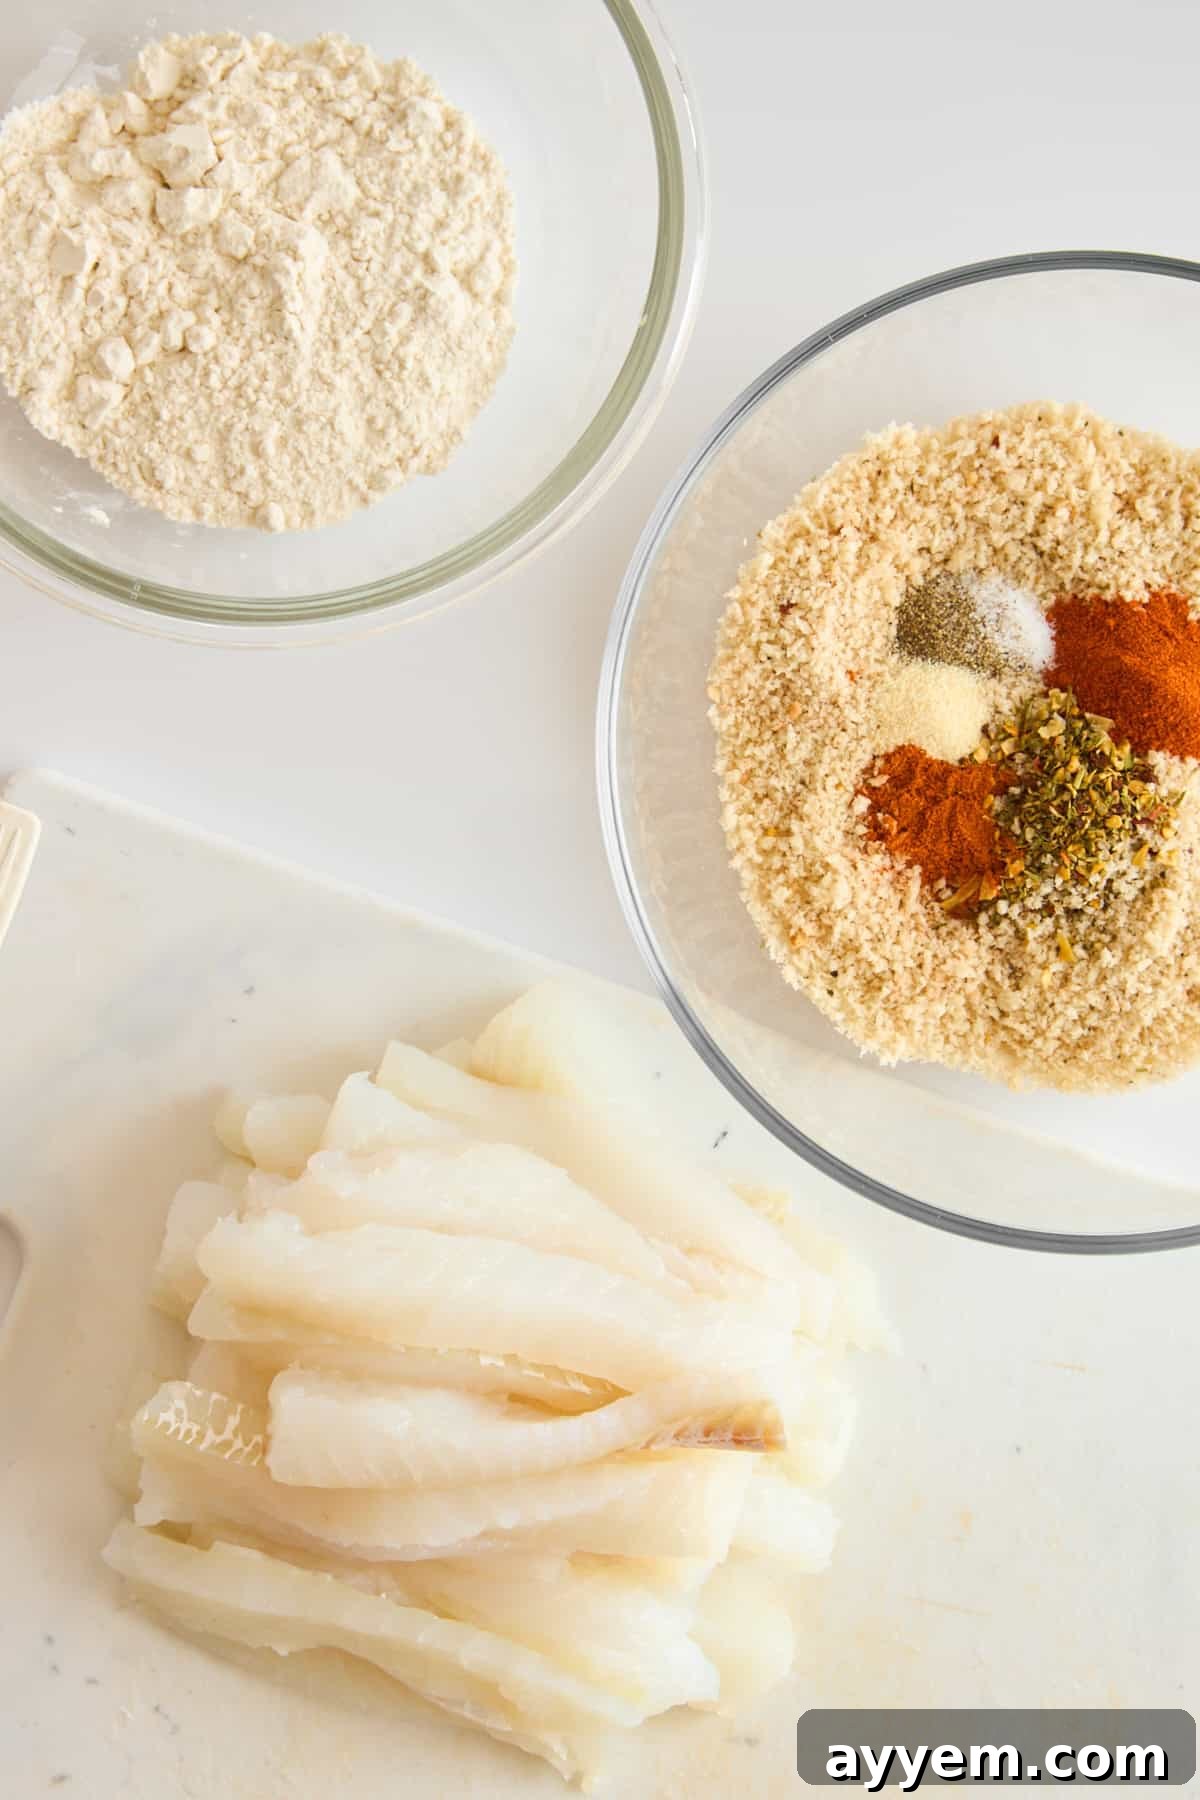
- Gather Your Bowls: Set up three shallow bowls in an assembly line fashion. This organized approach makes the breading process smooth and efficient.
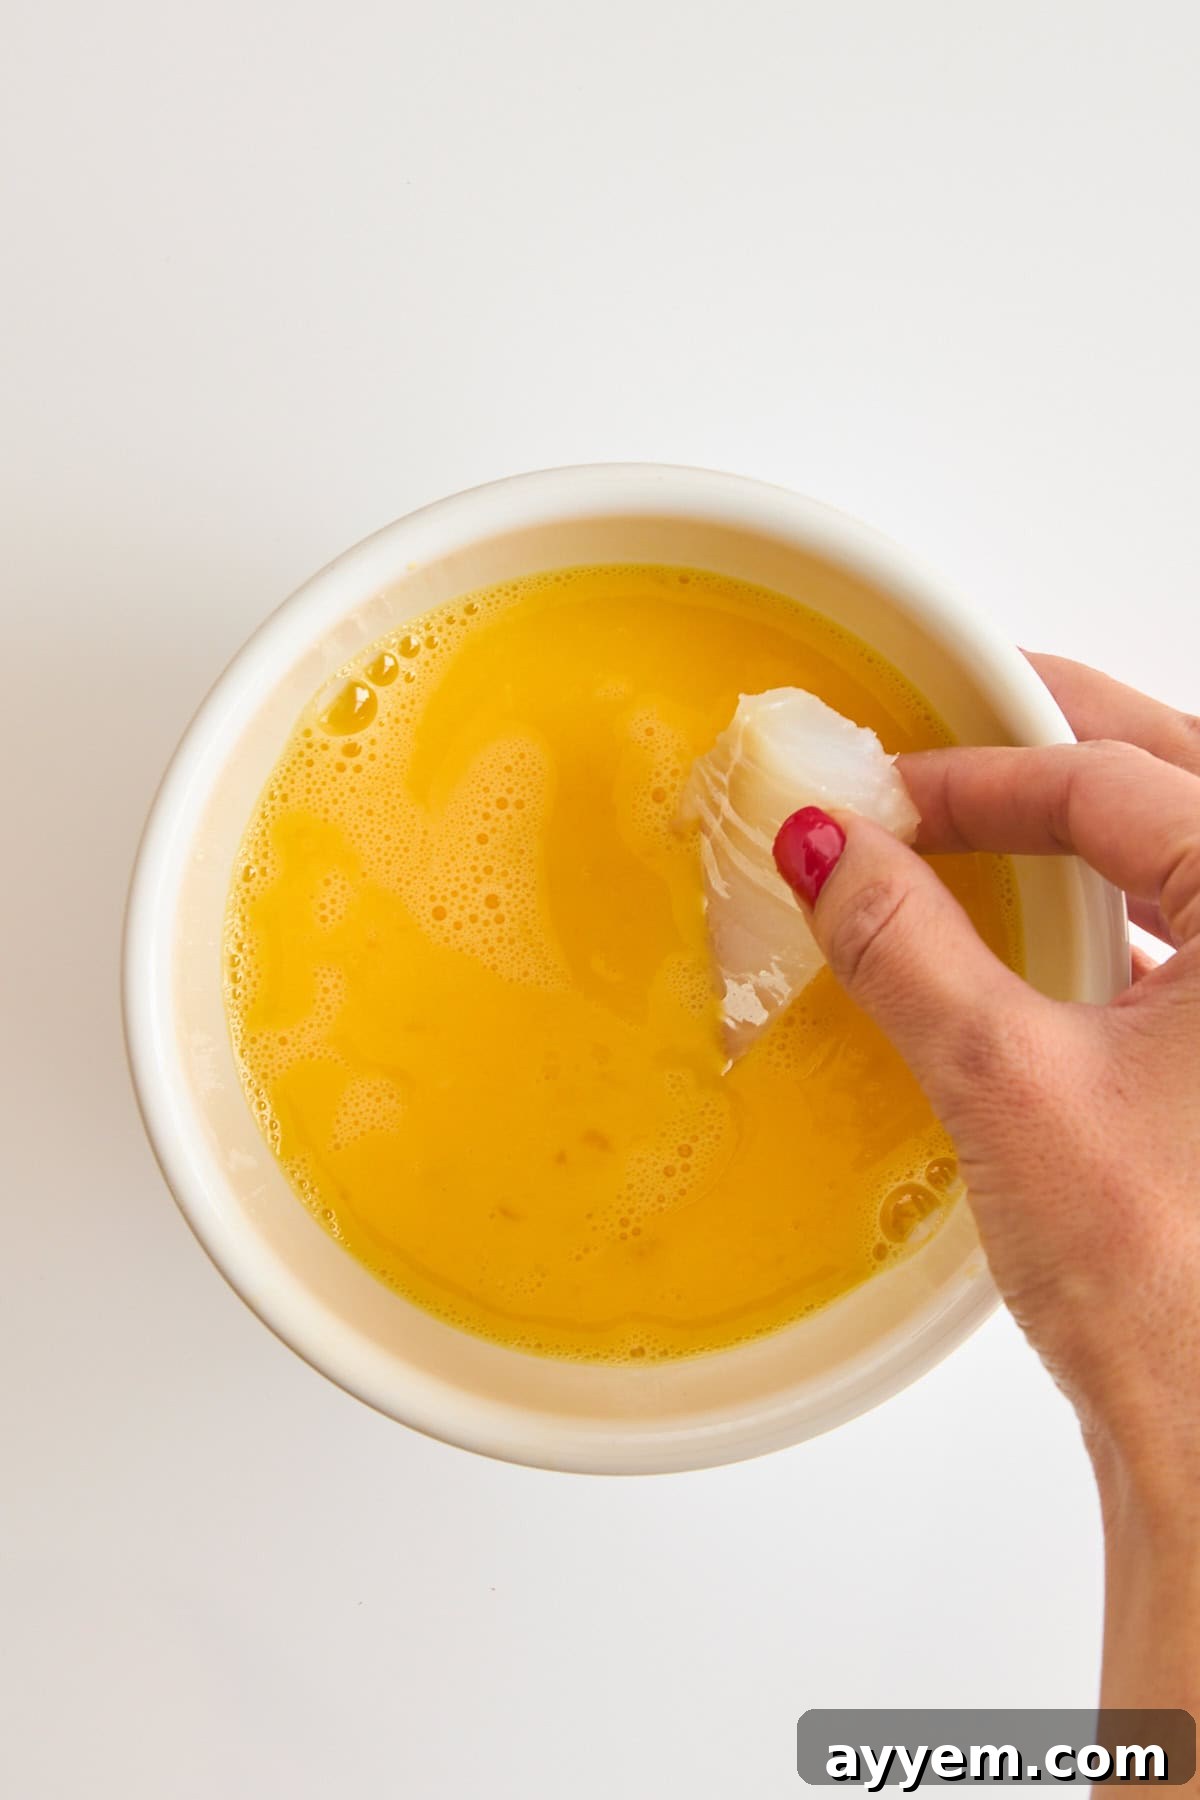
- The Egg Wash: In the first bowl, whisk your large eggs until the whites and yolks are fully combined and slightly frothy. This creates a uniform sticky base for the flour.
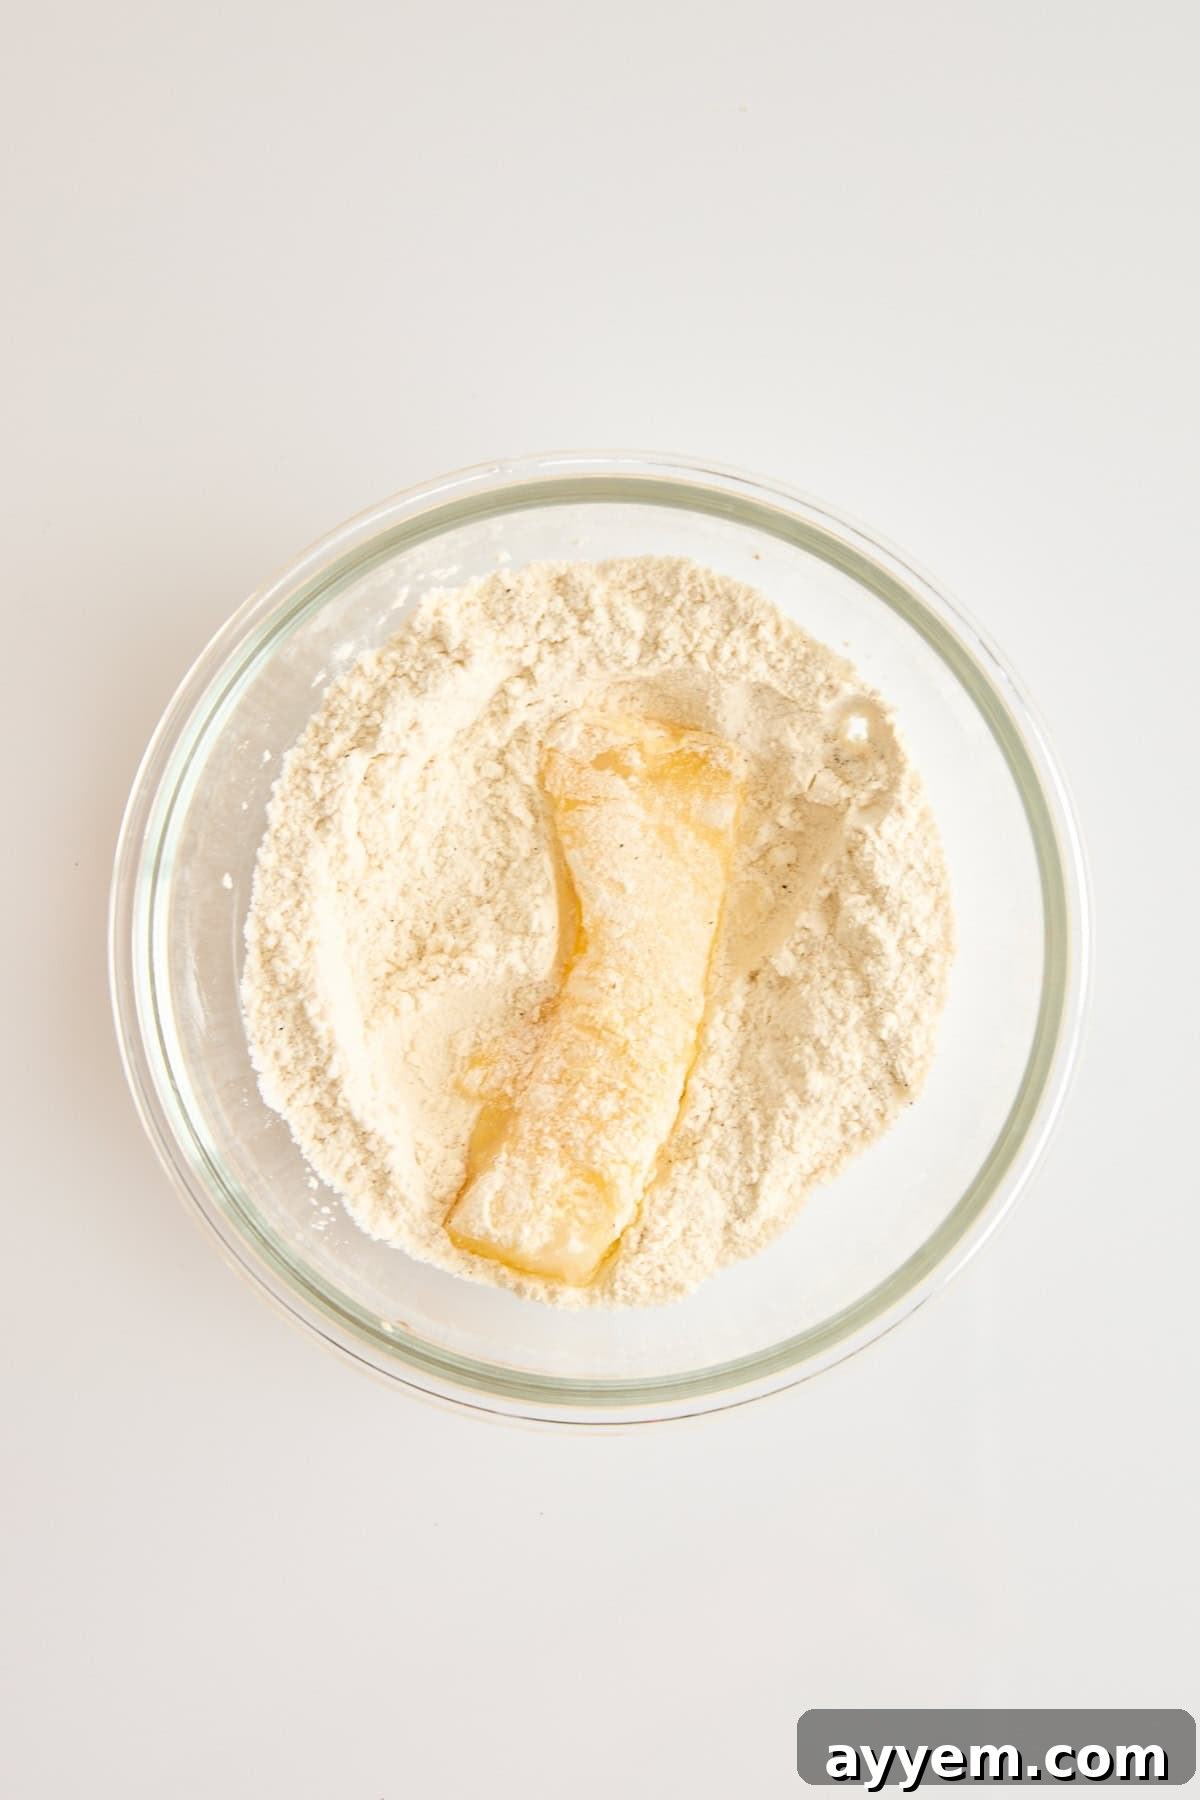
- The Seasoned Flour: In the second bowl, combine the all-purpose flour with half of the specified salt and black pepper. Whisk these together thoroughly to ensure the seasoning is evenly distributed. This layer helps absorb any remaining moisture from the fish and creates a crucial adhesion point for the egg.
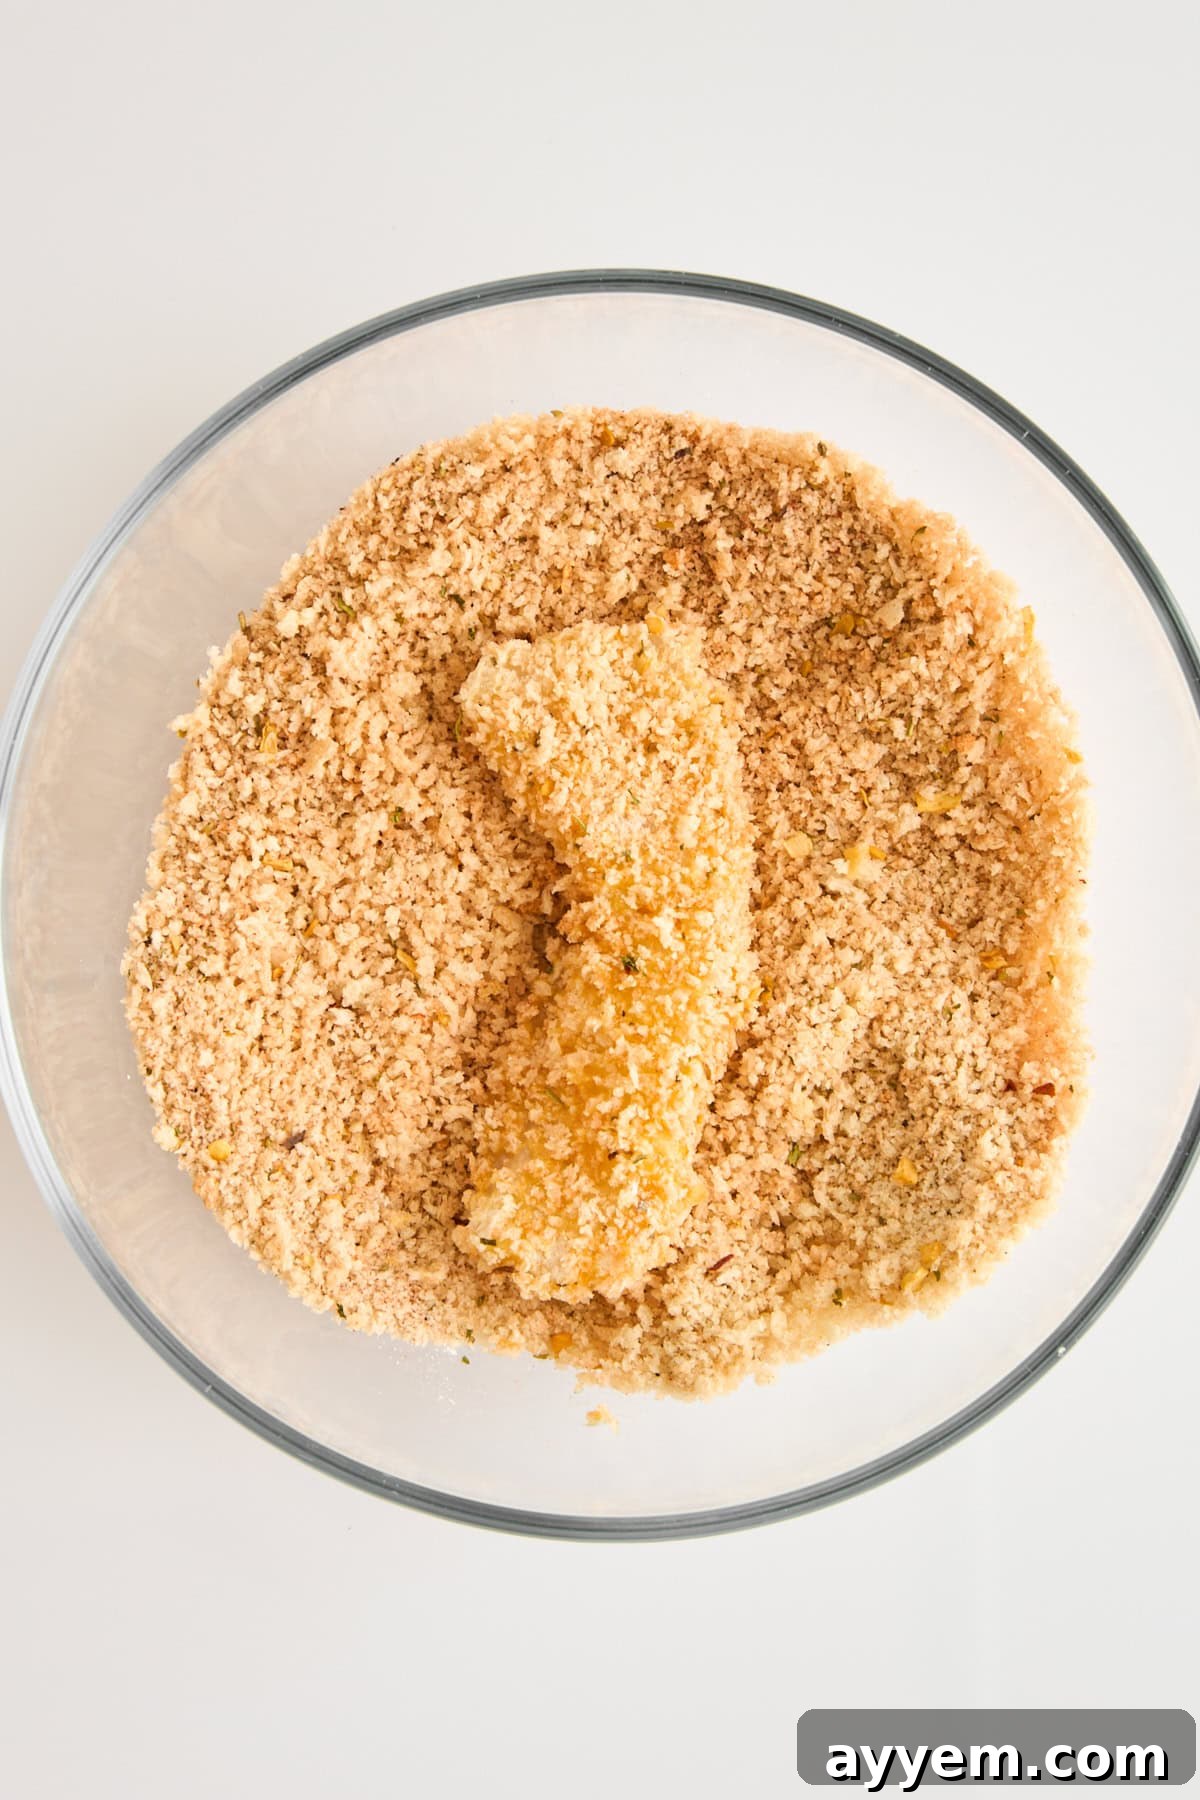
- The Flavorful Panko Mix: In the third bowl, combine the panko breadcrumbs with the remaining salt, black pepper, Italian seasoning, paprika, garlic powder, and the optional cayenne pepper. Stir this mixture well. The panko’s unique texture, combined with these aromatic spices, is what gives your fish sticks their signature crispiness and deep flavor.
2. Master the Art of Coating the Fish
- Dry the Fish: Before you begin breading, it’s crucial to pat the cod fillets thoroughly dry with paper towels. Excess moisture is the enemy of crispiness and can lead to a soggy crust.
- First Flour Dredge: Take each fish stick and dredge it completely in the seasoned flour mixture. Ensure every surface is coated, then gently shake off any excess flour.
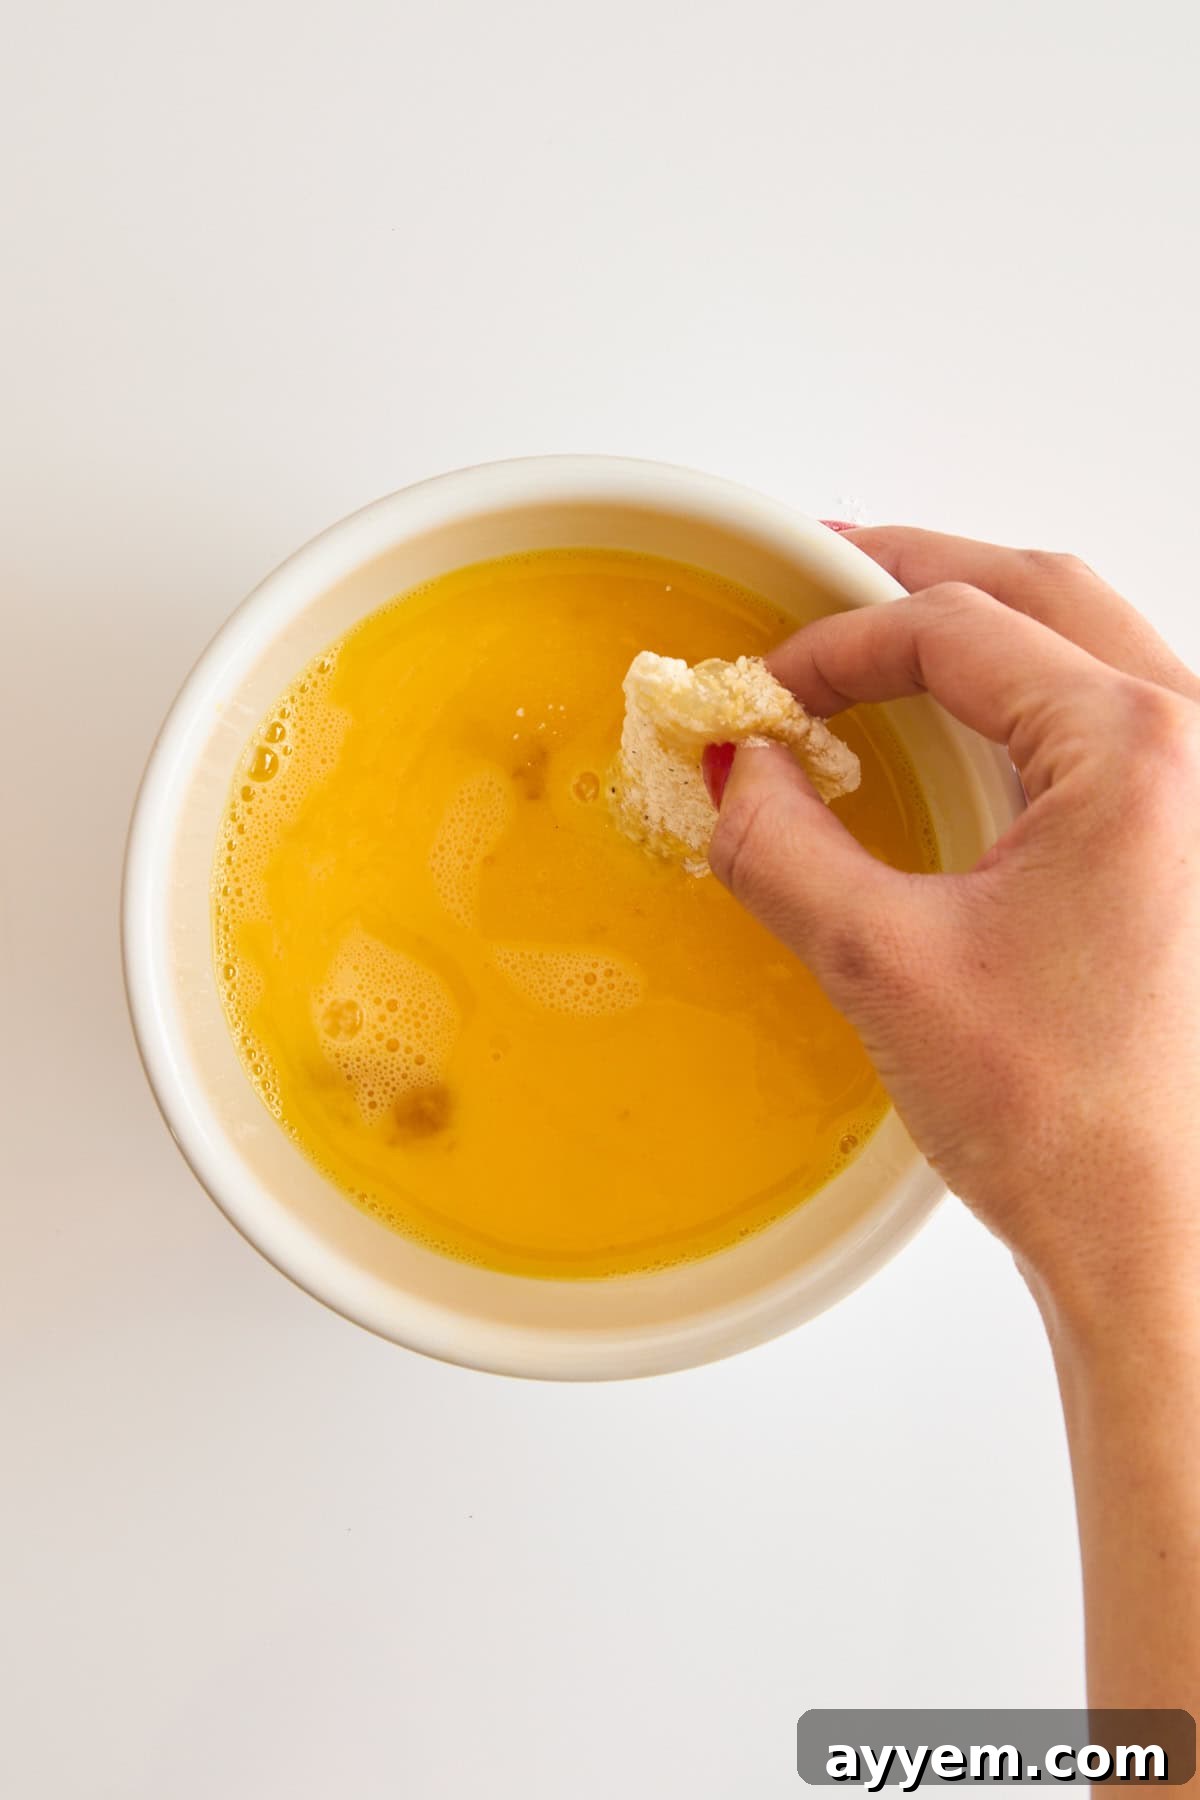
- First Egg Dip: Immediately dip the flour-coated fish stick into the whisked egg, allowing any excess egg to drip off.
- Double Dredge for Extra Crunch: For an exceptionally thick and crispy crust, repeat the flour dredge and egg dip steps one more time. This double layer significantly enhances the final texture and prevents the fish from drying out.
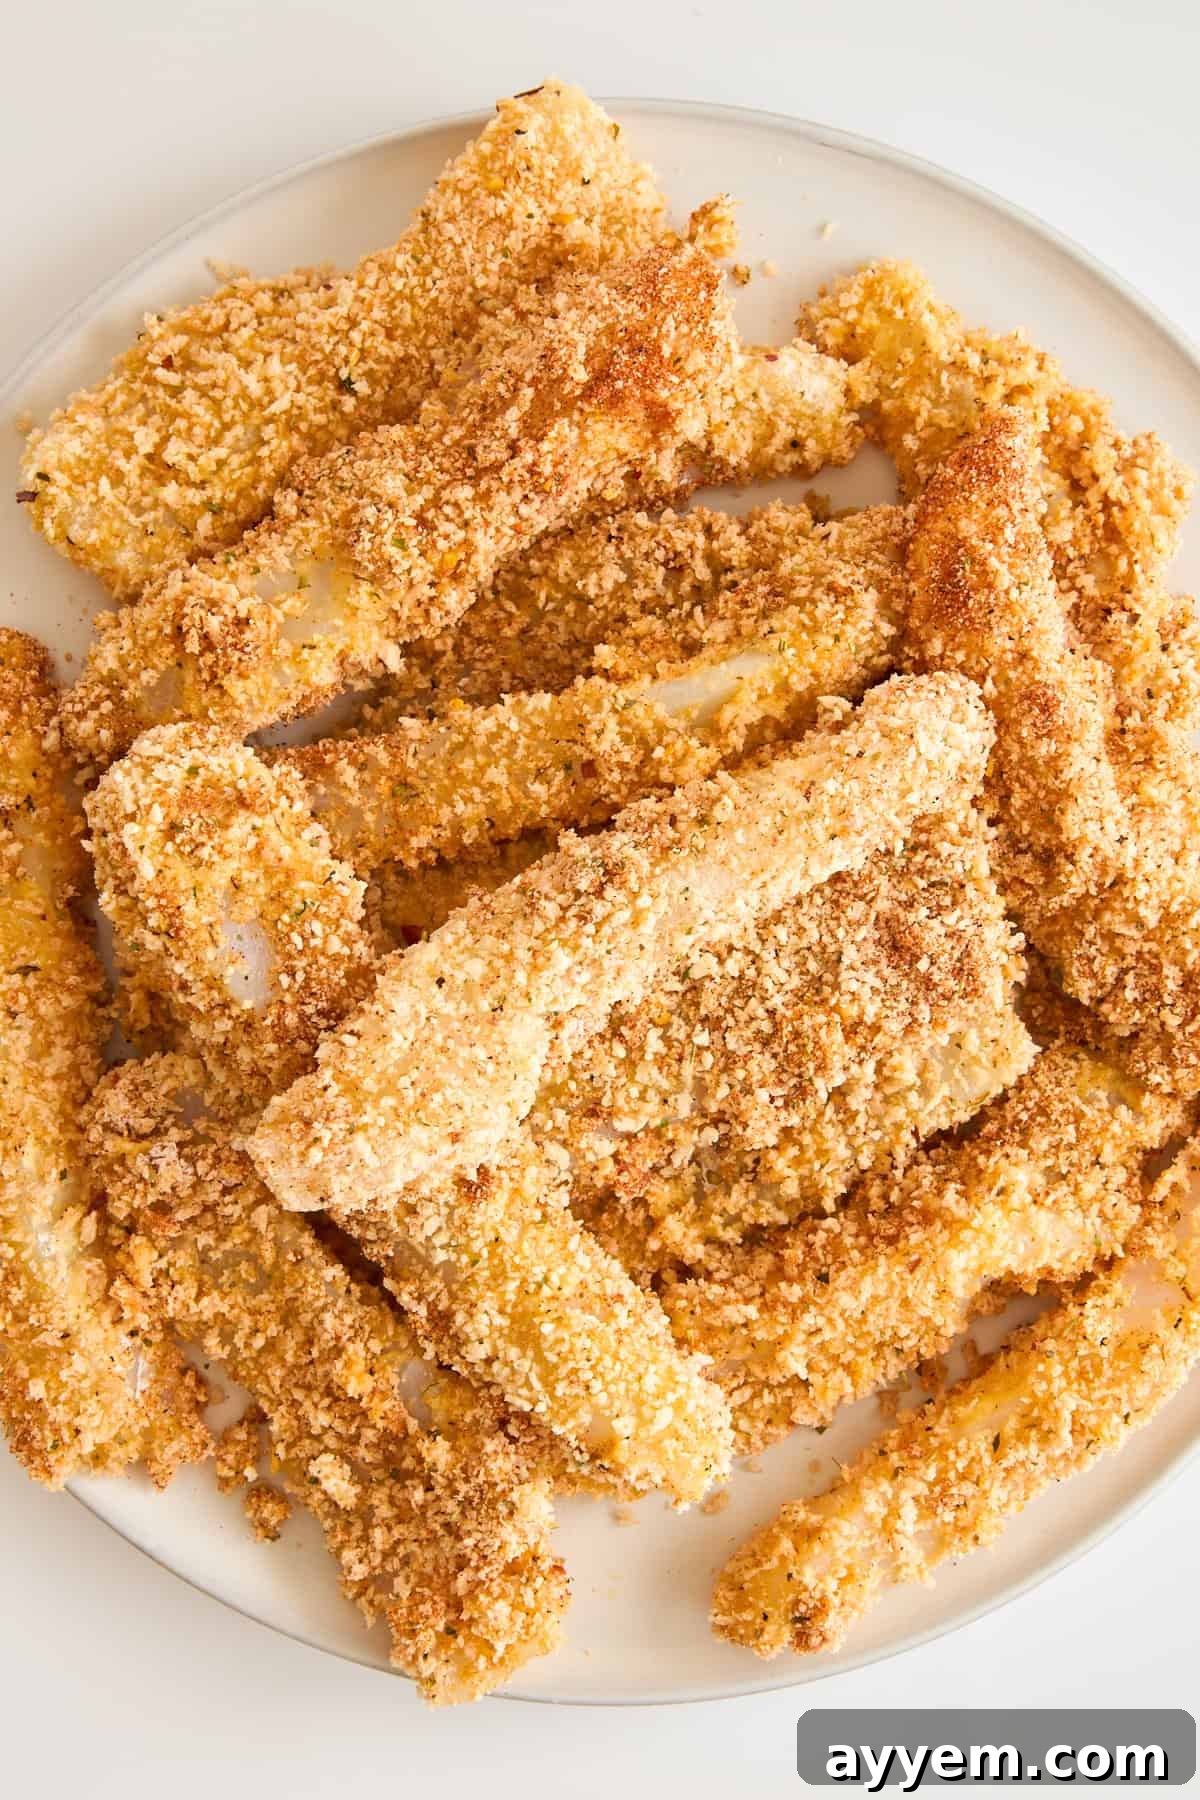
- Final Panko Press: Finally, press the fish stick firmly into the seasoned panko breadcrumbs. Make sure the panko adheres well to all sides. Don’t be shy; really press it on to create a robust, crunchy crust. Lay the breaded fish sticks on a clean plate or baking sheet as you finish each one, ensuring they don’t touch.
3. Pan-Frying for Golden Crispiness
- Heat the Skillet: In a large, nonstick skillet, heat a generous drizzle of olive oil over medium heat. Alternatively, you can use nonstick olive oil cooking spray. The oil should be shimmering but not smoking. Proper oil temperature is key to achieving a golden crust without burning.
- Cook in Batches: Gently place the breaded fish sticks into the hot skillet, ensuring you don’t overcrowd the pan. Overcrowding can lower the oil temperature and lead to steaming rather than frying, resulting in less crispy fish. Cook in batches if necessary, allowing enough space between each piece.
- Fry Until Golden: Cook for approximately 3-4 minutes per side, or until the coating is beautifully crisp and golden brown. The fish should flake easily when tested with a fork, indicating it’s cooked through.
- Drain and Serve: Once cooked, transfer the fish sticks to a plate lined with paper towels to drain any excess oil. Serve immediately with your favorite dipping sauces.
Versatile Cooking Methods for Your Fish Sticks
While pan-frying yields an undeniably crispy result, homemade fish sticks are wonderfully adaptable to other cooking methods. Whether you prefer baking for a lighter option or air frying for an extra crunch, these alternatives ensure delicious results.
Baked Fish Sticks: A Lighter Alternative
Baking is an excellent choice for a healthier version of fish sticks, using less oil while still achieving a pleasant crispiness.
- Preheat Oven: Preheat your oven to 400°F (200°C).
- Prepare Baking Sheet: Line a baking sheet with parchment paper for easy cleanup and to prevent sticking. Lightly spray the parchment paper with nonstick olive oil spray or brush with a little olive oil.
- Arrange Fish Sticks: Place the breaded fish sticks in a single layer on the prepared baking sheet, ensuring they don’t touch. Lightly spray the tops of the fish sticks with olive oil cooking spray. This helps them brown and crisp up.
- Bake: Bake for 15-20 minutes, flipping halfway through, until the fish sticks are golden brown and crispy, and the fish is cooked through and flakes easily. The exact time may vary depending on the thickness of your fish.
Air Fryer Fish Sticks: Maximum Crisp, Minimal Oil
The air fryer is a fantastic tool for achieving super crispy results with minimal oil, making it a favorite for many. They cook up beautifully, providing that perfect crunch without the mess of pan-frying.
- Preheat Air Fryer: Preheat your air fryer to 400°F (200°C) for 5 minutes.
- Prepare Basket: Lightly spray the air fryer basket with nonstick olive oil spray.
- Arrange Fish Sticks: Place the breaded fish sticks in a single layer in the air fryer basket, ensuring not to overcrowd it. Cook in batches if necessary. Lightly spray the tops of the fish sticks with olive oil cooking spray.
- Air Fry: Air fry for 8-12 minutes, flipping them halfway through, until they are golden brown, extra crispy, and the fish is fully cooked.
Creative Variations to Explore
This homemade fish stick recipe is wonderfully versatile, allowing for endless creative twists to suit your taste. Don’t be afraid to experiment!
- Different Fish: While cod is excellent, feel free to swap it for other white fish like haddock, pollock, tilapia, or even firm salmon for a richer flavor profile.
- Gluten-Free: Easily adapt this recipe by using your favorite gluten-free all-purpose flour blend and gluten-free panko breadcrumbs. The results will be just as delicious and crispy!
- Spice it Up: Elevate the heat by stirring extra chili powder, a dash of smoked paprika, or a few drops of your favorite hot sauce into the egg mixture. You could also mix finely chopped jalapeños into the breading.
- Herb Garden Freshness: Incorporate fresh herbs into your panko mixture. Finely chopped parsley, dill, chives, or cilantro can add a burst of freshness. Lemon zest is also a fantastic addition for a bright, citrusy note.
- Cheese Please: For an extra layer of savory flavor, mix a few tablespoons of grated Parmesan cheese into your panko breadcrumbs. It adds a nutty, umami depth that pairs wonderfully with fish.
- Cracker Crumb Coating: Instead of panko, try using crushed saltine crackers or buttery Ritz crackers for a different texture and flavor. This creates a rich, savory crust reminiscent of classic cracker-crusted fish.
- Sesame Seed Crunch: Add a tablespoon or two of sesame seeds to your panko mixture for a unique nutty flavor and extra crunch, especially delicious with an Asian-inspired dipping sauce.
Expert Tips for Flawless Fish Sticks Every Time
Achieving perfectly crispy and flavorful fish sticks is simple with a few insider tips:
- Pat Your Fish Dry: This is arguably the most crucial step for crispiness. Excess moisture on the fish surface will create steam, leading to a soggy breading. Use paper towels to blot the fish thoroughly before starting the breading process.
- Set Up an Assembly Line: Arrange your flour, egg, and panko bowls in a logical sequence. This streamlines the breading process, keeps your workspace clean, and ensures an even coating on each fish stick. Use one hand for dry ingredients (flour, panko) and the other for wet (egg) to avoid clumping.
- Don’t Skimp on Breading: Ensure each piece of fish is fully coated in every layer. The double-dip method (flour-egg-flour-egg-panko) recommended in this recipe creates a thicker, more durable, and ultimately crispier crust.
- Proper Oil Temperature: Whether pan-frying or air frying, ensure your cooking surface or oil is at the correct temperature. Too low, and the breading will absorb too much oil and become greasy. Too high, and the breading will burn before the fish cooks through. Medium heat for pan-frying is usually ideal.
- Don’t Overcrowd the Pan/Basket: Cook fish sticks in batches if necessary. Crowding the pan lowers the cooking temperature, inhibits even browning, and can lead to steamed, rather than crispy, fish sticks. Give them space to breathe and crisp up.
- Even Thickness: Try to cut your fish sticks into uniform sizes. This ensures they cook evenly and are all done at the same time.
- Serve Immediately: For the absolute best texture, fish sticks are best enjoyed fresh off the stove or out of the oven/air fryer when they are at their crispiest.
Serving Suggestions & Dipping Delights
Homemade fish sticks are incredibly versatile and pair well with a variety of sides and dipping sauces, making them a perfect meal for any occasion. Here are some ideas to complete your culinary experience:
Delicious Dipping Sauces:
- Classic Tartar Sauce: A creamy blend of mayonnaise, pickles (or relish), capers, and fresh dill is a timeless pairing that complements the richness of the fish.
- Zesty Lemon-Dill Yogurt Dip: For a lighter option, combine Greek yogurt with fresh lemon juice, chopped dill, a touch of garlic powder, and a pinch of salt and pepper. It’s refreshing and tangy.
- Spicy Sriracha Mayo: Mix sriracha hot sauce with mayonnaise for a simple yet addictive spicy kick that contrasts beautifully with the crispy fish.
- Homemade Tzatziki: The cool cucumber and garlic notes in tzatziki offer a refreshing counterpoint to the warm, crispy fish.
- Sweet Chili Sauce: For an Asian-inspired twist, a sweet and tangy chili sauce provides a vibrant flavor profile.
- Ketchup or BBQ Sauce: Simple and kid-friendly, these classic condiments are always a hit.
Perfect Side Dishes:
- Crispy French Fries or Sweet Potato Fries: A classic pairing for a reason, creating a satisfying “fish and chips” experience.
- Coleslaw: A fresh, crunchy coleslaw provides a cool, tangy contrast to the warm fish.
- Roasted Vegetables: Asparagus, broccoli, or bell peppers roasted with a squeeze of lemon add a healthy and colorful touch to your plate.
- Simple Green Salad: A light salad with a vinaigrette dressing offers a refreshing balance.
- Lemon Rice or Quinoa: A side of fluffy lemon-herb rice or quinoa makes for a wholesome and filling meal.
- Corn on the Cob: Sweet and juicy, corn on the cob is a fantastic seasonal addition.
You can also get creative by tucking your fish sticks into soft tortillas for delicious fish tacos, sliding them into slider buns with some slaw for mini fish sandwiches, or even chopping them up and sprinkling them over a Caesar salad for a fun take on chicken Caesar.
Storing and Reheating Your Homemade Treats
While homemade fish sticks are best enjoyed fresh and crispy, you can certainly store leftovers for future enjoyment. Keep in mind that their signature crispiness may diminish slightly upon refrigeration, but with proper reheating, you can bring back much of their original crunch.
Refrigeration:
Store cooked fish sticks in an airtight container in the refrigerator for up to 2 days. This helps maintain their quality and prevents them from absorbing other fridge odors.
Freezing for Longer Storage:
For longer storage, homemade fish sticks freeze beautifully.
- Flash Freeze: Arrange the cooked and cooled fish sticks in a single layer on a baking sheet. Place the baking sheet in the freezer for 1-2 hours, or until the fish sticks are completely frozen solid. This prevents them from sticking together.
- Transfer to Storage: Once frozen, transfer the individual fish sticks to a freezer-safe bag or an airtight container. Remove as much air as possible from the bag to prevent freezer burn.
- Duration: You can keep them in the freezer for up to 3 months.
Reheating Tips to Restore Crispiness:
To best revive that beloved crunch, avoid the microwave, which will only make them soggy. Instead, opt for these methods:
- Oven: Preheat your oven to 375°F (190°C). Place the frozen (or thawed) fish sticks on a baking sheet and bake for 10-15 minutes, or until heated through and crispy. Flip halfway for even heating.
- Air Fryer: For the crispiest results, the air fryer is your best friend for reheating. Preheat your air fryer to 375°F (190°C). Place the frozen (or thawed) fish sticks in the basket in a single layer. Air fry for 5-8 minutes, or until hot and crispy, shaking the basket once or twice.
- Skillet: Lightly coat a nonstick skillet with olive oil or cooking spray and heat over medium heat. Add the fish sticks and cook for a few minutes per side until heated through and re-crisped.
Frequently Asked Questions about Homemade Fish Sticks
Mild, flaky white fish like cod, pollock, haddock, or tilapia are typically used because of their mild flavor and tender texture that holds up well to breading and cooking.
Yes, absolutely! Making fish sticks at home gives you full control over the ingredients, allowing you to choose fresh fish and avoid the preservatives, excessive sodium, and unhealthy oils often found in store-bought, pre-fried versions. This makes them a significantly healthier and fresher option.
Yes, an air fryer is a fantastic method for making fish sticks! They cook up beautifully, achieving a perfectly crispy exterior without needing a lot of oil, and they are typically faster than baking.
Several key steps prevent fish sticks from falling apart. First, pat the fish thoroughly dry before breading. Second, ensure each layer of the breading (flour, egg, panko) adheres well before moving to the next. Double-dipping in flour and egg can create a more robust crust. Finally, avoid overcrowding the pan during cooking, which can make them steam instead of fry, weakening the coating.
You can bread the fish sticks up to a few hours in advance and keep them refrigerated on a baking sheet. For longer storage, flash-freeze them after breading (but before cooking), then transfer to an airtight container. Cook from frozen as directed, adding a few extra minutes to the cooking time.
For pan-frying, a neutral-flavored oil with a high smoke point is ideal. Olive oil (especially light olive oil), avocado oil, or canola oil work well. You only need a shallow layer to achieve crispiness, not deep-frying.
Discover More Seafood Sensations
If you’re eager to explore more savory seafood recipes, we’ve curated a collection of delightful dishes that are just as easy and flavorful as these homemade fish sticks!
- Air Fryer Shrimp
- Za’atar Baked Salmon with Avocado Salsa
- Shrimp Bake in Tomato Sauce
- Shrimp Kofta Meatballs
- Air Fryer Salmon Bites
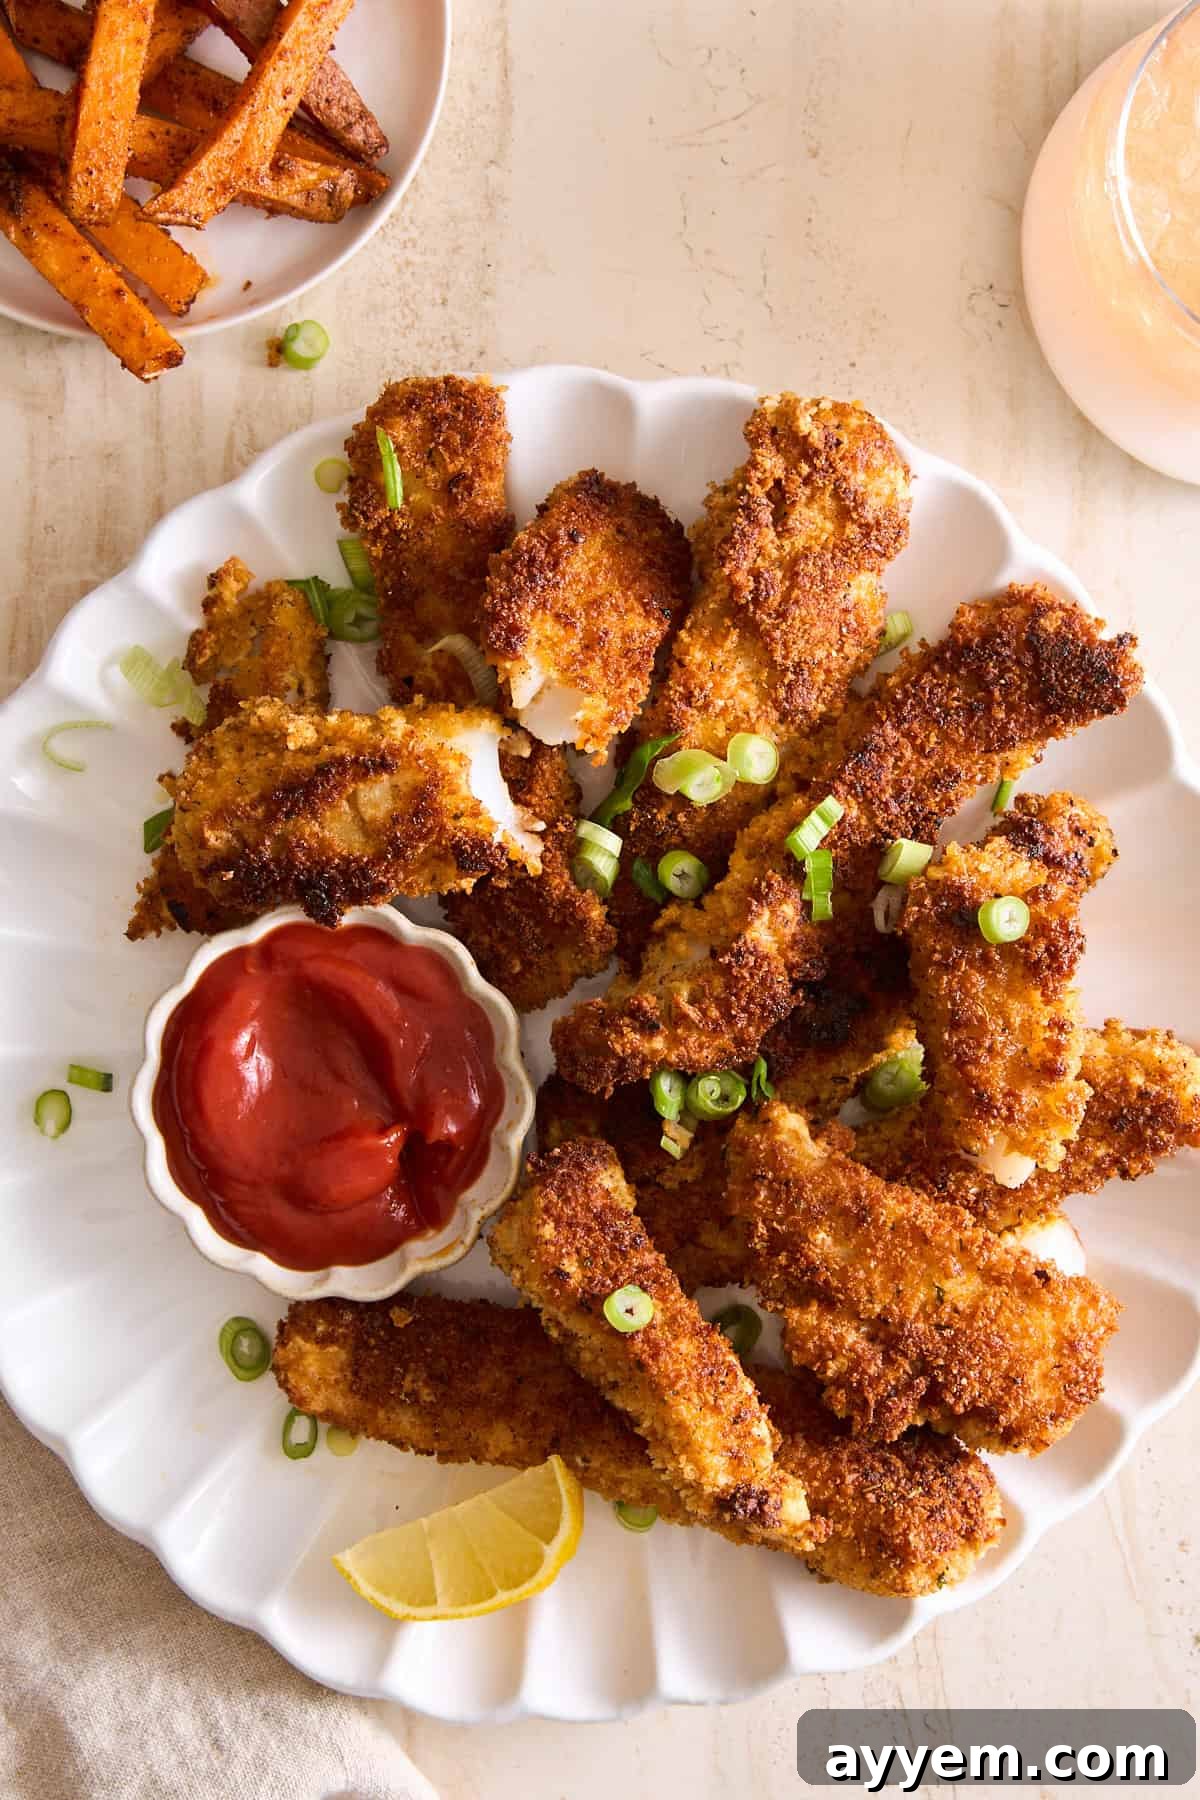
Panko Crusted Fish Sticks Recipe
Food Dolls
6 servings
10 mins
8 mins
18 mins
Pin
Better than store-bought options, this panko-crusted fish sticks recipe comes together with a handful of simple ingredients and cooks in less than ten minutes on the stove. Crisp on the outside with a soft, flaky center, they’re full of delicious, savory flavor!
Ingredients
- 4 large eggs whisked
- 2 1/4 cups panko breadcrumbs
- 1 teaspoon salt divided
- 1 1/4 teaspoons black pepper divided
- 1 teaspoon Italian seasoning
- 1 teaspoon paprika
- 1/2 teaspoon garlic powder
- 1/4 teaspoon cayenne pepper optional, for a little heat
- 1/2 cup all-purpose flour
- 1 1/4 pounds cod fillet – cut into sticks approximately 3-4” long, 1/2-1” wide
- Nonstick olive oil cooking spray
Instructions
-
Set up your breading station – In one shallow bowl, whisk the eggs. In another, combine the panko breadcrumbs, 1/2 teaspoon salt, 3/4 teaspoon black pepper, Italian seasoning, paprika, garlic powder, and cayenne (if using). In a third bowl, add the flour and season it with the remaining 1/2 teaspoon salt and 1/2 teaspoon black pepper.
-
Coat the cod – Pat the cod fillets dry. First, dredge each piece in the seasoned flour, then dip it into the egg mixture. Repeat the flour and egg dip one more time—double dipping in the flour creates a thicker, crispier crust. Finally, press the fillets into the breadcrumb mixture, ensuring an even coating.
-
Pan-fry to golden perfection – Heat a generous drizzle of olive oil or spray in a large skillet over medium heat. Once hot, add the breaded cod fillets, leaving space between them. Cook for 3-4 minutes per side, or until crispy and golden brown.
Equipment
Notes
Storage: Store cooked fish sticks in an airtight container in the fridge for up to 2 days. For longer storage, freeze them in a single layer on a baking sheet until solid. Then, transfer to a freezer-safe bag or container and keep in the freezer for up to 3 months. Reheat in the oven or air fryer for best crispiness.
Nutrition
Calories: 590kcal |
Carbohydrates: 56g |
Protein: 40g |
Fat: 21g |
Saturated Fat: 6g |
Polyunsaturated Fat: 3g |
Monounsaturated Fat: 6g |
Trans Fat: 0.1g |
Cholesterol: 663mg |
Sodium: 909mg |
Potassium: 639mg |
Fiber: 3g |
Sugar: 1g |
Vitamin A: 955IU |
Vitamin C: 1mg |
Calcium: 115mg |
Iron: 4mg
Nutrition information is automatically calculated, so should only be used as an approximation.