

Craving a taste of summer carnival magic without leaving your kitchen? Indulge in the whimsical delight of this incredible Homemade Cotton Candy Ice Cream! This recipe brings all the fun and vibrant flavor of your favorite fairground treat right into your home, in a deliciously creamy, no-churn ice cream format. Forget the bulky ice cream maker or the messy bags of ice and salt; all you need are a few simple ingredients, a stand mixer, and an overnight freeze to create a dessert that will truly enchant everyone. Get ready for a perfectly sweet, visually stunning, and unbelievably easy frozen dessert that promises to be an instant family favorite!

Why Homemade Cotton Candy Ice Cream Is a Must-Try
There’s an undeniable charm to cotton candy – its wispy texture and instantly dissolving sweetness are pure nostalgia. Now, imagine transforming that ethereal quality into a cold, rich, and creamy ice cream. This recipe does exactly that, capturing the essence of the beloved carnival treat in every spoonful. It’s more than just a dessert; it’s an experience, bringing the joy and vibrant colors of a summer fair directly to your table.
Beyond its magical appeal, this homemade cotton candy ice cream stands out for several compelling reasons, making it the ideal choice for any occasion, from a casual backyard BBQ to a festive birthday celebration or simply a delightful afternoon snack:
- Effortlessly Easy: The term “no-churn” is your new best friend! This recipe eliminates the need for any specialized ice cream equipment. With minimal active preparation time, you simply combine your ingredients, let your mixer do the work, and then pop it into the freezer. Wake up to a perfectly set, ready-to-enjoy dessert!
- Endlessly Customizable: While the classic pink and blue hues and cotton candy flavor are enchanting on their own, this ice cream serves as a fantastic canvas for your creativity. Feel free to incorporate your favorite mix-ins like chocolate chips, mini marshmallows, or different kinds of sprinkles. Drizzle with chocolate syrup or caramel for an extra layer of indulgence. The possibilities are truly boundless!
- Budget-Friendly Delight: Crafted with just a handful of readily available and inexpensive pantry staples, this recipe offers a gourmet-quality dessert without the gourmet price tag. There’s no need for an extensive grocery list or exotic ingredients, making it an economical option for feeding a crowd or simply satisfying a sweet craving.
- Perfect for Any Season: While often associated with summer, the bright, cheerful flavors and colors of cotton candy ice cream can bring a burst of joy to any time of year. It’s a versatile treat that’s guaranteed to brighten spirits, regardless of the weather outside.
Does Cotton Candy Ice Cream Truly Taste Like Cotton Candy?
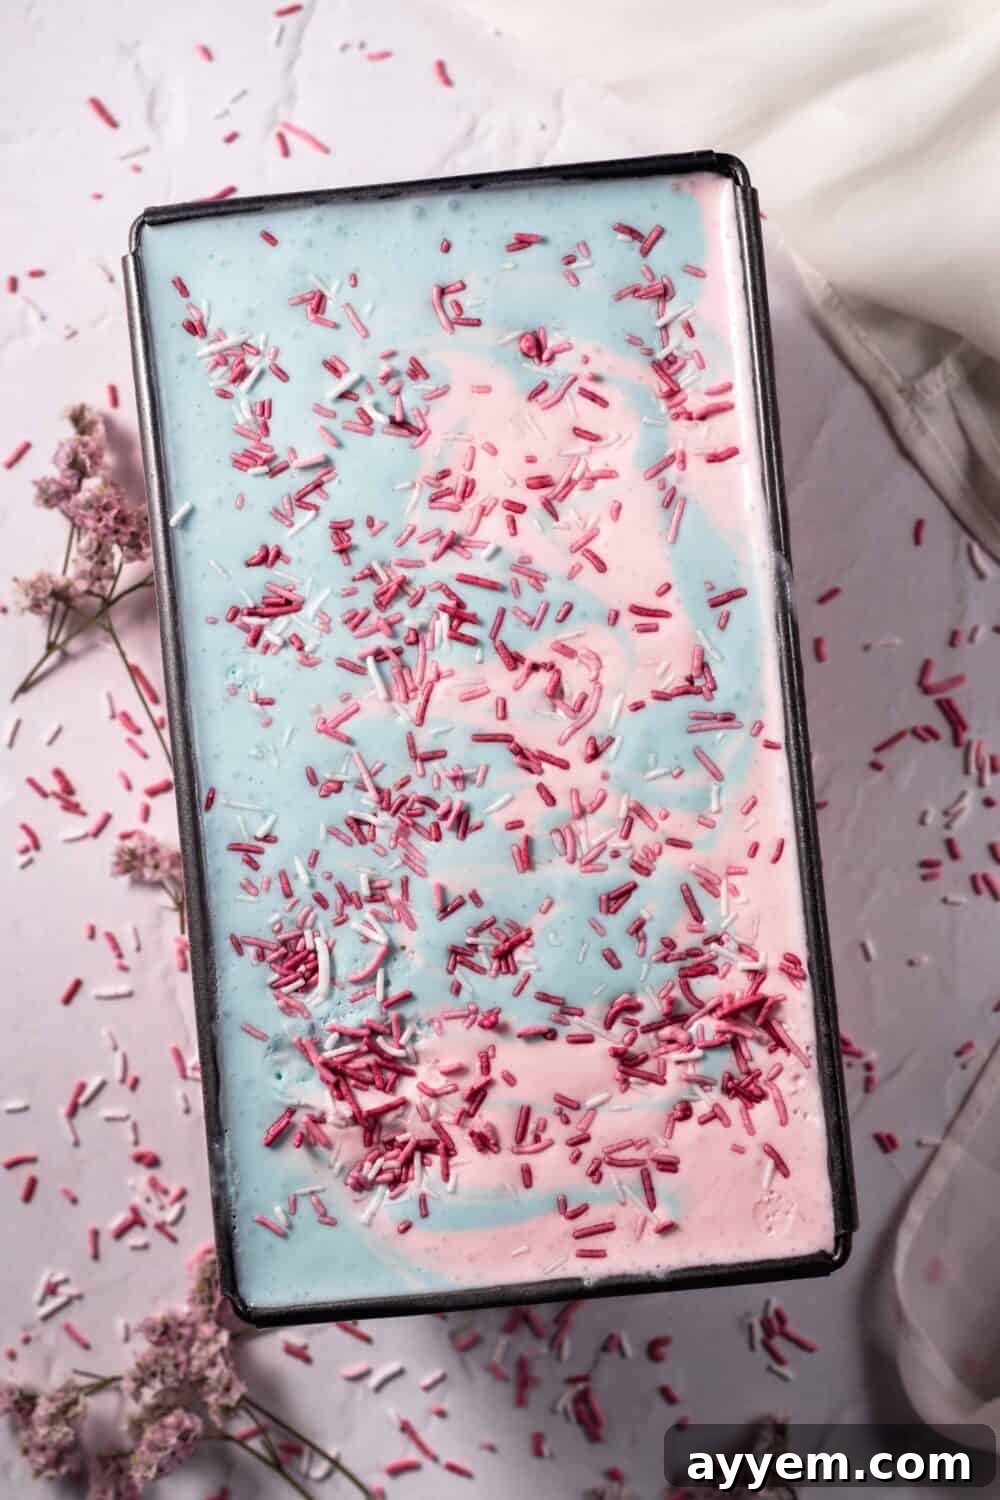
Absolutely! Prepare to be genuinely amazed by how accurately this homemade ice cream replicates the iconic flavor of cotton candy. It’s not just an approximation; it’s a delightful, creamy rendition of that sugary, melt-in-your-mouth experience you adore from the fairgrounds. The ice cream boasts a beautifully balanced sweetness that isn’t overpowering, complemented by a subtly fruity, vanilla-like essence that is the hallmark of traditional cotton candy. Furthermore, it proudly showcases the classic swirl of vibrant pink and blue colors, making it a feast for both the eyes and the palate. This isn’t just cotton candy-flavored ice cream; it’s the pure magic of spun sugar transformed into a luxurious, frozen dessert that will transport your taste buds straight to the heart of a bustling carnival.
The Simple Ingredients Behind This Dreamy Dessert
Creating this irresistible frozen treat requires just six straightforward ingredients, all easily found at your local grocery store. Here’s a closer look at what you’ll need and the role each plays in achieving that perfect cotton candy bliss:
- Heavy Cream (Divided): This is the superstar ingredient that forms the rich, luxurious base of our no-churn ice cream. When whipped, heavy cream incorporates air, creating a light, fluffy texture that freezes into a wonderfully creamy consistency, completely eliminating the need for an ice cream machine. Ensure it’s very cold before whipping for optimal volume and stability. Both “heavy cream” and “heavy whipping cream” are suitable and interchangeable for this recipe.
- Sweetened Condensed Milk (Divided): More than just a sweetener, sweetened condensed milk is crucial for the perfect no-churn ice cream. Its high sugar content and thick consistency prevent the formation of large ice crystals, resulting in a remarkably smooth and scoopable ice cream straight from the freezer. It also provides that essential creamy sweetness that defines cotton candy.
- Pink Cotton Candy: This is where the magic truly begins! Real cotton candy is incorporated directly into the mixture, infusing the ice cream with its unique flavor and a beautiful, soft pink hue. As it dissolves, it lends its characteristic sweetness and a hint of that nostalgic, airy taste. Choose fresh, vibrant cotton candy for the best results.
- Blue Cotton Candy: Complementing the pink, blue cotton candy adds another layer of classic carnival color and a delightful sweet essence. The dual colors are not just for aesthetics; they contribute to the overall authentic cotton candy flavor profile, making each spoonful a colorful and tasty adventure.
- Funfetti Sprinkles or White Chocolate Chips: These are our recommended primary mix-ins, adding texture, extra sweetness, and a celebratory pop of color. Funfetti sprinkles provide a cheerful crunch, while white chocolate chips melt subtly, enhancing the creamy indulgence.
- Extra Sprinkles (for Topping): A final flourish of sprinkles on top isn’t just for decoration; it adds another playful layer of texture and reinforces the festive, fun-loving spirit of cotton candy. Feel free to use any color or shape you prefer!

Crafting Your Homemade Cotton Candy Ice Cream: A Step-by-Step Guide
Say goodbye to the complexities of traditional ice cream making! This no-churn method is incredibly simple, relying on your trusty stand mixer to create a velvety smooth base. Follow these easy steps to bring your homemade cotton candy dream to life:
- Prepare the Pink Base: In the bowl of a stand mixer fitted with the whisk attachment, combine 2 cups of very cold heavy cream, 7 ounces of sweetened condensed milk, and the entirety of the pink cotton candy. Begin beating on medium-low speed, gradually increasing to medium-high. Continue to beat until soft peaks form. This means when you lift the whisk, the cream should hold a soft, gentle peak that curls at the top. Be careful not to overmix! Once achieved, gently transfer this vibrant pink mixture to a separate bowl and set it aside.
- Create the Blue Base: Without cleaning the mixer bowl (a little cross-contamination of color is fine, it adds to the marbled effect!), repeat the first step with the remaining 2 cups of heavy cream, 7 ounces of sweetened condensed milk, and the blue cotton candy. Beat until soft peaks form, just like before.
- Layer for Marbled Perfection: Now for the artistic part! Take a standard loaf pan (or any freezer-safe container). Begin by dropping alternating spoonfuls of the pink and blue cotton candy ice cream mixtures into the pan. Don’t worry about being too precise; the goal is a beautiful, random marble effect. You can gently swirl them with a knife for a more pronounced marble, but a simple layering will also look fantastic. If using, gently fold in your funfetti sprinkles or white chocolate chips into either or both mixtures before layering, or sprinkle them between layers as you go.
- The Big Freeze: Once all the ice cream mixture is layered in the loaf pan, lightly cover the pan with plastic wrap or aluminum foil. This helps prevent freezer burn and keeps unwanted ice crystals from forming on the surface. Carefully place the covered pan in the freezer. Allow it to freeze undisturbed overnight (for at least 8-12 hours). This crucial chilling period ensures the ice cream hardens completely and achieves its optimal creamy texture.
- Serve and Savor: When your ice cream is perfectly set, remove it from the freezer. Let it sit on the counter for 5-10 minutes to soften slightly for easier scooping. Dish out generous scoops into cones, bowls, or even elaborate sundaes. Finish with an extra flourish of sprinkles, a drizzle of chocolate syrup, or any other favorite toppings you desire. Now, dig in and enjoy the magical taste of homemade carnival fun!
How Long Does This Homemade Cotton Candy Ice Cream Last?
Unlike commercial ice creams that are packed with preservatives and stabilizers, homemade ice cream is a fresh, natural delight. This means its shelf life, while still generous, is slightly shorter than store-bought varieties. When stored properly in an airtight container in the freezer, your delicious homemade cotton candy ice cream will maintain its optimal flavor and creamy texture for **1 to 2 weeks**. Beyond this period, you might notice a subtle change in texture, often becoming slightly grainier as tiny ice crystals begin to form.
To extend the life of your ice cream and preserve its quality, here are a few key tips:
- Airtight is Key: Always transfer your ice cream to a dedicated freezer-safe, airtight container after the initial freeze. This minimizes exposure to air, which is the primary cause of freezer burn and ice crystal formation.
- Minimize Counter Time: When serving, try to limit the amount of time the ice cream spends at room temperature. Take it out, scoop what you need (allowing just a few minutes for softening if necessary), and immediately return it to the coldest part of your freezer. Rapid temperature fluctuations can degrade the texture.
- Cover Directly: For added protection, you can press a piece of plastic wrap directly onto the surface of the ice cream before securing the lid of your container. This creates an extra barrier against air.
Can I Make This Cotton Candy Ice Cream Dairy-Free?
While we haven’t personally tested this specific cotton candy ice cream recipe using dairy-free alternatives, it’s a common desire for many! The good news is that dairy-free versions of heavy cream and sweetened condensed milk are widely available in most well-stocked grocery stores today. However, it’s important to approach dairy-free substitutions with realistic expectations, as they can sometimes alter the final taste and texture of your ice cream.
For instance, if you opt for sweetened condensed coconut milk, be aware that its distinct coconut flavor is quite potent and will undoubtedly transfer to your ice cream. While delicious in its own right, it will likely give your cotton candy ice cream a tropical twist rather than the pure, unadulterated carnival flavor. Similarly, achieving the same light and fluffy texture as traditional whipped heavy cream can be a challenge with dairy-free heavy cream alternatives. Many plant-based creams (like coconut cream or cashew cream) don’t whip to the same volume or maintain their structure as robustly as dairy cream. Your dairy-free version will still be tasty and satisfying, but it might have a slightly denser texture and a less airy, creamy feel compared to the dairy original.
If you’re eager to explore delicious naturally dairy-free desserts that are tried and true, consider trying these fantastic recipes:
- Decadent Peanut Butter Lava Cake: A rich, gooey delight that’s completely dairy-free and gluten-free.
- Perfect Paleo Chocolate Chip Cookies: Enjoy classic comfort with these wholesome, dairy-free cookies.
- Scrumptious Biscoff Blender Muffins: A quick and easy, naturally dairy-free treat bursting with biscoff flavor.
Expert Tips for the Best Homemade Cotton Candy Ice Cream
To ensure your homemade cotton candy ice cream turns out perfectly creamy, vibrant, and packed with flavor every time, keep these expert tips in mind:
- Chill Your Bowl and Whisk: For optimal whipping results, place your stand mixer bowl and whisk attachment in the freezer for about 15-20 minutes before you start. Cold equipment helps the heavy cream whip faster and achieve maximum volume, leading to a lighter, airier ice cream.
- Don’t Overmix: When whipping the heavy cream, stop as soon as soft peaks form. Overmixing can lead to a grainy texture and eventually turn the cream into butter, which is not what we want for ice cream!
- Quality Cotton Candy Matters: The flavor of your cotton candy will directly impact the flavor of your ice cream. Opt for fresh, flavorful cotton candy from a reputable source for the best results. If your cotton candy seems stale or lacks strong flavor, the ice cream might fall flat.
- Achieving Vibrant Colors: The natural colors from the cotton candy will give you beautiful pastel shades. If you desire more intense, vibrant pink and blue hues, you can add a drop or two of food coloring (gel food coloring works best) to each mixture before freezing. Stir it in gently to avoid deflating the whipped cream.
- Gentle Folding: When combining the ingredients and layering, use a gentle folding technique to maintain as much air in the whipped cream as possible. This is key to a light and creamy texture.
- Patience is a Virtue (for Freezing): While it’s tempting to check on your ice cream every hour, resist the urge! An uninterrupted overnight freeze allows the mixture to properly set and harden, preventing iciness and ensuring that perfect scoopable consistency.
- Creative Swirls: For a more dramatic marbled effect, after layering, take a knife and gently swirl it through the ice cream mixture once or twice. Don’t overdo it, or the colors will blend too much.
Common Questions About Homemade Cotton Candy Ice Cream
Absolutely! This recipe is specifically designed as a no-churn method, meaning you don’t need any special equipment like an ice cream machine. All you require is a stand mixer (or a hand mixer) to whip the cream and a freezer-safe container for freezing.
Yes, definitely! The beauty of homemade ice cream is the freedom to experiment. While pink (often vanilla or strawberry) and blue (typically blue raspberry) are classic, feel free to try other exciting cotton candy flavors like grape, cherry, or even green apple. Just remember that the flavor of the cotton candy will dictate the final taste of your ice cream.
The key to extra fluffy ice cream lies in the whipping of the heavy cream. Ensure your heavy cream is very cold, and use a chilled bowl and whisk. Whip the cream until it forms firm but soft peaks, incorporating plenty of air. While this recipe already includes the whipped cream, you can ensure it reaches its maximum volume for the fluffiest result.
The best way to serve this delightful ice cream is entirely up to your preference! It’s fantastic in a classic waffle cone, elegant in a dessert bowl with a spoon, or even blended into a whimsical milkshake. Get creative with toppings like extra sprinkles, chocolate syrup, caramel, mini candies, or even a tuft of fresh cotton candy for a truly over-the-top presentation!
Icy ice cream often results from not enough fat or sugar, or from incorporating too much water. In no-churn recipes, the high fat content of heavy cream and the sugar in sweetened condensed milk usually prevent this. Ensure you’re using full-fat heavy cream and don’t reduce the amount of condensed milk. Also, make sure your container is truly airtight during freezing to prevent moisture from getting in and forming crystals.
Absolutely! This cotton candy ice cream is an ideal make-ahead dessert. Since it requires an overnight freeze, it’s perfect for preparing a day or two in advance of your event. Just remember to store it in an airtight container in the freezer until ready to serve, ensuring it remains fresh and creamy.
More Yummy Ice Cream Desserts to Explore
If this homemade cotton candy ice cream has sparked your love for frozen treats, you’re in luck! We have a collection of equally delightful and easy-to-make ice cream recipes that are perfect for any occasion. Expand your dessert repertoire with these fantastic options:
- Easy No-Churn Biscoff Ice Cream: Indulge in the irresistible caramelized cookie flavor of Biscoff, transformed into a dreamy, no-churn ice cream that you’ll want to make again and again.
- Crispy Fried Ice Cream (No Deep Fryer Needed!): Experience the magic of fried ice cream with a clever, easy technique that skips the deep fryer, offering a unique textural delight.
- Copycat Tonight Dough Ice Cream: Recreate the beloved, chunky, and utterly delicious flavor of a popular store-bought favorite with this homemade rendition.

Homemade Cotton Candy Ice Cream
5 out of 5 stars based on 3 votes
Food Dolls
16 servings
15 mins
1 day
1 day 15 mins (approx. 15 mins active prep)
Save, Pin, Print, or Email this recipe!
Bring the flavor of a summer fair into your home with this easy and delicious, no-churn Homemade Cotton Candy Ice Cream. Simply freeze overnight, and enjoy the perfect summer treat everyone will want on repeat!
Ingredients
- 4 cups heavy cream, divided
- 14 ounces sweetened condensed milk, divided
- 2 cups pink cotton candy
- 2 cups blue cotton candy
- 1 cup funfetti sprinkles or white chocolate chips
- 2 Tablespoons sprinkles (for topping)
Instructions
- In the bowl of a stand mixer, combine 2 cups heavy cream, 7 ounces condensed milk, and the pink cotton candy. Beat until soft peaks form. Transfer to a separate bowl, and set aside.
- In the same bowl, combine the remaining 2 cups heavy cream, 7 ounces condensed milk, and the blue cotton candy. Beat until soft peaks form.
- In a loaf pan, layer the ice cream alternating the pink and blue. Top with sprinkles and chocolate chips, if desired. Freeze overnight.
- Store in the freezer for 1-2 weeks in an airtight container for best quality.
Nutrition Information
Serving: 1 serving | Calories: 536kcal | Carbohydrates: 73g | Protein: 4g | Fat: 27g | Saturated Fat: 17g | Polyunsaturated Fat: 1g | Monounsaturated Fat: 6g | Cholesterol: 76mg | Sodium: 48mg | Potassium: 182mg | Sugar: 73g | Vitamin A: 941IU | Vitamin C: 1mg | Calcium: 118mg | Iron: 0.1mg
Nutrition information is automatically calculated and should only be used as an approximation.
Like this recipe? We’d love to hear from you! Please leave a comment and share your thoughts.