
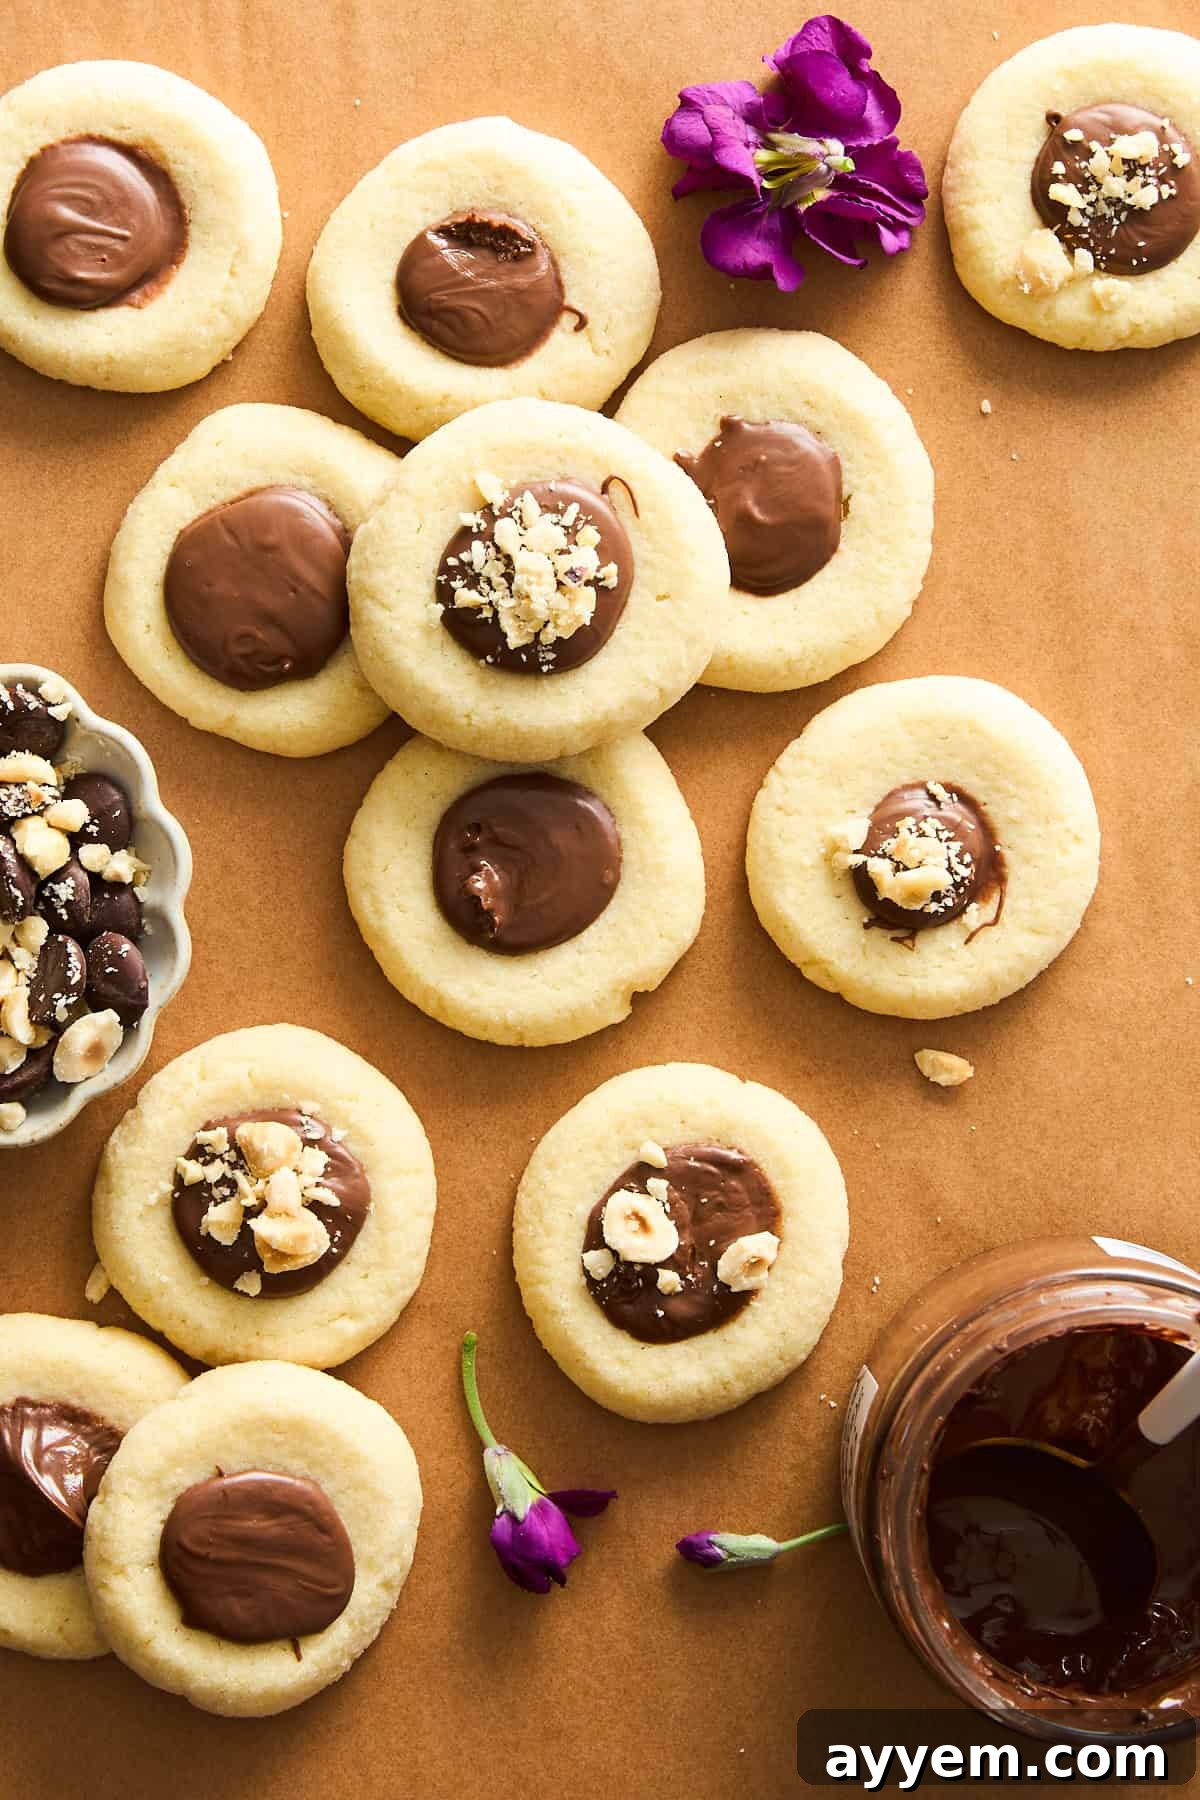
If you’re searching for a cookie recipe that’s effortlessly simple yet utterly irresistible, these delightful Nutella Thumbprint Cookies are precisely what you need! They perfectly blend a rich, buttery softness with a decadent chocolate-hazelnut richness, making them an ideal treat for any occasion, from casual afternoon snacks to elegant holiday gatherings. Prepare to fall in love with their charming appearance and incredible flavor.
What Are Nutella Thumbprint Cookies? The Ultimate Sweet Indulgence
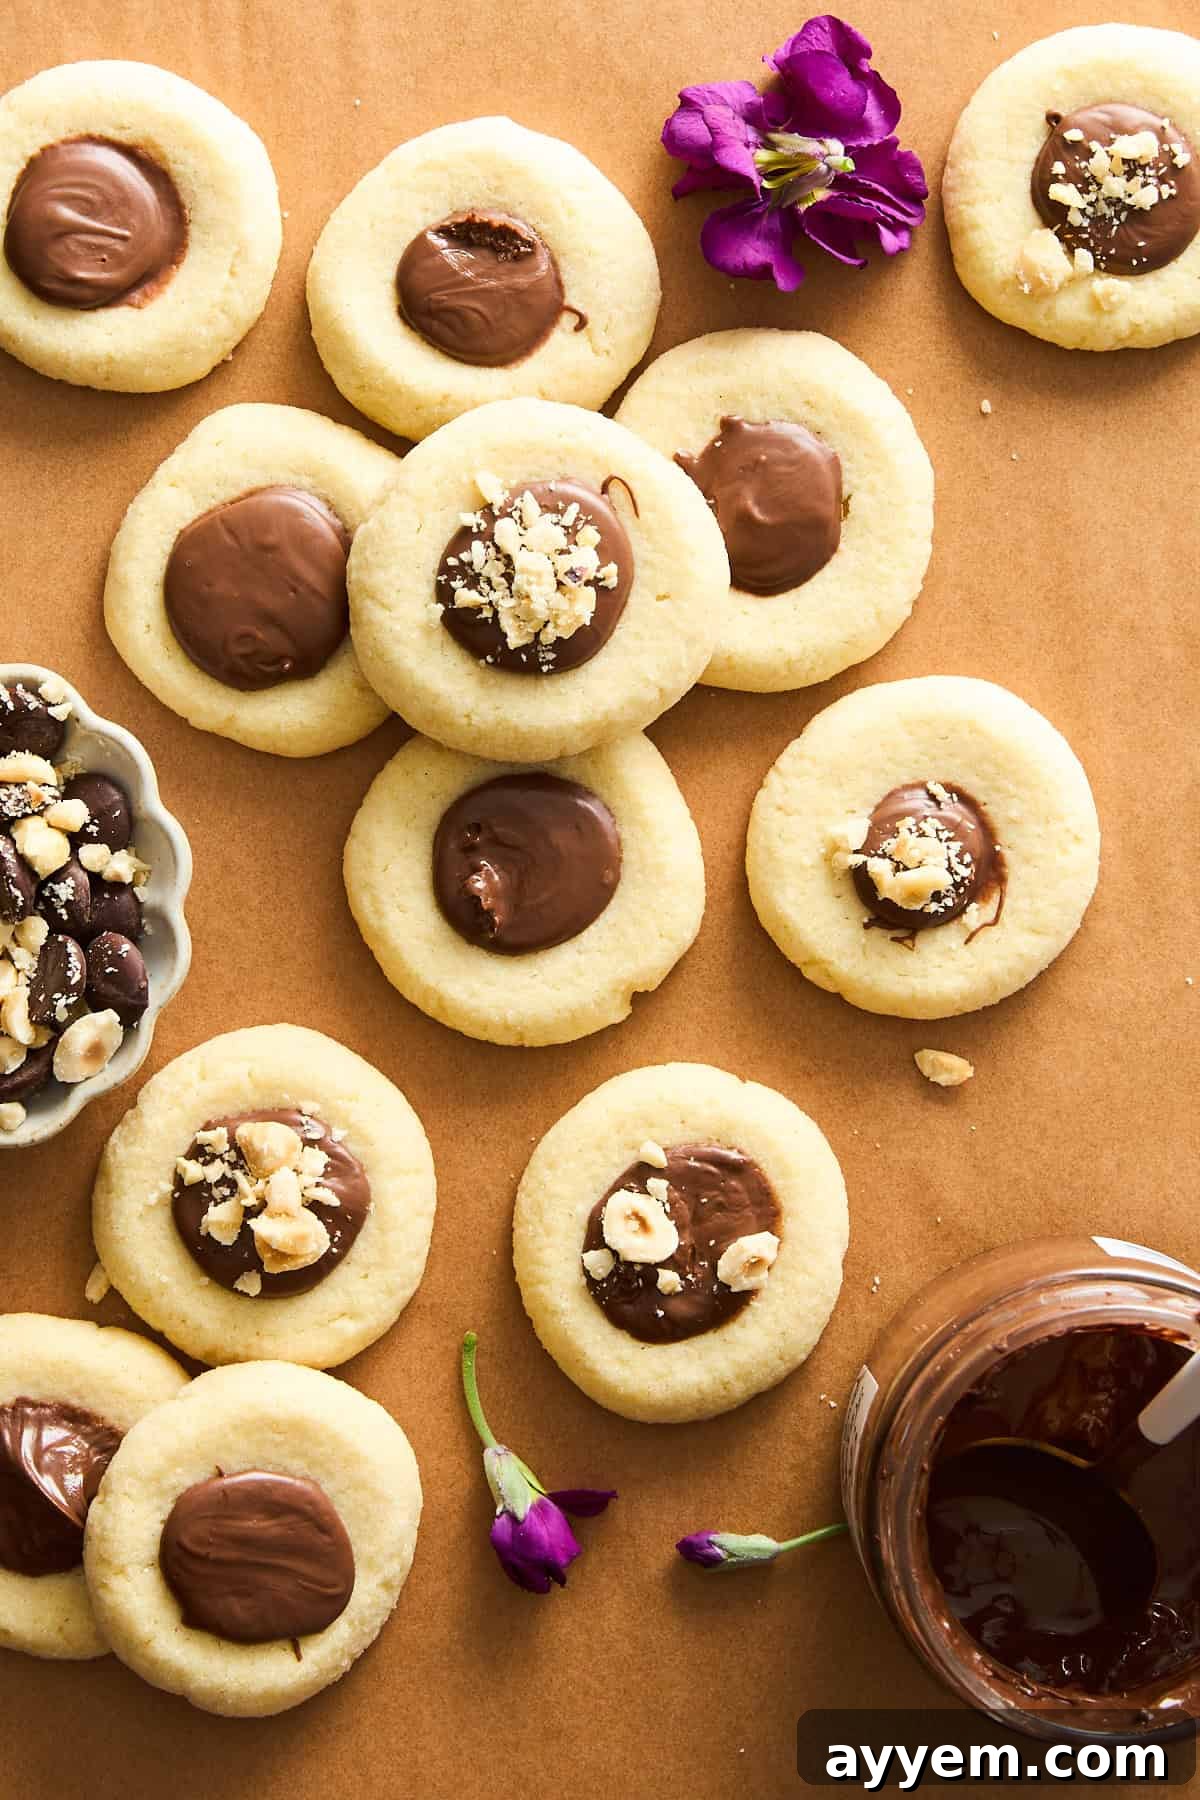
Nutella thumbprint cookies represent a harmonious marriage of tender, melt-in-your-mouth cookie dough, reminiscent of classic shortbread, and the unparalleled creaminess of chocolate-hazelnut spread. Each cookie begins as a perfectly portioned ball of dough, which is then gently indented with a thumb – a charming characteristic that gives these cookies their whimsical name! This creates a cozy well, ready to be filled with a generous dollop of luscious Nutella. A final sprinkle of finely toasted hazelnuts not only adds a delightful crunch but also amplifies the nutty aroma, elevating these cookies from simple treats to an extraordinary indulgence.
These cookies are not just a joy to eat; they’re also incredibly fun to make, making them a fantastic baking project to involve kids in the kitchen. The foundation is a buttery, slightly crumbly cookie base that serves as the perfect neutral canvas for the luxurious, sweet, and nutty chocolate hazelnut spread. While they are undoubtedly a cherished highlight during the festive holiday season, their universal appeal makes them a year-round favorite. Imagine them gracing your afternoon tea spread, adorning a dessert table, or simply being enjoyed with a cup of coffee. With minimal effort and straightforward ingredients, you’ll be able to produce a batch of cookies that are as visually stunning as they are exquisitely delicious.
Why You’ll Adore This Nutella Thumbprint Cookie Recipe
- Effortlessly Easy: This recipe is designed for simplicity, making it perfect for bakers of all skill levels.
- Irresistibly Delicious: The combination of buttery cookie and creamy Nutella is pure bliss.
- Versatile Treat: Ideal for holidays, parties, lunchboxes, or just a cozy evening at home.
- Kid-Friendly: A fantastic way to get little ones involved in the baking process, especially during the rolling and thumb-printing stages.
- Customizable: Easily adaptable with various fillings and toppings to suit any preference.
- Make-Ahead Friendly: The dough can be prepared in advance, saving you time when cravings strike.

Essential Ingredients for Perfect Nutella Thumbprint Cookies
Creating these heavenly cookies requires a handful of common pantry staples. Here’s a detailed look at each ingredient and why it’s essential for achieving that perfect taste and texture:
- Unsalted Butter: This is the heart of our tender cookie dough. Using softened, room-temperature butter is crucial for a smooth, creamy dough that blends beautifully with sugar, resulting in a light and airy texture. For best results, take your butter out of the refrigerator about 30 minutes to an hour before you plan to start baking.
- Granulated Sugar: White granulated sugar provides the essential sweetness for the cookie base and contributes to a slightly crisp exterior. Rolling the formed cookie dough balls in additional granulated sugar before baking adds an extra layer of sweetness and a delightful sparkle, enhancing the crunchiness of each bite.
- Egg Yolk: The egg yolk is a secret weapon for adding richness, tenderness, and a beautiful golden hue to the cookie dough. It contributes to a wonderfully crumbly and melt-in-your-mouth texture. Don’t discard the egg white; save it for another recipe, perhaps a light meringue or an omelet!
- Whole Egg: The full egg acts as a vital binding agent, helping to hold the dough together while also imparting extra moisture, which keeps the cookies soft and prevents them from becoming too dry.
- Vanilla Extract: A touch of pure vanilla extract infuses the cookies with a warm, fragrant, and classic flavor that complements the richness of the butter and Nutella. Opt for real vanilla extract for the most authentic and robust taste.
- All-Purpose Flour: As the structural foundation of almost any classic cookie, all-purpose flour provides the necessary body and shape. Accurate measurement is key here; spoon the flour into your measuring cup and level it off with a straight edge to ensure the perfect texture – too much flour can lead to dry, dense cookies.
- Almond Flour: The addition of almond flour is a game-changer, imparting a delicate nuttiness and contributing to an incredibly tender, almost crumbly, and wonderfully soft crumb in the cookie base. It adds depth of flavor and a touch of sophistication.
- Salt: A small but mighty ingredient, salt plays a crucial role in balancing the sweetness of the sugar and Nutella, while also enhancing all the other flavors in the dough. It prevents the cookies from tasting overly sweet and brings out their complexity.
- Chocolate Hazelnut Spread (Nutella): This is truly the star of the show! Its creamy, rich, intensely chocolatey, and distinctly nutty flavor profile is what makes these thumbprint cookies so utterly irresistible. Ensure it’s at room temperature for easy spooning into the cookie indentations.
- Toasted and Crushed Hazelnuts: Used as a garnish, these add an exquisite finishing touch. The toasted hazelnuts provide a satisfying crunch and a deeper, earthier hazelnut flavor that perfectly echoes the Nutella filling, creating a symphony of textures and tastes.
Step-by-Step Guide: How to Make Irresistible Nutella Thumbprint Cookies
Follow these simple steps to create a batch of perfect Nutella thumbprint cookies that will impress everyone:
- Prepare Your Workspace and Preheat Oven: Begin by preheating your oven to 350°F (175°C). Line two large baking sheets with parchment paper; this prevents sticking and ensures even baking.
- Cream Butter and Sugar: In a spacious mixing bowl, combine the softened unsalted butter and granulated sugar. Using a hand mixer or stand mixer fitted with a paddle attachment, beat the mixture on medium-high speed for 2-3 minutes until it becomes light, pale, and fluffy. This step incorporates air, contributing to the cookies’ tender texture.
- Incorporate Wet Ingredients: Add the large egg yolk, the whole large egg, and the vanilla extract to the creamed butter and sugar. Continue beating on medium speed until all the wet ingredients are thoroughly combined and the mixture is smooth. Scrape down the sides of the bowl as needed to ensure everything is fully incorporated.
- Mix Dry Ingredients: In a separate, medium-sized bowl, whisk together the all-purpose flour, almond flour, and salt. This ensures that the dry ingredients are evenly distributed before being added to the wet mixture.
- Combine Wet and Dry: Gradually add the dry flour mixture to the wet ingredients in the large bowl, mixing on low speed until just combined. Be careful not to overmix the dough, as this can develop the gluten in the flour and result in tough cookies. Stop mixing as soon as no streaks of flour are visible.
- Form the Cookies: Scoop small portions of the dough, about 1 tablespoon each, and roll them between your palms to form uniformly sized, smooth balls. If you desire an extra crisp and sweet exterior, gently roll each dough ball in a shallow bowl of additional granulated sugar. Place the formed cookie balls about 2 inches apart on your prepared baking sheets to allow for spreading during baking.
- Make Indentations: Using your thumb or the back of a small spoon (a ½ teaspoon measuring spoon works perfectly), gently press a small, shallow well into the center of each cookie. Take care not to press all the way through to the bottom of the cookie, as this will cause the filling to leak out.
- Bake the Cookies: Transfer the baking sheets to your preheated oven. Bake for 10-11 minutes, or until the edges of the cookies are lightly golden brown and the centers appear set. The cookies should still be slightly soft to the touch in the middle.
- Cool Completely: Once baked, remove the cookies from the oven. Allow them to cool briefly on the baking sheets for about 5 minutes. This initial cooling period helps them firm up and prevents them from breaking when moved. After 5 minutes, carefully transfer the cookies to a wire rack to cool completely.
- Add the Nutella and Garnish: Once the cookies have fully cooled to room temperature, spoon about ½ teaspoon (or more, if you like a generous filling!) of chocolate hazelnut spread into each indentation. For an irresistible finish, sprinkle the tops with toasted and crushed hazelnuts. Serve and enjoy!
Expert Tips for the Best Nutella Thumbprint Cookies
- Room Temperature Ingredients: Ensure butter and eggs are at room temperature. This allows them to cream together more efficiently, creating a smoother dough and a better cookie texture.
- Don’t Overmix: Mix the dry ingredients into the wet only until just combined. Overmixing develops gluten, leading to tougher cookies.
- Consistent Cookie Size: Use a cookie scoop (about 1 tablespoon) to ensure all cookies are the same size. This promotes even baking and a professional appearance.
- Chill the Dough (Optional but Recommended): If your kitchen is warm or the dough feels too soft to handle, chill it for 15-30 minutes before rolling and indenting. This can help prevent spreading.
- Perfect Indentation: For a clean thumbprint, lightly flour your thumb or the back of a spoon to prevent sticking. Press firmly enough to create a well, but not so deep that you go through the cookie.
- Warm Nutella (for easier filling): If your Nutella is too firm, microwave it for 10-15 seconds (stirring halfway) until it’s slightly more fluid. This makes it easier to spoon into the indentations smoothly.
- Cool Before Filling: Always allow the cookies to cool completely before adding the Nutella. If filled when warm, the Nutella might melt and spread, losing its defined shape.
Delicious Variations to Customize Your Thumbprint Cookies
While the classic Nutella thumbprint is a masterpiece on its own, these cookies are incredibly versatile and lend themselves beautifully to customization. Get creative with your fillings and additions:
- Peanut Butter Perfection: For the peanut butter lovers, swap out the Nutella for a dollop of creamy peanut butter. You can even drizzle a little melted chocolate on top for a classic chocolate-peanut butter pairing.
- Fruity Jam Twist: Embrace a more traditional thumbprint cookie by using a dollop of your favorite fruit jam. Raspberry, apricot, strawberry, or even fig jam would add a vibrant, sweet, and tangy contrast to the buttery cookie.
- Espresso Kick: Infuse a subtle coffee flavor into your cookie dough by adding a pinch (about ½ teaspoon) of instant espresso powder. This enhances the chocolate flavor of the Nutella beautifully.
- White Chocolate Dream: After filling with Nutella, drizzle melted white chocolate over the cooled cookies for an elegant look and an extra layer of sweetness.
- Warm Spices: Introduce a cozy aroma by adding a pinch of ground cinnamon, cardamom, or a mix of pumpkin pie spice to the cookie dough. These spices pair wonderfully with both the buttery cookie and the hazelnut flavor.
- Rich Dark Chocolate Ganache: For an intense chocolate experience, replace the Nutella with a homemade dark chocolate ganache. Simply melt dark chocolate with a bit of heavy cream for a rich, sophisticated filling.
- Tropical Coconut: Instead of crushed hazelnuts, sprinkle shredded toasted coconut over the Nutella for a delightful texture and a hint of tropical flavor.
- Caramel Delight: Fill the indentations with a gooey salted caramel sauce for a sweet and savory sensation that’s utterly decadent.
Storage Guidelines: Keeping Your Nutella Thumbprint Cookies Fresh
One of the many great things about Nutella thumbprint cookies is how well they store, allowing you to enjoy them for days after baking. Proper storage ensures they retain their delightful texture and flavor:
For short-term storage, place your cooled Nutella thumbprint cookies in an airtight container at room temperature. They will remain wonderfully fresh and delicious for about 3-5 days without any loss of texture or taste. Keep them away from direct sunlight or heat to maintain their quality.
Refrigerating the cookies is generally not necessary unless your kitchen is particularly warm or humid. If you choose to refrigerate them, they will stay fresh for up to 1 week. When removing them from the fridge, allow them to come to room temperature for about 15-20 minutes before serving to ensure the cookie base is soft and the Nutella is creamy.
To freeze these cookies and enjoy them at a later date, arrange them in a single layer on a baking tray and place them in the freezer until solid (this prevents them from sticking together). Once frozen solid, transfer the cookies to a freezer-safe airtight container or a heavy-duty freezer bag, layering them between sheets of parchment paper if stacking. They will last for approximately 2-3 months in the freezer. When you’re ready to enjoy them, simply thaw them at room temperature for a few hours. The quality of the cookie and the Nutella filling will remain excellent.
Frequently Asked Questions About Nutella Thumbprint Cookies
Absolutely! Nutella is fantastic, but these cookies are incredibly versatile. You can use almost any spread you like. Popular alternatives include creamy peanut butter, your favorite fruit jam (raspberry, apricot, strawberry), lemon curd, or even caramel sauce. Feel free to get creative and experiment with different flavors to suit your preference!
While all-purpose flour combined with almond flour provides the best texture for these cookies, you can experiment with other flours. For a gluten-free option, a 1:1 gluten-free baking blend could work, though it might slightly alter the texture. Whole wheat pastry flour can also be used for a slightly healthier alternative, but be aware that the cookies may be denser. Always adjust liquids as needed if changing flours significantly.
Yes, these cookies are excellent for making ahead! You can prepare the cookie dough up to 3 days in advance and store it, tightly wrapped, in the refrigerator. Alternatively, you can freeze the unbaked dough for up to 3 months. Just thaw it in the fridge overnight before proceeding with rolling, indenting, and baking. You can also bake the cookies completely, cool them, and then freeze them without the Nutella filling. Add the filling once thawed.
To achieve a clean and well-defined indentation, use your thumb or the back of a small, round measuring spoon (like a ½ teaspoon). Gently press down on the center of each cookie dough ball. Ensure you don’t press too hard, or you risk breaking through the bottom of the cookie, which could cause the Nutella to leak out during baking or filling. If the dough is sticky, lightly dust your thumb or spoon with flour.
Several factors can cause cookies to spread excessively. The butter might have been too soft or even slightly melted, or there might have been too little flour in the dough. Overmixing the dough can also lead to spreading. To prevent this, ensure your butter is just softened (not greasy), measure your flour accurately, and chill the dough for 15-30 minutes before baking, especially if your kitchen is warm.
Discover More Delectable Cookie Recipes
Still craving more sweet treats? We’ve got you covered with an array of irresistible cookie recipes that are always a smash hit in our household and are sure to become new favorites in yours!
Hearty and Chewy Oatmeal Peanut Butter Cookies
Soft and Chewy Classic Gingerbread Cookies
Gourmet Brown Butter Pistachio Chocolate Chip Cookies
Delicate Pecan Snowball Cookies

Nutella Thumbprint Cookies Recipe
Food Dolls
12 -20 cookies
10
11
21
Ingredients
- 1 cup unsalted butter softened to room temperature
- ½ cup granulated sugar
- 1 large egg yolk
- 1 large egg
- 1 teaspoon vanilla extract
- 2 cups all-purpose flour
- ¼ cup almond flour
- ½ teaspoon salt
- ½ cup granulated sugar for rolling, optional
- ⅓ cup chocolate hazelnut spread
- toasted and crushed hazelnuts for garnish
Instructions
-
Preheat Oven: Preheat your oven to 350°F (175°C) and line two baking sheets with parchment paper.
-
Cream Butter and Sugar: In a large mixing bowl, use a hand mixer or stand mixer to beat the softened butter and ½ cup granulated sugar until light and fluffy, about 2-3 minutes.1 cup unsalted butter, ½ cup granulated sugar
-
Add Wet Ingredients: Add the egg yolk, whole egg, and vanilla extract to the butter mixture. Beat until fully combined.1 large egg yolk, 1 large egg, 1 teaspoon vanilla extract
-
Combine Dry Ingredients: In a separate bowl, whisk together the all-purpose flour, almond flour, and salt. Gradually add the dry ingredients to the wet ingredients, mixing until just combined.2 cups all-purpose flour, ¼ cup almond flour, ½ teaspoon salt
-
Shape and Roll: Scoop about 1 tablespoon of dough and roll it into a ball. If desired, roll the ball in the additional ½ cup sugar for a crisp, sweet coating. Place the balls 2 inches apart on the prepared baking sheets.½ cup granulated sugar
-
Create Indentations: Use your thumb or the back of a small spoon to gently press an indentation into the center of each cookie.
-
Bake: Bake the cookies in the preheated oven for 10-11 minutes, or until the edges are lightly golden.
-
Cool: Allow the cookies to cool briefly on the baking sheet for 5 minutes, then transfer them to a wire rack to cool completely.
-
Fill with spread: Spoon about ½ teaspoon of chocolate hazelnut spread (as much or as little as you’d like). Sprinkle with toasted hazelnuts.⅓ cup chocolate hazelnut spread, toasted and crushed hazelnuts
Equipment
Notes
- Almond flour adds a subtle nuttiness and tenderness to the cookies but can be replaced with an equal amount of additional all-purpose flour if needed.
- These cookies can be stored in an airtight container at room temperature for up to 1 week, or in the refrigerator for longer freshness.
Nutrition
Nutrition information is automatically calculated, so should only be used as an approximation.