
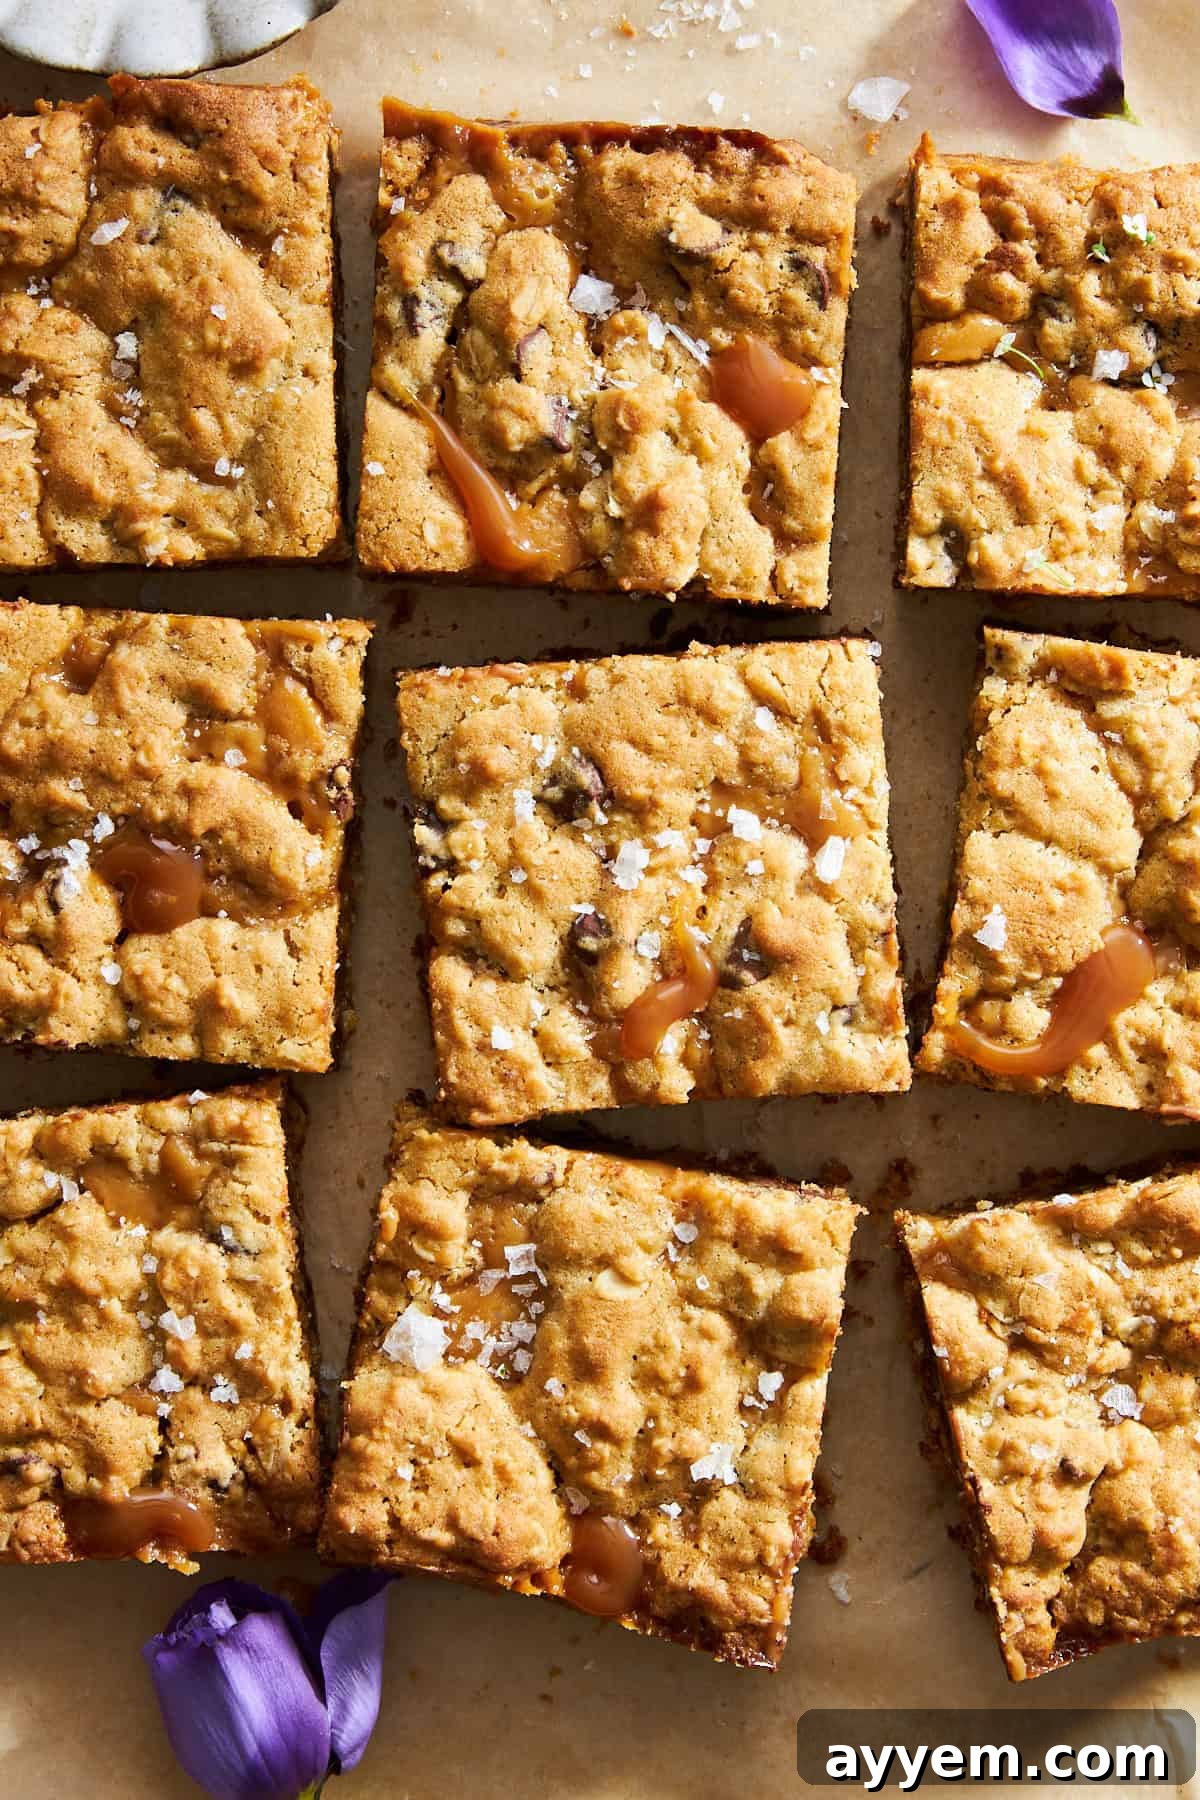
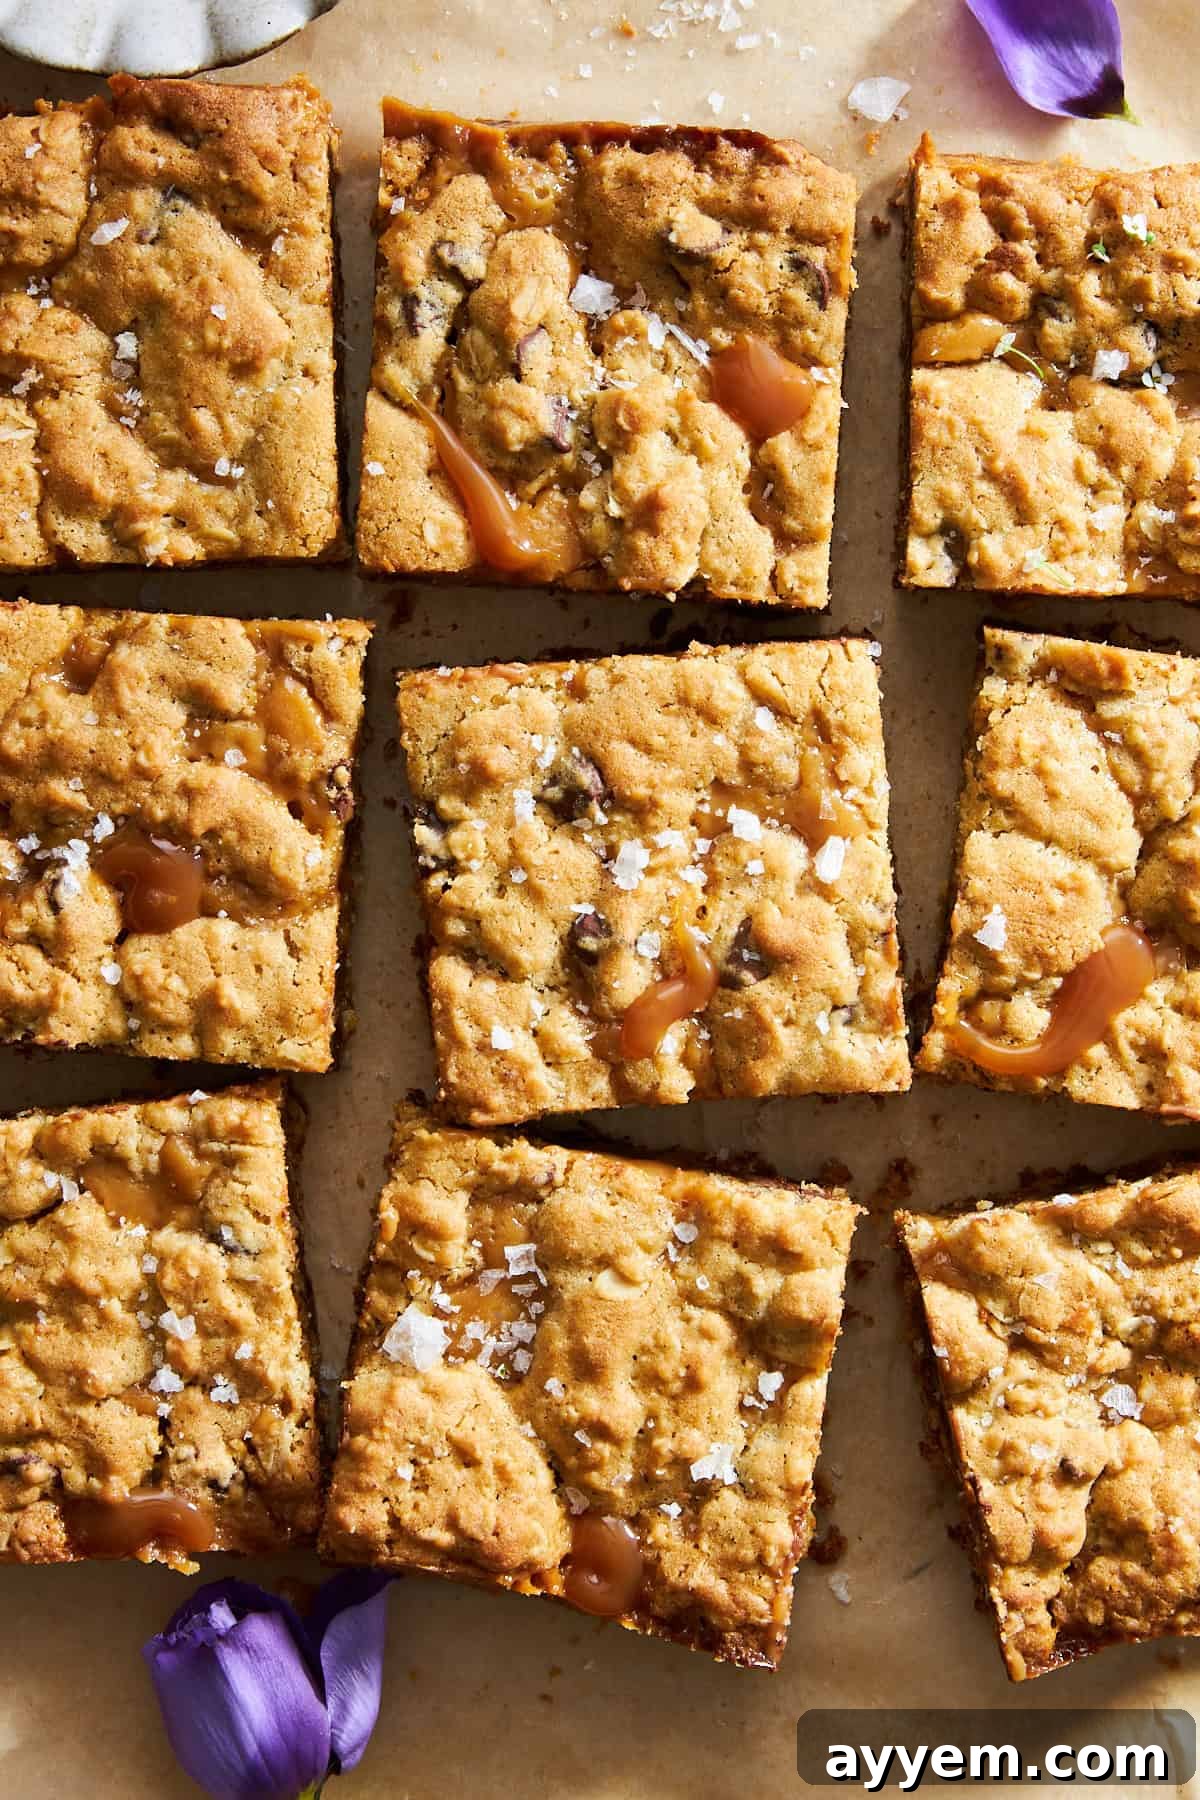
Get ready to be enchanted by our irresistible Chocolate Chip Caramel Bars, widely cherished as Caramelitas! These aren’t just any dessert bars; they are a decadent symphony of textures and flavors, meticulously layered to deliver the ultimate indulgence. Imagine sinking your teeth into a buttery, crumbly oat crust, met with a luscious layer of gooey, rich caramel, abundant pockets of perfectly melted chocolate, and crowned with a wholesome brown sugar oatmeal topping. Every bite offers a delightful contrast of sweet and salty, chewy and crisp, making them an instant favorite for any occasion. Whether you’re a seasoned baker or just starting, this recipe for homemade caramelitas promises a truly rewarding baking experience, culminating in a treat that will disappear faster than you can say “delicious!”
What Are Chocolate Chip Caramel Bars?
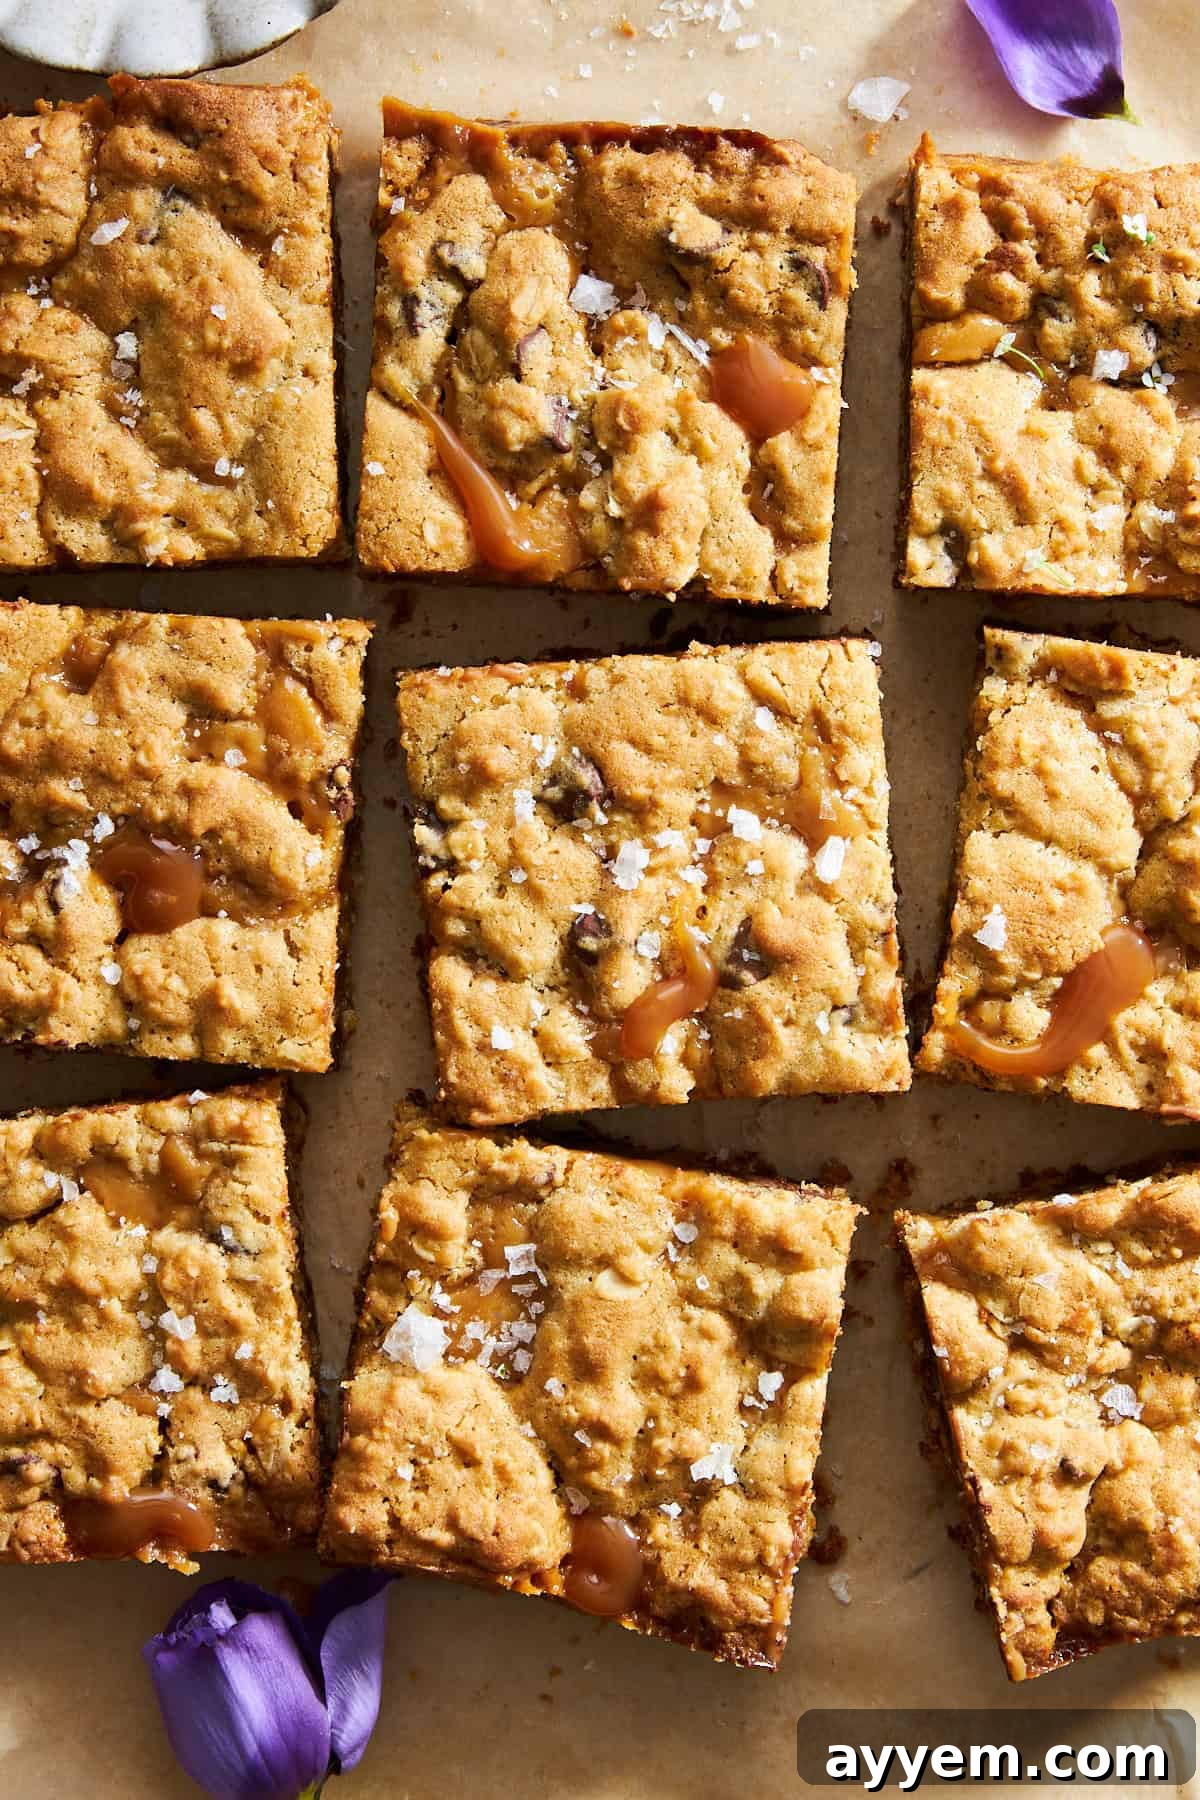
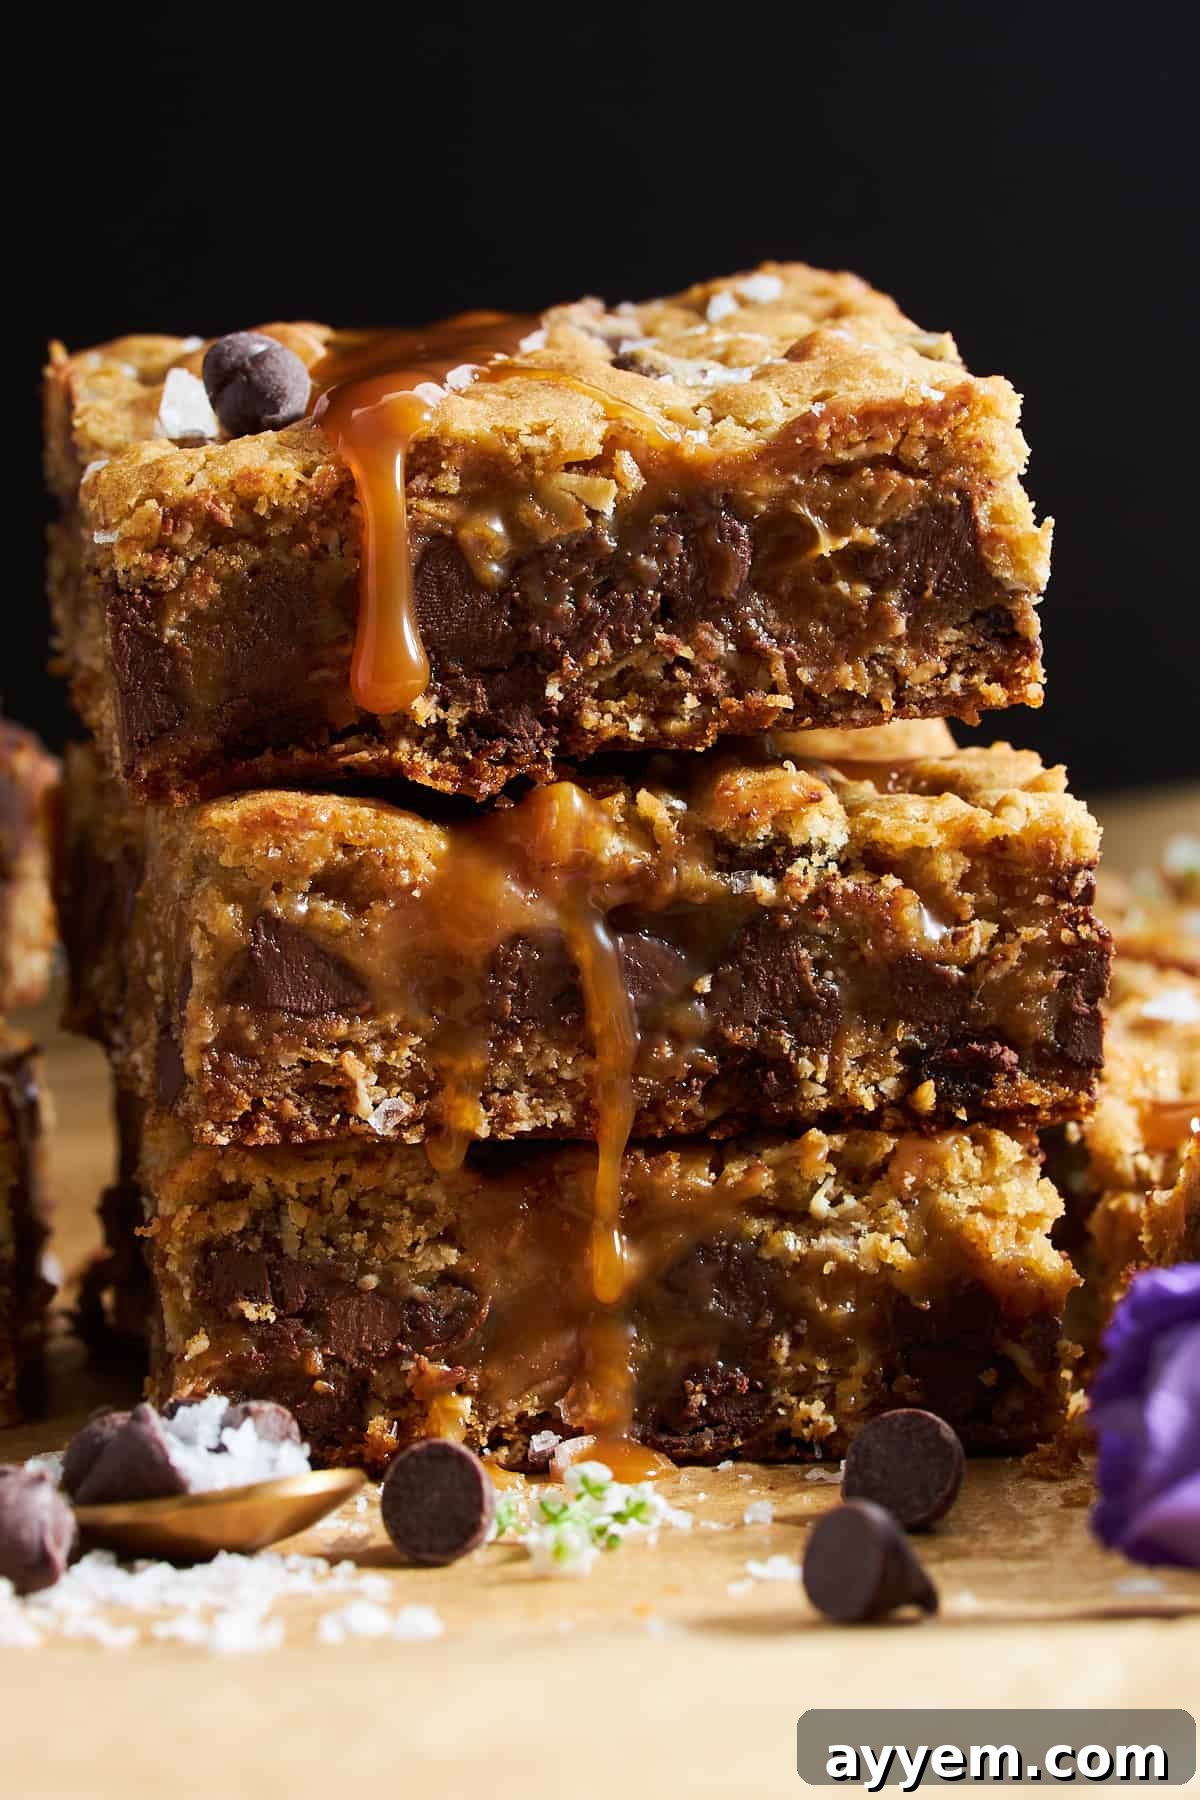
Chocolate Chip Caramel Bars, affectionately known as Caramelitas, are a classic dessert bar renowned for their rich, multi-layered profile and comforting taste. At their heart is a robust, buttery oatmeal cookie base, which provides a wonderfully chewy foundation with a hint of crispiness. This bottom layer is generously spread with a thick, homemade caramel sauce – a sweet, gooey masterpiece that practically melts in your mouth. Sprinkled throughout and over the caramel are semi-sweet chocolate chips, which transform into delectable, molten pockets of chocolatey goodness during baking.
The magic of Caramelitas lies in their intricate texture and flavor balance. The oats contribute a hearty, wholesome chew, while the caramel brings a luxurious, sticky sweetness that is undeniably satisfying. The chocolate chips add a touch of bittersweet richness, beautifully counteracting the caramel’s intensity. Finally, a crumbly top layer of the same oat mixture bakes to a golden perfection, adding a satisfying crunch that completes this dessert. This harmonious blend of textures and flavors – from the chewy oats and gooey caramel to the melting chocolate and crispy topping – makes these bars incredibly addictive. They are a true testament to simple ingredients coming together to create something extraordinary, perfect for holiday gatherings, potlucks, or simply as an everyday treat.
Essential Ingredients for Perfect Caramelitas
Crafting the perfect batch of Chocolate Chip Caramel Bars begins with selecting the right ingredients. Each component plays a vital role in achieving that signature taste and texture. Here’s a detailed look at what you’ll need:
- Butter: We use softened unsalted butter for the oat crust and a touch more for the caramel. Unsalted butter allows you to control the overall saltiness of your bars, ensuring a balanced flavor profile. It imparts a rich, creamy flavor and helps create that desirable crumbly-yet-tender texture in the base.
- Dark Brown Sugar: This isn’t just for sweetness; dark brown sugar adds a deep, molasses-rich flavor that is crucial for the complex taste of the oat crust. Its moistness also contributes to the chewy texture of the bars.
- Vanilla Extract: A baking staple, vanilla extract enhances and complements all the other flavors, adding a warm, aromatic depth to both the crust and the overall bar. Don’t skip this, as it brightens the entire dessert.
- All-Purpose Flour: The backbone of our oat crust, all-purpose flour provides the necessary structure. For best results, lightly spoon and level your flour, or even sift it, to prevent a dense crust and ensure a tender crumb.
- Rolled Old-Fashioned Oats: These are non-negotiable for authentic Caramelitas. Unlike instant or quick oats, old-fashioned rolled oats maintain their shape and provide the characteristic hearty, chewy texture that defines these bars.
- Baking Soda: A small amount of baking soda acts as a leavening agent, helping the oat crust to rise ever so slightly and contributing to a tender, less dense texture. It reacts with the acidic notes in the brown sugar to create a light lift.
- Sea Salt: A pinch of sea salt in both the crust and the caramel is essential. It balances the sweetness, cuts through the richness, and enhances all the other flavors, creating that addictive sweet and salty dynamic that makes these bars truly special.
- Caramel Squares: For convenience and consistent results, individually wrapped caramel squares are perfect for the gooey middle layer. Make sure to unwrap them ahead of time – it can be a fun task for kids to help with! We recommend using a good quality brand for the best flavor and melt.
- Heavy Cream: This is the secret to a luxuriously smooth, pourable, and incredibly creamy caramel sauce. Heavy cream emulsifies with the melted caramels and butter, preventing the caramel from becoming too stiff or hard once cooled.
- Semi-Sweet Chocolate Chips or Chunks: Semi-sweet chocolate provides the perfect balance to the rich caramel, offering a delightful contrast without being overly sweet. Use good quality chips or chop up a semi-sweet chocolate bar for larger, meltier pockets.
- Whole Egg + Yolk: The egg and extra yolk add moisture and richness to the oat mixture, helping to bind it together and provide structure, resulting in a cohesive yet tender crust.
How to Make Indulgent Chocolate Chip Caramel Bars
Creating these delightful Chocolate Chip Caramel Bars is a straightforward process, even for beginner bakers. Follow these steps for a perfectly layered and utterly delicious dessert:
- Prepare Your Pan and Oven: Begin by preheating your oven to 350°F (175°C). This ensures your oven is at the correct temperature when the bars are ready to bake. Line a 9×9-inch baking pan with aluminum foil, extending the foil over the edges to create “handles.” This is a crucial step for easy removal and cleanup, especially with the sticky caramel. Lightly spray the foil with cooking spray and set the prepared pan aside.
- Cream Butter and Sugar: In a large mixing bowl, combine the softened butter and dark brown sugar. Beat them together using an electric mixer or a sturdy whisk until the mixture is light, fluffy, and thoroughly combined. This creaming process incorporates air, contributing to the crust’s tender texture.
- Incorporate Wet Ingredients: Add the whole egg, extra yolk, and vanilla extract to the creamed butter and sugar mixture. Whisk everything until it’s perfectly smooth and well-integrated, ensuring no streaks of egg remain.
- Combine Dry Ingredients: Gradually add the all-purpose flour, rolled old-fashioned oats, baking soda, and sea salt to the wet mixture. Stir gently with a spoon or spatula until just combined. Be careful not to overmix, as this can lead to tough bars. Once the dry ingredients are mostly incorporated, fold in half of the semi-sweet chocolate chips (about 1/2 cup).
- Form the Base Layer: Take approximately two-thirds of the oat mixture and press it evenly into the bottom of your prepared 9×9-inch pan. Use the back of a spoon, a spatula, or your fingers to create a smooth, flat, and compact layer. Reserve the remaining one-third of the oat mixture for the topping.
- Pre-Bake the Base: Place the pan with the oat crust into the preheated oven and bake for 10 minutes. This initial bake helps set the crust before adding the gooey fillings, preventing it from becoming soggy. While it bakes, move on to preparing the caramel.
- Prepare the Luscious Caramel Sauce: In a large microwave-safe mixing bowl, combine the unwrapped caramel squares, heavy cream, unsalted butter, and a tiny pinch of sea salt. Heat this mixture in the microwave on high power in 60-second intervals, stirring vigorously after each burst. Continue this process until the caramels are completely melted and the sauce is smooth, creamy, and free of lumps. This may take several minutes, depending on your microwave’s power.
- Layer with Chocolate: Once the 10 minutes of pre-baking are up, carefully remove the pan from the oven. Evenly sprinkle the remaining half cup of semi-sweet chocolate chips over the warm, partially baked crust. The residual heat will start to slightly melt the chocolate, creating wonderful pockets.
- Pour the Caramel: Slowly and evenly pour the freshly made, warm caramel sauce over the chocolate chips, spreading it gently with a spatula to ensure it covers the entire surface of the base layer.
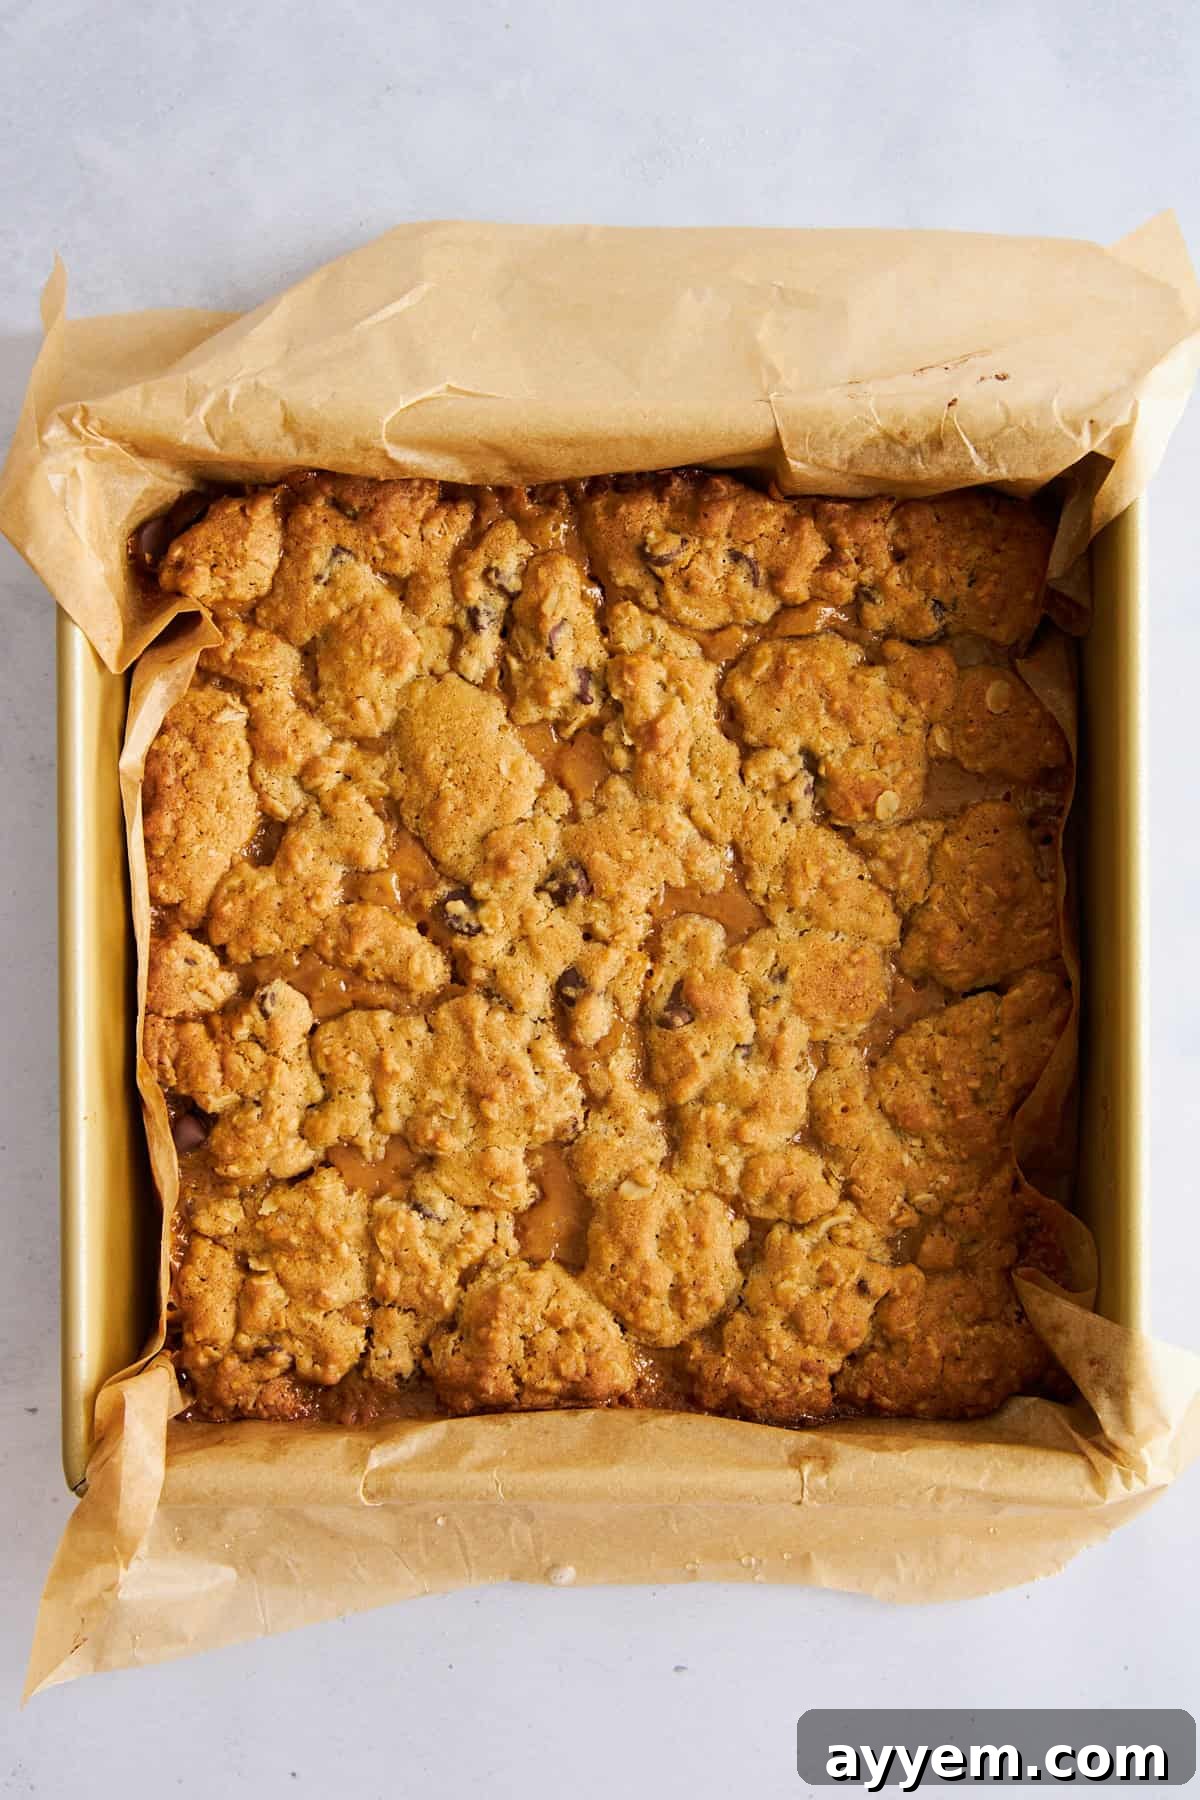
- Top and Final Bake: Crumble the reserved one-third of the oat mixture evenly over the caramel layer. Return the pan to the oven and bake for another 15 to 18 minutes, or until the edges of the bars are lightly golden brown and the caramel center is bubbling slightly. This indicates the layers have set beautifully.
- Cool and Serve: Once baked, remove the pan from the oven and let the bars cool completely on a wire rack before attempting to cut them. Cooling is essential for the caramel to set properly, ensuring clean, neat slices. Once cooled, use the foil handles to lift the entire slab out of the pan, then slice into squares or rectangles. Enjoy your homemade Caramelitas!
Delicious Variations to Customize Your Caramelitas
One of the best aspects of these Chocolate Chip Caramel Bars is how versatile they are! While the classic recipe is undeniably perfect, don’t hesitate to get creative with these delicious variations to suit your taste or occasion:
- Nuts for Extra Crunch: For an enhanced textural experience and a nutty flavor, fold a handful of chopped pecans, walnuts, or even almonds into the oat mixture. You can also sprinkle them over the caramel layer before the final oat topping. Toasted nuts will offer an even deeper flavor.
- Espresso Kick: Elevate the richness of the caramel by mixing a teaspoon of instant espresso powder or finely ground coffee into the caramel sauce while it’s melting. The subtle coffee notes beautifully complement both the chocolate and caramel, adding a sophisticated depth of flavor.
- The Ultimate Salted Caramel: For those who adore the sweet and salty combination, a generous sprinkle of flaky sea salt over the warm caramel layer, just before adding the final oat crumble, is a must. This simple addition enhances the flavors and creates an irresistible contrast.
- Chocolate Choices: Don’t feel limited to semi-sweet chocolate chips. Experiment with different types of chocolate! Swap them out for creamy white chocolate chips for a sweeter, milder bar, or use dark chocolate chips or chunks for a more intense, sophisticated cocoa flavor that perfectly balances the sweet caramel. You could even use a mix of chocolate types.
- Fruity Twist: For a hint of tang and chewiness, add a handful of dried cranberries, dried cherries, or even chopped dried apricots to the oat mixture. These dried fruits provide a vibrant contrast to the rich caramel and chocolate.
- Spice it Up: A pinch of ground cinnamon, nutmeg, or even a touch of cardamom added to the oat mixture can introduce a warm, cozy spice dimension, making these bars perfect for autumn or winter.
- Pretzel Perfection: For a truly unique sweet and salty crunch, crush some pretzels and mix them into the top oat crumble, or sprinkle them directly over the caramel layer before the final bake.
Storing Your Chocolate Chip Caramel Bars
If you’re lucky enough to have any Chocolate Chip Caramel Bars leftover (which rarely happens in our house!), proper storage is key to maintaining their incredible taste and texture. These bars are quite versatile when it comes to storage options:
For short-term storage, while the bars can be kept at room temperature in an airtight container for a day or two, we highly recommend refrigerating them. In the fridge, they will maintain their optimal chewy texture and prevent the caramel from becoming too soft and gooey. Simply transfer the cooled bars to an airtight container and store them in the refrigerator for up to a week. For serving, you can enjoy them chilled or allow them to come to room temperature for about 15-20 minutes for a softer bite.
For longer preservation, these bars freeze beautifully. Once completely cooled, cut the bars into individual portions. Wrap each portion tightly in plastic wrap, then place them in a freezer-safe airtight container or heavy-duty freezer bag. They can be stored in the freezer for up to 2-3 months. To enjoy a frozen bar, simply thaw it at room temperature for an hour or two, or briefly warm it in the microwave for that freshly baked, gooey experience.
Common Questions About Chocolate Chip Caramel Bars
Absolutely not! These bars are surprisingly simple to prepare, making them an excellent choice for bakers of all skill levels, including novices. The process involves a few basic mixing steps, layering, and then letting your oven do most of the work. With clear instructions, you’ll be able to create an impressive, caramel-coated, chocolate-studded treat with minimal effort.
Yes, they can! They are perfectly suited for cutting into bars, squares, or even small rectangles, making them ideal for parties, bake sales, or as a delightful addition to any snack plate. The key to achieving neat slices is to allow the bars to cool completely before cutting. This gives the caramel layer sufficient time to set, ensuring clean edges and preventing sticking.
Chocolate Chip Caramel Bars offer a truly delightful interplay of textures. The oat crust and topping bake to a perfect balance of crispiness and chewiness, while the caramel layer remains wonderfully gooey and soft. The melted chocolate chips add pockets of smooth, melty goodness, creating a complex and satisfying mouthfeel with every bite. It’s a combination that keeps you coming back for more!
Absolutely! Making gluten-free Chocolate Chip Caramel Bars is entirely possible without sacrificing flavor or texture. Simply swap the all-purpose flour for a high-quality gluten-free flour blend (ensure it contains xanthan gum for structure, or add it separately according to package directions). Additionally, confirm that your rolled oats are certified gluten-free, as some oats can be cross-contaminated during processing. With these adjustments, you can still enjoy that buttery, chewy, chocolatey caramel experience!
Explore More Irresistible Caramel Desserts
If the luscious, buttery richness of caramel captures your heart as it does ours, you’re in for a treat! Caramel is a versatile ingredient that elevates any dessert to new heights of deliciousness. For those who can’t get enough of that silky, golden goodness, here are more drool-worthy caramel-infused recipes from Food Dolls that are guaranteed to satisfy your deepest caramel cravings:
Salted Caramel Bread Pudding: A comforting classic elevated with a divine salted caramel sauce, making every spoonful a warm, sweet, and slightly salty delight.
Creme Caramel (Flan): Experience the elegant simplicity of this silky smooth, custard-like dessert, bathed in a shimmering, amber caramel sauce.
Brown Sugar Caramel Muffins: Perfect for breakfast or a sweet snack, these muffins are infused with the rich, comforting notes of brown sugar and gooey caramel swirls.
Slow Cooker Chocolate Caramel Pecan Clusters: An incredibly easy and addictive treat featuring crunchy pecans, rich chocolate, and chewy caramel, all made effortlessly in your slow cooker.
Chocolate Chip Caramel Bars (Caramelitas)
Print Recipe
Email Recipe
Ingredients
- 3/4 cup butter, softened
- 1 cup dark brown sugar, packed
- 1 whole egg + yolk
- 2 teaspoons vanilla extract
- 1 1/2 cups all-purpose flour
- 1 1/2 cups rolled old-fashioned oats
- 1 teaspoon baking soda
- 1/2 teaspoon sea salt
- 1 cup semi-sweet chocolate chips or chunks, divided
- 35 wrapped caramel squares
- 1/2 cup heavy cream
- 1 Tablespoon unsalted butter
Instructions
- Preheat oven to 350°F (175°C). Line a 9×9-inch pan with aluminum foil, extending over the edges, and spray with cooking spray. Lining your pan is highly recommended for ease of cleanup due to the stickiness of the caramel; set pan aside.
- In a large mixing bowl, mix together the softened butter and dark brown sugar until smooth and creamy.
- Add the whole egg, egg yolk, and vanilla extract, then whisk until thoroughly combined and smooth.
- Add the flour, oats, baking soda, and sea salt to the mixture. Stir until just combined. Fold in 1/2 cup of the chocolate chips.
- Press two-thirds of the oat mixture evenly into the prepared pan to create an even, smooth, flat layer. Reserve the remaining one-third of the mixture.
- Bake the base layer for 10 minutes. While it bakes, prepare the caramel sauce.
- In a large microwave-safe mixing bowl, combine the unwrapped caramel squares, heavy cream, and 1 Tablespoon of unsalted butter. Heat on high power in 60-second bursts, stirring vigorously after each burst, until fully melted and smooth.
- After 10 minutes, remove the pan from the oven and evenly sprinkle the remaining 1/2 cup of chocolate chips over the partially baked crust.
- Slowly and evenly pour the melted caramel sauce over the chocolate chips, spreading gently if needed to cover the base.
- Evenly crumble the reserved oatmeal-brown sugar mixture over the top of the caramel layer. Return the pan to the oven and bake for about 15 to 18 minutes, or until the edges are lightly golden brown and the center is bubbling slightly.
- Allow the bars to cool completely on a wire rack before lifting out of the pan by the foil handles and slicing into squares.
Equipment
Nutrition
Nutrition information is automatically calculated, so should only be used as an approximation.