
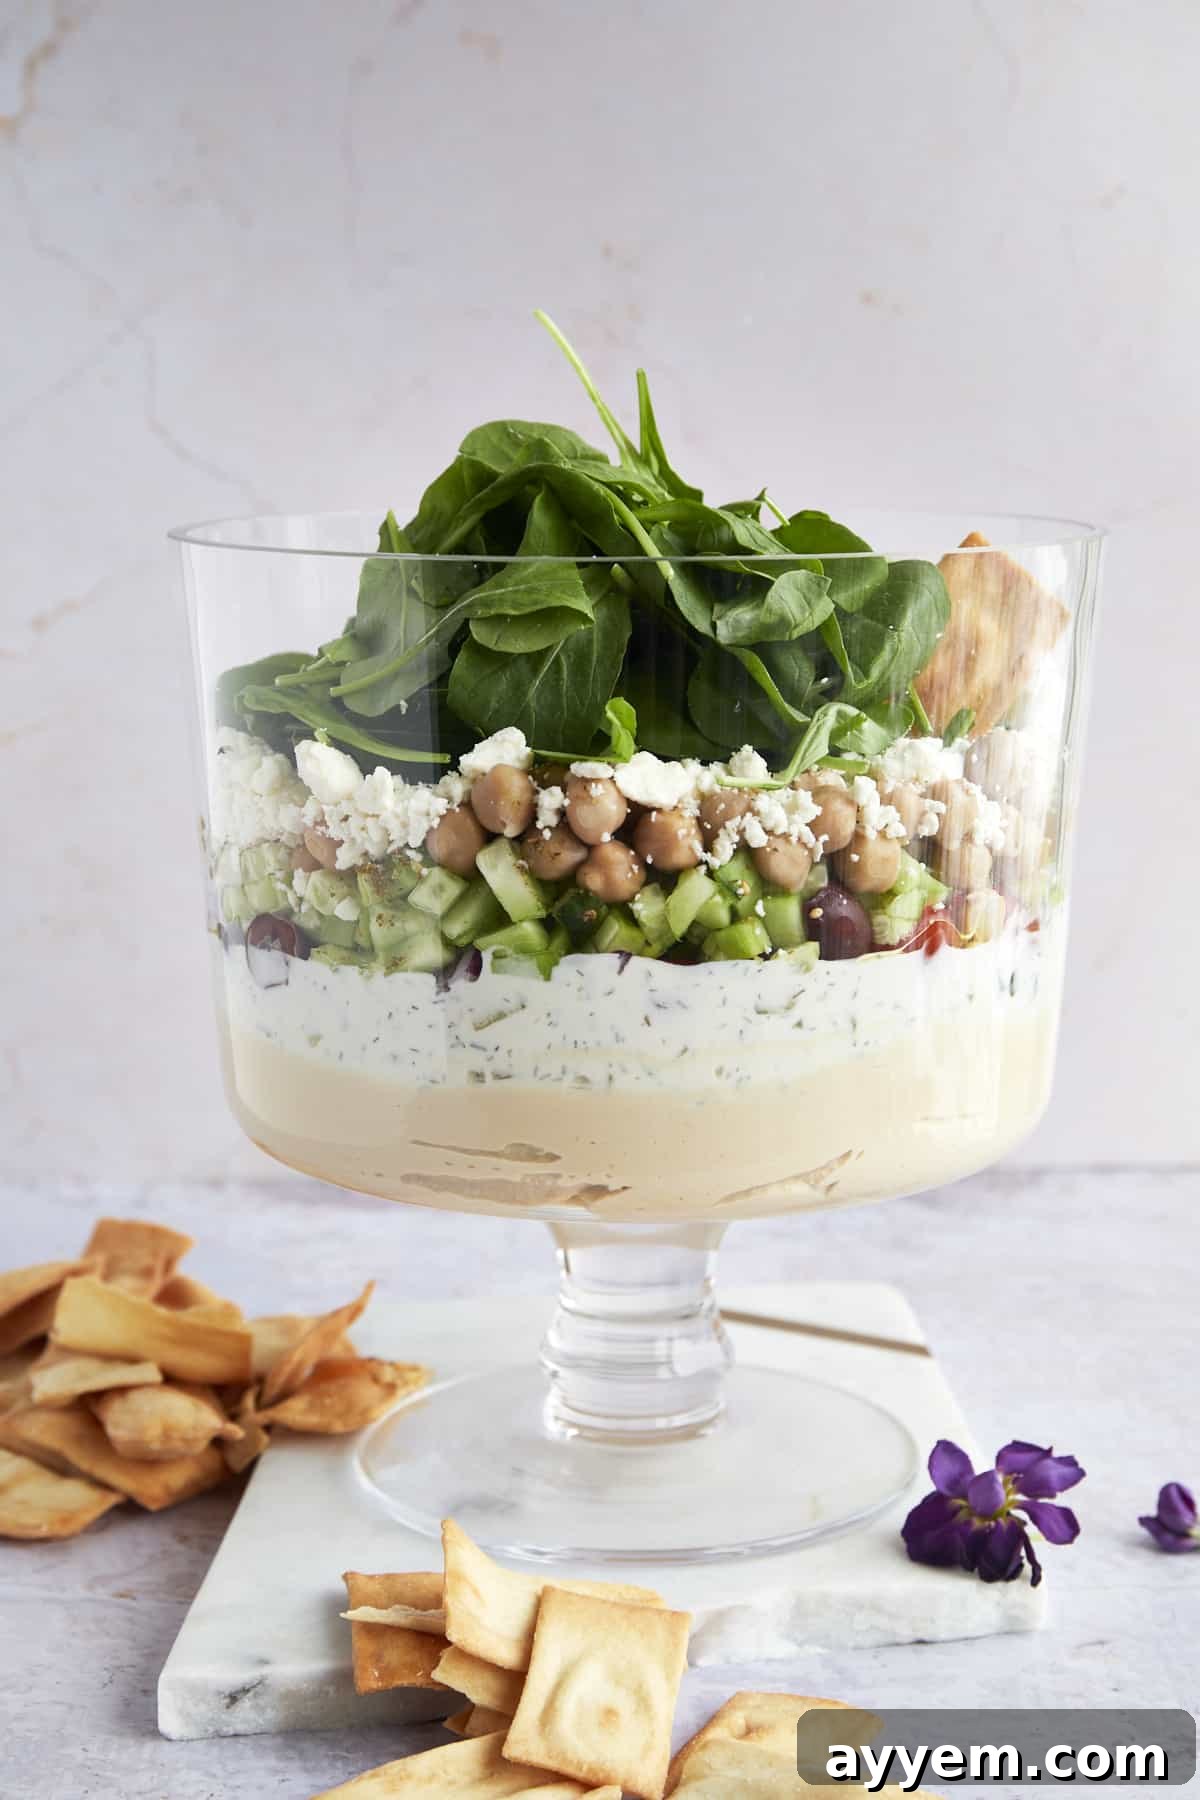
Experience a burst of fresh, Mediterranean flavors with this incredible 7 Layer Greek Dip! It’s a vibrant, no-cook appetizer that promises to be the star of any gathering. Imagine generous layers of creamy hummus and zesty tzatziki, perfectly complemented by a colorful medley of crisp vegetables, hearty chickpeas, savory crumbled feta cheese, and the aromatic warmth of Za’atar seasoning. This dip isn’t just a dish; it’s a symphony of tastes and textures, designed for sharing and savoring. Whether you’re hosting a party, looking for a healthy snack, or simply craving something refreshing, this easy-to-assemble Greek dip is your go-to. Serve it with classic pita chips, your favorite crackers, or a vibrant assortment of fresh veggie sticks for the ultimate dipping experience.
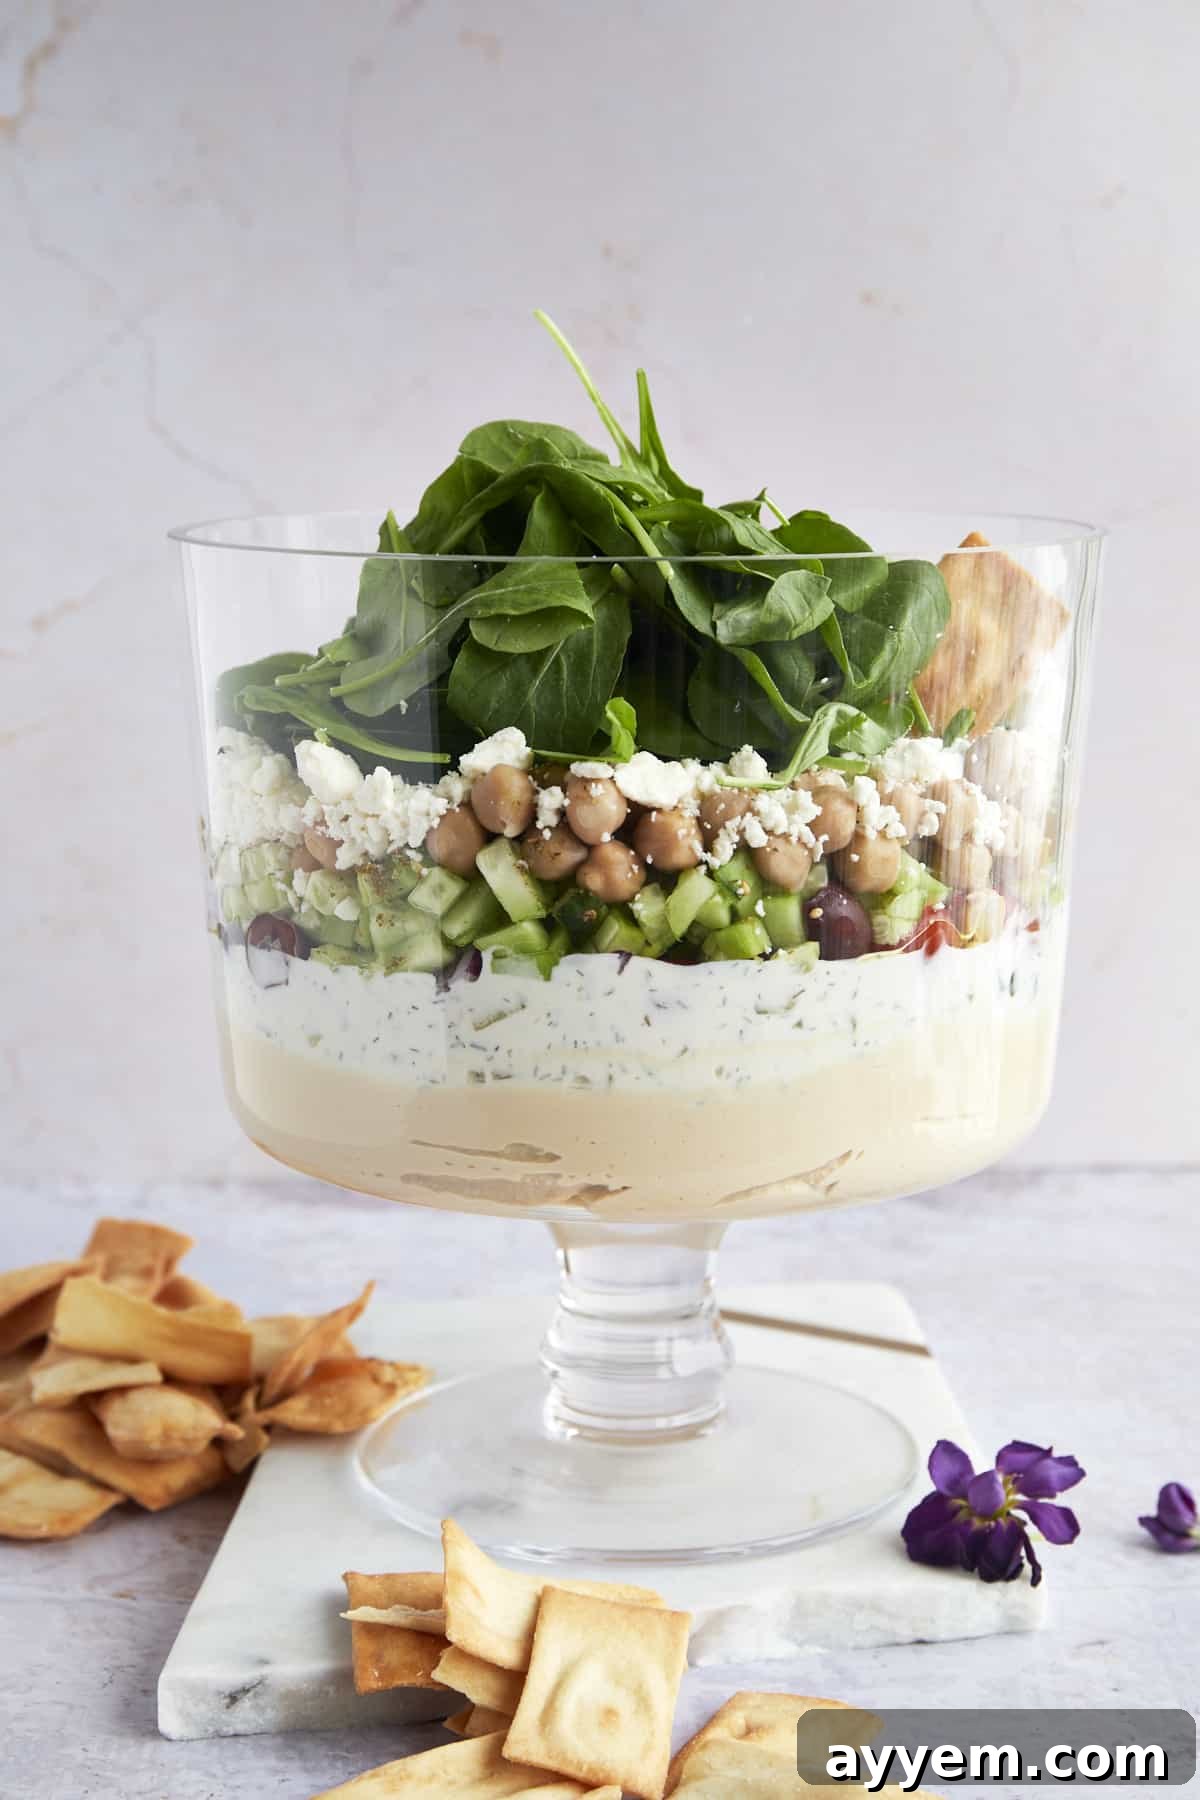
Discovering the Deliciousness: What Goes into a 7 Layer Greek Dip?
The allure of a 7 Layer Greek Dip lies in its harmonious combination of fresh, wholesome ingredients, each contributing to an unforgettable Mediterranean experience. While the name suggests exactly seven components, this recipe often includes a few extra touches that elevate its flavor profile and nutritional value. The beauty of this dip is how these distinct layers interact, creating a complex yet refreshing taste that makes it an instant crowd-pleaser and a healthy addition to any meal or snack spread. Let’s delve into the core ingredients that make this Greek dip so utterly irresistible.
The Essential Layers: Creamy Bases and Fresh Produce
- Hummus: The Rich Foundation – The bedrock of our 7 Layer Greek Dip is a generous spread of creamy hummus. This velvety chickpea dip provides a substantial and satisfying base, rich in plant-based protein, dietary fiber, and healthy fats. For the freshest taste, consider making your own with our healthy chickpea hummus recipe. However, for utmost convenience without sacrificing quality, a premium store-bought hummus is an excellent alternative. We particularly adore Baba’s hummus for its exceptional smoothness and authentic flavor, making it our preferred ready-made option.
- Tzatziki: The Cool & Tangy Counterpart – Layered delicately over the hummus, tzatziki sauce brings a refreshing, cool, and tangy dimension to the dip. Its blend of cucumber, garlic, and yogurt perfectly balances the richness of the hummus. If you’re inspired to make it from scratch, you can easily prepare it by seasoning plain Greek yogurt with fresh minced garlic, a squeeze of lemon juice, finely chopped dill, and a touch of salt and black pepper. This homemade option adds an extra layer of freshness and vibrant flavor.
- Tomatoes: Bursting with Sweetness – Vibrant and juicy, grape tomatoes are our go-to for this dip. Halved or quartered, they provide delightful pops of color and natural sweetness, cutting through the creaminess of the dips. Their small size integrates beautifully into the layers. Cherry tomatoes can be used as an equally delicious substitute, offering a similar sweetness and visual appeal.
- Cucumbers: Crisp & Hydrating – For that essential crisp texture and cooling sensation, we recommend Persian cucumbers. Their thin skin and minimal seeds ensure a delicate crunch without introducing excess water. English cucumbers are also an excellent choice, providing a mild flavor and tender texture that complements the other ingredients perfectly. Be sure to chop them finely for even distribution.
- Kalamata Olives: Briny Mediterranean Essence – Pitted and halved Kalamata olives are indispensable for imparting a distinctive briny, salty, and slightly fruity flavor that defines Mediterranean cuisine. Their deep purple hue also adds visual depth. If Kalamata olives are not available or if you prefer a milder taste, sliced black olives can be used as a good alternative.
- Chickpeas (Garbanzo Beans): Hearty & Wholesome – Canned chickpeas are a wonderfully convenient and nutritious addition, contributing a pleasant, earthy texture and a boost of plant-based protein and fiber. Remember to rinse and drain them thoroughly before incorporating them into the dip. This step is crucial for removing excess sodium and improving their overall texture.
The Finishing Touches: Spices, Cheese, and Fresh Herbs
- Olive Oil: The Golden Elixir – A generous drizzle of high-quality extra virgin olive oil is more than just a garnish; it’s a vital flavor enhancer. It adds a rich, fruity, and slightly peppery note, while also helping the seasonings adhere to the fresh produce below. Beyond its culinary appeal, olive oil contributes beneficial monounsaturated fats.
- Za’atar: The Aromatic Secret Weapon – This iconic Middle Eastern spice blend is what truly makes this Greek dip sing. Typically a mix of dried thyme, oregano, marjoram, toasted sesame seeds, and sumac, Za’atar offers a unique warm, earthy, tangy, and herbaceous flavor. Its deeply aromatic presence elevates the dip, providing an authentic taste that transports you straight to the Mediterranean.
- Feta Cheese: Tangy & Crumbly Perfection – Crumbled feta cheese is a non-negotiable for its signature salty tang and delightfully creamy yet crumbly texture. We highly recommend using full-fat feta for the richest flavor and best mouthfeel, as its robust character stands out beautifully amidst the fresh ingredients.
- Baby Arugula: A Peppery Fresh Finale – The final layer of fresh baby arugula not only adds a beautiful vibrant green color but also a subtle peppery bite. This refreshing contrast to the creamy and savory components provides a bright, crisp finish. Alternatively, baby spinach offers a milder green, or a sprinkle of fresh parsley or dill can be used for a more classic herbal note.
Assembling Your Masterpiece: Seven Layers to Pure Delight
One of the most appealing aspects of this Greek layer dip is its effortless preparation. There’s absolutely no cooking involved, making it a perfect last-minute appetizer or a stress-free option when you’re entertaining a crowd. With minimal prep time, you can create a visually stunning and incredibly flavorful dip in mere minutes.
- Prepare All Ingredients: Start by preparing all your fresh ingredients. Slice the grape tomatoes into halves or quarters, peel and finely dice the Persian cucumbers, and thoroughly rinse and drain the canned chickpeas. For optimal crispness and to prevent a watery dip, gently pat the chopped tomatoes and cucumbers dry with a paper towel. Having everything ready before you start layering will ensure a smooth and enjoyable assembly process.
- Lay the Hummus Base: Choose your serving vessel – a clear trifle bowl is excellent for showcasing the distinct layers, but a wide, shallow platter or an elegant serving dish also works beautifully. Carefully spread the 2 cups of creamy hummus evenly across the bottom, creating a sturdy and delicious first layer. This will be the foundation for all the vibrant flavors to come.
- Add the Refreshing Tzatziki, Tomatoes, and Cucumbers: Next, gently spoon and spread the 1 cup of cool tzatziki sauce over the hummus layer. Take care to keep the layers distinct. Then, artfully arrange your sliced grape tomatoes and diced Persian cucumbers over the tzatziki. Distribute them evenly so that every scoop offers a taste of these fresh veggies.
- Incorporate Olives and Chickpeas: Evenly scatter the 1 cup of pitted Kalamata olives over the tomatoes and cucumbers. Their briny notes will begin to infuse the surrounding layers. Follow this by adding the rinsed and drained chickpeas, ensuring they are well-distributed to provide a hearty texture throughout the dip.
- Drizzle with Olive Oil and Season with Za’atar: Drizzle a generous amount of high-quality extra virgin olive oil over the top of the chickpea layer. This adds moisture, richness, and helps bind the flavors. Then, liberally sprinkle Za’atar seasoning to taste, ensuring a vibrant, aromatic coating over the chickpeas. The unique blend of Za’atar will elevate the dip with its distinctive Mediterranean character.
- Finish with Feta and Arugula: Complete your layered masterpiece by sprinkling the ½ cup of crumbled feta cheese evenly over the Za’atar and chickpeas. The salty, tangy feta adds a delightful counterpoint. Finally, gently place the fresh baby arugula leaves on top, creating a beautiful green crown that offers a fresh, slightly peppery finish and vibrant visual appeal.
- Serve Immediately: For the absolute best taste, texture, and visual presentation, serve your spectacular 7 Layer Greek Dip immediately after assembly. This ensures that all the vegetables are at their crispest, the creamy layers are perfectly chilled, and the aromatic flavors are at their peak.
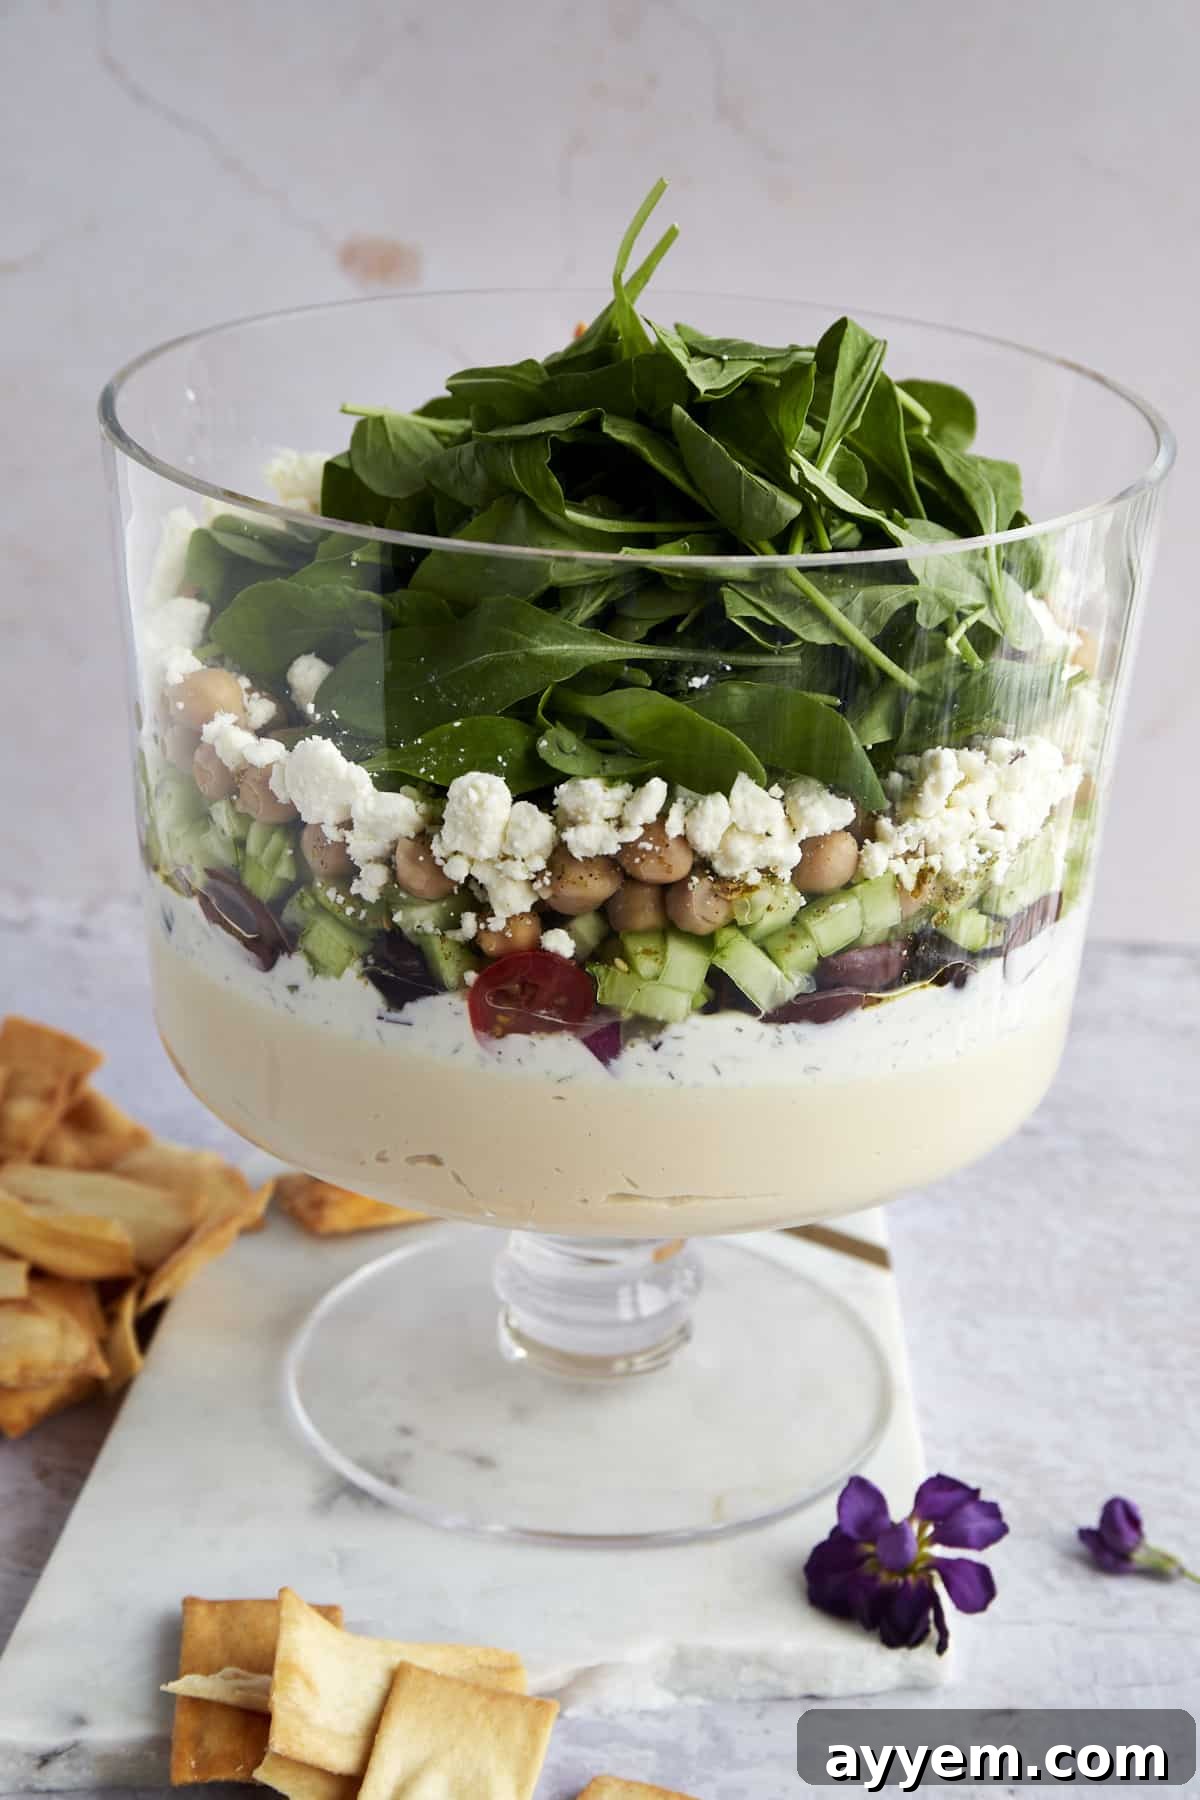
Perfect Pairings: How to Serve Your 7 Layer Greek Dip
The beauty of this 7 Layer Greek Dip extends to its incredible versatility when it comes to serving. While classic Mediterranean dippers are always a hit, the array of textures and flavors in this dip means it pairs wonderfully with a wide variety of accompaniments. Don’t be afraid to get creative and offer a selection that caters to all tastes and dietary preferences.
- Classic Mediterranean Dippers: Warm pita bread, sliced into triangles, or crispy pita chips are the quintessential choices. Their mild flavor and sturdy structure are perfect for scooping up all the vibrant layers.
- Crunchy & Savory Options: For those who love a satisfying crunch, consider serving pretzel crisps, a medley of tortilla chips (plain or with a hint of lime), or robust gourmet crackers. The subtle saltiness of these choices beautifully complements the freshness of the dip.
- Soft Breads & Wraps: Lightly warmed, fluffy naan bread offers a slightly chewy texture and a gentle flavor that pairs exceptionally well with the Mediterranean ingredients. This dip also makes an excellent spread for wraps, sandwiches, or even a flavorful base for a chicken or fish dish.
- Healthy Vegetable Sticks: For a gluten-free, low-carb, and extra nutritious option, provide a colorful assortment of fresh vegetable sticks. Think crisp celery sticks, sweet carrot sticks, vibrant bell pepper strips (red, yellow, orange for a visual feast!), cucumber spears, or even blanched green beans or broccoli florets. These add a refreshing crunch and boost of vitamins.
- Beyond the Dipping Bowl: This versatile dip can also transform into a light and flavorful lunch. Use it as a topping for grilled chicken or fish, a vibrant spread in a pita pocket, or even a deconstructed salad bowl base with extra greens.
Prep Ahead & Storage: Maximizing Freshness and Convenience
Can I Make This Recipe Ahead of Time?
For the freshest possible taste and best texture, we typically recommend assembling the 7 Layer Greek Dip just before you plan to serve it. This prevents the vegetables from releasing too much moisture and keeps the creamy layers distinct and vibrant. However, you can certainly take steps to significantly reduce your preparation time on the day of your event:
- Vegetable Preparation: All your fresh vegetables (tomatoes, cucumbers, olives) can be chopped, sliced, and prepared one to two days in advance. Store each type of chopped vegetable in separate, airtight containers in the refrigerator. This keeps them wonderfully crisp and ready for quick assembly.
- Hummus and Tzatziki: If you’re opting to make your hummus or tzatziki from scratch, these can also be prepared a day or two ahead. Store them in individual airtight containers in the fridge to maintain their freshness and flavor.
- Last-Minute Assembly: On the day of your gathering, simply retrieve your prepped ingredients from the fridge. Arranging them into layers, drizzling with olive oil and Za’atar, and topping with feta and arugula will only take a few minutes, ensuring your dip is at its absolute best when presented.
How Long Does Greek Layer Dip Last in the Fridge?
The 7 Layer Greek Dip is truly at its peak when enjoyed fresh, right after assembly. The crispness of the vegetables and the distinct, vibrant flavors are most pronounced then. If you find yourself with leftovers, they can be covered tightly with plastic wrap (or an airtight lid if using a container) and stored in the refrigerator. While still enjoyable, it’s best to consume any leftover dip within one to two days. Beyond this timeframe, the textures of the fresh vegetables may begin to soften, and the flavors might meld more intensely than desired, potentially leading to a slightly watery consistency at the bottom of the dish. Always perform a quick check for freshness and aroma before consuming leftovers.
Common Questions About 7 Layer Greek Dip
This dip is designed to be served cold! Its beauty lies in its fresh, chilled layers that deliver a crisp and wonderfully refreshing experience. The cool temperature enhances the flavors of the creamy hummus, tangy tzatziki, and all the vibrant fresh vegetables, making it an ideal light and invigorating appetizer perfect for parties, especially on warm days or as a vibrant contrast to richer main courses.
Absolutely! Customization is highly encouraged to truly make this dip your own and cater to personal tastes or dietary needs. Feel free to experiment with various additions or ingredient swaps. Popular choices include adding roasted red peppers for a smoky sweetness, chopped artichoke hearts for an extra briny tang, a sprinkle of fresh mint or oregano, or even a dash of red pepper flakes for a subtle kick. You could also try different types of olives or incorporate thinly sliced radishes for added crunch. The possibilities for Mediterranean-inspired variations are boundless!
To ensure your dip remains perfectly textured and avoid a watery consistency, the key is to manage moisture from the fresh vegetables. After dicing your tomatoes and cucumbers, gently pat them dry with a clean paper towel before layering them. This simple but effective step helps to absorb any excess moisture that would otherwise seep into your creamy hummus and tzatziki layers, keeping every component crisp and your dip wonderfully enjoyable.
Without a doubt, hummus serves as the classic and most effective base layer for a Greek dip. Its inherently rich, creamy texture and distinct garlicky, earthy flavor provide a substantial and stable foundation that harmonizes beautifully with all the vibrant toppings. Hummus not only contributes a delicious taste but also acts as a natural binder, holding the other layers together and ensuring a satisfying, cohesive scoop every single time. It’s the perfect canvas for the fresh and bold Mediterranean ingredients.
Yes, this 7 Layer Greek Dip is incredibly healthy and nutritious! It’s packed with wholesome ingredients: hummus and chickpeas provide excellent sources of plant-based protein and dietary fiber, while the abundance of fresh vegetables like tomatoes, cucumbers, and arugula contributes essential vitamins, minerals, and disease-fighting antioxidants. Tzatziki, typically made with Greek yogurt, offers beneficial probiotics and additional protein. With healthy monounsaturated fats from olive oil and chickpeas, this dip is a guilt-free and satisfying choice for any occasion.
Absolutely! Transforming this 7 Layer Greek Dip into a vegan delight is quite straightforward. The primary substitutions needed would be for the tzatziki sauce and feta cheese. For tzatziki, simply use a high-quality dairy-free Greek yogurt alternative and season it with fresh garlic, lemon juice, and dill. As for the feta, there are numerous excellent plant-based feta crumbles available on the market that successfully mimic the tangy, salty flavor and crumbly texture of traditional feta. With these simple swaps, your delicious 7 Layer Greek Dip can be enjoyed by everyone, regardless of dietary preferences!
Expand Your Mediterranean Palette: More Irresistible Dip Recipes
If the fresh and vibrant flavors of this 7 Layer Greek Dip have captured your heart, you’re in for a treat! The rich culinary traditions of the Mediterranean and beyond offer a treasure trove of incredible dips that are perfect for entertaining, healthy snacking, or complementing your favorite meals. Continue your flavor adventure with these equally delightful recipes:
- Marinated Chickpeas with Whipped Feta: A fantastic appetizer featuring tender, flavor-infused chickpeas paired with a light, airy whipped feta for a sophisticated twist.
- Roasted Red Pepper Feta Dip with Crispy Chickpeas: Indulge in the sweet smokiness of roasted red peppers blended with tangy feta, all crowned with delightfully crispy chickpeas for an irresistible textural contrast.
- Roasted Eggplant and Tomatoes with Yogurt Dip: A deeply savory and comforting dip showcasing tender, caramelized roasted eggplant and tomatoes, brightened by a cool, creamy yogurt base.
- White Bean Dip with Roasted Tomatoes: A smooth, herbaceous white bean dip elevated by the sweet, sun-kissed intensity of roasted cherry tomatoes, perfect for a light snack.
- Mediterranean Feta Dip: A simpler, yet equally flavorful feta-based dip that captures the essence of Mediterranean flavors, ideal for quick cravings or impromptu gatherings.
- Layered Taco Dip: While a departure from Greek cuisine, this popular layered dip offers a different but equally satisfying flavor profile, proving that the layered concept is a winning formula for any party!
7 Layer Greek Dip: The Complete Recipe Card
Here’s the full, easy-to-follow recipe to bring this sensational 7 Layer Greek Dip to life in your own kitchen. This no-bake wonder is perfect for quick preparation, offering maximum Mediterranean flavor with minimal effort, making it ideal for any occasion.
7 Layer Greek Dip
Author: Food Dolls
Yields: 12 servings
Prep time: 10 minutes
Total time: 10 minutes
This vibrant 7 layer Greek dip is a celebration of Mediterranean flavors, featuring creamy hummus, zesty tzatziki, fresh vegetables, hearty chickpeas, aromatic Za’atar, and tangy feta cheese. A no-bake sensation, it’s perfect for effortless entertaining and healthy snacking!
Ingredients
- 2 cups grape tomatoes, sliced (or cherry tomatoes, halved)
- 1 ½ cups Persian cucumbers, peeled and sliced/diced (or English cucumbers)
- 2 (15 ounce) cans chickpeas, rinsed and thoroughly drained
- 2 cups hummus (homemade or your favorite store-bought brand)
- 1 cup tzatziki sauce (homemade or store-bought, or seasoned plain Greek yogurt)
- 1 cup Kalamata olives, pitted and halved (or black olives, sliced)
- Olive oil, to taste (high-quality extra virgin preferred)
- Za’atar, to taste (a generous sprinkle for authentic flavor)
- ½ cup feta cheese crumbles (full-fat recommended for best flavor)
- 2 cups baby arugula (or baby spinach, or a sprinkle of fresh parsley)
Instructions
- Prepare Ingredients: Begin by slicing the grape tomatoes, peeling and dicing the Persian cucumbers, and thoroughly rinsing and draining the canned chickpeas. To prevent the dip from becoming watery, gently pat the sliced tomatoes and cucumbers dry with a paper towel.
- Layer Hummus: Evenly spread the 2 cups of hummus across the bottom of your chosen serving dish (a trifle bowl or large platter works well). This forms a stable and flavorful base.
- Add Tzatziki and Fresh Veggies: Gently spread the 1 cup of tzatziki sauce over the hummus, being careful to keep the layers distinct. Then, artfully arrange the sliced grape tomatoes and diced cucumbers over the tzatziki.
- Introduce Olives and Chickpeas: Evenly scatter the 1 cup of pitted Kalamata olives over the fresh vegetable layer. Follow this by distributing the rinsed and drained chickpeas across the dip.
- Drizzle and Season with Za’atar: Drizzle a generous amount of olive oil over all the layers. Next, liberally sprinkle Za’atar seasoning to taste, ensuring an aromatic coating that infuses the dip with its signature Mediterranean flavor.
- Garnish with Feta and Arugula: Finish by sprinkling the ½ cup of feta cheese crumbles evenly over the top. Finally, gently place the fresh baby arugula leaves as a vibrant and refreshing garnish.
- Serve Immediately: For the best experience, serve your visually stunning 7 Layer Greek Dip immediately with an assortment of dippers such as pita chips, warm pita bread, celery sticks, carrot sticks, bell pepper strips, or your preferred accompaniments. Enjoy!
Equipment
- 1 Trifle Bowl (highly recommended for showcasing layers, but any large serving platter will do)
Nutrition Information (per serving)
Serving Size: 1 serving | Calories: 275kcal | Carbohydrates: 29g | Protein: 12g | Fat: 14g | Saturated Fat: 3g | Polyunsaturated Fat: 3g | Monounsaturated Fat: 5g | Cholesterol: 9mg | Sodium: 508mg | Potassium: 399mg | Fiber: 9g | Sugar: 5g | Vitamin A: 467IU | Vitamin C: 5mg | Calcium: 123mg | Iron: 3mg
Please note: Nutrition information is automatically calculated and should be considered an approximation. Actual values may vary based on specific ingredients and preparation methods.
Loved this incredible 7 Layer Greek Dip recipe?
We’d be thrilled to hear your thoughts! Please leave a comment below and share your experience. Your feedback helps us grow and inspires other home cooks to try this delightful dish!