
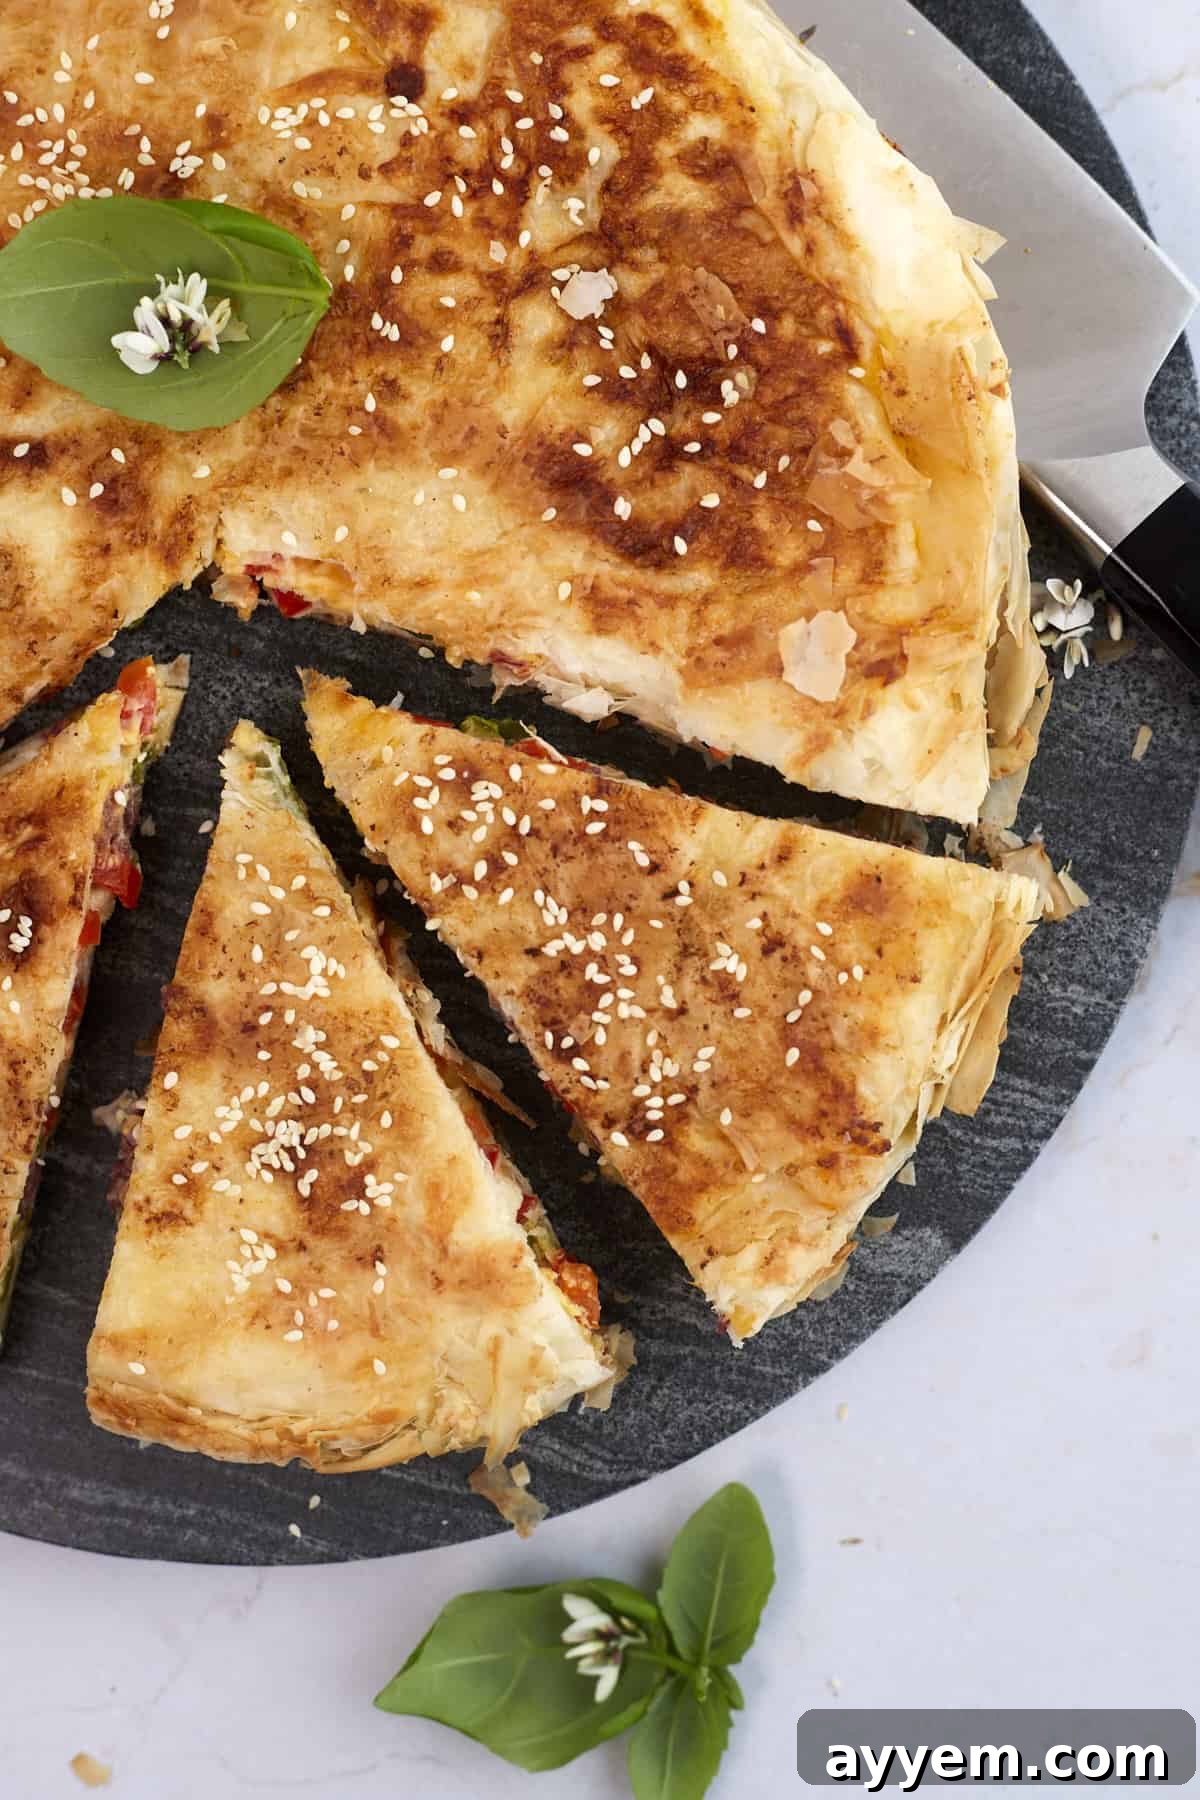
The Ultimate Skillet Veggie Phyllo Pie: A Flaky, Savory Delight for Any Meal
Prepare to be enchanted by our exquisite Skillet Veggie Phyllo Pie, a culinary masterpiece inspired by the rich and savory traditions of Mediterranean cuisine. Imagine delicate, golden-brown layers of impossibly flaky phyllo dough, lovingly encasing a vibrant and wholesome filling. This isn’t just a dish; it’s an experience, a harmonious blend of textures and tastes that promises to elevate your mealtime.
This hearty vegetarian creation is a true chameleon of the kitchen, effortlessly transitioning from a satisfying breakfast or brunch centerpiece to a light yet fulfilling dinner, or even a delightful appetizer for gatherings. Its irresistible crispy, buttery crust and savory, comforting interior are guaranteed to captivate your palate and quickly earn a coveted spot in your recipe collection. It’s a testament to simple ingredients coming together to create something truly extraordinary, proving that plant-based meals can be both incredibly flavorful and deeply satisfying.
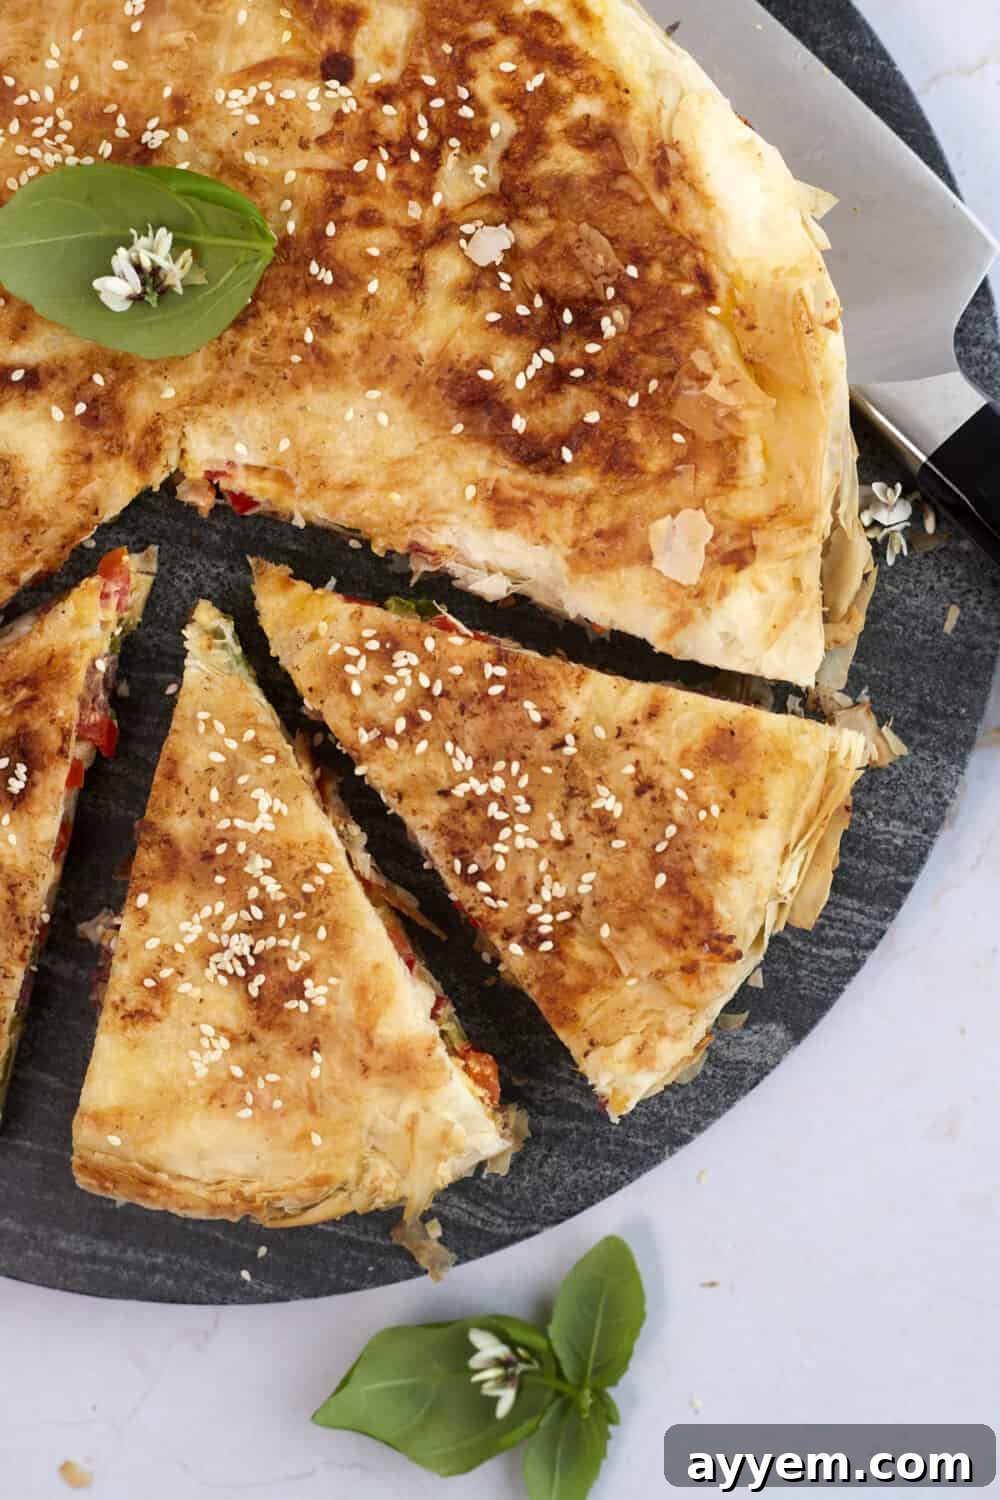
What Exactly Is a Skillet Veggie Phyllo Pie?
A Skillet Veggie Phyllo Pie is a unique and delightful savory pie that defies easy categorization. While some might compare it to a Mediterranean-inspired breakfast burrito, it’s far more sophisticated and distinct. Think of it as a cousin to traditional phyllo spinach pies, but with its own vibrant personality. It’s a dish that needs to be experienced to be fully appreciated, boasting a complexity of flavor and texture that is both surprising and incredibly delicious.
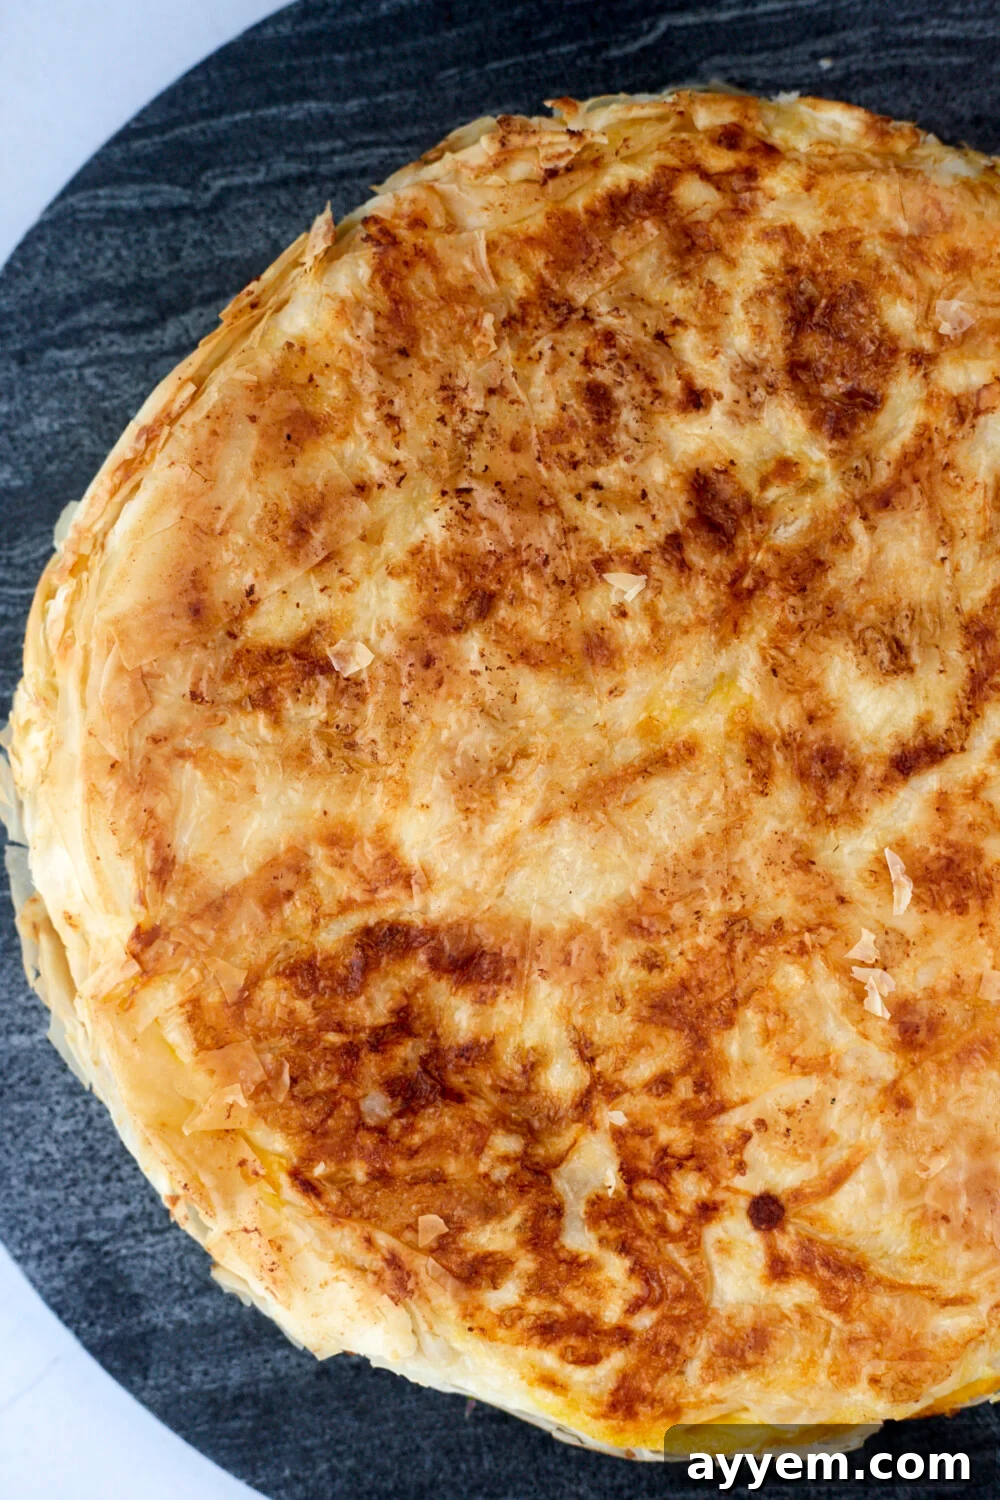
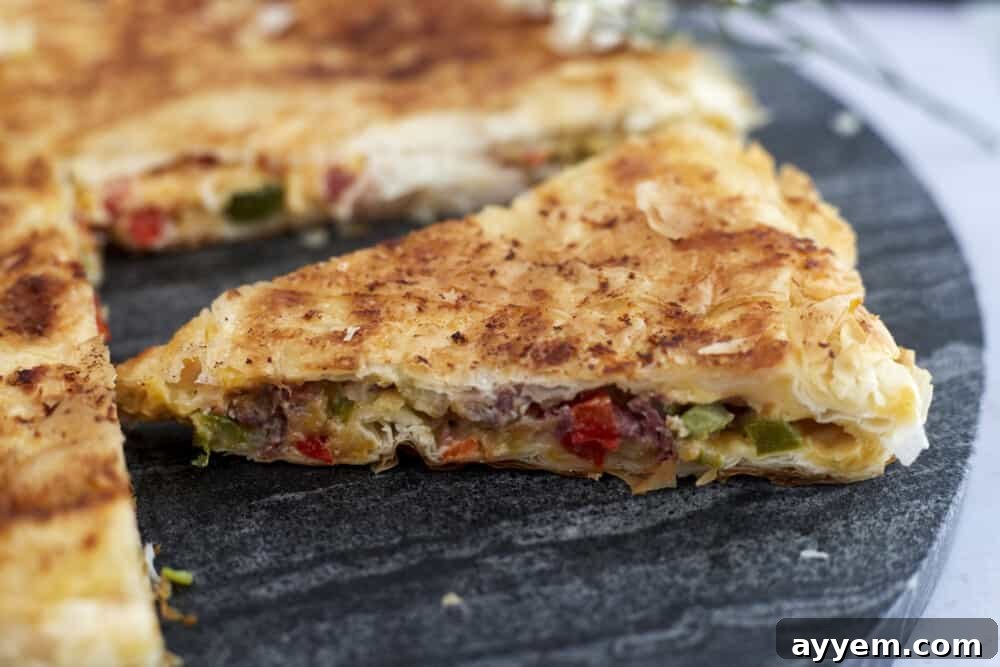
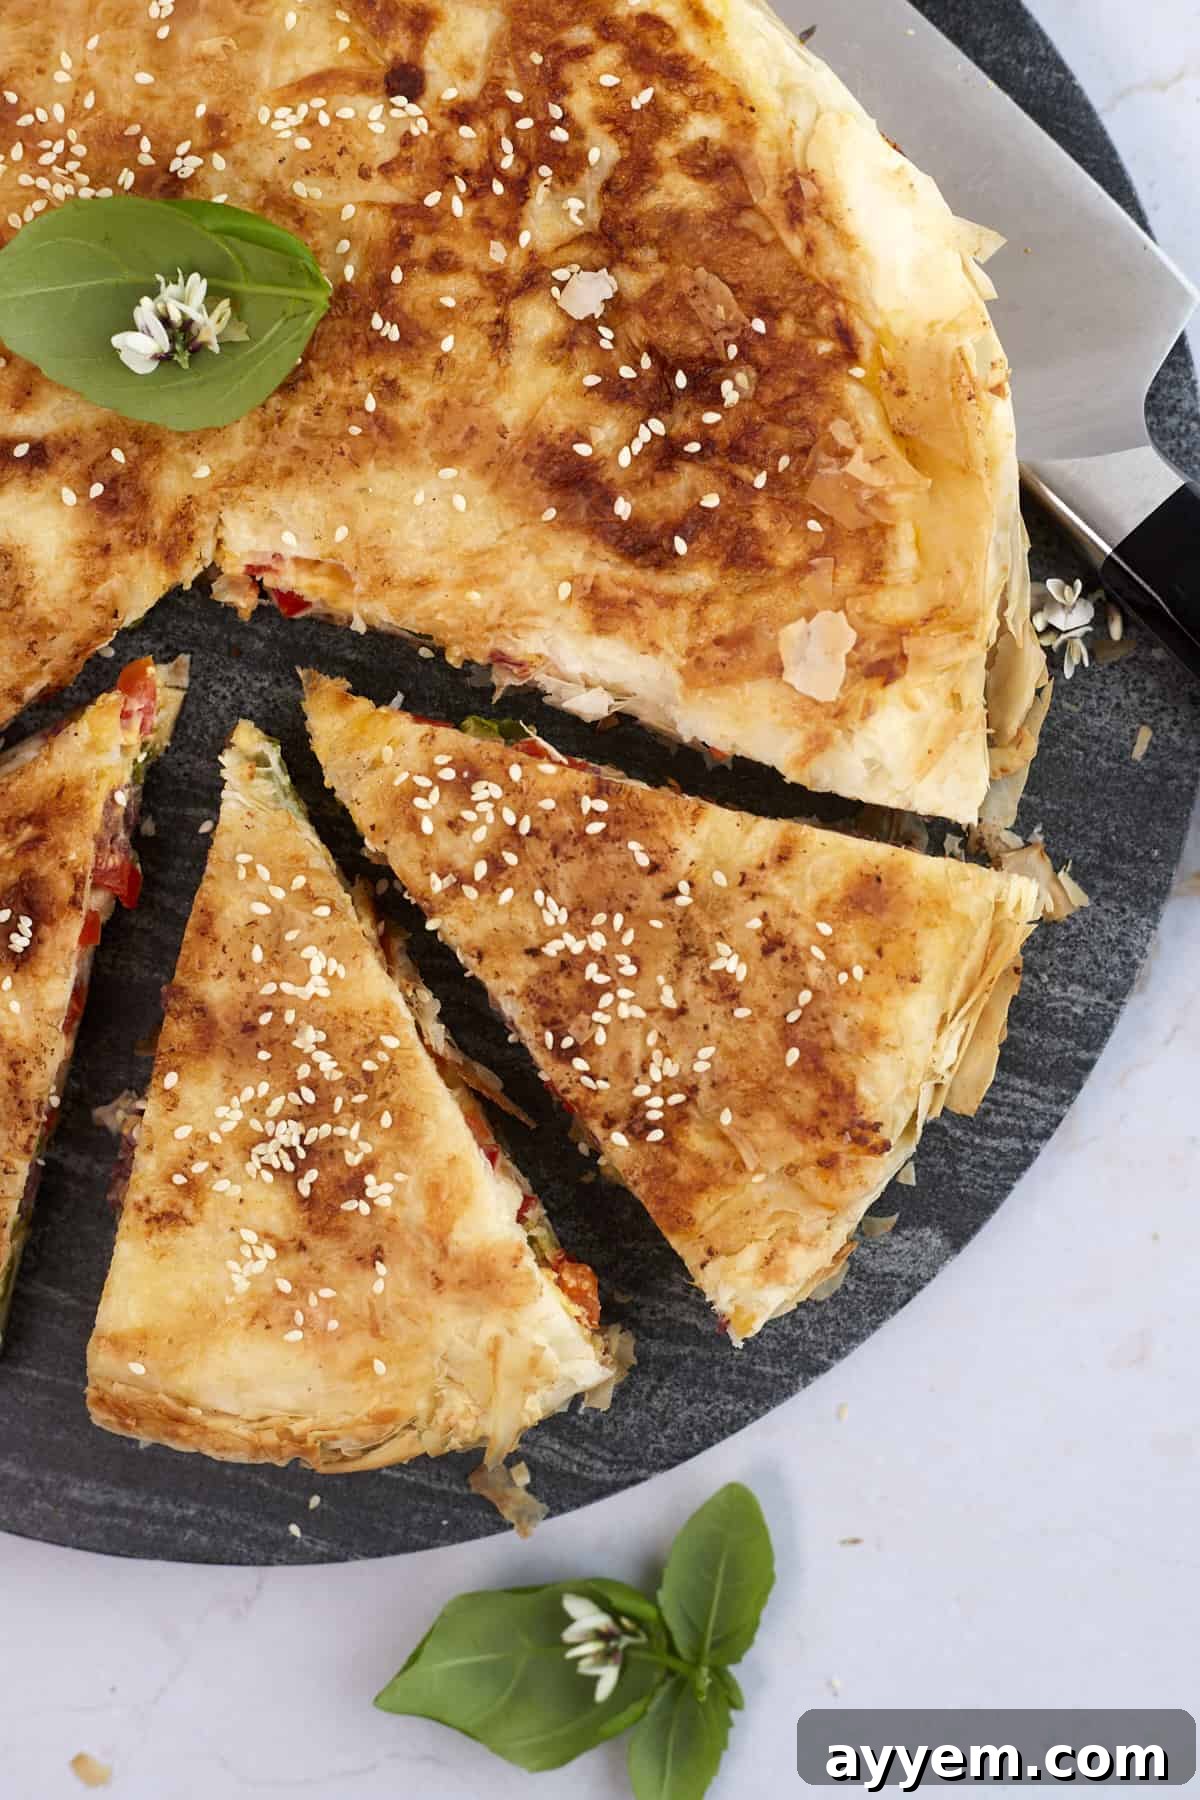
At its heart, this pie features numerous thin sheets of phyllo dough, meticulously brushed with melted butter and layered in a large skillet. This creates a foundation of unparalleled crispiness. Nestled within these layers is a generous, savory filling composed of fluffy eggs, an assortment of colorful vegetables, and rich, melting cheeses. The dough is then artfully folded over the filling, encasing it completely, before the entire creation is cooked directly on the stovetop. The result is a beautifully golden-brown exterior that shatters with every bite, revealing a warm, gooey, and omelet-like center. One taste, and you’ll understand why this easy-to-make dish is so utterly addictive!
Phyllo Dough Explained: Unraveling the Mystery
Phyllo vs. Filo Dough: Is There a Difference?
The culinary world can sometimes be a labyrinth of terms, but here’s a simple truth: there is absolutely no difference between “phyllo” and “filo” dough. Both terms refer to the same type of unleavened, paper-thin pastry dough. The variation in spelling is merely a linguistic difference, with “phyllo” being the more common transliteration from Greek (φύλλο) in North America, while “filo” is often seen in British English and other European contexts.
This delicate dough is created by layering numerous sheets, each meticulously brushed with oil or melted butter, before being baked to achieve its characteristic flaky and crisp texture. Phyllo dough is a cornerstone of Middle Eastern, Balkan, and Greek cuisines, celebrated for its versatility in both sweet and savory applications. Beyond this delightful veggie pie, it’s famously used in dishes like the iconic spanakopita, an array of baklava varieties, and even creative modern twists such as crinkle phyllo desserts.
Phyllo Dough vs. Pie Crust: A Tale of Two Pastries
While both phyllo dough and traditional pie crust serve as foundations for delicious pies, they are fundamentally different in their composition and resulting texture. The key distinction lies in their structure and how they are prepared. Phyllo dough, as we’ve established, consists of numerous individual, paper-thin sheets, which, when layered and buttered, create an incredibly light, airy, and distinctly crispy finish.
In contrast, standard pie dough is typically a single, thicker mass of pastry made with flour, fat (like butter or shortening), and water. It’s rolled out as one cohesive unit, resulting in a tender, sometimes crumbly, but generally less flaky texture than phyllo. While both are undeniably delicious and crucial for their respective culinary roles – phyllo for its shattering crispness and pie crust for its comforting chewiness, as seen in decadent desserts like easy pecan fried pie – they offer distinct gastronomic experiences.
Why a Skillet for Your Phyllo Pie? The Secret to Crispy Perfection
Choosing a skillet, particularly a cast-iron skillet, for this phyllo pie isn’t just a matter of convenience; it’s a strategic culinary decision that significantly contributes to the dish’s incredible texture. A heavy-bottomed skillet excels at even heat distribution, ensuring that your phyllo crust cooks uniformly without burning in some spots and remaining raw in others. This consistent heat is paramount for achieving that coveted golden-brown hue and irresistible crispness on both the top and bottom layers.
Furthermore, cooking the pie directly on the stovetop allows for precise control over the cooking process. You can monitor the browning of the bottom crust, ensuring it develops a deep, rich flavor and a satisfying crunch before you even flip it. The skillet’s sides also help to contain the filling, allowing it to cook evenly and set beautifully. This method results in a truly homemade pie with a rustic charm and a perfect contrast between the tender, savory interior and the remarkably crispy, buttery exterior – a textural symphony that an oven alone might struggle to achieve.
Essential Ingredients for Your Skillet Veggie Phyllo Pie
Crafting this savory phyllo pie requires a simple yet thoughtfully curated list of ingredients, each playing a vital role in its delicious outcome. Here’s a closer look at what you’ll need to assemble this Mediterranean-inspired delight:
- Vibrant Vegetables: A colorful medley of red, green, and yellow bell peppers, along with finely chopped onions, forms the heart of our filling. These not only contribute fantastic texture and a subtle sweetness but also pack a powerful nutritional punch, making the pie both delicious and wholesome. Feel free to explore other finely diced veggies like zucchini, mushrooms, or even chopped spinach for added variety and nutrients.
- Briny Olives: We specifically love incorporating green olives for their distinct salty, briny flavor. They add a wonderful Mediterranean character and a delightful pop of umami that perfectly complements the other ingredients. Black olives can also be used for a milder flavor.
- Farm-Fresh Eggs: Eggs are the foundational binder for our filling, bringing all the delicious elements together into a cohesive, omelet-like consistency. They also significantly boost the protein content, making this pie a truly satisfying meal. Their richness creates that ooey-gooey center we all crave.
- Aromatic Seasonings: Simplicity is key here. A modest dash of salt and freshly cracked black pepper is all it takes to enhance the natural flavors of the filling. For an optional but highly recommended finish, a sprinkle of sesame seeds on top before serving adds an extra layer of nutty crunch and visual appeal. You could also consider a pinch of dried oregano or thyme for an herbal note.
- Melted Cheeses: A delightful combination of shredded mozzarella and cheddar cheese lends incredible creaminess and a rich, savory depth to the pie. These cheeses melt beautifully, creating pockets of gooey goodness within the filling. Don’t hesitate to experiment with your favorite melty cheese varieties, such as Gruyere, Monterey Jack, or even a touch of feta for a sharper, saltier kick. Just ensure your chosen cheeses are known for their excellent melting properties.
- Delicate Phyllo Dough: This is the star of our crust! You’ll typically find phyllo dough conveniently located in the freezer section of most grocery stores. Remember, proper thawing is crucial for easy handling; ensure it’s completely defrosted according to package instructions before you begin your culinary adventure.
- Rich Butter: Melted butter is indispensable for creating the signature flaky layers of phyllo. Each sheet must be liberally brushed to not only help them adhere to each other but also to achieve that desired golden, crispy texture and impart a luxurious, rich flavor throughout the crust. Clarified butter (ghee) can also be used for an even nuttier flavor and less chance of burning.
Crafting Your Skillet Veggie Phyllo Pie: A Step-by-Step Guide
While this recipe might appear to have several steps, the process is surprisingly straightforward and incredibly rewarding. For a truly seamless cooking experience, make sure to read through all instructions before you begin. You’ll find a complete, printable recipe card at the bottom of this article with full details and measurements.
- Prepare the Flavorful Filling: Begin by cracking your eggs into a large mixing bowl. Whisk them vigorously until they are smooth and well combined. Next, gently fold in your finely chopped bell peppers, onions, and green olives. Add the shredded mozzarella and cheddar cheeses, followed by your seasonings: salt and black pepper. Stir everything together until the ingredients are evenly distributed, creating a vibrant and savory mixture.
- Lay the Foundation for the Crispy Crust: Take your chosen skillet (a 10-inch cast iron skillet works wonders) and use a pastry brush to generously butter the bottom and sides, ensuring every inch is coated. Carefully lay your first sheet of thawed phyllo dough into the pan, positioning it so that the edges extend over the sides of the skillet. Using your pastry brush, coat this sheet thoroughly with melted butter. Repeat this process, layering four more sheets of phyllo dough, brushing each one generously with butter before adding the next. Ensure the bottom of the pan is completely covered by these buttered layers, creating a robust and flaky base.
- Introduce the Heart of the Pie: Gently pour the prepared egg and veggie filling into the phyllo-lined skillet. Use a spatula or the back of a spoon to spread the filling out evenly across the bottom, making sure it reaches all edges. Now, place another single sheet of phyllo dough directly on top of the filling and brush it liberally with melted butter.
- Seal and Layer the Top Crust: Carefully pull the overhanging edges of the bottom phyllo layers up and over the filling, arranging them neatly on top. This creates a beautifully enclosed pie. To complete the top crust, layer four additional sheets of phyllo dough, brushing each sheet with melted butter in between layers, just as you did for the bottom. This final layering will ensure a magnificent, golden, and extra-flaky top.
- Cook to Golden Perfection: Place your skillet on the stovetop over medium-low heat. Cook the phyllo pie for approximately 8-10 minutes. During this time, the eggs in the filling will begin to set, and the bottom crust will turn a beautiful golden-brown. To check for doneness, you can carefully lift a corner with a spatula.
- The Big Flip: Once the bottom is golden and the filling is mostly set, it’s time for the crucial flip! Carefully place a large plate over the top of the skillet. With confidence and quickness, invert the skillet onto the plate, so the pie is now sitting crust-side up on the plate. Then, gently slide the pie back into the skillet, raw-crust side down. Continue to cook for another 8-10 minutes, or until the second side is also deeply golden brown and crispy.
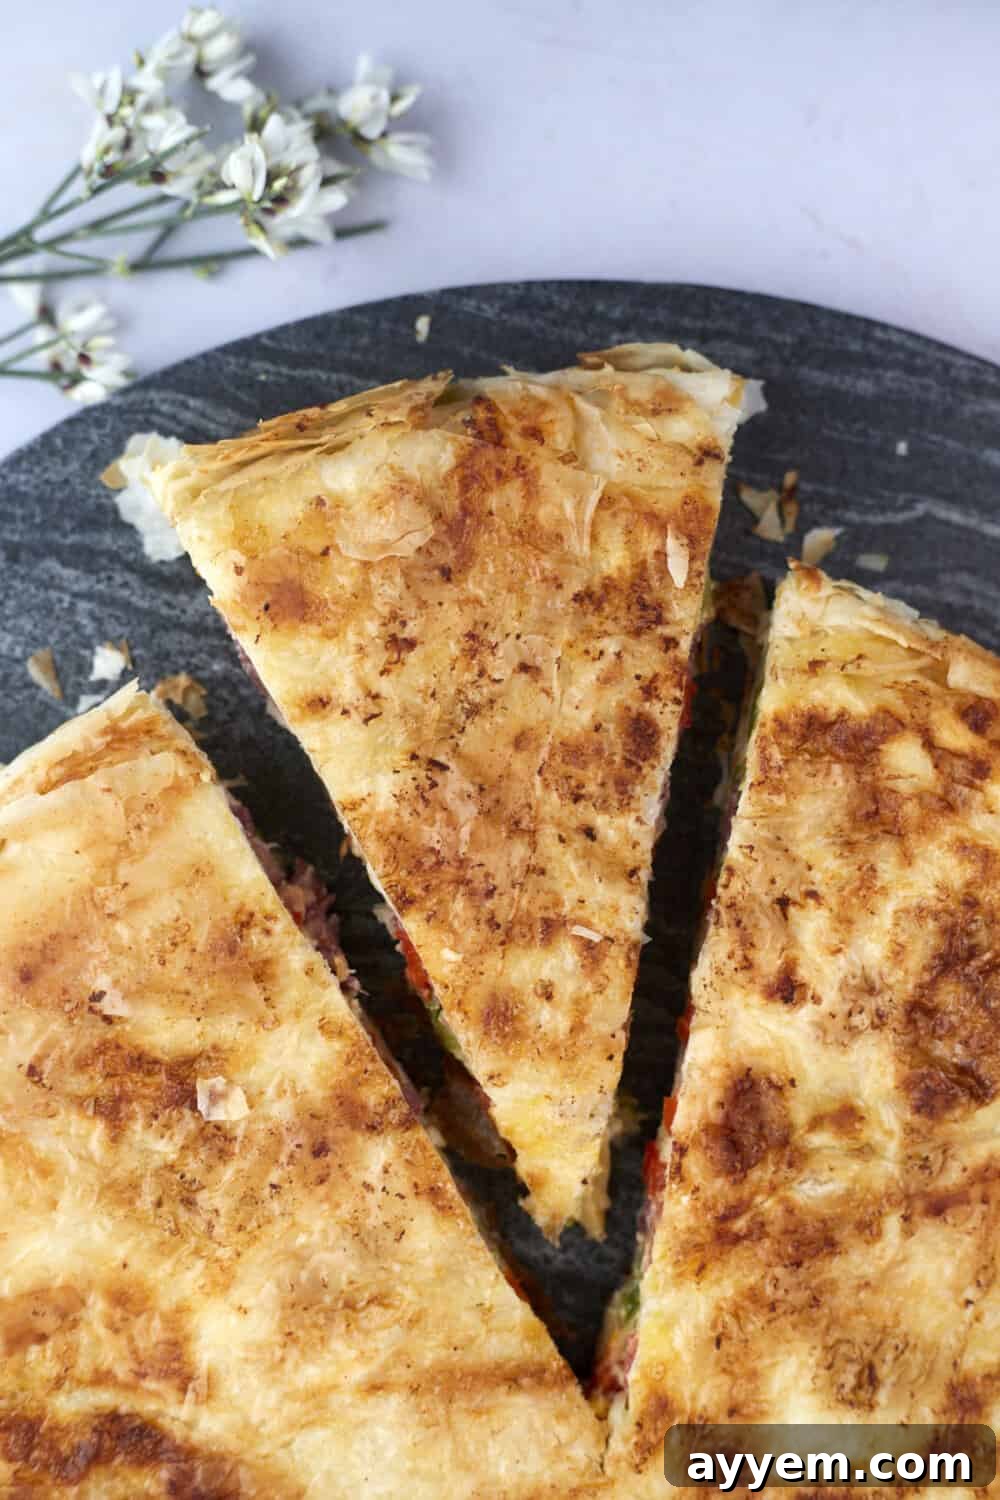
- Garnish and Serve: Once both sides are perfectly golden and the pie is cooked through, remove it from the heat. If desired, sprinkle a generous amount of sesame seeds over the top for an added layer of texture and a nutty aroma. Slice the pie into wedges and serve immediately while it’s still warm, allowing you to enjoy the ultimate combination of crispy crust and a savory, satisfying filling.
Mastering Phyllo Dough: Essential Tips for Success
Working with phyllo dough can seem daunting at first due to its delicate nature, but with a few key techniques, you’ll be handling it like a seasoned pro. Many readers express initial hesitation, but these tips will ensure your Skillet Veggie Phyllo Pie (and any other phyllo creation) turns out perfectly every time:
- Keep it Covered, Always: Phyllo dough is notoriously prone to drying out almost instantly when exposed to air. This rapid drying leads to brittleness and tearing. To prevent this, always keep the unused sheets covered. A slightly damp kitchen towel draped over the stack of phyllo sheets on your workspace is your best friend. Only uncover a sheet when you are ready to use it, and re-cover the rest immediately.
- Thaw Slowly and Completely: Patience is a virtue when it comes to phyllo. Always thaw frozen phyllo dough in the refrigerator overnight, or for at least 8-10 hours, before you plan to use it. Attempting to unroll or separate partially frozen sheets will inevitably result in tearing and frustration. A slow thaw ensures the dough remains pliable and easy to handle.
- Don’t Stress the Tears: It’s important to remember that phyllo dough is incredibly thin and delicate. Tears and small holes are almost inevitable, especially for beginners, and even experienced cooks encounter them. Don’t worry! The beauty of layering means that any imperfections in one sheet will be completely hidden by the subsequent layers. Once baked, no one will ever know a tear was there. Think of it as part of the dough’s character.
- Work Efficiently and With Confidence: While you don’t need to rush, working with a steady, confident pace helps prevent the dough from drying out or sticking. Have all your ingredients (melted butter, filling, pastry brush) prepped and within arm’s reach before you start layering. The faster you can brush and layer, the less time the dough has to dry, and the better it will adhere, resulting in those beautiful, cohesive layers.
- Generous Buttering is Key: Don’t skimp on the butter! Each sheet needs to be thoroughly brushed with melted butter (or oil, if preferred) to ensure maximum crispness and flavor. The butter acts as a barrier, preventing the layers from sticking together and allowing them to puff up and become distinct during cooking. This generous application is what creates the iconic flaky texture.
- Practice Makes Perfect: Like any new cooking technique, handling phyllo dough improves with practice. The more you work with it, the more comfortable and confident you’ll become. Don’t be discouraged by your first attempt; embrace the learning process!
Delightful Serving Suggestions for Your Phyllo Pie
While this Skillet Veggie Phyllo Pie is undoubtedly a satisfying and complete meal on its own, it truly shines when paired with a few complementary dishes, transforming it into a magnificent feast perfect for any occasion, from a casual brunch to an elegant dinner. Here are some delectable ideas to elevate your phyllo pie experience:
- Mediterranean Dips: Start your meal with a creamy and flavorful dip. A warm Warm Feta Dip with Marinated Olives offers a salty, tangy counterpoint, while Whipped Feta with Tomato and Cucumber Salad provides a refreshing, zesty balance to the richness of the pie. Hummus or tzatziki are also excellent choices.
- Crispy Potato Sides: For those who love a hearty side, perfectly roasted or Crispy Smashed Potatoes offer a delightful crunch and satisfying starch that complements the pie beautifully. Lemon herb roasted potatoes would also be fantastic.
- Fresh Salads: A light, crisp salad can cut through the richness of the pie, offering a refreshing contrast. A simple green salad with a lemon-herb vinaigrette, a traditional Greek salad with olives and feta, or a vibrant tomato and cucumber salad are all excellent choices.
- Artisan Breads: Serve slices of your phyllo pie alongside some crusty bread. Focaccia with Tomatoes would be a delicious choice, or even a simple baguette to soak up any stray bits of the savory filling.
- Soup and Salad Combo: For a comforting and complete meal, pair a smaller slice of the phyllo pie with a light vegetable soup (like a lentil soup or a creamy tomato soup) and a fresh side salad.
Storing and Reheating Your Skillet Veggie Phyllo Pie
This skillet veggie phyllo pie is undeniably at its peak when enjoyed fresh from the pan, while the crust is at its crispiest and the filling is wonderfully warm and gooey. However, should you find yourself with the delightful problem of leftovers, rest assured that this pie stores remarkably well, allowing you to savor its flavors for days to come.
To store, allow the pie to cool completely to room temperature. Then, transfer any remaining slices or the entire pie (if undisturbed) into an airtight container. This is crucial for preventing the phyllo from becoming soggy and protecting the filling. Store the container in the refrigerator for up to 3 days. For best results, avoid stacking slices directly on top of each other if possible, or place a piece of parchment paper between them to prevent sticking.
When you’re ready to enjoy your leftovers, reheating effectively is key to reviving that desirable crispness. You have several excellent options:
- Oven Reheating (Recommended): For the crispiest results, preheat your oven to 350°F (175°C). Place the pie slices on a baking sheet and heat for 10-15 minutes, or until warmed through and the phyllo has re-crisped. This method best mimics the original texture.
- Skillet Reheating: For a quick and efficient reheat, place slices in a dry skillet over medium-low heat. Cover loosely and heat for 5-7 minutes per side, or until warm and crispy. Be mindful not to let the phyllo burn.
- Microwave (Least Recommended for Crispness): While convenient, the microwave will soften the phyllo crust, making it less crispy. If time is of the essence, heat individual slices on a microwave-safe plate for 30-60 seconds, or until warm. This is best if you don’t mind a softer texture.
Common Questions About Skillet Veggie Phyllo Pie
We understand you might have a few questions as you embark on making this delicious pie. Here are answers to some frequently asked questions to ensure your cooking experience is smooth and successful:
Can I use different vegetables in the filling?
Absolutely! The beauty of this recipe lies in its adaptability. While our recipe features bell peppers and onions for their classic appeal, feel free to get creative with other vegetables you love or have on hand. Finely chopped zucchini, sautéed mushrooms, wilted spinach (squeezed dry), or even corn kernels would be delicious additions. Just ensure any vegetables with high water content (like zucchini or mushrooms) are pre-sautéed to remove excess moisture before adding them to the egg mixture, which helps maintain the pie’s texture and prevents sogginess.
How do I prevent the phyllo dough from drying out while assembling the pie?
Preventing phyllo dough from drying out is crucial for easy handling. As you work, always keep the unused sheets covered with a slightly damp (not wet) kitchen towel or plastic wrap. Only expose one or two sheets at a time as you butter and layer them. Working efficiently also helps, so have all your ingredients prepped and ready before you start layering the phyllo.
What type of skillet should I use?
A cast-iron skillet is highly recommended for this recipe. Its exceptional heat retention and even heat distribution contribute significantly to achieving that perfectly crispy, golden-brown crust. If a cast-iron skillet isn’t available, a heavy-bottomed, oven-safe non-stick skillet will also yield excellent results. The key is a pan that heats evenly and can withstand the stovetop cooking.
Can I add protein to the filling?
Yes, certainly! While the classic version is a delightful vegetarian dish, you can easily boost the protein content to suit your preferences. Cooked and finely diced chicken, ground turkey, crumbled firm tofu, or even pre-cooked sausage can be incorporated into the egg and veggie filling. Ensure any meat additions are fully cooked and seasoned before mixing them in to maintain the pie’s overall flavor balance.
More Delicious Veggie-Loaded Recipes to Explore
If you’ve enjoyed incorporating more vegetables into your diet with this phyllo pie, you’re in luck! We have a plethora of other family-favorite recipes that make it easy and delicious to sneak in those nutritious greens and colorful produce. Expand your culinary repertoire with these vibrant dishes:
- Easy Shakshuka with Feta: A comforting and flavorful one-pan egg dish, perfect for breakfast or brunch.
- Hearty Veggie Rice: A versatile and satisfying side dish or light main, packed with fresh vegetables.
- Fresh Veggie Pasta: A vibrant and quick-to-make pasta dish bursting with garden-fresh goodness.
- Easy Vegetarian Ramen Recipe: A soulful and customizable bowl of ramen, rich in vegetables and umami flavor.
Skillet Veggie Phyllo Pie Recipe
Layers of flaky phyllo dough are stuffed with an egg, cheese, and veggie filling for a savory and delicious skillet veggie phyllo pie recipe that’s perfect any time of the day!
Ingredients
- 3 large eggs
- ⅓ cup red bell pepper, finely chopped
- ⅓ cup green bell pepper, finely chopped
- ⅓ cup orange bell pepper, finely chopped
- ¼ cup yellow onion, finely chopped
- ⅓ cup green olives, chopped
- ½ cup Mozzarella cheese, shredded
- ½ cup Cheddar cheese, shredded
- ½ teaspoon salt
- ½ teaspoon black pepper
- 10 sheets phyllo dough
- 6 Tablespoons butter, melted
- Optional: sesame seeds for garnish
Instructions
- In a large bowl, crack the eggs. Whisk until smooth.
- Stir in the chopped peppers, onions, olives, cheese, salt, and pepper.
- Butter the bottom of a large skillet or pan, coating it completely. Add 1 sheet of phyllo dough, making sure it hangs off the edges. Using a pastry brush, coat the dough with butter, and layer a second sheet on top. Repeat this process until 4 sheets of dough have been used, ensuring the bottom of the pan is completely covered.
- Pour the filling into the pan, spreading it out evenly. Layer a sheet of phyllo on top, and brush it with butter.
- Pull the edges of the dough over the pan, arranging them on top. Layer 4 additional sheets of dough on top of the pan, buttering each sheet in between layers.
- Cook on the stovetop on medium-low heat for 8-10 minutes or until the eggs have set and the bottom crust is golden.
- Revert the phyllo pie onto a plate, and then carefully slide it back into the pan, uncooked side down. Continue to cook for 8-10 minutes or until the dough is golden brown and crispy on the second side.
- Garnish with sesame seeds, if desired, and slice.
- Serve immediately.
- Store leftovers in an airtight container in the fridge for up to 3 days. Reheat in the oven or skillet for best results.
Nutrition
Serving: 1 serving | Calories: 132kcal | Carbohydrates: 12g | Protein: 6g | Fat: 7g | Saturated Fat: 3g | Polyunsaturated Fat: 1g | Monounsaturated Fat: 2g | Trans Fat: 0.01g | Cholesterol: 60mg | Sodium: 379mg | Potassium: 84mg | Fiber: 1g | Sugar: 1g | Vitamin A: 446IU | Vitamin C: 13mg | Calcium: 93mg | Iron: 1mg
Nutrition information is an approximation and should be used as a guideline.
Like this recipe?
Please leave a comment below and share your thoughts!